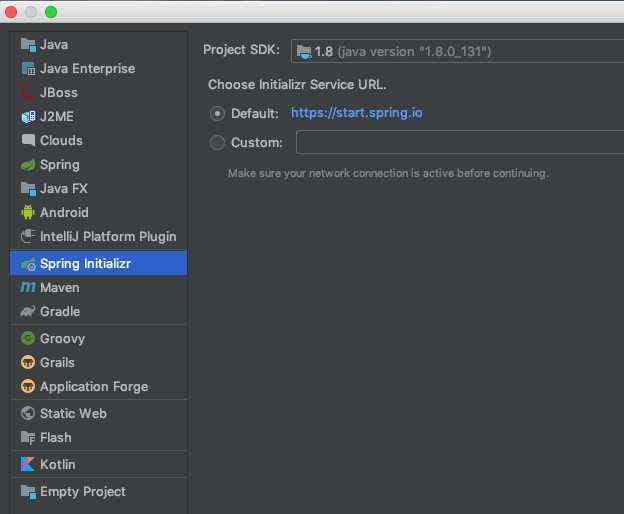
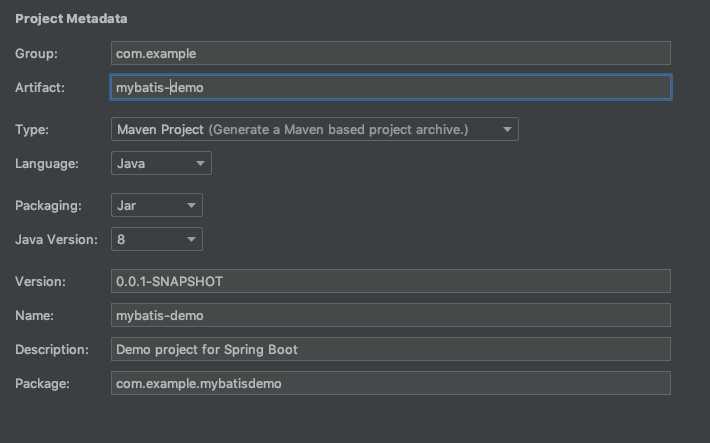
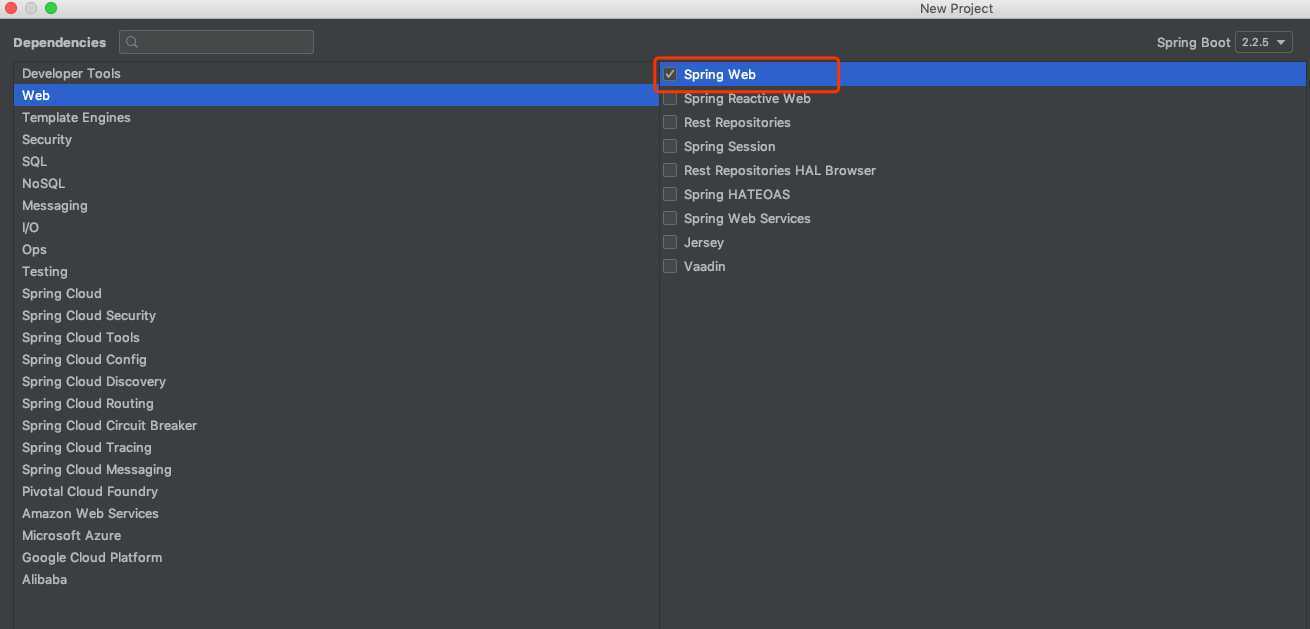
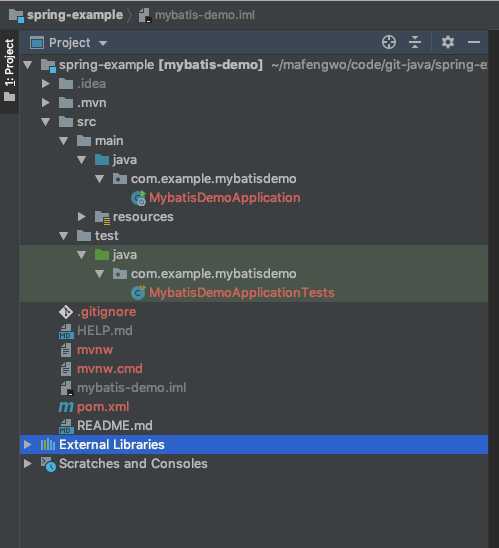
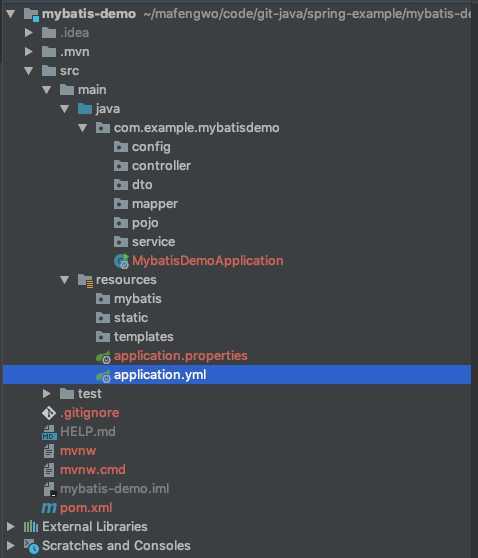
1.修改pom.xml文件,添加mybatis配置
<dependency>
    <groupId>mysql</groupId>
    <artifactId>mysql-connector-java</artifactId>
</dependency>

<dependency>
    <groupId>org.mybatis.spring.boot</groupId>
    <artifactId>mybatis-spring-boot-starter</artifactId>
    <version>2.1.0</version>
</dependency>

<dependency>
    <groupId>org.projectlombok</groupId>
    <artifactId>lombok</artifactId>
</dependency>
2.修改配置文件 application.properties 为application.yml
server:
  port: 8050
  servlet:
    context-path: /springboot

mybatis:
  # 对应实体类的包名
  type-aliases-package: com.example.mybatisdemo.pojo
  # mapper.xml文件
  mapper-locations: classpath:mybatis/mapper/*.xml
  config-location: classpath:mybatis/mybatis-config.xml


spring:
  datasource:
    url: jdbc:mysql://127.0.0.1:3306/komo?characterEncoding=utf-8
    username: root
    password: 123456
    driver-class-name: com.mysql.cj.jdbc.Driver
3.数据库中新建表:
CREATE TABLE `t_user` (
  `id` int(11) NOT NULL AUTO_INCREMENT COMMENT ‘主键自增‘,
  `username` varchar(128) NOT NULL COMMENT ‘用户名‘,
  `password` varchar(64) NOT NULL COMMENT ‘密码‘,
  PRIMARY KEY (`id`)
) ENGINE=InnoDB DEFAULT CHARSET=utf8 COMMENT=‘用户表‘;
MybatisDemoApplication.java
package com.example.mybatisdemo;

import org.mybatis.spring.annotation.MapperScan;
import org.springframework.boot.SpringApplication;
import org.springframework.boot.autoconfigure.SpringBootApplication;

@SpringBootApplication
@MapperScan("com.example.mybatisdemo.mapper")
public class MybatisDemoApplication {

    public static void main(String[] args) {
        SpringApplication.run(MybatisDemoApplication.class, args);
    }

}
1.新建UserMapper.xml
<?xml version="1.0" encoding="UTF-8"?>
<!DOCTYPE mapper PUBLIC "-//mybatis.org//DTD Mapper 3.0//EN"
        "http://mybatis.org/dtd/mybatis-3-mapper.dtd">

<mapper namespace = "com.example.mybatisdemo.mapper.UserMapper">

    <resultMap id = "result" type = "com.example.mybatisdemo.pojo.User">
        <result property = "id" column = "id"/>
        <result property = "username" column = "username"/>
        <result property = "password" column = "password"/>
    </resultMap>

    <sql id="column_list" >
        id, username, password
    </sql>

    <!--    查询-->
    <select id = "findOne" resultMap = "result">
        SELECT <include refid="column_list"></include>
        FROM t_user WHERE id = #{id}
    </select>

    <insert id="insert" useGeneratedKeys="true" keyProperty="id">
        insert into t_user(username, password) values (#{username}, #{password})
    </insert>

    <update id="update">
        update t_user set username=#{username}, password=#{password} where id = #{id}
    </update>

    <delete id="delete">
        delete from t_user where id = #{id}
    </delete>

</mapper>
2.新建pojo/User.java
package com.example.mybatisdemo.pojo;

import lombok.Data;

/**
 * @author komiles@163.com
 * @date 2020-03-22 19:54
 */
@Data
public class User {

    private Integer id;

    private String username;

    private String password;
}
3.新建mapper/UserMapper.java
package com.example.mybatisdemo.mapper;

import com.example.mybatisdemo.pojo.User;
import org.apache.ibatis.annotations.Mapper;

/**
 * @author komiles@163.com
 * @date 2020-03-22 19:57
 */
@Mapper
public interface UserMapper {
    User findOne(Integer id);
}
4.新建service/UserService.java
package com.example.mybatisdemo.mapper;

import com.example.mybatisdemo.pojo.User;
import org.apache.ibatis.annotations.Mapper;

/**
 * @author komiles@163.com
 * @date 2020-03-22 19:57
 */
@Mapper
public interface UserMapper {
    User findOne(Integer id);
}
5.新建service/impl/UserServiceImpl.java
package com.example.mybatisdemo.service.impl;

import com.example.mybatisdemo.mapper.UserMapper;
import com.example.mybatisdemo.pojo.User;
import com.example.mybatisdemo.service.UserService;
import org.springframework.beans.factory.annotation.Autowired;
import org.springframework.stereotype.Service;

/**
 * @author komiles@163.com
 * @date 2020-03-22 21:48
 */
@Service
public class UserServiceImpl implements UserService {
    @Autowired
    private UserMapper userMapper;

    @Override
    public User userInfo(Integer id) {
        return userMapper.findOne(id);
    }
}
6.新建controller/TestController.java
package com.example.mybatisdemo.controller;

import com.example.mybatisdemo.dto.UserDTO;
import com.example.mybatisdemo.pojo.User;
import com.example.mybatisdemo.service.impl.UserServiceImpl;
import org.springframework.beans.BeanUtils;
import org.springframework.beans.factory.annotation.Autowired;
import org.springframework.web.bind.annotation.GetMapping;
import org.springframework.web.bind.annotation.RequestMapping;
import org.springframework.web.bind.annotation.RequestParam;
import org.springframework.web.bind.annotation.RestController;

/**
 * @author komiles@163.com
 * @date 2020-03-22 21:56
 */
@RestController
@RequestMapping("/test")
public class TestController {

    @Autowired
    private UserServiceImpl userService;


    @GetMapping("/userInfo")
    public User getUserInfo(@RequestParam(value = "user_id", defaultValue = "0") Integer id){

        User userInfo = userService.userInfo(id);
        if(userInfo == null) {
            return null;
        }
        return userInfo;
    }
}
运行项目
1.访问地址:http://127.0.0.1:8050/springboot/test/userInfo?user_id=1
前端展示

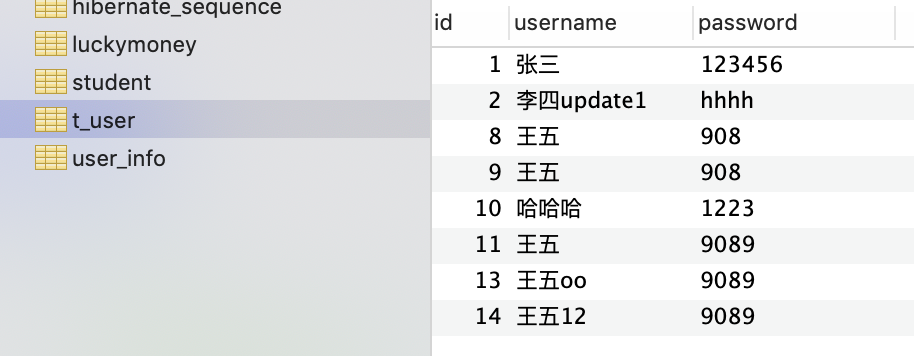
数据库:
1.pom.xml文件需要引入mysql-connector-java、mybatis-spring-boot-start、lombok
2.application.yml 主要正确设置mybatis文件的路径。例如:配置mapper.xml文件和config.xml文件,路径需要加上classpath:
例如:mapper-locations: classpath:mybatis/mapper/*.xml config-location: classpath:mybatis/mybatis-config.xml
3.application.yml 需要正确配置数据库连接
4.启动文件需要加@MapperScan注解。例如:@MapperScan("com.example.mybatisdemo.mapper")
5.接口文件 UserServiceImpl.java 需要加@Service注解
6.Mapper目录的文件,需要加 @Mapper注解
7.需要提前写pojo/User.java和mapper/UserMapper.java文件
8.mybatis/mapper/UserMapper.xml里的配置了对应的pojo和mapper
为了更好的理解项目,项目代码已经上传到github上。地址为:https://github.com/KoMiles/spring-example/tree/master/mybatis-demo
原文:https://www.cnblogs.com/wangkongming/p/12548908.html