1.随项目自动生成强大RESTful API文档,减少工作量
2.API文档与代码整合在一起,便于同步更新API说明
3.页面测试功能来调试每个RESTful API
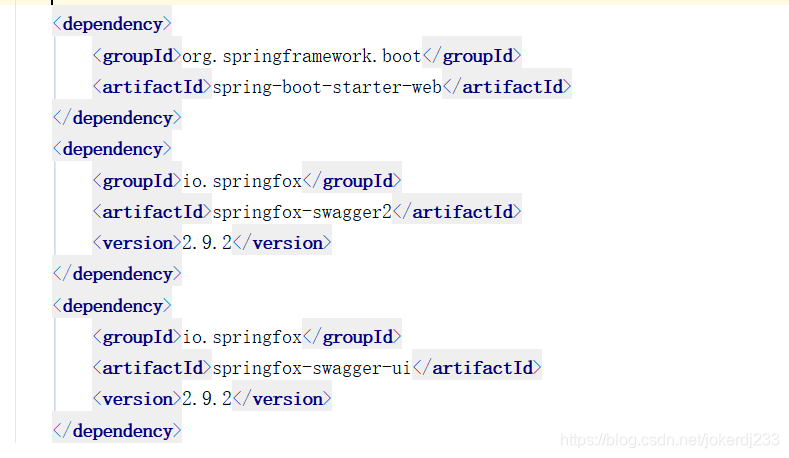
		  <dependency>
            <groupId>org.springframework.boot</groupId>
            <artifactId>spring-boot-starter-web</artifactId>
        </dependency>
		 <dependency>
            <groupId>io.springfox</groupId>
            <artifactId>springfox-swagger2</artifactId>
            <version>2.9.2</version>
        </dependency>
        <dependency>
            <groupId>io.springfox</groupId>
            <artifactId>springfox-swagger-ui</artifactId>
            <version>2.9.2</version>
        </dependency>

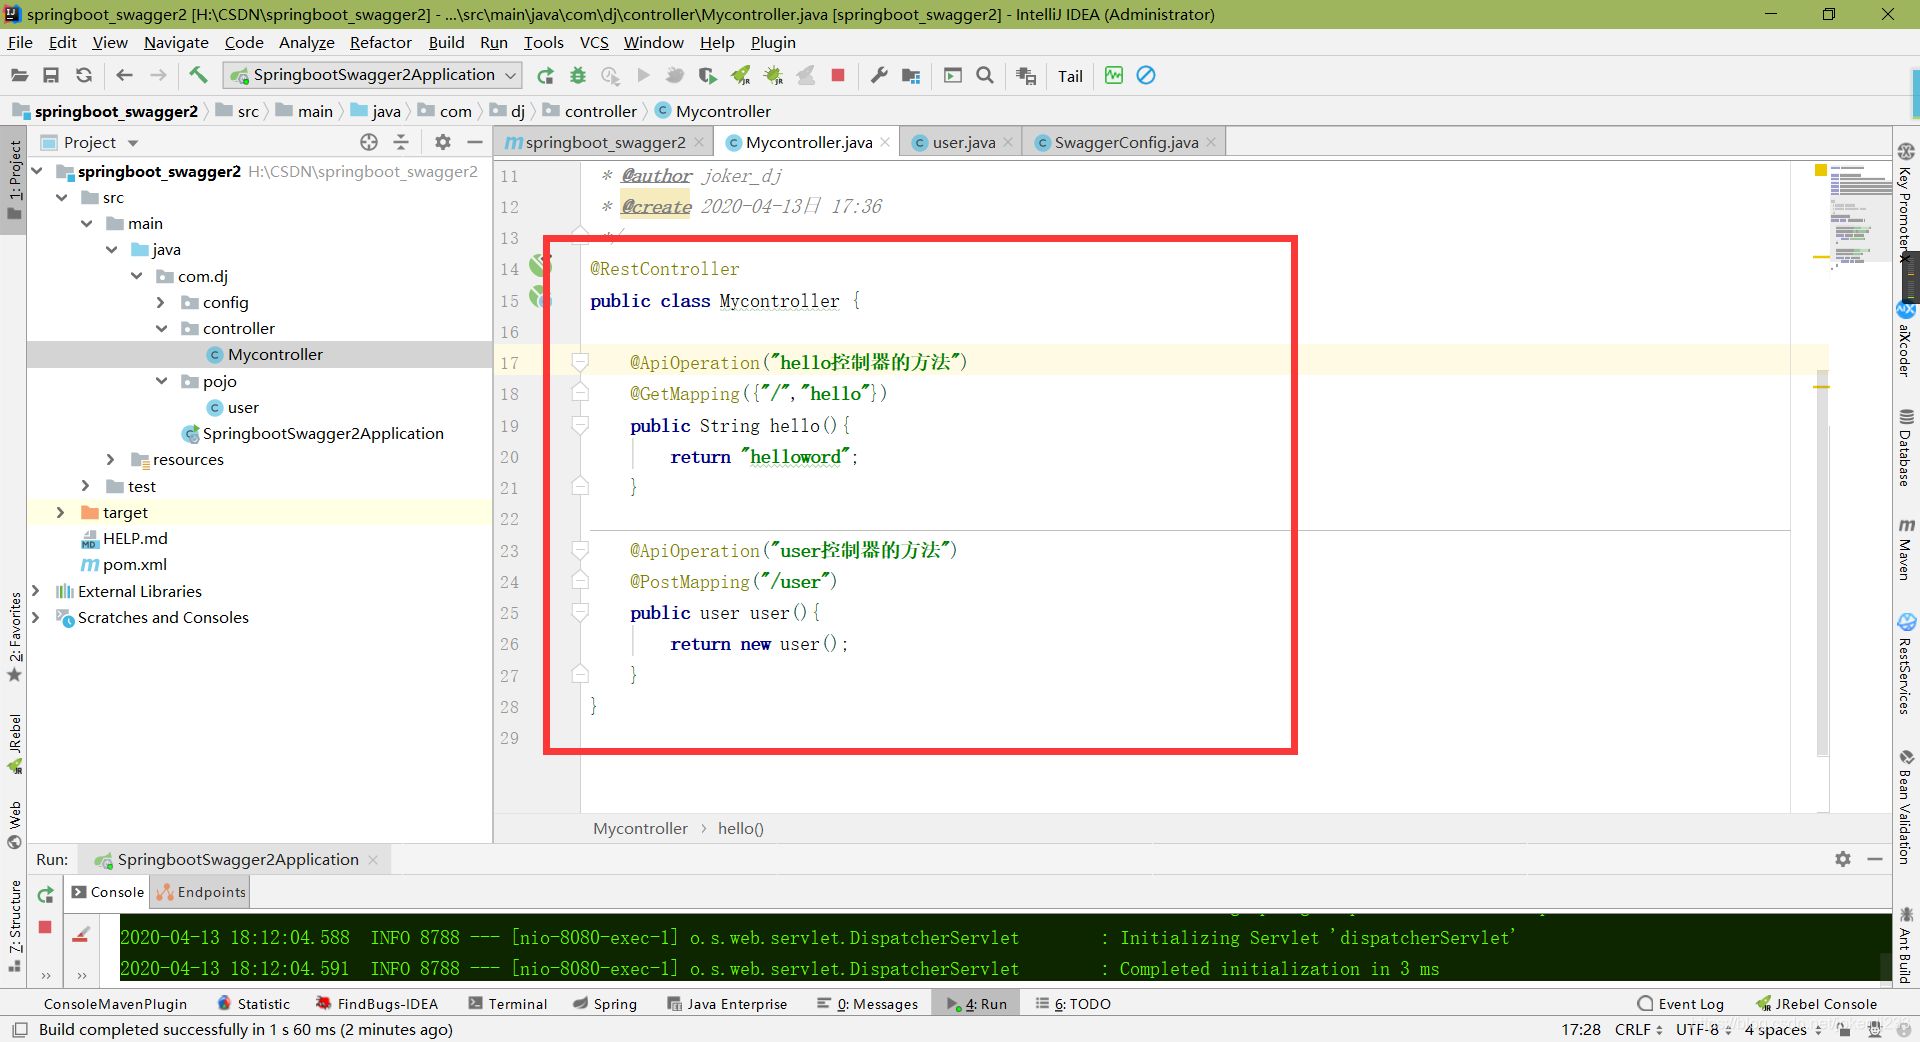
@RestController
public class Mycontroller {
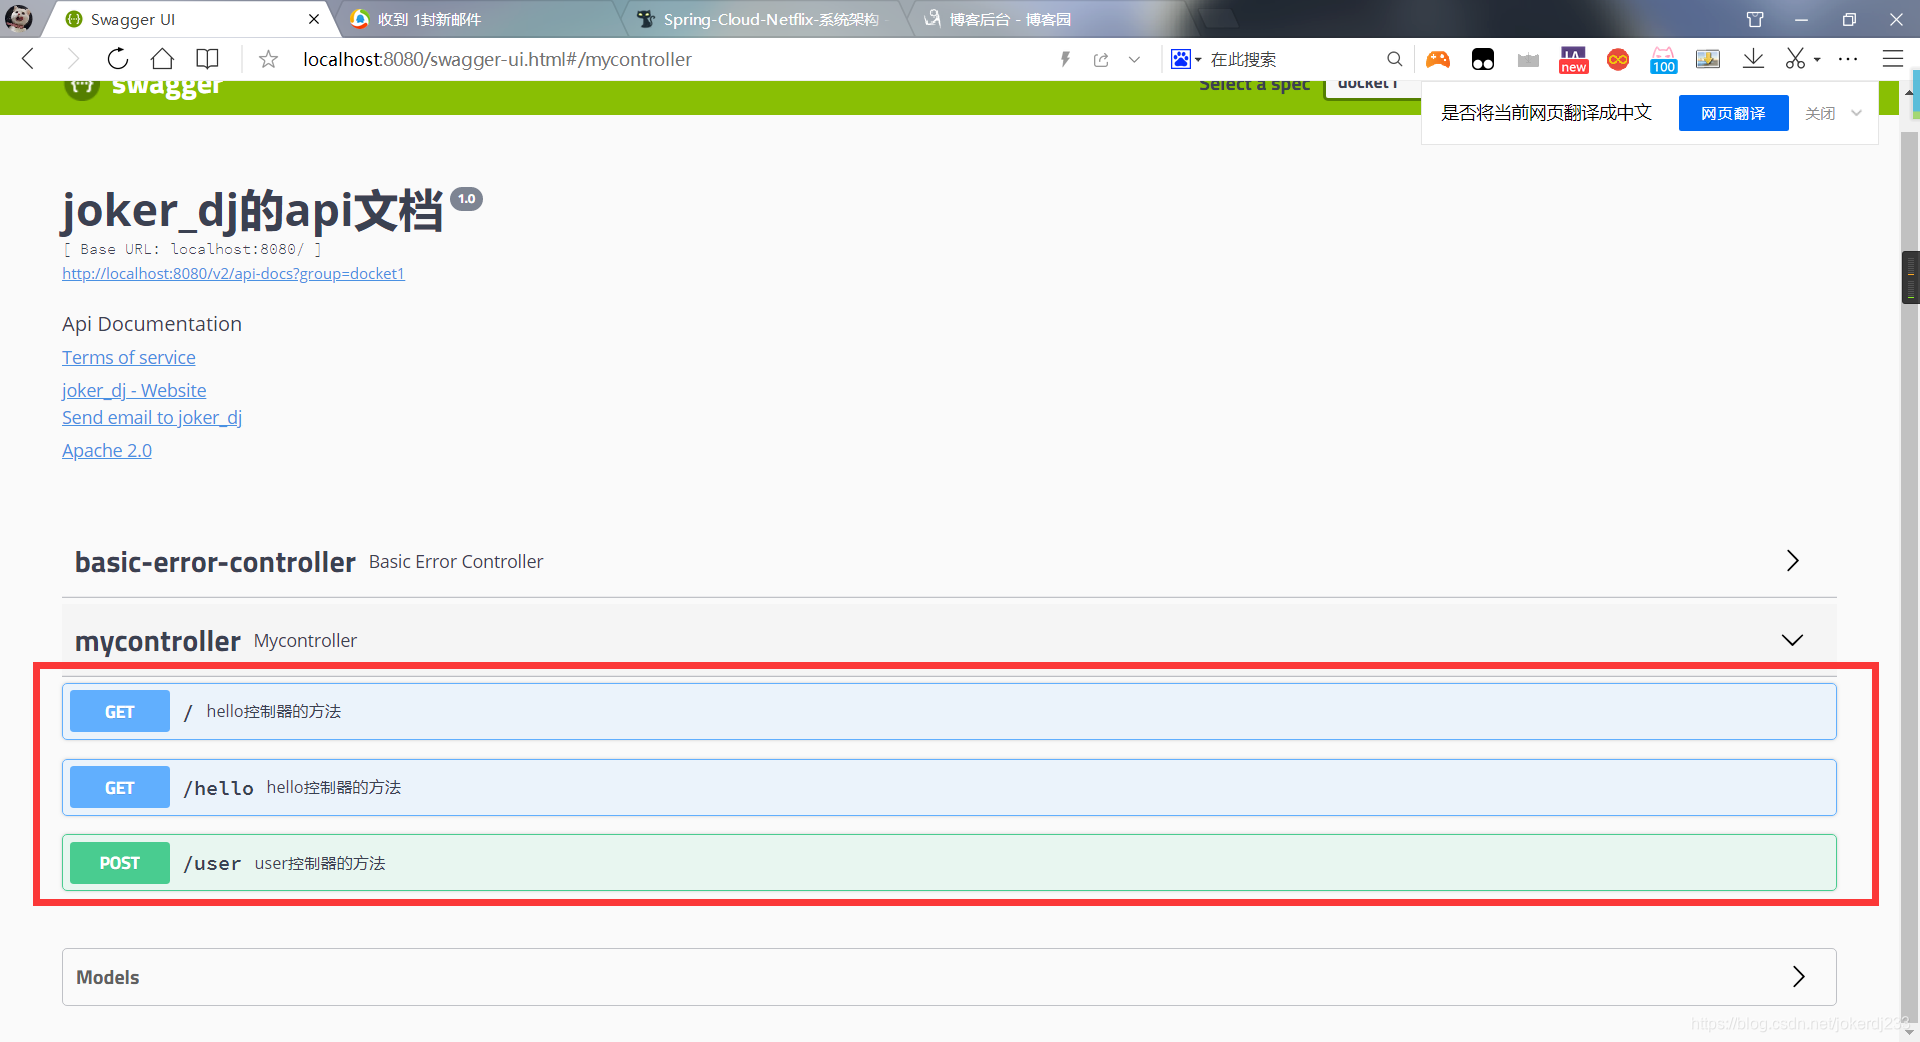
@GetMapping({"/","hello"})
public String hello(){
return "helloword";
}
}
写上注解
@Configuration
@EnableSwagger2
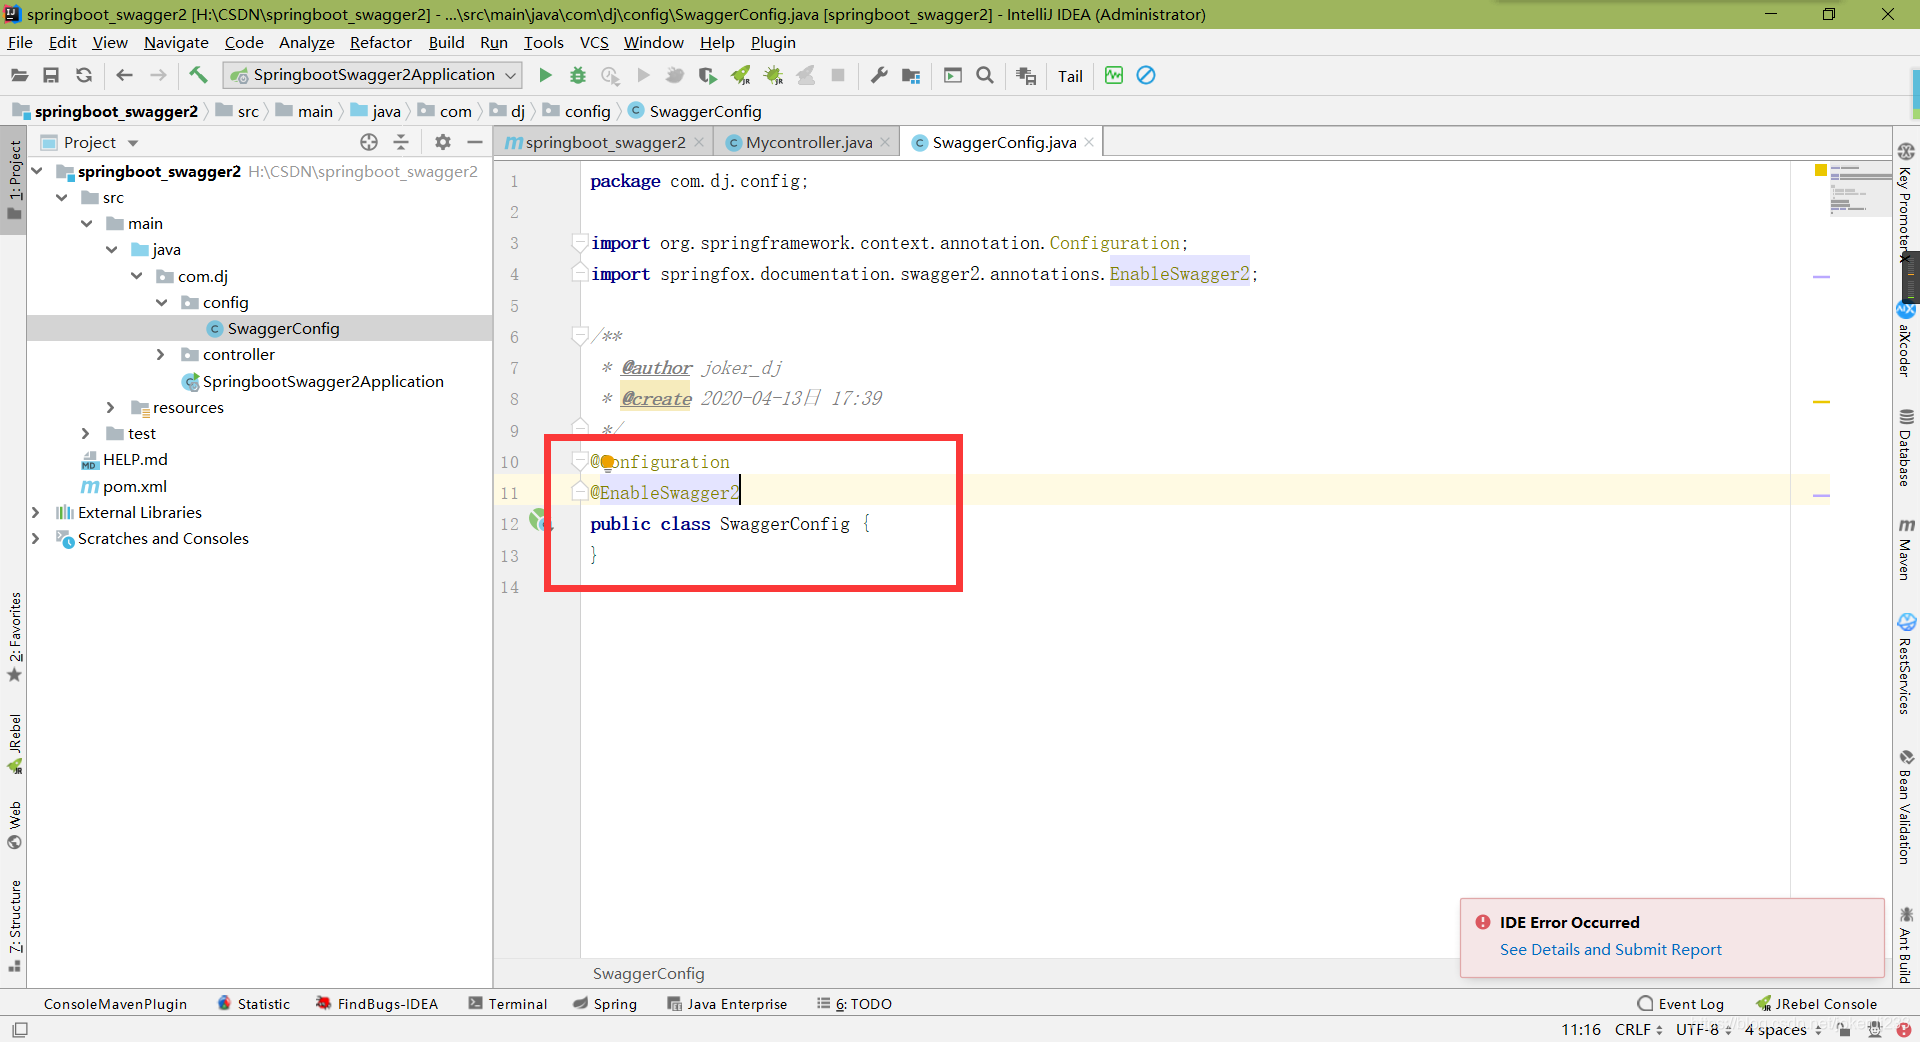
@Configuration
@EnableSwagger2
public class SwaggerConfig {
}
启动项目运行
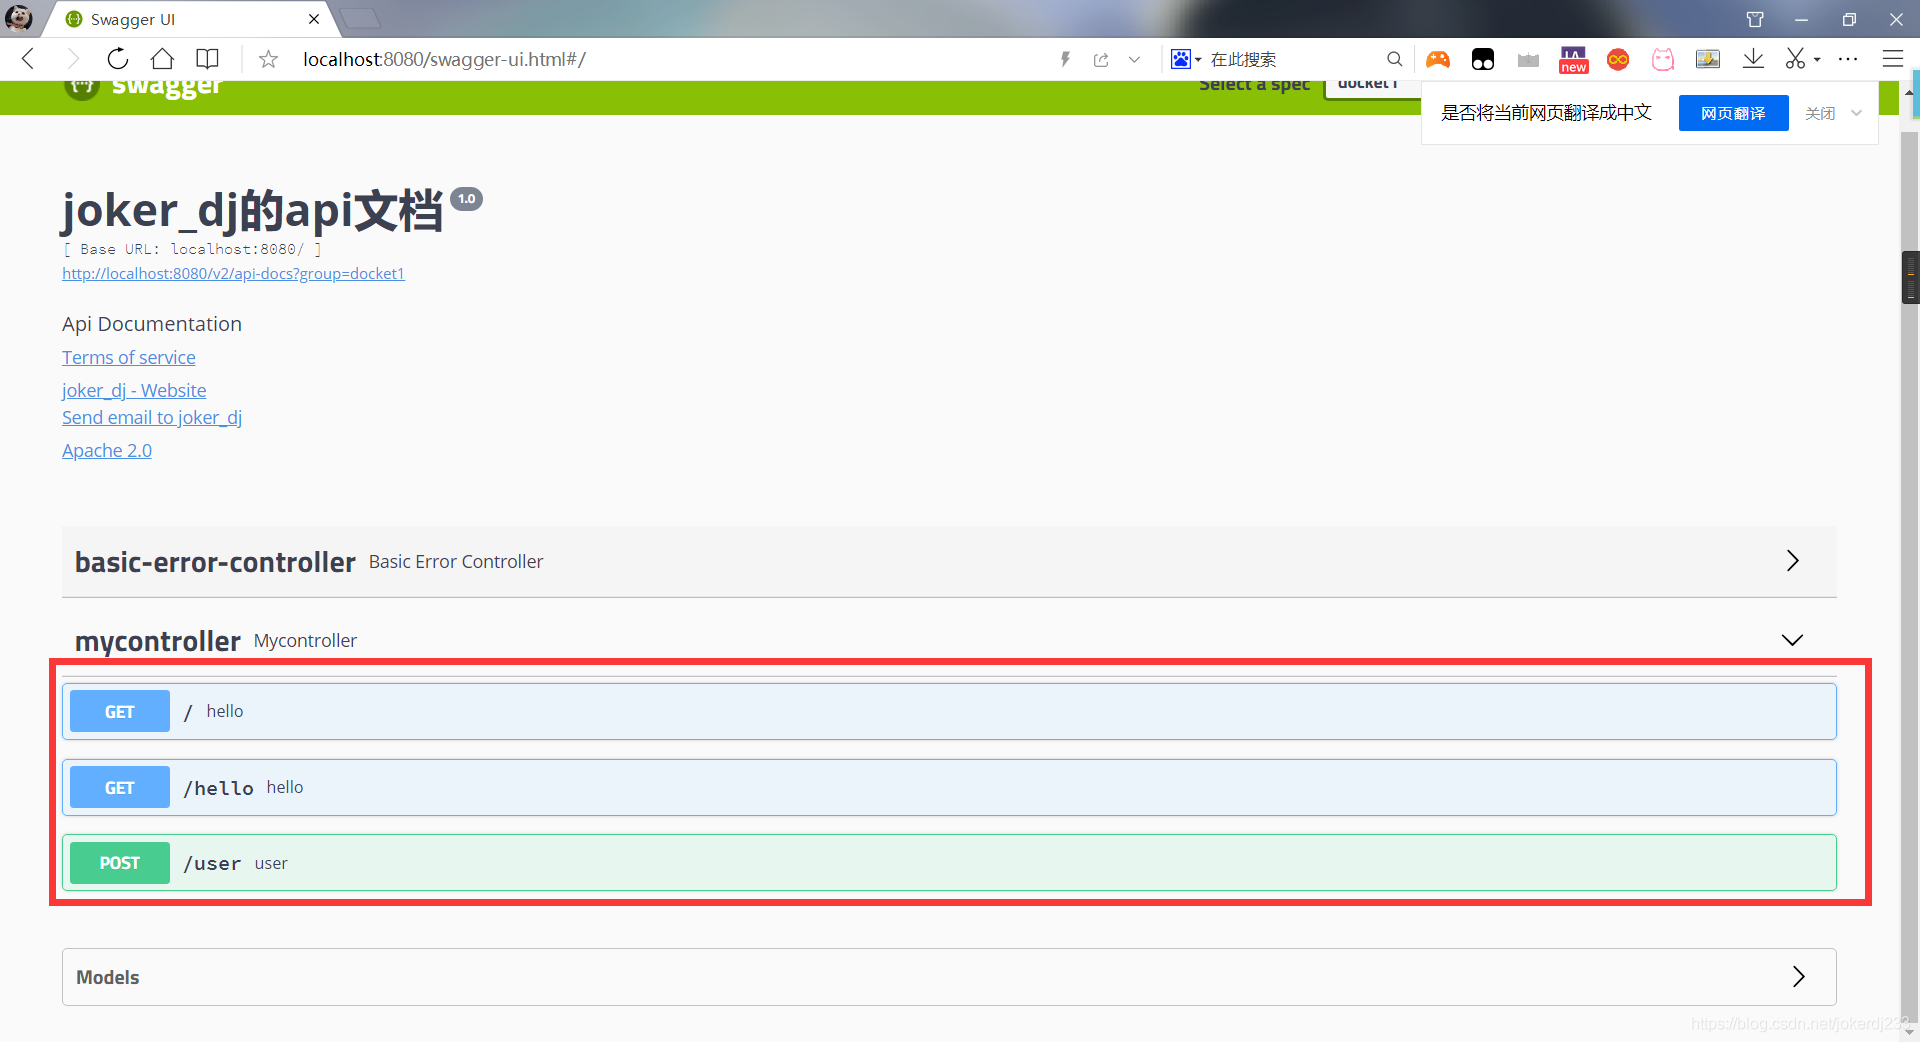
浏览器输入 http://localhost:8080/swagger-ui.html
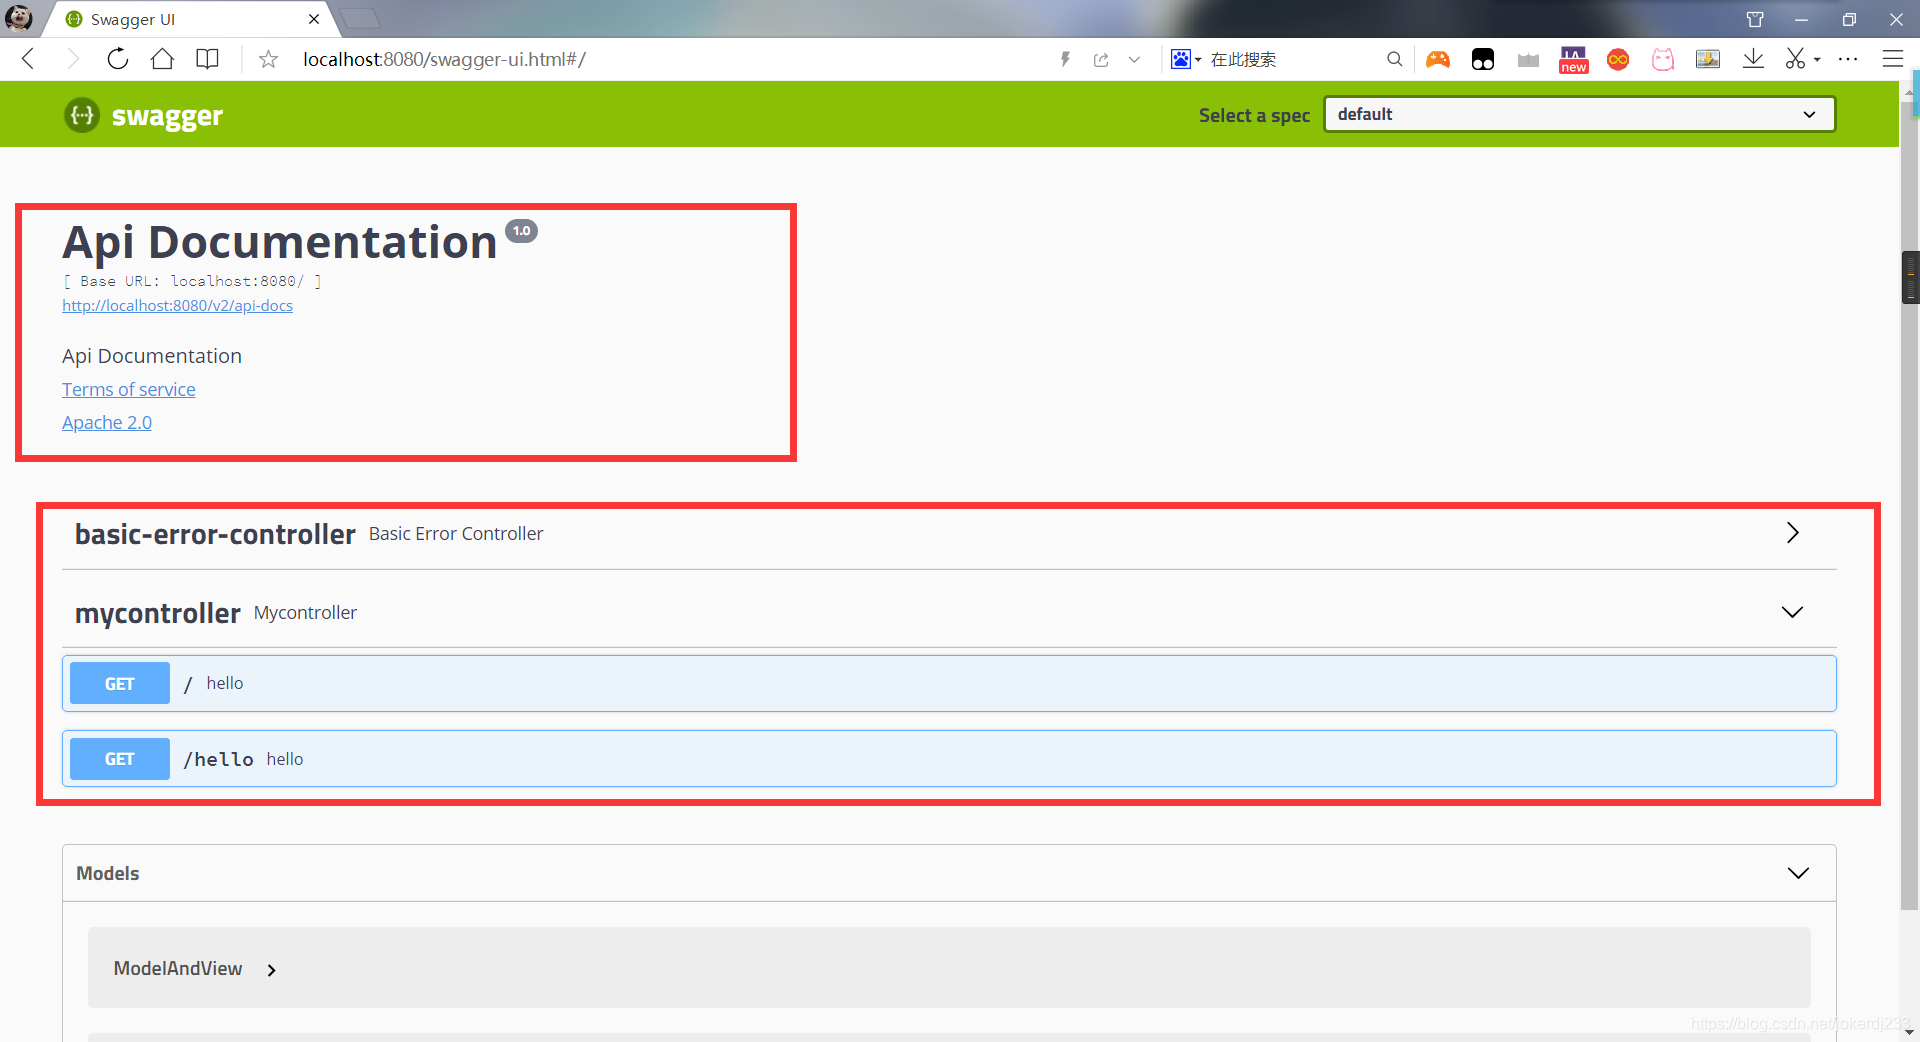
我们所写的controller方法都会被检测到
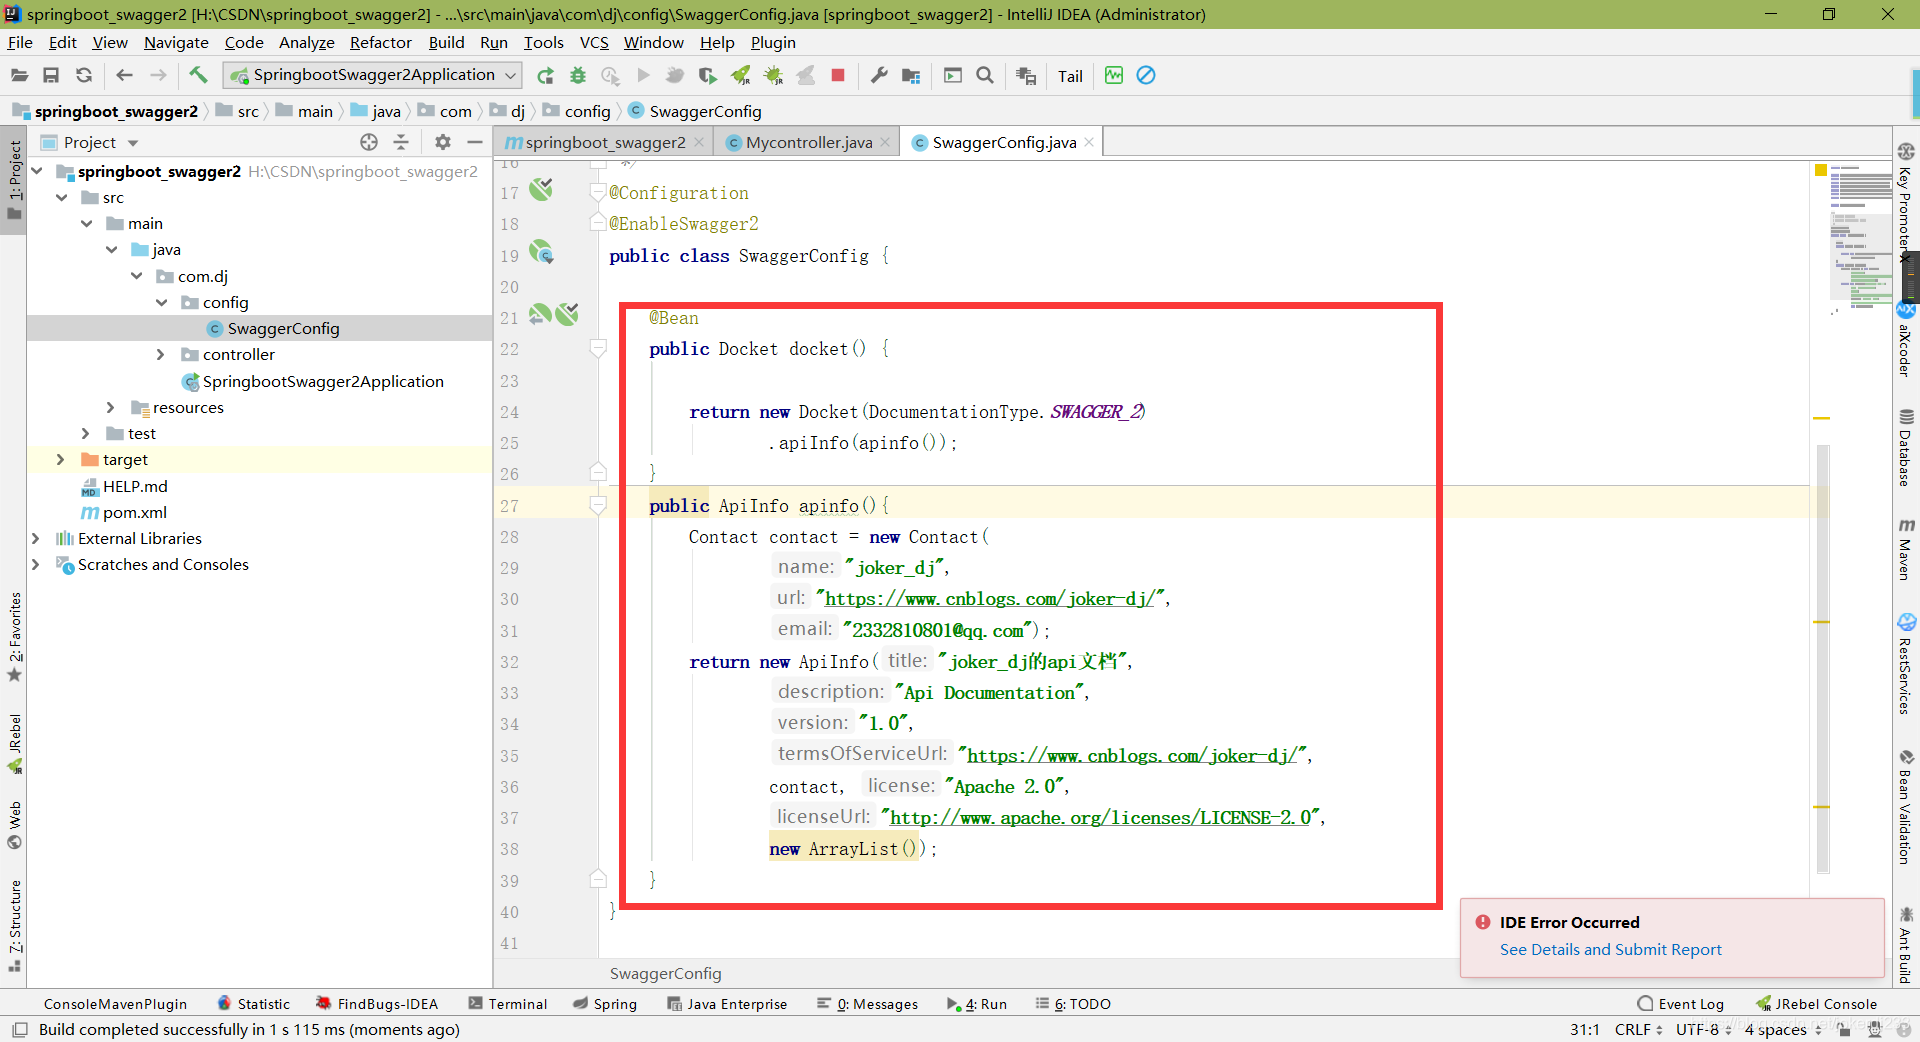
    @Bean
    public Docket docket() {

        return new Docket(DocumentationType.SWAGGER_2)
                .apiInfo(apinfo());
    }
    public ApiInfo apinfo(){
        Contact contact = new Contact(
                "joker_dj",
                "https://www.cnblogs.com/joker-dj/",
                "2332810801@qq.com");
        return new ApiInfo("joker_dj的api文档",
                "Api Documentation",
                "1.0",
                "https://www.cnblogs.com/joker-dj/",
                contact, "Apache 2.0",
                "http://www.apache.org/licenses/LICENSE-2.0",
                new ArrayList());
    }
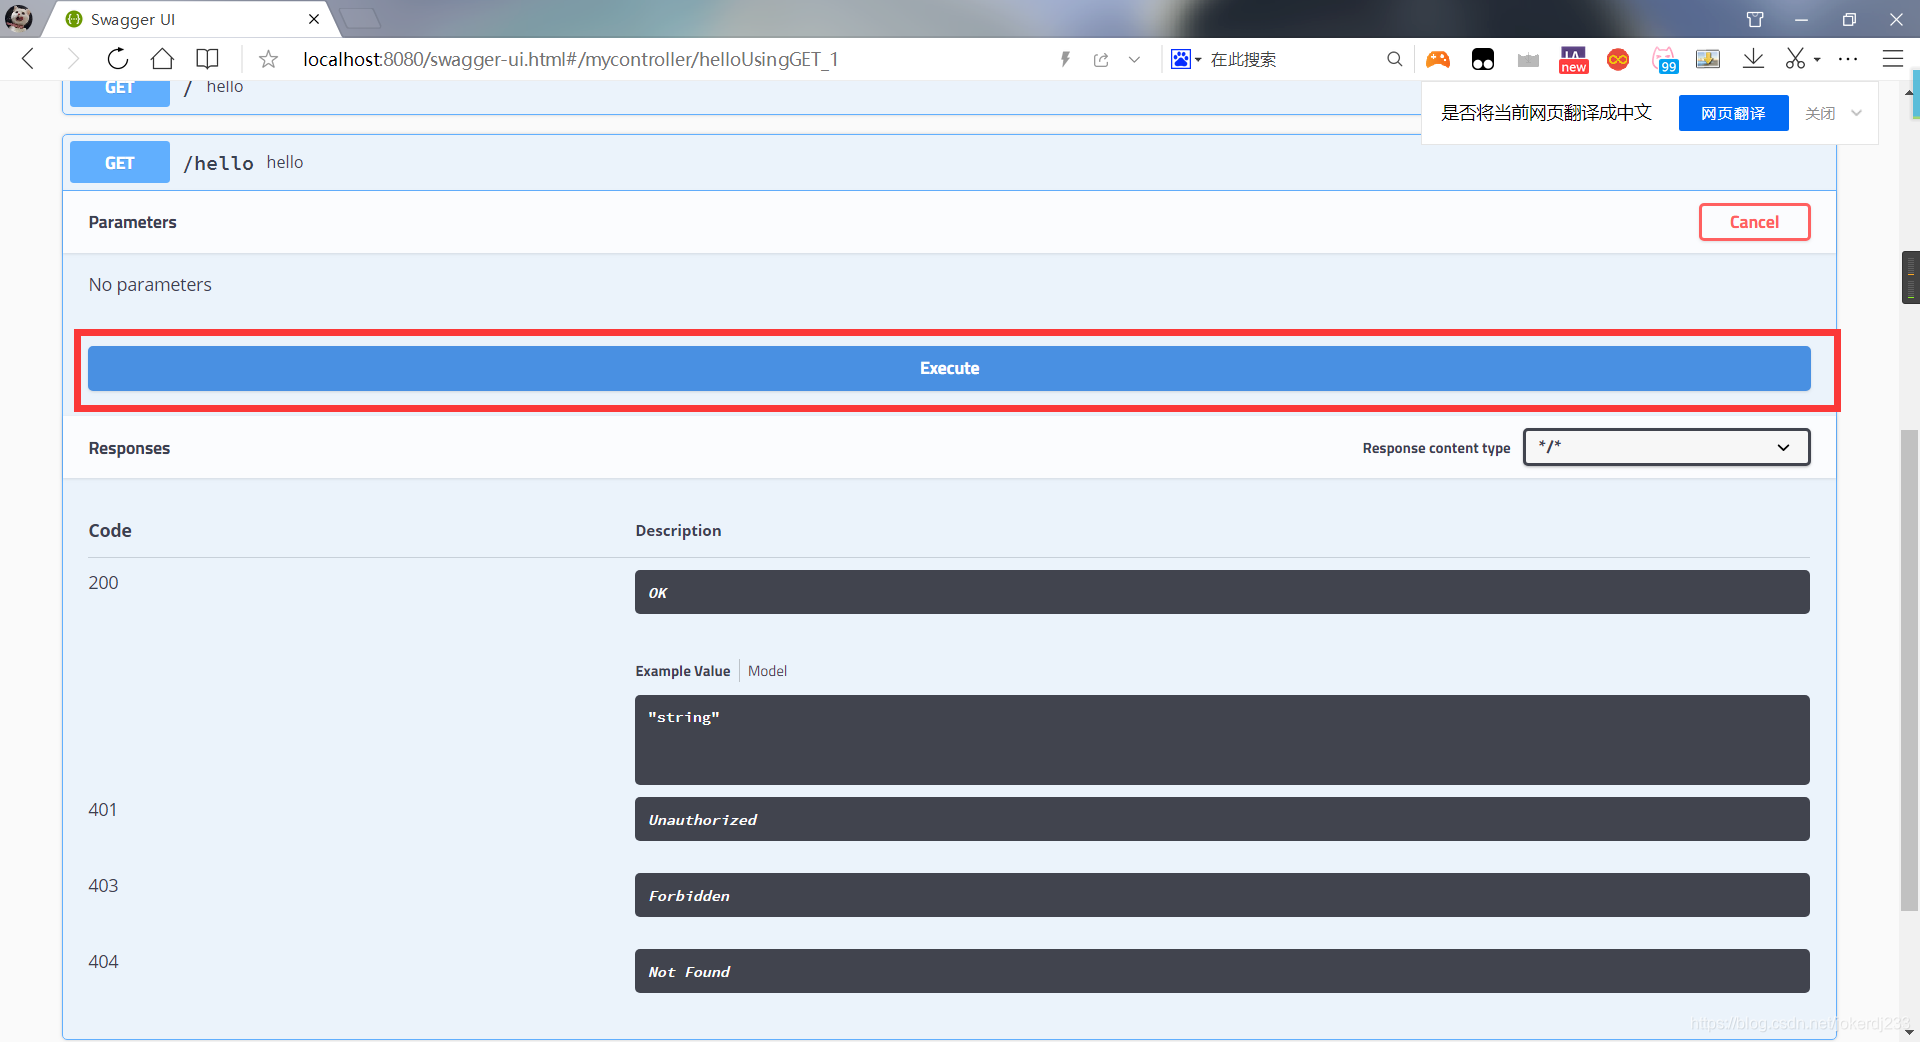
运行看效果

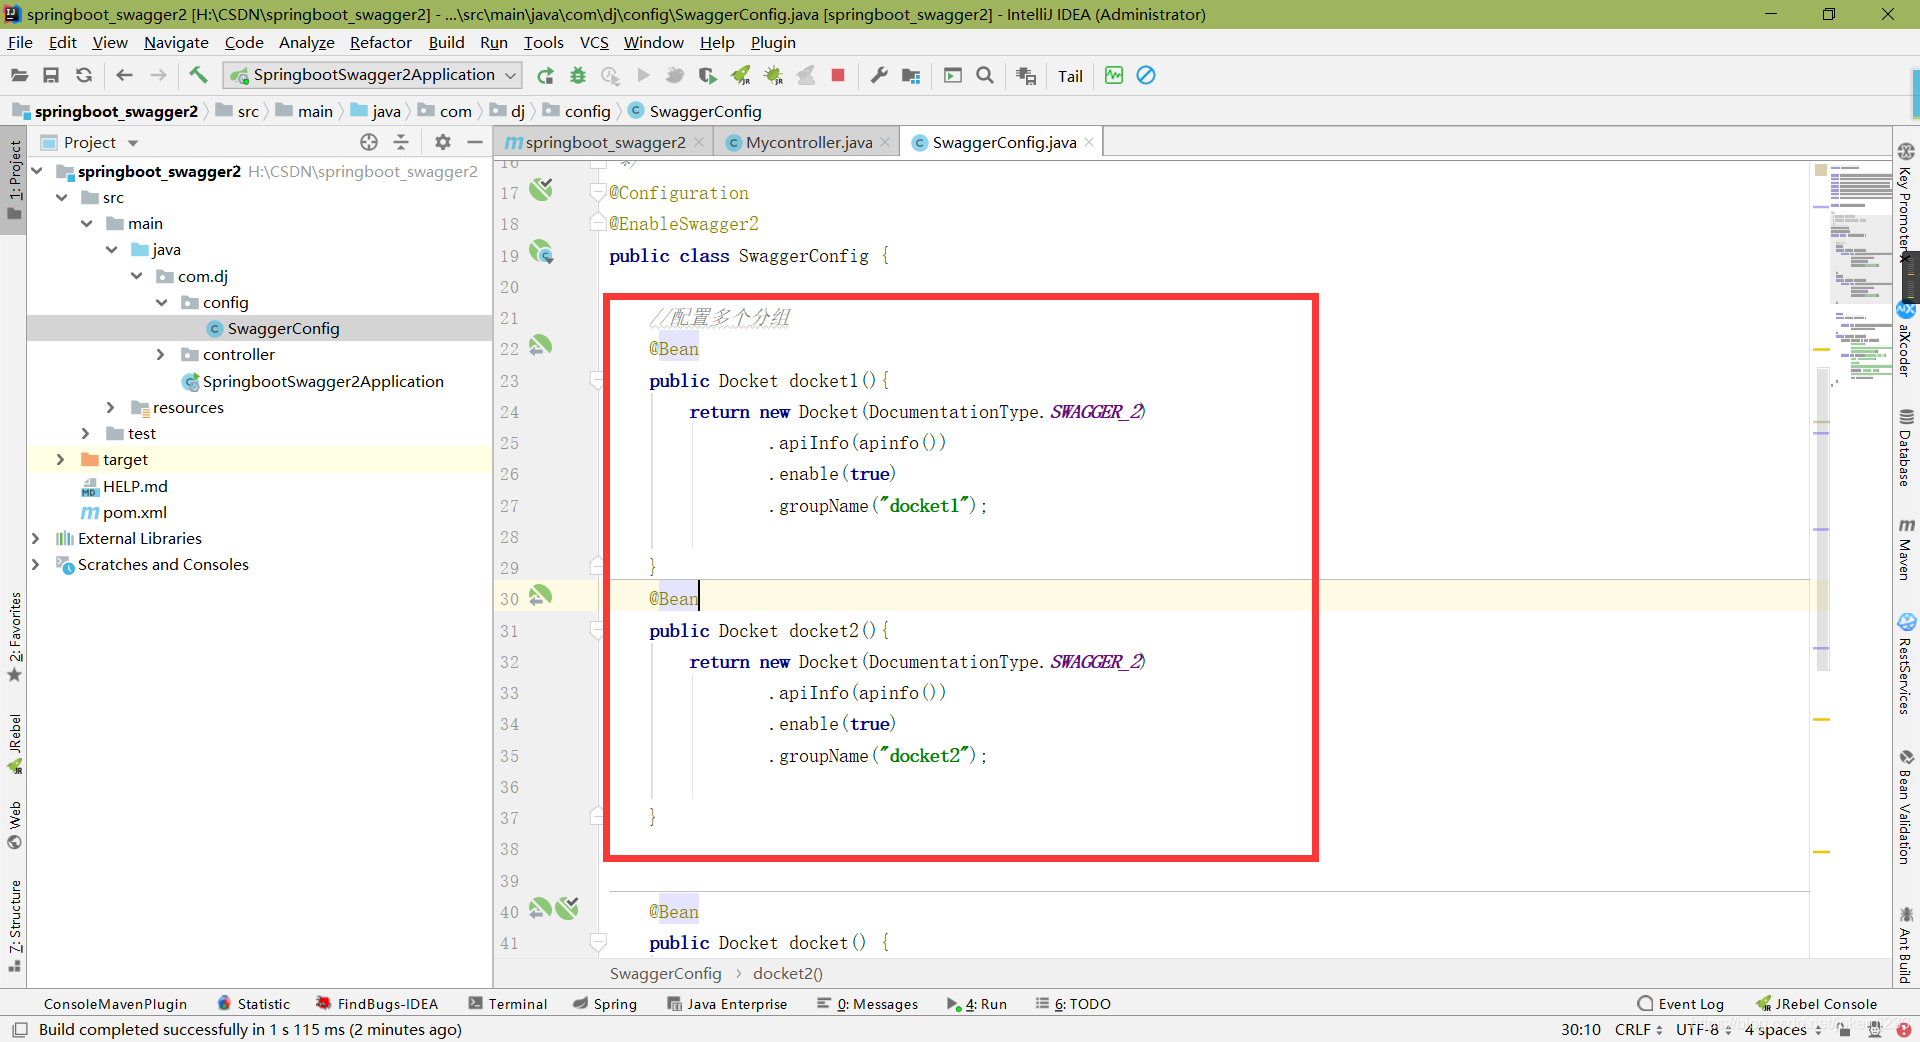
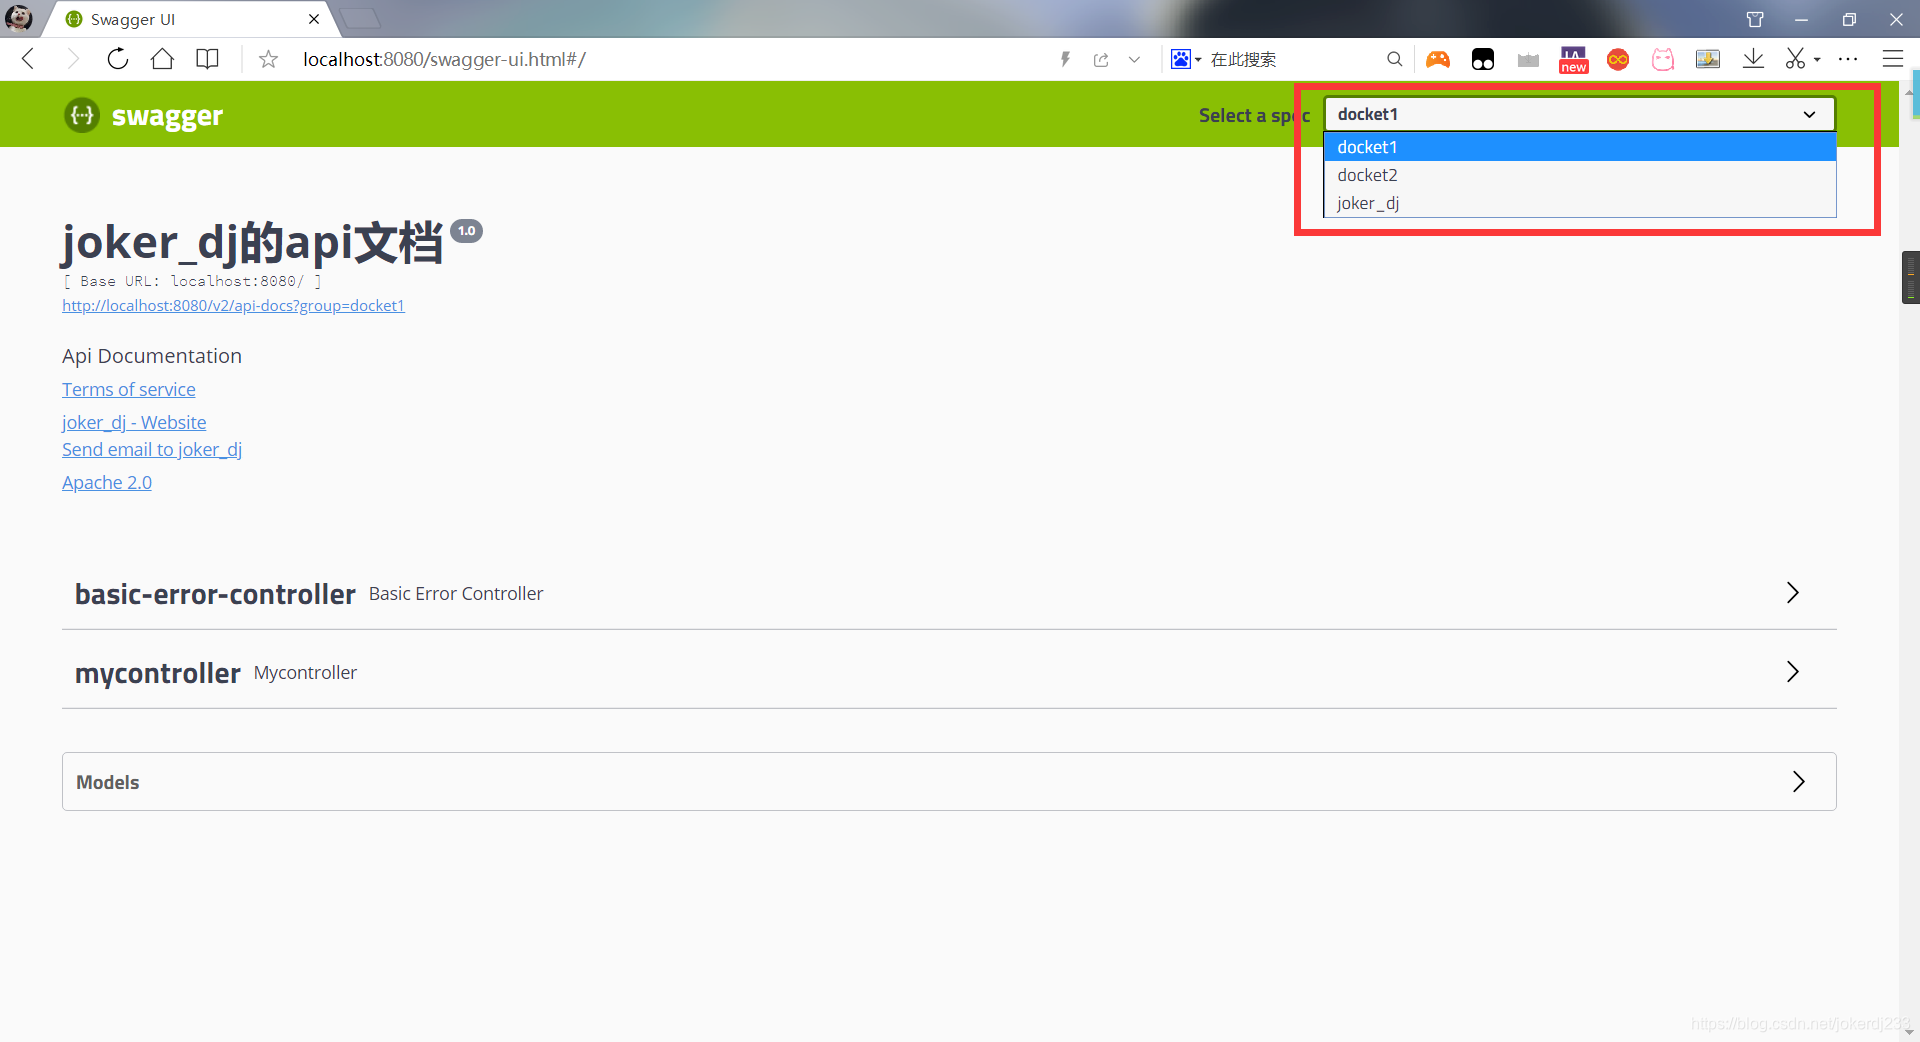
2. 配置多个分组
多配置几个Docket即可
3. 配置其他的信息 不一一解释 都有注释
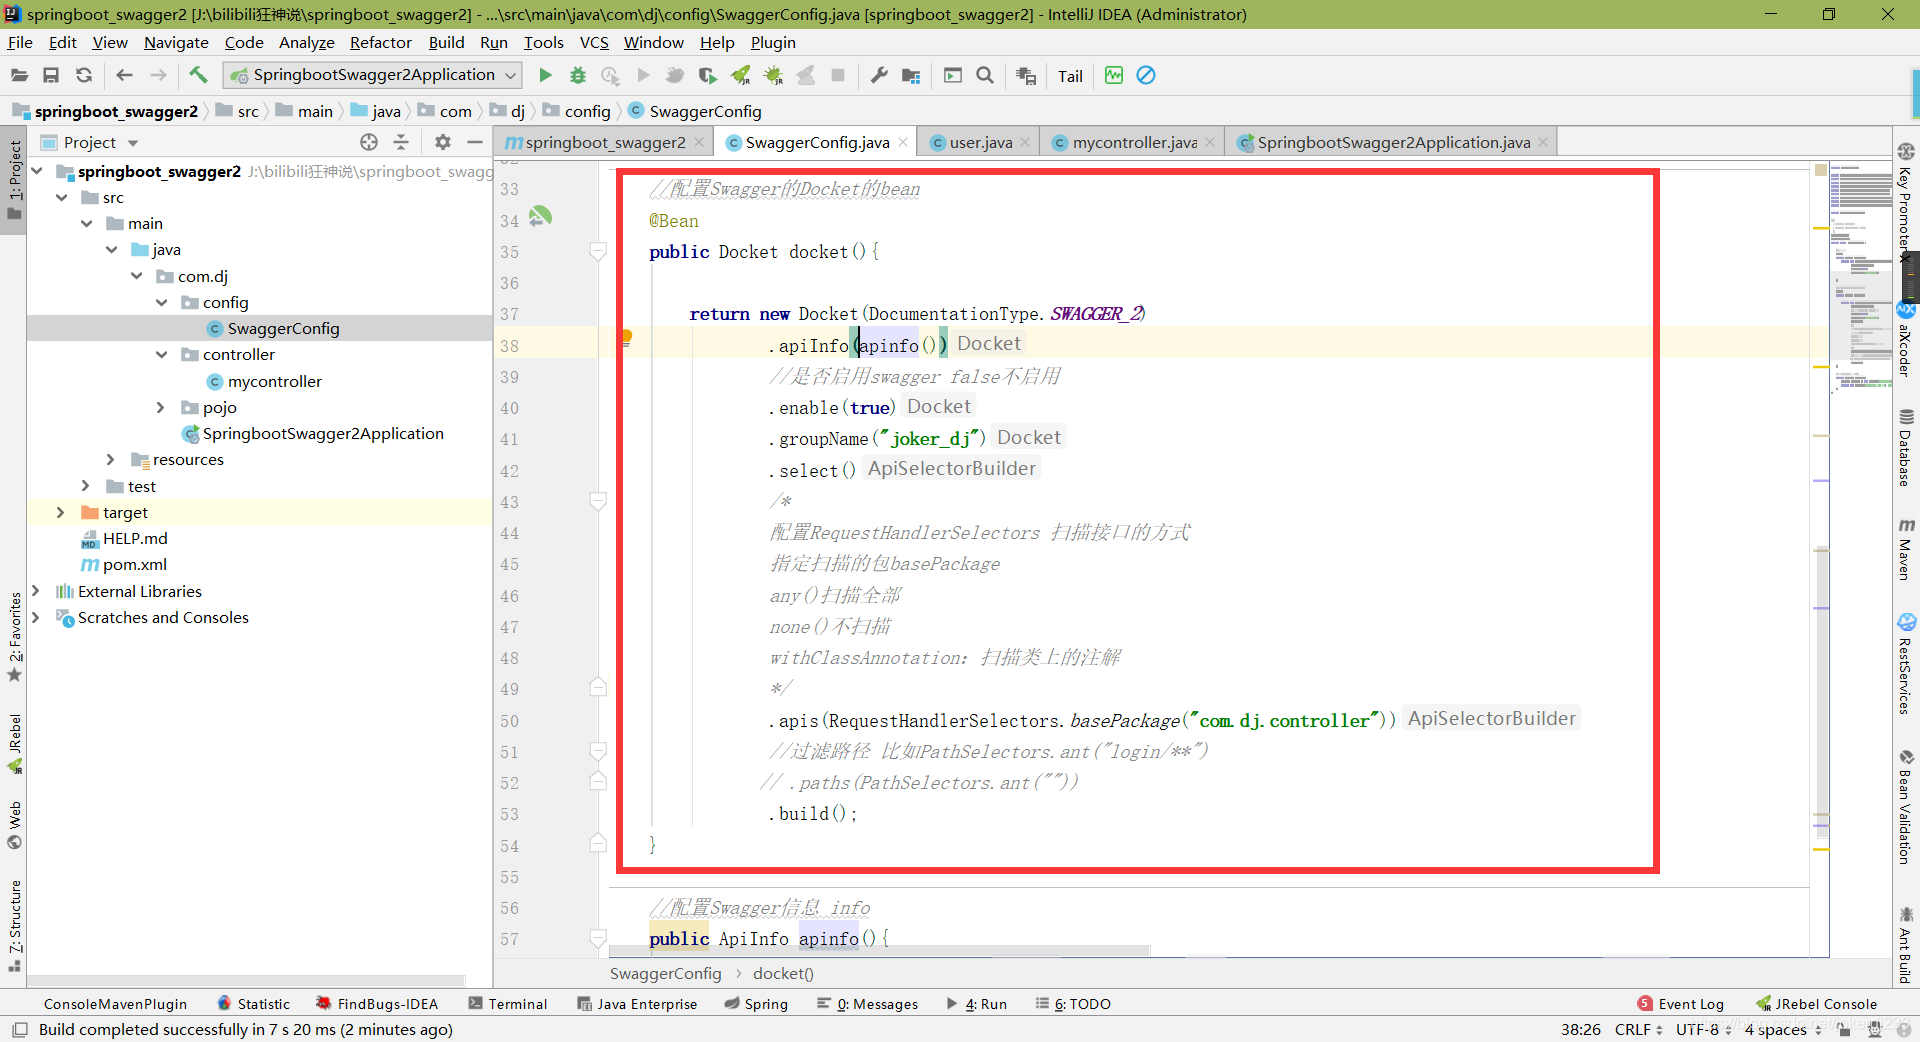
@Bean
    public Docket docket(){

        return new Docket(DocumentationType.SWAGGER_2)
                .apiInfo(apinfo())
                //是否启用swagger false不启用
                .enable(true)
                .groupName("joker_dj")
                .select()
                /*
                配置RequestHandlerSelectors 扫描接口的方式
                指定扫描的包basePackage
                any()扫描全部
                none()不扫描
                withClassAnnotation:扫描类上的注解
                */
                .apis(RequestHandlerSelectors.basePackage("com.dj.controller"))
                //过滤路径 比如PathSelectors.ant("login/**")
               // .paths(PathSelectors.ant(""))
                .build();
    }


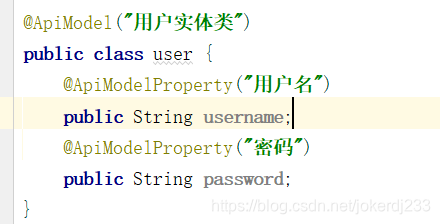
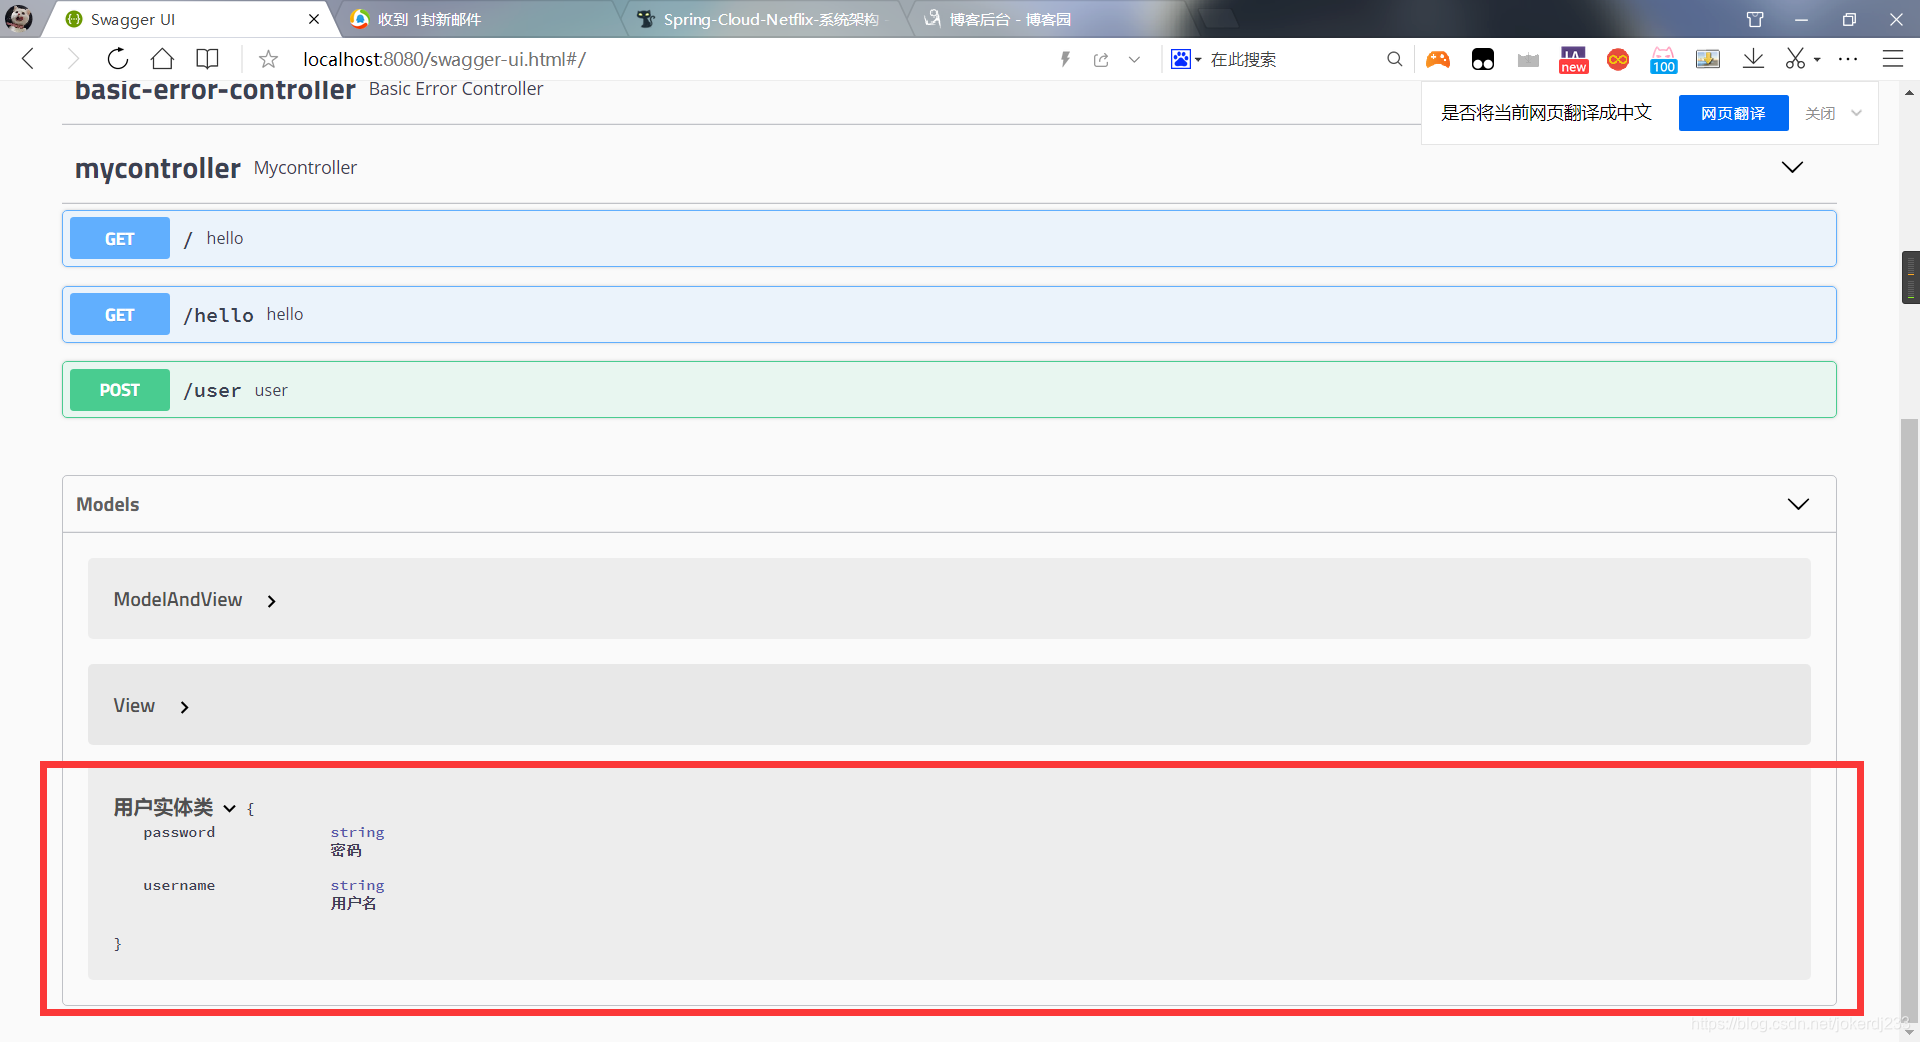
@ApiModel("用户实体类")
public class user {
    @ApiModelProperty("用户名")
    public String username;
    @ApiModelProperty("密码")
    public String password;
}
运行看效果
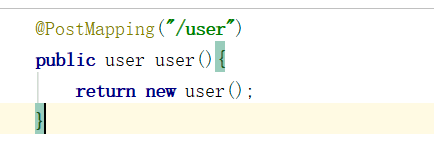
添加到controller上
@ApiOperation
运行看效果
5. 发送数据 测试接口
在controller中编写代码
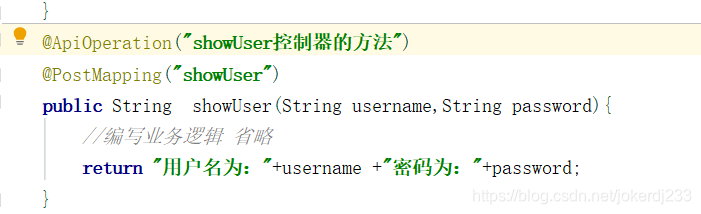
运行测试
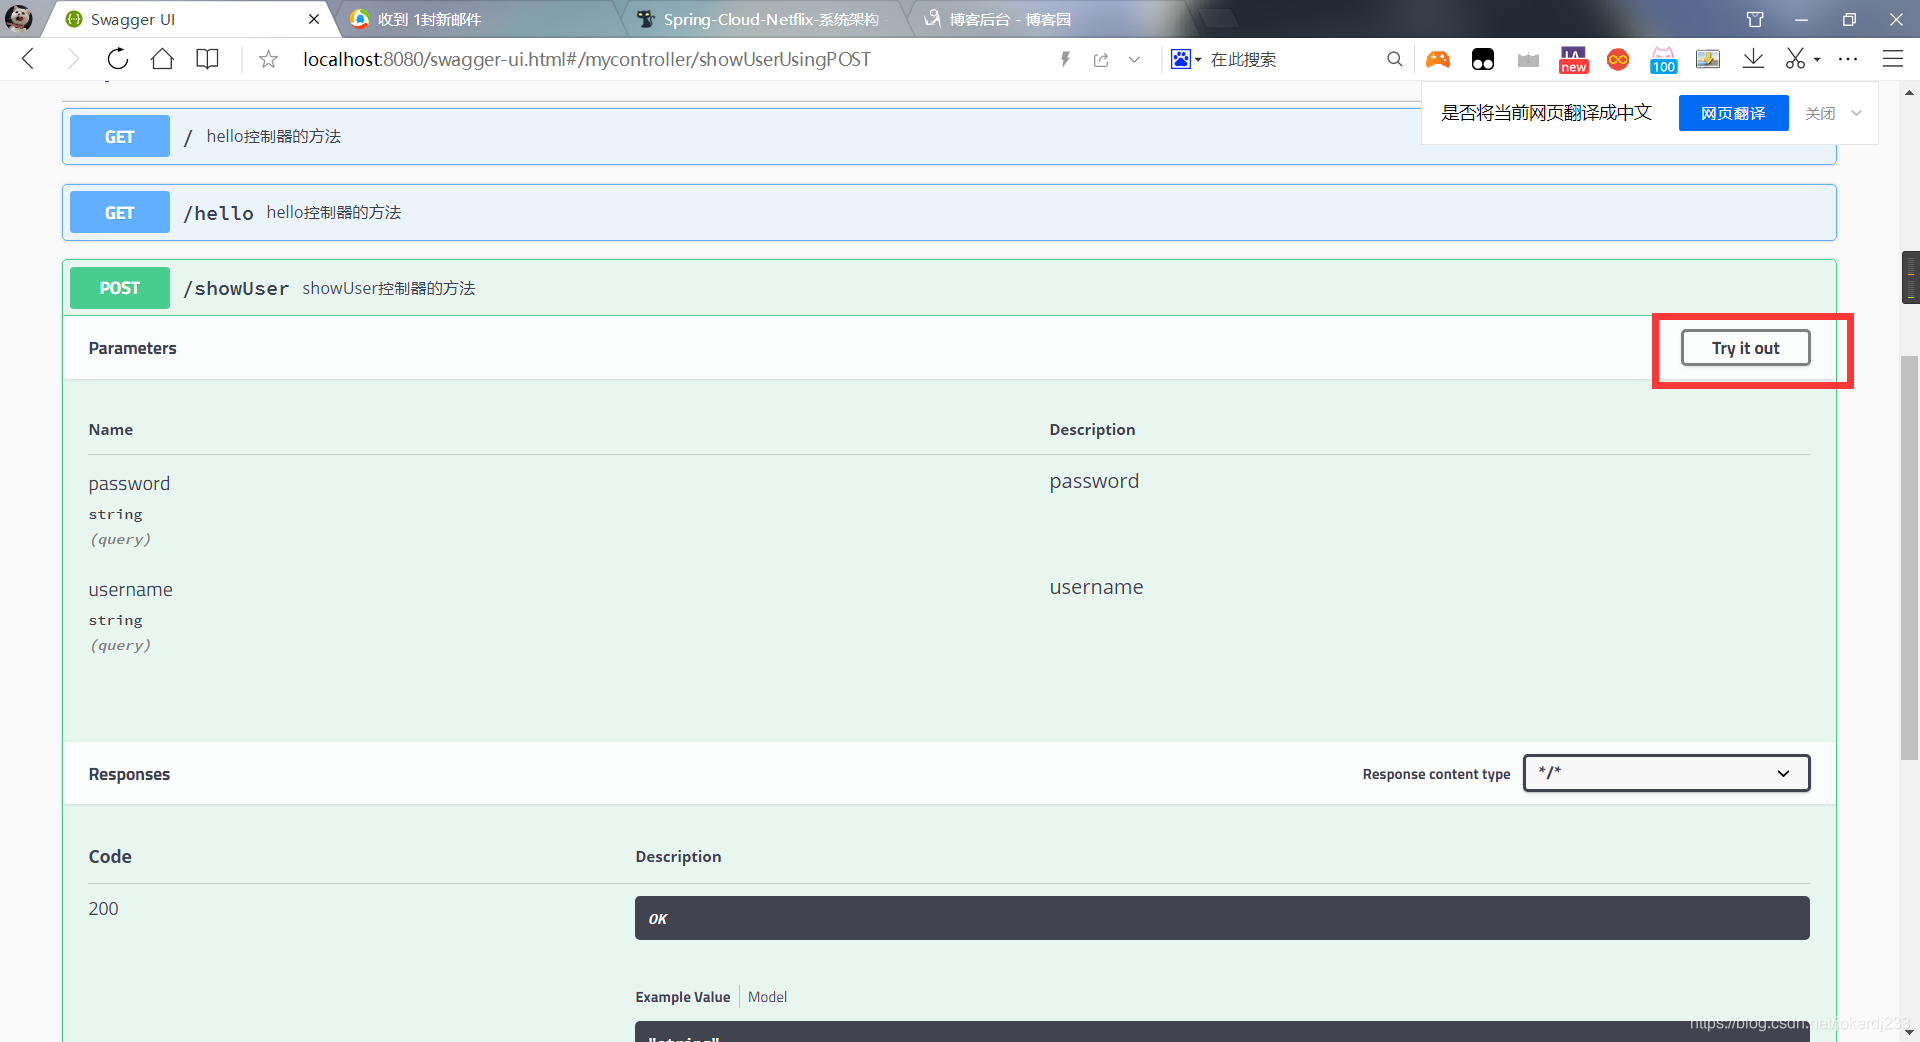
输入用户名 密码 点击测试
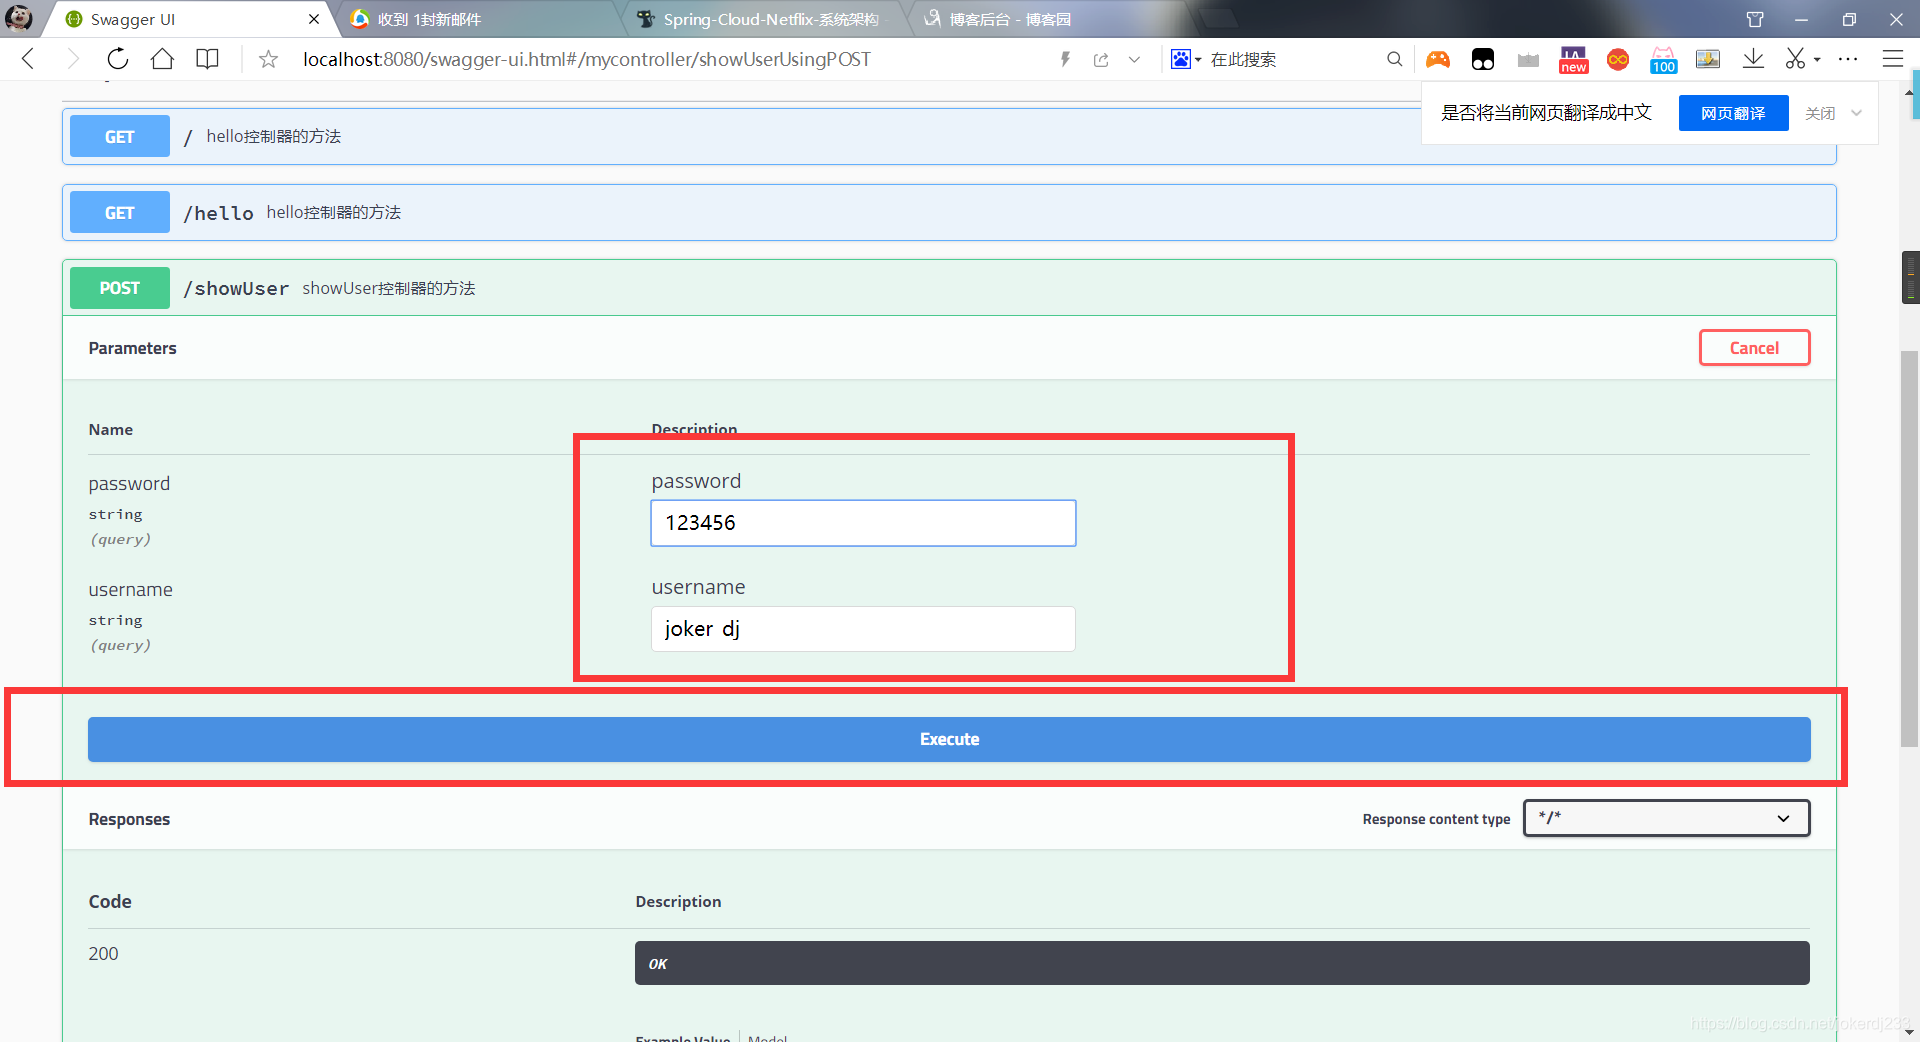
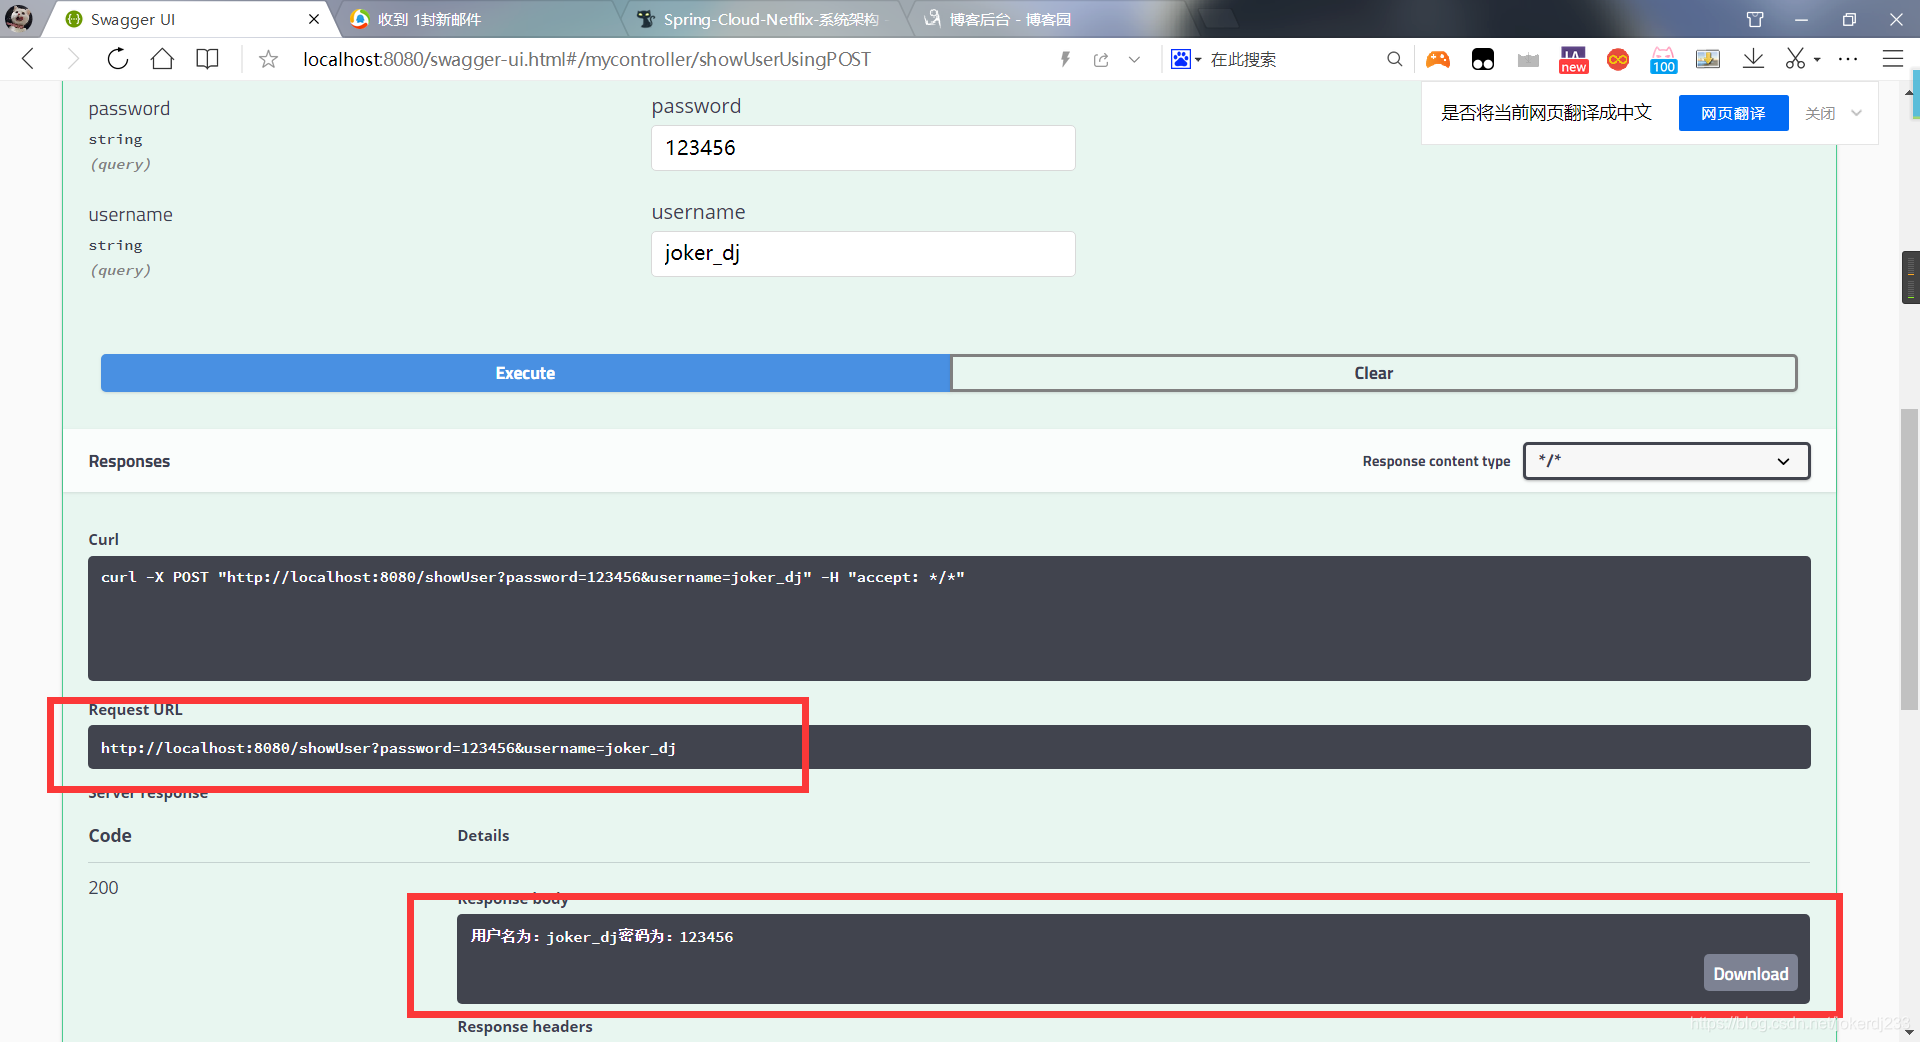
这样就返回了我们数据
总结:Swagger这个工具主要是针对开发人员测试接口来使用的,
注意:在项目上线的时候己得吧Swagger给关闭 防止接口暴露 (安全)
原文:https://www.cnblogs.com/joker-dj/p/12693051.html