Ribbon简介
负载均衡(Load Balance)
LB,即负载均衡(Load Balance) ,在微服务或分布式集群中经常用的一种应用。
负载均衡简单的说就是将用户的请求平摊的分配到多个服务上,从而达到系统的HA (高可用)。
常见的负载均衡软件有Nginx, Lvs 等等。
dubbo、 SpringCloud中均给我们提供了负载均衡,SpringCloud的负载均衡算法可以自定义。
负载均衡简单分类:
即在服务的消费方和提供方之间使用独立的LB设施,如Nginx(反向代理服务器),由该设施负责把访问请求通过某种策略转发至服务的提供方!
将LB逻辑集成到消费方,消费方从服务注册中心获知有哪些地址可用,然后自己再从这些地址中选出一个合适的服务器。Ribbon就属于进程式LB,它只是一个类库,集成于消费方进程,消费方通过它来获取到服务提供方的地址!
集成Ribbon
        <dependency>
            <groupId>org.springframework.cloud</groupId>
            <artifactId>spring-cloud-starter-netflix-ribbon</artifactId>
        </dependency>

        <dependency>
            <groupId>org.springframework.cloud</groupId>
            <artifactId>spring-cloud-starter-netflix-eureka-client</artifactId>
        </dependency>
eureka:
  instance:
    hostname: localhost #eureka服务端实例名称
  client:
    register-with-eureka: false #表示是否向eureka注册自己
    fetch-registry: false #如果为false表示自己为注册中心
    service-url:  #监控页面
      defaultZone: http://127.0.0.1:7001/eureka/,http://127.0.0.1:7002/eureka/,http://127.0.0.1:7003/eureka/
@EnableEurekaClient
@SpringBootApplication
public class DeptConsumer_80 {
    public static void main(String[] args) {
        SpringApplication.run(DeptConsumer_80.class,args);
    }
}
//配置负载均衡实现RestTemplate
@Bean
@LoadBalanced //Ribbon
public RestTemplate restTemplate(){
    return new RestTemplate();
}
private static final String REST_PATH_PREFIX="http://springcloud-provider-dept";

Ribbon实现负载均衡
新建两个数据库sc02,sc03,数据与sc01除db_source其余一致。
新建两个Maven项目springcloud-provider-dept-8002,springcloud-provider-dept-8003。复制springcloud-provider-dept-8001项目中的所有内容。
修改springcloud-provider-dept-8002,springcloud-provider-dept-8003的application.yml中的端口号,连接的数据库名字与Eureka的默认描述信息。
保证3个服务提供者的application name一致。
spring:
  application:
    name: springcloud-provider-dept
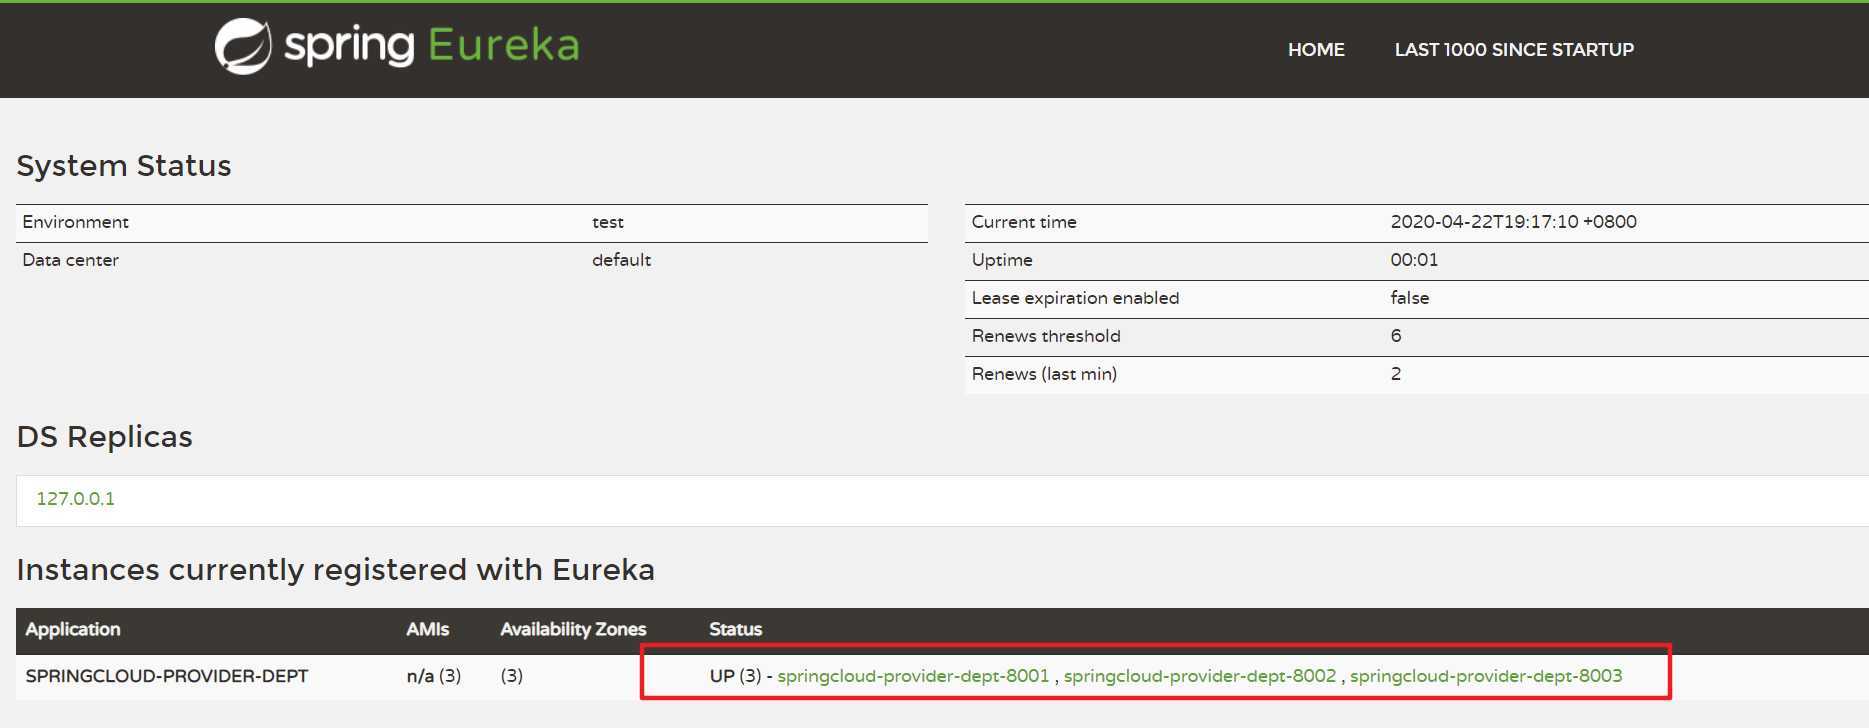
访问http://localhost/consumer/dept/all,多次刷新页面,发现查询了不同的数据库(默认算法为简单轮询):


自定义负载均衡算法
//自定义负载均衡算法:一个服务连续访问5次后,换下一个服务
public class MyRule extends AbstractLoadBalancerRule {
    public MyRule(){
    }
    private int total=0;
    private int current=0;

    @SuppressWarnings({"RCN_REDUNDANT_NULLCHECK_OF_NULL_VALUE"})
    public Server choose(ILoadBalancer lb, Object key) {


        if (lb == null) {
            return null;
        } else {
            Server server = null;

            while(server == null) {
                if (Thread.interrupted()) {
                    return null;
                }

                List<Server> upList = lb.getReachableServers(); //活着的服务
                List<Server> allList = lb.getAllServers();      //所有服务
                int serverCount = allList.size();
                if (serverCount == 0) {
                    return null;
                }

//========================核心算法开始==============================
                System.out.println(111);
                if(total<=5){
                    server = upList.get(current);
                    total++;
                }else {
                    total=0;
                    current++;
                    if (current>=upList.size()){
                        current=0;
                    }
                    server = upList.get(current);
                }

//========================核心算法结束==============================


                if (server == null) {
                    Thread.yield();
                } else {
                    if (server.isAlive()) {
                        return server;
                    }

                    server = null;
                    Thread.yield();
                }
            }

            return server;
        }
    }

    protected int chooseRandomInt(int serverCount) {
        return ThreadLocalRandom.current().nextInt(serverCount);
    }

    @Override
    public Server choose(Object key) {
        return this.choose(this.getLoadBalancer(), key);
    }

    @Override
    public void initWithNiwsConfig(IClientConfig clientConfig) {
    }

}
@Configuration
public class MyRuleConfig {

    @Bean
    public IRule myRule(){
        return new MyRule();
    }
}
@EnableEurekaClient
@SpringBootApplication
@RibbonClient(name = "springcloud-provider-dept",configuration = MyRuleConfig.class)//在微服务启动的时候就能加载我们自定义的Ribbon类
public class DeptConsumer_80 {
    public static void main(String[] args) {
        SpringApplication.run(DeptConsumer_80.class,args);
    }
}
原文:https://www.cnblogs.com/yinrz/p/12755734.html