官方文档:链接
- MyBatis 是支持定制化 SQL、存储过程以及高级映射的优秀的持久层框架。
- MyBatis 避免了几乎所有的 JDBC 代码和手动设置参数以及获取结果集。
- MyBatis可以使用简单的XML用于配置和原始映射,将接口和Java的POJO类映射成数据库中的记录
- 使开发者只需要关注 SQL 本身,而不需要花费精力去处理例如注册驱动、创建connection、创建statement、手动设置参数、结果集检索等jdbc繁杂的过程代码。
- 原是apache的一个开源项目iBatis
- 2010年6月这个项目由apache software foundation 迁移到了google code,并且改名为MyBatis 。
- iBATIS一词来源于“internet”和“abatis”的组合,是一个基于Java的持久层框架。
- SQL夹在Java代码块里,耦合度高导致硬编码内伤
- 维护不易且实际开发需求中sql是有变化,频繁修改的情况多见
- 要自已创建connection、创建statement、手动设置参数、结果集检索等
- 长难复杂SQL,对于Hibernate而言处理也不容易
- 内部自动生产的SQL,不容易做特殊优化。
- 基于全映射的全自动框架,javaBean存在大量字段时无法只映射部分字段。导致数据库性能下降。
- 对开发人员而言,核心sql还是需要自己优化
- MyBatis是一个半自动化的持久化层框架。
- MyBatis 是支持定制化 SQL、存储过程以及高级映射的优秀的持久层框架。


/*
Navicat MySQL Data Transfer

Source Server         : itlike
Source Server Version : 50720
Source Host           : localhost:3306
Source Database       : mybatis

Target Server Type    : MYSQL
Target Server Version : 50720
File Encoding         : 65001

Date: 2018-12-04 14:13:49
*/

SET FOREIGN_KEY_CHECKS=0;

-- ----------------------------
-- Table structure for customer
-- ----------------------------
DROP TABLE IF EXISTS `customer`;
CREATE TABLE `customer` (
  `cust_id` int(11) NOT NULL AUTO_INCREMENT,
  `cust_name` varchar(255) DEFAULT NULL,
  `cust_profession` varchar(255) DEFAULT NULL,
  `cust_phone` varchar(255) DEFAULT NULL,
  `email` varchar(255) DEFAULT NULL,
  PRIMARY KEY (`cust_id`)
) ENGINE=InnoDB AUTO_INCREMENT=11 DEFAULT CHARSET=utf8;

-- ----------------------------
-- Records of customer
-- ----------------------------
INSERT INTO `customer` VALUES (‘1‘, ‘鲁班‘, ‘射手‘, ‘13499887733‘, ‘12341241@qq.com‘);
INSERT INTO `customer` VALUES (‘2‘, ‘李白‘, ‘刺客‘, ‘18977665521‘, ‘libai@163.com‘);
INSERT INTO `customer` VALUES (‘3‘, ‘阿轲‘, ‘刺客‘, ‘18977665997‘, ‘aike@qq.com‘);
INSERT INTO `customer` VALUES (‘4‘, ‘德玛西亚‘, ‘肉盾‘, ‘13700997665‘, ‘demaxiya.126.com6‘);
INSERT INTO `customer` VALUES (‘5‘, ‘亚索‘, ‘战士‘, ‘13586878987‘, ‘yasuo@qq.com‘);
INSERT INTO `customer` VALUES (‘6‘, ‘奶妈‘, ‘辅助‘, ‘13398909089‘, ‘nama@qq.com‘);
INSERT INTO `customer` VALUES (‘7‘, ‘剑圣‘, ‘刺客‘, ‘13398909088‘, ‘jiansheng@163.com‘);
INSERT INTO `customer` VALUES (‘8‘, ‘盖伦‘, ‘肉盾‘, ‘15923242231‘, ‘gailun@126.com‘);
INSERT INTO `customer` VALUES (‘9‘, ‘锤石‘, ‘辅助‘, ‘13398908900‘, ‘8888@163.com‘);
INSERT INTO `customer` VALUES (‘10‘, ‘阿木木‘, ‘辅助‘, ‘13398908928‘, ‘13398908928@qq.com‘);

@Getter@Setter//Lombok插件
public class Customer {
    private Integer cust_id;
    private String cust_name;
    private String cust_profession;
    private String cust_phone;
    private String email;

    @Override
    public String toString() {
        return "Customer{" +
                "cust_id=" + cust_id +
                ", cust_name=‘" + cust_name + ‘\‘‘ +
                ", cust_profession=‘" + cust_profession + ‘\‘‘ +
                ", cust_phone=‘" + cust_phone + ‘\‘‘ +
                ", email=‘" + email + ‘\‘‘ +
                ‘}‘;
    }
}

<?xml version="1.0" encoding="UTF-8" ?>
<!DOCTYPE configuration
        PUBLIC "-//mybatis.org//DTD Config 3.0//EN"
        "http://mybatis.org/dtd/mybatis-3-config.dtd">
<configuration>
    <!-- spring整合后 environments配置将废除 使用spring中的连接池 -->
    <environments default="development">
        <environment id="development">
            <!-- 使用jdbc事务管理 -->
            <transactionManager type="JDBC" />
            <!-- 数据库连接池 -->
            <dataSource type="POOLED">
                <property name="driver" value="com.mysql.jdbc.Driver" />
                <property name="url"
                          value="jdbc:mysql://localhost:3306/mybatis?characterEncoding=utf-8" />
                <property name="username" value="root" />
                <property name="password" value="123456" />
            </dataSource>
        </environment>
    </environments>
</configuration>
Customer.xml

<?xml version="1.0" encoding="UTF-8" ?>
<!DOCTYPE mapper
        PUBLIC "-//mybatis.org//DTD Mapper 3.0//EN"
        "http://mybatis.org/dtd/mybatis-3-mapper.dtd">
<mapper namespace="myTest">
    <!--根据cust_id查询客户-->
    <select id="queryCustomerById" parameterType="Int" resultType="com.dj.domain.Customer">
        SELECT * FROM `customer` WHERE cust_id  = #{cust_id}
    </select>
</mapper>

 <!--加载映射文件-->
    <mappers>
        <mapper resource="com\dj\domain\Customer.xml"></mapper>
    </mappers>

public class Test01 {
    @Test
    public void test() throws IOException {
        //1.SqlSessionFactoryBuilder 加载配置文件
        SqlSessionFactoryBuilder sqlSessionFactoryBuilder = new SqlSessionFactoryBuilder();
        //2.读取配置文件
        InputStream resourceAsStream = Resources.getResourceAsStream("SqlMappingConfig.xml");
        //3.获取session工厂
        SqlSessionFactory build = sqlSessionFactoryBuilder.build(resourceAsStream);
        //4.创建会话 --JDBC链接
        SqlSession sqlSession = build.openSession();
        //5.执行sql语句
        Customer queryCustomerById = sqlSession.selectOne("queryCustomerById", 1);
        //6.打印信息
        System.out.println(queryCustomerById);
        //7.关闭会话
        sqlSession.close();
    }
}

执行流程:

- SqlSessionFactoryBuilder用于创建SqlSessionFacoty
- SqlSessionFacoty一旦创建完成就不需要SqlSessionFactoryBuilder了
- 因为SqlSession是通过SqlSessionFactory创建的
- 所以可以将SqlSessionFactoryBuilder当成一个工具类使用,最佳使用范围是方法范围即方法体内局部变量。
- 创建sqlSession的工厂,是一个接口
- 接口中定义了openSession的不同重载方法
- SqlSessionFactory的最佳使用范围是整个应用运行期间,一旦创建后可以重复使用,通常以单例模式管理SqlSessionFactory。
- 连接到数据库的一个会话
- sqlSession中定义了数据库操作方法。
- 每个线程都应该有它自己的SqlSession实例
- SqlSession的实例不能共享使用,它也是线程不安全的。因此最佳的范围是请求或方法范围
- 绝对不能将SqlSession实例的引用放在一个类的静态字段或实例字段中。


public class mybatisutils {
    public static final SqlSessionFactory build;
    static {
        //1.SqlSessionFactoryBuilder 加载配置文件
        SqlSessionFactoryBuilder sqlSessionFactoryBuilder = new SqlSessionFactoryBuilder();
        //2.读取配置文件
        InputStream resourceAsStream = null;
        try {
            resourceAsStream = Resources.getResourceAsStream("SqlMappingConfig.xml");
        } catch (IOException e) {
            e.printStackTrace();
        }
        //3.获取session工厂
        build = sqlSessionFactoryBuilder.build(resourceAsStream);
    }

    public static SqlSession openSession(){
        return build.openSession();
    }
}


//查询所有的用户
    @Test
    public void test02(){
        SqlSession sqlSession = mybatisutils.openSession();
        List<Customer> queryCustomerAll = sqlSession.selectList("queryCustomerAll");
        System.out.println(queryCustomerAll);
        //7.关闭会话
        sqlSession.close();
    }
在SqlMappingConfig.xml配置

执行sql语句


- 表示一个占位符号,通过#{}可以实现preparedStatement向占位符中设置值
- 自动进行java类型和jdbc类型转换
{}可以有效防止sql注入
{}可以接收简单类型值或pojo属性值
- 如果parameterType传输单个简单类型值,#{}括号中可以是value或其它名称


  <!--添加客户-->
    <insert id="insertCustomer" parameterType="com.dj.domain.Customer">
        insert into customer(cust_name,cust_profession,cust_phone,email)values(#{cust_name},#{cust_profession},#{cust_phone},#{email})
    </insert>

 //添加用户
    @Test
    public void test04(){
        SqlSession sqlSession = mybatisutils.openSession();
        Customer customer = new Customer();
        customer.setCust_name("张飞");
        customer.setCust_phone("1684612684");
        customer.setCust_profession("肉盾");
        customer.setEmail("12515165@qq.com");
        //执行sql
        sqlSession.insert("insertCustomer", customer);
        //6.提交事务
        sqlSession.commit();
        //7.关闭会话
        sqlSession.close();
    }


 <!--添加客户-->
    <insert id="insertCustomer" parameterType="com.dj.domain.Customer">
        <!--获取插入的ID-->
        <selectKey keyColumn="cust_id" keyProperty="cust_id" order="AFTER" resultType="Integer">
            SELECT LAST_INSERT_ID()
        </selectKey>
        insert into customer(cust_name,cust_profession,cust_phone,email)values(#{cust_name},#{cust_profession},#{cust_phone},#{email})
    </insert>


要求
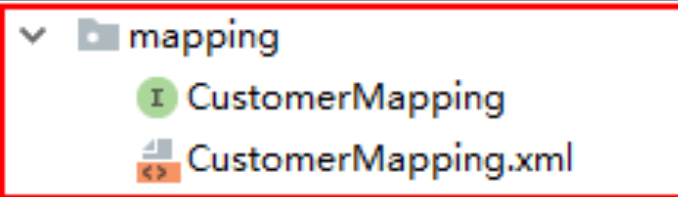
- namespace必须和Mapper接口类路径一致
- id必须和Mapper接口方法名一致
- parameterType必须和接口方法参数类型一致
- resultType必须和接口方法返回值类型一致


- 动态代理对象调用sqlSession.selectOne()和sqlSession.selectList()是根据mapper接口方法的返回值决定
- 如果返回list则调用selectList方法,如果返回单个对象则调用selectOne方法。


当这些参数属于我们业务POJO时,我们直接传递POJO


我们也可以封装多个参数为map,直接传递


定义属性及读取属性文件

这是 MyBatis 中极为重要的调整设置,它们会改变 MyBatis 的运行时行为


类型别名是为 Java 类型设置一个短的名字


- 无论是 MyBatis 在预处理语句(PreparedStatement)中设置一个参数时,还是从结果集中取出一个值时, 都会用类型处理器将获取的值以合适的方式转换成 Java 类型。
- JDK1.8之后实现全部的JSR310规范,日期时间处理上,我们可以使用MyBatis基于JSR310(Date and Time API)
- 编写的各种日期时间类型处理器。MyBatis3.4以前的版本需要我们手动注册这些处理器,以后的版本都是自动注册的
transactionManager事务管理
Type有以下取值:
JDBC:使用JDBC 的提交和回滚设置,依赖于从数据源得到的连接来管理事务范围
MANAGED:不提交或回滚一个连接、让容器来管理事务的整个生命周期ManagedTransactionFactory
自定义:实现TransactionFactory接口 ,type=全类名/别名
dataSource数据源
type有以下取值:
UNPOOLED:不使用连接池UnpooledDataSourceFactory
POOLED:使用连接池PooledDataSourceFactory
JNDI:在EJB 或应用服务器这类容器中查找指定的数据源
自定义:实现DataSourceFactory接口,定义数据源的获取方式
实际开发
实际开发中我们使用Spring管理数据源
并进行事务控制的配置来覆盖上述配置
MyBatis 可以根据不同的数据库厂商执行不同的语句。
可以能过databaseIDProvider标签来进行设置
<databaseIdProvider type="DB_VENDOR">
        <property name="MYSQL" value="mysql"/>
        <property name="DB2" value="db2"/>
        <property name="Oracle" value="oracle" />
        <property name="SQL Server" value="sqlserver"/>
    </databaseIdProvider>


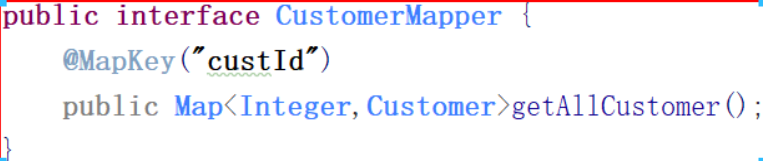
第1种形式:
key:是列名 value:是列名对应的值

第2种形式:
Map<key,自定义对象>:key为自己指定的我列


- 之有在写输出时使用的都是resultType
- 但是resultType要求必须得要字段名称和数据库当中的名称一致时才能有值,否则为null
- 如果sql查询字段名和pojo的属性名不一致,可以通过resultMap将字段名和属性名作一个对应关系
表名与domain


关系表

查询
分步查询
第一步 先查出所有的订单

第二步 根据id查出对应客户

左连接查询
查询所有的订单及订单所对应的客户
左连接:把左边表的数据全部查出,右边表只查出满足条件的记录
应对sql
SELECT * FROM `order` as o LEFT JOIN customer as c on o.cus_id = c.cust_id;
建立domain

建立Mapping映射


测试

分部查询懒加载
 <!--延迟加载的全局开关。当开启时,所有关联对象都会延迟加载。-->
        <setting name="lazyLoadingEnabled" value="true"/>
        <!--当开启时,任何方法的调用都会加载该对象的所有属性。否则,每个属性会按需加载-->
        <setting name="aggressiveLazyLoading" value="false"/>
        <!--指定哪个对象的方法触发一次延迟加载。-->
        <setting name="lazyLoadTriggerMethods" value="equals,clone,hashCode"/>
查询
查询客户和客户订单

sql语句
SELECT * FROM customer as c LEFT JOIN `order` as o on c.cust_id = o.cust_id;
映射

测试

添加
保存数据


维护外键


管理关系

删除
删除时一定要先打破关系再做删除操作


关系表

查询
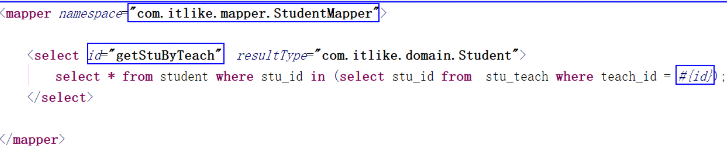
分步查询
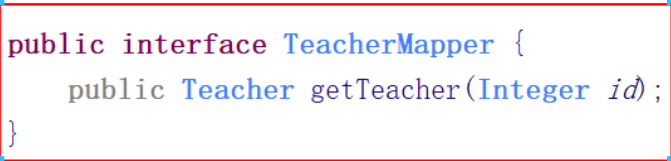
查询出指定的老师


根据老师id查询出所有学生

查询

左边接查询

通过mybatis提供的各种标签方法实现动态拼接sql。
需求:根据客户名和级别查询客户

存在问题
有可能传入的名称或级别为空
可以使用if标签来进行判断

如果前一个条件这后,后面就会多一个and执行就会报错

去掉第一个前And
查询条件值为指定的值当中
给定的值可以以三种形式给出
数组:

List:


VO:
创建Vo


测试

Sql中可将重复的sql提取出来,使用时用include引用即可,最终达到sql重用的目的。

- MyBatis中使用缓存来提高其性能。
- 当查询数据时, 会先从缓存中取出数据,如果缓存中没有,再到数据库当中查询
- MyBatis中的缓存分为两种:一级缓存和二级缓存
- 一级缓存是sqlSession级别的,二级缓存是mapper级别的
- 本地缓存 (默认开启)
- 在sqlSession没有关闭之前,再去查询时, 会从缓存当中取出数据,不会重新发送新的sql
- 如果在查询之前,执行了增\删\改 缓存就会失效
- 手动清空缓存
- 如果两次的查询条件不一样,缓存也会失效
- 如果两个查询在不同的sqlsession当中
- 全局作用域缓存 一个namespace对应一个缓存
- 如果会话关闭,一级缓存的数据会被保存到二级缓存中
- 不同namespace查出的数据 ,会放到自己对应的缓存中
- 现在默认也是打开的
注意事项:
- 查询的数据都会先放到一级缓存当中
- 只有会话关闭,一级缓存中的数据才会转称到二级缓存中
缓存相关属性:
- cacheEnabled:只能控制二级缓存的开关
- select中useCache:控制的也是二级缓存是否使用
- 增删改标签中flushCache 一级和二级都会被清空 增删改flushCache默认为true 查询flushCache默认为false
- sqlSession.clearCache() 只清楚当前session的一级缓存
- localCacheScope:本地缓存作用域 取值:SESSION、STATEMENT、STATEMENT可以使用它禁用缓存
缓存使用顺序
- 代码生成器
- 可以根据指定的表快速生成对应的映射文件,接口,以及Bean类
- 支持基本的增删改查,以及QBC风格的条件查询
- 但是一些复杂的表连接还是需要我们自己来去编写
使用
<?xml version="1.0" encoding="UTF-8"?>
<!DOCTYPE generatorConfiguration
        PUBLIC "-//mybatis.org//DTD MyBatis Generator Configuration 1.0//EN"
        "http://mybatis.org/dtd/mybatis-generator-config_1_0.dtd">
<generatorConfiguration>
    <!--
    targetRuntime:设置自动生成的版本
    MyBatis3:
    MyBatis3Simple:简单增删改查
    -->
    <context id="DB2Tables" targetRuntime="MyBatis3">
        <!--
           不要生成日期和备注
        -->
        <commentGenerator>
            <property name="suppressDate" value="true"/>
            <property name="suppressAllComments" value="true" />
        </commentGenerator>
        <jdbcConnection driverClass="com.mysql.jdbc.Driver"
                        connectionURL="jdbc:mysql://localhost:3306/mybatis?characterEncoding=utf-8"
                        userId="root"
                        password="1234">
        </jdbcConnection>
        <!--
        配置domain生成策略
        targetProject:把自动生成的domian放在哪个工程里面
        targetPackage:哪个包下
        -->
        <javaModelGenerator targetPackage="com.itlike.domain" targetProject=".\src">
            <property name="enableSubPackages" value="true" />
            <property name="trimStrings" value="true" />
        </javaModelGenerator>
        <!--
            配置mapper的生成策略
            targetPackage:把自动生成的mapper放在哪个工程里面
            targetProject:哪个包下
        -->
        <sqlMapGenerator targetPackage="com.itlike.mapper"  targetProject=".\src">
            <property name="enableSubPackages" value="true" />
        </sqlMapGenerator>
        <!--
            mapper接口生成策略
        -->
        <javaClientGenerator type="XMLMAPPER" targetPackage="com.itlike.mapper"  targetProject=".\src">
            <property name="enableSubPackages" value="true" />
        </javaClientGenerator>
        <table tableName="customer" domainObjectName="Customer" ></table>
        <table tableName="teacher" domainObjectName="Teacher" ></table>
        <table tableName="student" domainObjectName="Student" ></table>
    </context>
</generatorConfiguration>
 List<String> warnings = new ArrayList<String>();
        boolean overwrite = true;
        File configFile = new File("./src/generatorConfig.xml");
        ConfigurationParser cp = new ConfigurationParser(warnings);
        Configuration config = cp.parseConfiguration(configFile);
        DefaultShellCallback callback = new DefaultShellCallback(overwrite);
        MyBatisGenerator myBatisGenerator = new MyBatisGenerator(config, callback, warnings);
        myBatisGenerator.generate(null);
下载分页插件
下载地址
配置分页插件
<plugins>
        <plugin interceptor="com.github.pagehelper.PageInterceptor"></plugin>
    </plugins>
Page<Object> page = PageHelper.startPage(1, 5);
查询数据之后添加
PageInfo<Customer> pageInfo = new PageInfo<>(customers, 5);
属性介绍
        System.out.println("当前页:"+pageInfo.getPageNum());
        System.out.println("每页显示记录数:"+pageInfo.getPageSize());
        System.out.println("总页数:"+pageInfo.getPages());
        System.out.println("总记录数:"+pageInfo.getTotal());
        System.out.println("是否有上一页:"+pageInfo.isHasPreviousPage());
        System.out.println("是否有下一页:"+pageInfo.isHasNextPage());
        System.out.println("导航页面:"+ Arrays.toString(pageInfo.getNavigatepageNums()));
<?xml version="1.0" encoding="UTF-8"?>
<beans xmlns="http://www.springframework.org/schema/beans"
       xmlns:xsi="http://www.w3.org/2001/XMLSchema-instance"
       xmlns:context="http://www.springframework.org/schema/context"
       xmlns:aop="http://www.springframework.org/schema/aop"
       xmlns:tx="http://www.springframework.org/schema/tx"
       xsi:schemaLocation="http://www.springframework.org/schema/beans
        http://www.springframework.org/schema/beans/spring-beans.xsd
        http://www.springframework.org/schema/context
        http://www.springframework.org/schema/context/spring-context.xsd
    http://www.springframework.org/schema/aop
    http://www.springframework.org/schema/aop/spring-aop.xsd
     http://www.springframework.org/schema/tx
        http://www.springframework.org/schema/tx/spring-tx.xsd
">
    <!--注解扫描-->
    <context:component-scan base-package="com.itlike"/>
</beans>
相关jar包

<!--Spring的核心监听器-->
    <listener>
        <listener-class>
            org.springframework.web.context.ContextLoaderListener
        </listener-class>
    </listener>
    <!--
     加载Spring的配置文件的路径的
     默认加载的/WEB-INF/applicationContext.xml
     -->
    <context-param>
        <param-name> contextConfigLocation</param-name>
        <param-value>classpath:applicationContext.xml</param-value>
    </context-param>

<?xml version="1.0" encoding="UTF-8"?>
<beans xmlns="http://www.springframework.org/schema/beans"
       xmlns:xsi="http://www.w3.org/2001/XMLSchema-instance"
       xmlns:context="http://www.springframework.org/schema/context"
       xmlns:mvc="http://www.springframework.org/schema/mvc"
       xsi:schemaLocation="http://www.springframework.org/schema/beans
	http://www.springframework.org/schema/beans/spring-beans.xsd
	http://www.springframework.org/schema/context
	http://www.springframework.org/schema/context/spring-context.xsd
	http://www.springframework.org/schema/mvc
    http://www.springframework.org/schema/mvc/spring-mvc-4.0.xsd
	">
    <!--注解扫描-->
    <context:component-scan base-package="com.itlike">
        <!--只扫描控制器-->
        <context:include-filter type="annotation" expression="org.springframework.stereotype.Controller"/>
    </context:component-scan>
    <!--静态资源访问-->
    <mvc:default-servlet-handler/>
    <mvc:annotation-driven />
    <!--配置视图解析器-->
    <bean class="org.springframework.web.servlet.view.InternalResourceViewResolver">
        <property name="prefix" value="/WEB-INF/view/"/>
        <property name="suffix" value=".jsp"/>
    </bean>
</beans>
 <!-- 解决post乱码问题 -->
    <filter>
        <filter-name>encoding</filter-name>
        <filter-class>org.springframework.web.filter.CharacterEncodingFilter</filter-class>
        <!-- 设置编码参是UTF8 -->
        <init-param>
            <param-name>encoding</param-name>
            <param-value>UTF-8</param-value>
        </init-param>
    </filter>
    <filter-mapping>
        <filter-name>encoding</filter-name>
        <url-pattern>/*</url-pattern>
    </filter-mapping>
    <!-- 配置SpringMVC前端控制器 -->
    <servlet>
        <servlet-name>mySpringMVC</servlet-name>
        <servlet-class>org.springframework.web.servlet.DispatcherServlet</servlet-class>
        <!-- 指定SpringMVC配置文件 -->
        <!-- SpringMVC的配置文件的默认路径是/WEB-INF/${servlet-name}-servlet.xml -->
        <init-param>
            <param-name>contextConfigLocation</param-name>
            <param-value>classpath:springmvc.xml</param-value>
        </init-param>
        <load-on-startup>1</load-on-startup>
    </servlet>
    <servlet-mapping>
        <servlet-name>mySpringMVC</servlet-name>
        <!-- 拦截所有,不包括jsp,包含.js .png.css     建议使用  -->
        <url-pattern>/</url-pattern>
    </servlet-mapping>
<form action="${pageContext.request.contextPath}/addcustomer">
     客户名称:<input type="text"> <br>
     客户职业:<input type="text"/> <br>
     客户电话: <input type="text"/> <br>
     客户邮件: <input type="text"/> <br>
    <input type="submit" value="添加">
  </form>
创建CustomterController处理业务


<?xml version="1.0" encoding="UTF-8" ?>
<!DOCTYPE configuration
        PUBLIC "-//mybatis.org//DTD Config 3.0//EN"
        "http://mybatis.org/dtd/mybatis-3-config.dtd">
<configuration>
    <settings>
        <setting name="logImpl" value="STDOUT_LOGGING"/>
    </settings>
    <typeAliases>
        <!-- 批量别名定义,扫描整个包下的类,别名为类名(大小写不敏感) -->
        <package name="com.myxq.domain" />
    </typeAliases>
</configuration>
db.properties
jdbc.driver=com.mysql.jdbc.Driver
jdbc.url=jdbc:mysql://localhost:3306/mybatis?characterEncoding=utf-8
jdbc.username=root
jdbc.password=1234
<?xml version="1.0" encoding="UTF-8" ?>
<!DOCTYPE mapper
        PUBLIC "-//mybatis.org//DTD Mapper 3.0//EN"
        "http://mybatis.org/dtd/mybatis-3-mapper.dtd">
<mapper namespace="com.itlike.mapper">
</mapper>
 <!--加载数据库属性文件-->
    <context:property-placeholder location="classpath:db.properties"/>
    <!--连接池-->
    <bean id="dataSource" class="com.alibaba.druid.pool.DruidDataSource">
        <property name="driverClassName" value="${jdbc.driver}" />
        <!--属性文件当中的名称不能和name名称一样-->
        <property name="url" value="${jdbc.url}" />
        <property name="username" value="${jdbc.username}" />
        <property name="password" value="${jdbc.password}" />
    </bean>
    <!-- 配置事务管理器 -->
    <bean id="transactionManager"
          class="org.springframework.jdbc.datasource.DataSourceTransactionManager">
        <!-- 数据源 -->
        <property name="dataSource" ref="dataSource" />
    </bean>
    <!-- 开启注解事务 -->
    <tx:annotation-driven transaction-manager="transactionManager"/>
    <!-- Mybatis的工厂 -->
    <bean id="sqlSessionFactoryBean" class="org.mybatis.spring.SqlSessionFactoryBean">
        <property name="dataSource" ref="dataSource"/>
        <!-- 核心配置文件的位置 -->
        <property name="configLocation" value="classpath:sqlMapConfig.xml"/>
        <!--配置mapper映射文件的路径-->
        <property name="mapperLocations" value="classpath:com/itlike/mapper/*.xml"/>
    </bean>
    <!-- 配置Mapper扫描 -->
    <bean class="org.mybatis.spring.mapper.MapperScannerConfigurer">
        <!-- 配置Mapper扫描包 -->
        <property name="basePackage" value="com.itlike.mapper" />
    </bean>
原文:https://www.cnblogs.com/joker-dj/p/12821375.html