
FROM mysql

#MAINTAINER IFORMATION
MAINTAINER jayer@xiajibaxie.com
FROM nginx

#MAINTAINER IFORMATION
MAINTAINER jayer@xiajibaxie.com
FROM php:7.4-fpm

#MAINTAINER IFORMATION
MAINTAINER jayer@xiajibaxie.com

#Configure PHP Core Extensions
RUN apt-get update && apt-get install -y         libfreetype6-dev         libjpeg62-turbo-dev         libpng-dev     && docker-php-ext-configure gd --with-freetype --with-jpeg     && docker-php-ext-install -j$(nproc) gd
 不明白为何挂载mysql下的data的时候多出那么多文件
server {
    listen       80;
    server_name  localhost;

    #charset koi8-r;
    #access_log  /var/log/nginx/host.access.log  main;

    location / {
        root   /usr/nginx-2/html;
        index  index.html  index.htm  index.php;
    }

    #error_page  404              /404.html;

    # redirect server error pages to the static page /50x.html
    #
    error_page   500 502 503 504  /50x.html;
    location = /50x.html {
        root   /usr/share/nginx/html;
    }

    # proxy the PHP scripts to Apache listening on 127.0.0.1:80
    #
    #location ~ \.php$ {
    #    proxy_pass   http://127.0.0.1;
    #}

    # pass the PHP scripts to FastCGI server listening on 127.0.0.1:9000
    #
     location ~ \.php$ {
         root           /usr/nginx-2/php; #php容器下的工作路径
         fastcgi_pass   lnmp_php-container:9000; #container name
         fastcgi_index  index.php;
         fastcgi_param  SCRIPT_FILENAME  $document_root$fastcgi_script_name;
         include        fastcgi_params;
     }

    # deny access to .htaccess files, if Apache‘s document root
    # concurs with nginx‘s one
    #
    #location ~ /\.ht {
    #    deny  all;
    #}
}
其中重点在于加入location ~ \.php${}的匹配信息(大致了解就是nginx在匹配路径文件时,如果后缀是php文件,即向容器端口去发送请求,从而得到运行php容器中相应路径下的index.php文件)
同时了解PHP的也应该知道,该脚本语言与HTML是兼容的。
前面3个root、fastcgi_pass、fastcgi_index容易理解,后面两个就不明白为啥了(直接写上就完事)
version: "3"
services:
 nginx:
   image: lnmp_nginx
   container_name: lnmp_nginx-container
   build: ./nginx
   ports:
     - "80:80"
   links:
     - "php"
   volumes:
     - ./nginx/html/:/usr/nginx-2/html/
     - ./nginx/default.conf:/etc/nginx/conf.d/default.conf
 php:
   image: lnmp_php
   container_name: lnmp_php-container
   build: ./php
   ports:
     - "9000:9000"
   volumes:
     - ./php/phpfile/:/usr/nginx-2/php/
   links:
     - "mysql"
   stdin_open: true
   tty: true
 mysql:
   image: lnmp_mysql
   container_name: lnmp_mysql-container
   build: ./mysql
   ports:
     - "3306:3306"
   volumes:
     - ./mysql/data/:/var/lib/mysql/
   environment:
     MYSQL_ROOT_PASSWORD : 123
这里用到的几个基本的就是,image和container_name定义镜像名与容器名,build相对路径下寻找Dockerfile定制镜像,ports端口映射。
volumes挂载数据卷或环境(稍微了解一下就是将主机的某个文件或路径补充到容器下的文件路径之后,所体现就是形成同一文件环境,主机内修改文件信息可永久性反馈到容器内)
...
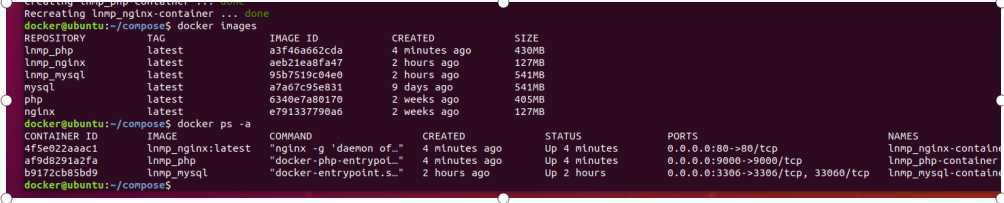
构建成功
<?php phpinfo();?>
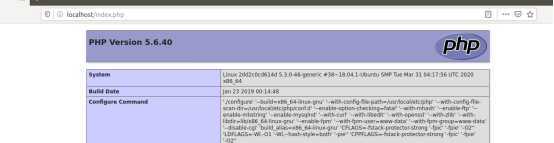 说明端口访问PHP环境成功
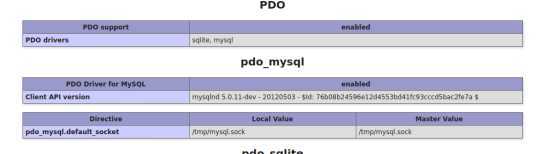
搭建完之后PHP没有mysqli,有pdo但不支持mysql,于是就去安装一下呗

写index.php执行php文件
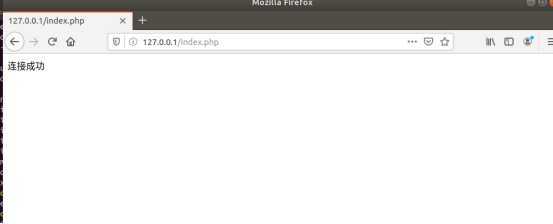
<?php
$servername = "lnmp_mysql-container";
$username = "root";
$password = "123";

// 创建连接
$conn = new mysqli($servername, $username, $password);

// 检测连接
if ($conn->connect_error) {
    die("连接失败: " . $conn->connect_error);
}
echo "连接成功";
?>
结果:
原文:https://www.cnblogs.com/jay-home/p/12853554.html