pip3 install celery
#启动redis服务端
# Celery settings
?
CELERY_BROKER_URL = ‘redis://localhost‘
?
#: Only add pickle to this list if your broker is secured
#: from unwanted access (see userguide/security.html)
CELERY_ACCEPT_CONTENT = [‘json‘]
CELERY_RESULT_BACKEND = ‘redis://localhost‘
CELERY_TASK_SERIALIZER = ‘json‘
from __future__ import absolute_import, unicode_literals
import os
from celery import Celery
?
# 设置“celery”程序的默认Django设置模块。
os.environ.setdefault(‘DJANGO_SETTINGS_MODULE‘, ‘demo.settings‘)
?
app = Celery(‘demo‘)
# 这里的demo表示你项目的名字
?
# Using a string here means the worker doesn‘t have to serialize
# the configuration object to child processes.
# - namespace=‘CELERY‘ means all celery-related configuration keys
#   should have a `CELERY_` prefix.
app.config_from_object(‘django.conf:settings‘, namespace=‘CELERY‘)
?
# 从所有已注册的Django app configs加载任务模块
app.autodiscover_tasks()
from django.shortcuts import render,HttpResponse
from .tasks import add
# Create your views here.
def index(request):
    add.delay(1,2)
    return HttpResponse(‘200 OK‘)
import time
from celery import Celery
?
celery_app = Celery(‘tasks‘, backend=‘redis://localhost‘, broker=‘redis://localhost‘)
# this is celery settings
?
# this is a function about need many time
@celery_app.task
def add(a, b):
    time.sleep(5)
    return a + b
然后我们就可以启动项目,并且启动celery的worker进程,并访问index路由
查看worker窗口是否正常执行
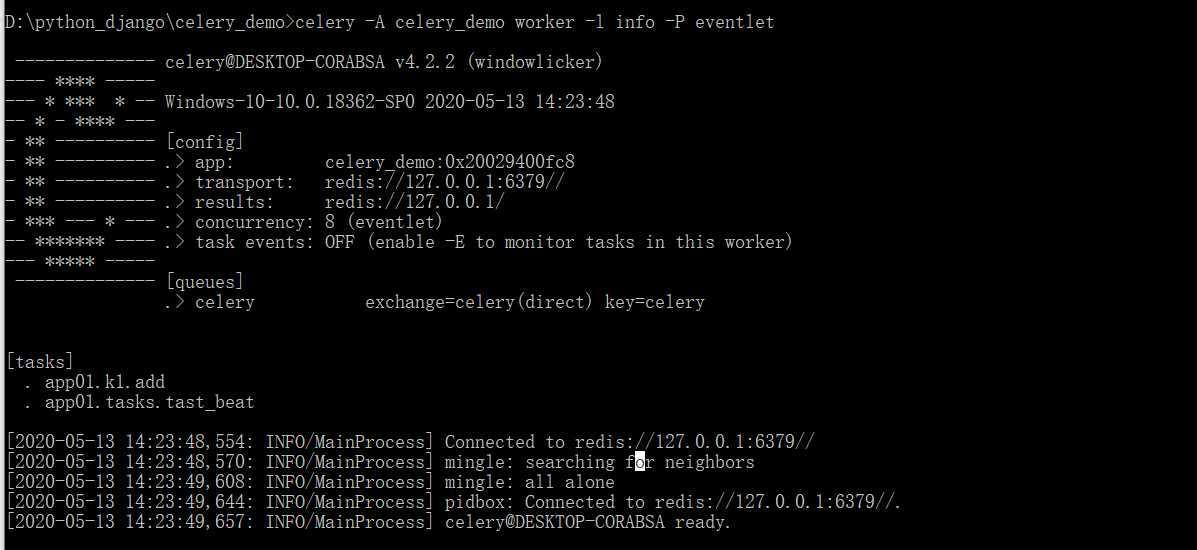
worker出现上图字样,没有ERROR字眼,就表示我们的celery已经准备就绪了,然后就可以进行访问查看worker是否正常处理异步操作
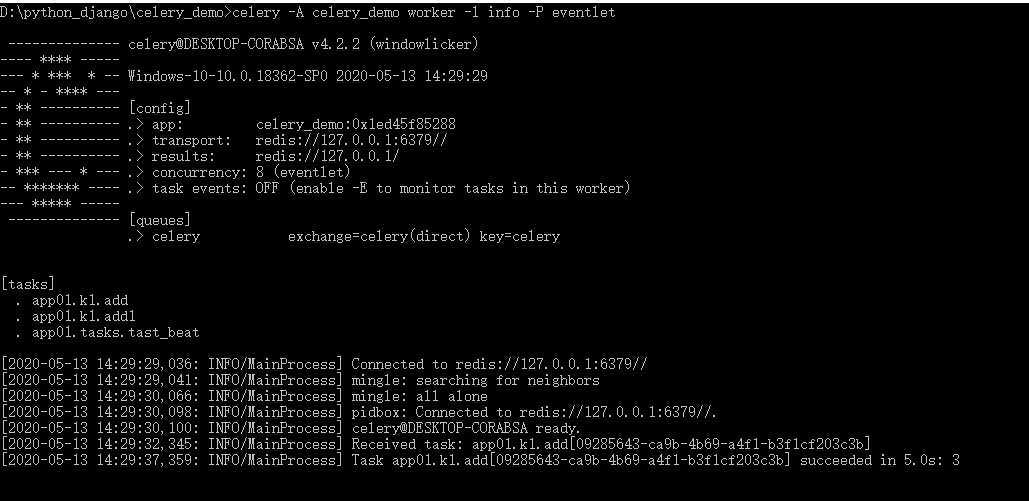
这样就表示我们的celery的异步执行任务就可以正常工作了
先安装一个eventlet
pip install eventlet
在启动worker的时候加入一个参数
celery -A <mymodule> worker -l info -P eventlet
然后就可以正常执行任务了
原文:https://www.cnblogs.com/wang-xing-hao/p/12882218.html