以下代码仅针对 Firefox
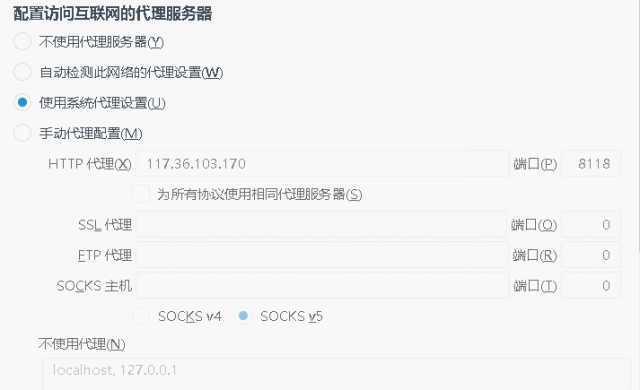
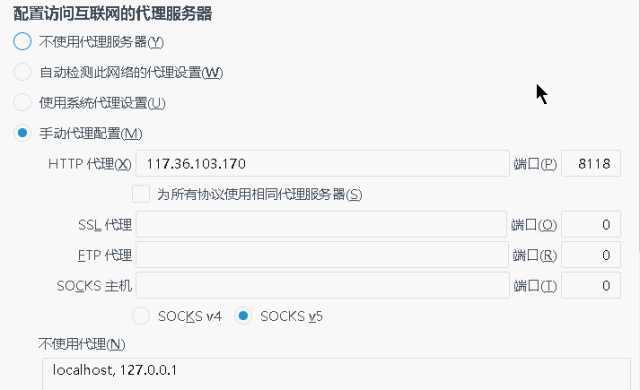
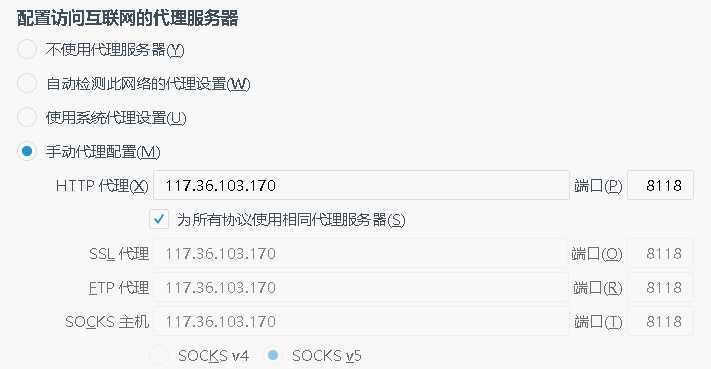
from selenium import webdriver
from selenium.webdriver.firefox.firefox_profile import FirefoxProfile

profile = FirefoxProfile()
# 激活手动代理配置(对应着在 profile(配置文件)中设置首选项)
profile.set_preference("network.proxy.type", 1)
# ip及其端口号配置为 http 协议代理
profile.set_preference("network.proxy.http", "117.36.103.170")
profile.set_preference("network.proxy.http_port", 8118)

# 所有协议共用一种 ip 及端口,如果单独配置,不必设置该项,因为其默认为 False
profile.set_preference("network.proxy.share_proxy_settings", True)

# 默认本地地址(localhost)不使用代理,如果有些域名在访问时不想使用代理可以使用类似下面的参数设置
# profile.set_preference("network.proxy.no_proxies_on", "localhost")

# 以代理方式启动 firefox
firefox  = webdriver.Firefox(profile)
firefox.get(‘http://httpbin.org/get‘)
渲染出来的页面如下(Firefox 自动格式化了 JSON 数据),可以看到 `origin` 字段的 IP 值正是配置的代理 IP
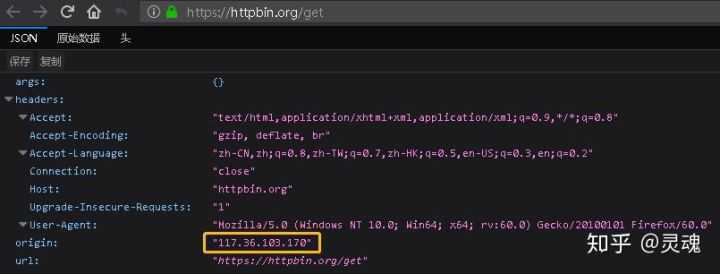
http://httpbin.org/get
如果只配置一个协议,比如这里的 HTTPS,可以利用 `set_preference()` 方法设置 HTTPS IP 代理可以使用 `network.proxy.ssl` 作为 key,`network.proxy.ssl_port` 是 ssl 的端口号(尝试使用官方文档中的 `network.proxy.sslProxy`、`network.proxy.ssl_proxy` 发现无法正常配置 ssl 的 IP,我的 Firefox 版本是 60.0 (64 位))
微信公众号:display3d
https://wx1.sinaimg.cn/thumb180/bfcc6bc7gy1ft2oyj1xrqj209k09k3yg.jpg
参考原文:https://zhuanlan.zhihu.com/p/39281522,https://www.iteye.com/blog/passerbyy-1286292
原文:https://www.cnblogs.com/yikemogutou/p/12902056.html