本次来说说BeanFactory的后置处理器,从源码来看它是位于refresh函数的第四步,为了方便你查阅我把refresh贴出来。
 1 @Override
 2 public void refresh() throws BeansException, IllegalStateException {
 3     // 方法加锁避免多线程同时刷新Spring上下文
 4     synchronized (this.startupShutdownMonitor) {
 5         // 准备上下文刷新
 6         prepareRefresh();
 7
 8         // 告诉子类刷新内部的beanFactory返回新的BeanFactory
 9         ConfigurableListableBeanFactory beanFactory = obtainFreshBeanFactory();
10
11         // 在当前上下文中准备要beanFactory
12         prepareBeanFactory(beanFactory);
13
14         try {
15             // 允许在上下文子类中对beanFactory进行后置处理
16             postProcessBeanFactory(beanFactory);
17
18             // 在上下文中将BeanFactory处理器注册为Bean
19             invokeBeanFactoryPostProcessors(beanFactory);
20
21             // 注册Bean处理器用于拦截Bean的创建
22             registerBeanPostProcessors(beanFactory);
23
24             // 在上下文中初始化国际化信息
25             initMessageSource();
26
27             // 在上下文中初始化event multicaster(事件多播器)
28             initApplicationEventMulticaster();
29
30             // 在指定的上下文子类中初始化其他指定的beans
31             onRefresh();
32
33             // 检查并注册事件监听
34             registerListeners();
35
36             // 实例化所有剩余的(非延迟初始化)单例
37             finishBeanFactoryInitialization(beanFactory);
38
39             // 最后一步:发布相应的事件
40             finishRefresh();
41         }
42
43         catch (BeansException ex) {
44             if (logger.isWarnEnabled()) {
45                 logger.warn("Exception encountered during context initialization - " +
46                         "cancelling refresh attempt: " + ex);
47             }
48
49             // 如果出现异常则销毁已创建的单例
50             destroyBeans();
51
52             // 重置活动标志
53             cancelRefresh(ex);
54
55             // 将异常传递给调用者
56             throw ex;
57         }
58
59         finally {
60             // Reset common introspection caches in Spring‘s core, since we
61             // might not ever need metadata for singleton beans anymore...
62             resetCommonCaches();
63         }
64     }
65 }
postProcessBeanFactory(),顾名思义,它就是创建BeanFactory之后的一些操作。从源码上看,它是一个空函数,主要是为了给子类提供可扩展点的,是一个可选项。
1 protected void postProcessBeanFactory(ConfigurableListableBeanFactory beanFactory) {
2 }
像我们直接通过ClassPathXmlApplicationContext初始化的话,是不会有任何扩展点的。但如果是Web程序的话便会初始化一些Web程序需要的东西。
综上所述:postProcessBeanFactory(),主要是为了给子类提供可扩展点的,是一个可选项。
由上面我们可以来看下Web的一些扩展点(org.springframework.web.context.support.AbstractRefreshableWebApplicationContext#postProcessBeanFactory)。
1 @Override
2 protected void postProcessBeanFactory(ConfigurableListableBeanFactory beanFactory) {
3     beanFactory.addBeanPostProcessor(new ServletContextAwareProcessor(this.servletContext, this.servletConfig));
4     beanFactory.ignoreDependencyInterface(ServletContextAware.class);
5     beanFactory.ignoreDependencyInterface(ServletConfigAware.class);
6
7     WebApplicationContextUtils.registerWebApplicationScopes(beanFactory, this.servletContext);
8     WebApplicationContextUtils.registerEnvironmentBeans(beanFactory, this.servletContext, this.servletConfig);
9 }
上面的代码大同小异,先是添加了bean的后置处理器,然后忽略了一些Aware。
我看主要看下web扩展点的关键代码,也就是WebApplicationContextUtils。
———————————————————————————————————————————————————————
registerWebApplicationScopes:
 1 public static void registerWebApplicationScopes(ConfigurableListableBeanFactory beanFactory, ServletContext sc) {
 2     beanFactory.registerScope(WebApplicationContext.SCOPE_REQUEST, new RequestScope());
 3     beanFactory.registerScope(WebApplicationContext.SCOPE_SESSION, new SessionScope(false));
 4     beanFactory.registerScope(WebApplicationContext.SCOPE_GLOBAL_SESSION, new SessionScope(true));
 5     if (sc != null) {
 6         ServletContextScope appScope = new ServletContextScope(sc);
 7         beanFactory.registerScope(WebApplicationContext.SCOPE_APPLICATION, appScope);
 8         // Register as ServletContext attribute, for ContextCleanupListener to detect it.
 9         sc.setAttribute(ServletContextScope.class.getName(), appScope);
10     }
11
12     beanFactory.registerResolvableDependency(ServletRequest.class, new RequestObjectFactory());
13     beanFactory.registerResolvableDependency(ServletResponse.class, new ResponseObjectFactory());
14     beanFactory.registerResolvableDependency(HttpSession.class, new SessionObjectFactory());
15     beanFactory.registerResolvableDependency(WebRequest.class, new WebRequestObjectFactory());
16     if (jsfPresent) {
17         FacesDependencyRegistrar.registerFacesDependencies(beanFactory);
18     }
19 }
2-10行代码主要是注册了web的scope,如request、session、globalSession、application这些scope。以及后面的注册特殊的依赖类型等等,这不是我们的重点,不做赘述。
这里我们需要知道,在Spring容器中默认只注册了singleton、prototype,向上面的四种都是需要手动注册的,这也就是为什么还需要调用2-10行代码的原因了。
———————————————————————————————————————————————————————
registerEnvironmentBeans:注册和Environment有关的beans。
Scope是什么:
———————————————————————————————————————————————————————
自定义Scope:
我们首先来下web的定制scope是如何实现的,同样是基于接口Scope,只不过封装了一层AbstractRequestAttributesScope。
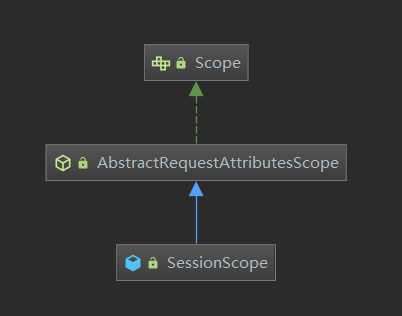
所以如果要自定义一个scope的话,只需要实现以下Scope接口。这里我们直接用Spring封装好的SimpleThreadScope作为demo。
1、使用代码的方式注册一个新的scope:
 1 public class TestSpring {
 2
 3     public static void main(String[] args) {
 4         Properties properties = System.getProperties();
 5         properties.setProperty("config", "beans");
 6
 7         ClassPathXmlApplicationContext ctx = new ClassPathXmlApplicationContext("${config}.xml");
 8         TestBean testBean = ctx.getBean(TestBean.class);
 9         testBean.run();
10
11         ctx.getBeanFactory().registerScope("thread", new SimpleThreadScope());
12     }
13 }
2、使用配置方式:
 1 <!-- 自定义scope map -->
 2 <bean class="org.springframework.beans.factory.config.CustomScopeConfigurer">
 3     <property name="scopes">
 4         <map>
 5             <entry key="myScope" value="com.jdr.spring.scope.MyScope"/>
 6         </map>
 7     </property>
 8 </bean>
 9
10 <!-- 使用自定义scope的bean -->
11 <bean id="scopeTestBean" class="com.jdr.spring.scope.ScopeTestBean" scope="myScope">
12     <!-- 让Bean符合自定义的作用域 -->
13     <!--<aop:scoped-proxy/>-->
14 </bean>
Spring源码学习笔记(六、Spring启动流程解析:BeanFactory后置处理)
原文:https://www.cnblogs.com/bzfsdr/p/12984608.html