比如客户端在发起请求的时候,需要 1??connect 到服务器,然后 2??write 数据传到服务器,再然后 3??read 服务器返回的数据,前面的 connect 和 write 就是 out 事件,后面的 read 就是 in 事件。
1. pipeline.addLast(new StringDecoder());

2. pipeline.addLast(new StringEncoder());

3. pipeline.addLast(new BizHandler());
1. pipeline.addLast(new StringDecoder());
2. pipeline.addLast(new StringEncoder());
3. pipeline.addLast(new BizHandler());
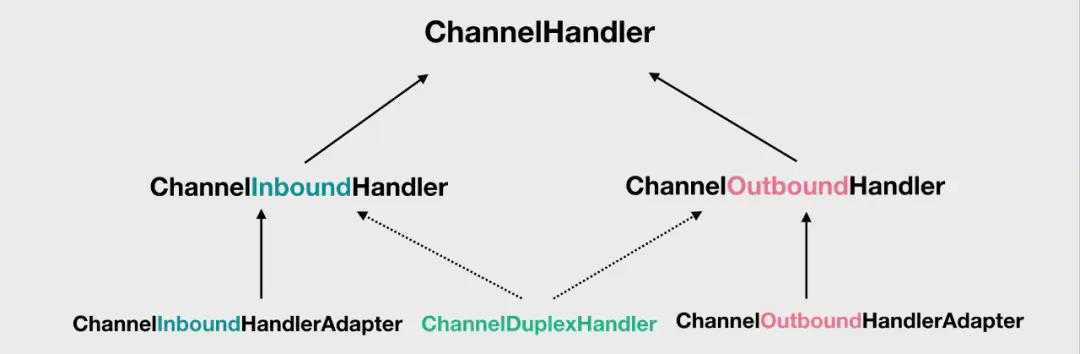
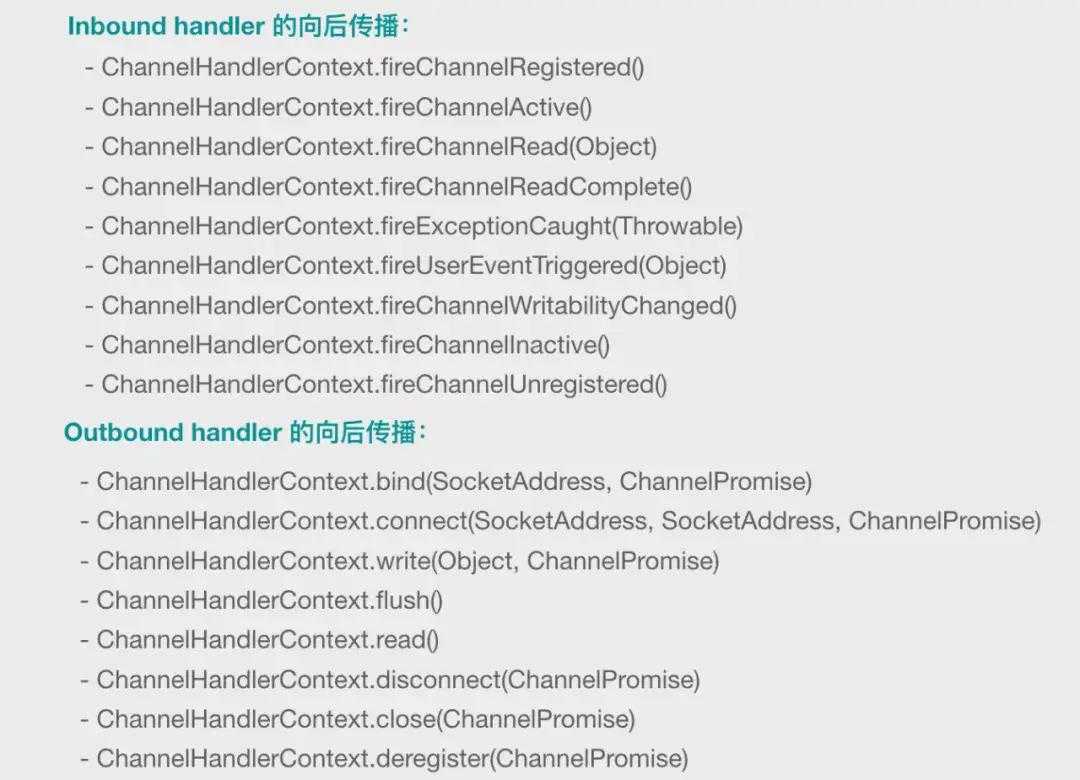
客户端连接进来的时候,读取(read)客户端请求数据的操作是 Inbound 的,e 操作是 Outbound 的,此时使用的是 2。
处理完数据后,返回给客户端数据的 write 操作是 Outbound 的,此时使用的是 2。
如果我们在上面的基础上,加上下面的第四行,这是一个 OutboundHandler:4. pipeline.addLast(new OutboundHandlerA());那么执行顺序是不是就是 1 -> 3 -> 2 -> 4 呢?答案是:不是的。对于 Inbound 操作,按照添加顺序执行每个 Inbound 类型的 handler;而对于 Outbound 操作,是反着来的,从后往前,顺次执行 Outbound 类型的 handler。所以,上面的顺序应该是先 1 后 3,它们是 Inbound 的,然后是 4,最后才是 2,它们两个是 Outbound 的。说实话,这种组织方式对新手应该很是头疼。那我们在开发的时候怎么写呢?其实也很简单,从最外层开始写,一步步写到业务处理层,把 Inbound 和 Outbound 混写在一起。比如 encode 和 decode 是属于最外层的处理逻辑,先写它们。假设 decode 以后是字符串,那再进来一层应该可以写进来和出去的日志。再进来一层可以写 字符串 <=> 对象 的相互转换。然后就应该写业务层了。
protected AbstractChannel(Channel parent) {
    this.parent = parent;    // 给每个 channel 分配一个唯一 id
    id = newId();    // 每个 channel 内部需要一个 Unsafe 的实例
    unsafe = newUnsafe();    // 每个 channel 内部都会创建一个 pipeline
    pipeline = newChannelPipeline();
}
Unsafe 类的构造方法是 private 的,但是它提供了 getUnsafe() 这个静态方法:Unsafe unsafe = Unsafe.getUnsafe();大家可以试一下,上面这行代码编译没有问题,但是执行的时候会抛java.lang.SecurityException异常,因为它就不是给我们的代码用的。但是如果你就是想获取 Unsafe 的实例,可以通过下面这个代码获取到:Field f = Unsafe.class.getDeclaredField("theUnsafe");f.setAccessible(true);Unsafe unsafe = (Unsafe) f.get(null);
不过,对于我们源码分析来说,我们还是会有很多时候需要分析 Unsafe 中的源码的
protected DefaultChannelPipeline newChannelPipeline() { return new DefaultChannelPipeline(this);}
protected DefaultChannelPipeline(Channel channel) {
    this.channel = ObjectUtil.checkNotNull(channel, "channel");
    succeededFuture = new SucceededChannelFuture(channel, null);
    voidPromise =  new VoidChannelPromise(channel, true);
    tail = new TailContext(this);
    head = new HeadContext(this);
    head.next = tail;
    tail.prev = head;
}
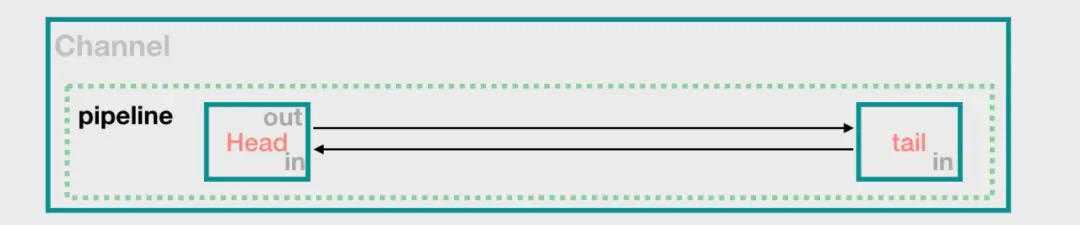
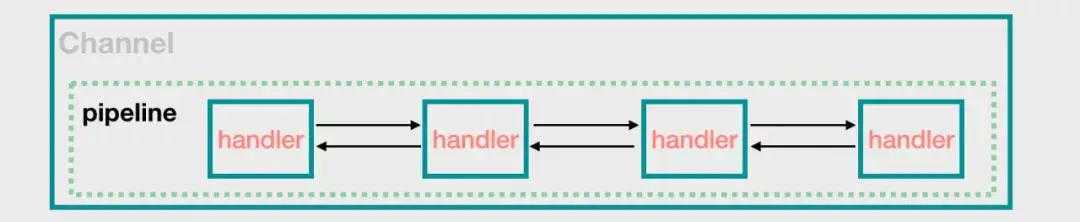
注意,在不同的版本中,源码也略有差异,head 不一定是 in + out,大家知道这点就好了。从上面的 head 和 tail 我们也可以看到,其实 pipeline 中的每个元素ChannelHandlerContext 的实例,而不是 ChannelHandler 的实例,context 包装了一下 handler,但是,后面我们都会用 handler 来描述一个 pipeline 上的节点,而不是使用 context,希望读者知道这一点。
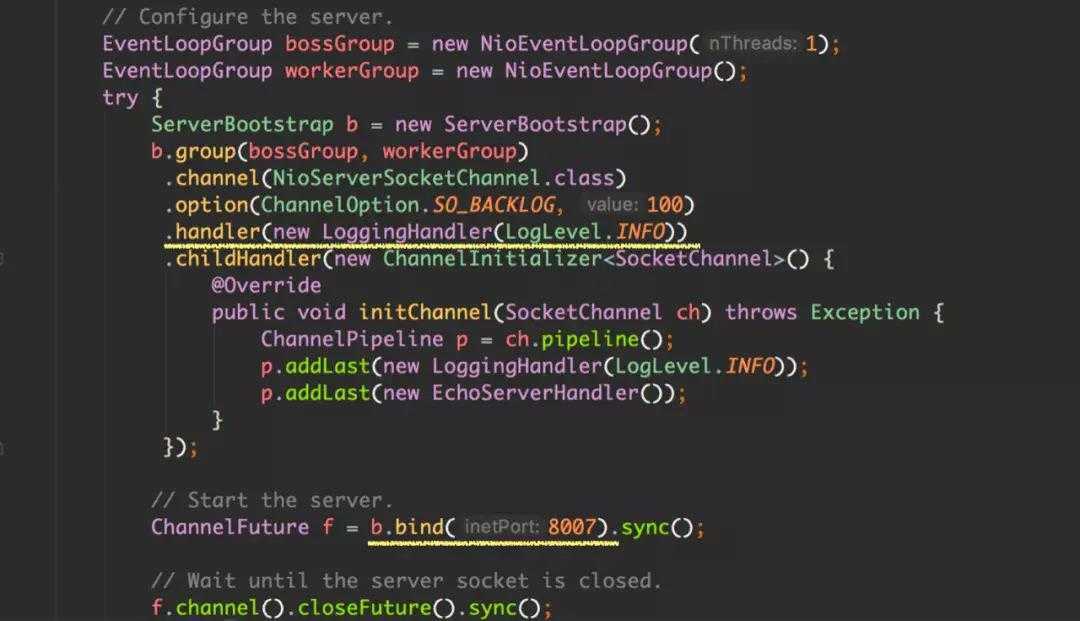
我们说过 childHandler 中指定的 handler 不是给 NioServerSocketChannel 使用的,是给 NioSocketChannel 使用的,所以这里我们不看它。
final ChannelFuture initAndRegister() {
    Channel channel = null;
    try {         // 1. 构造 channel 实例,同时会构造
            pipeline 实例, // 现在 pipeline 中有 head 和 tail 两个 handler 了
             channel = channelFactory.newChannel();         // 2. 看这里
             init(channel);
        }
    catch (Throwable t) {    ......}
}
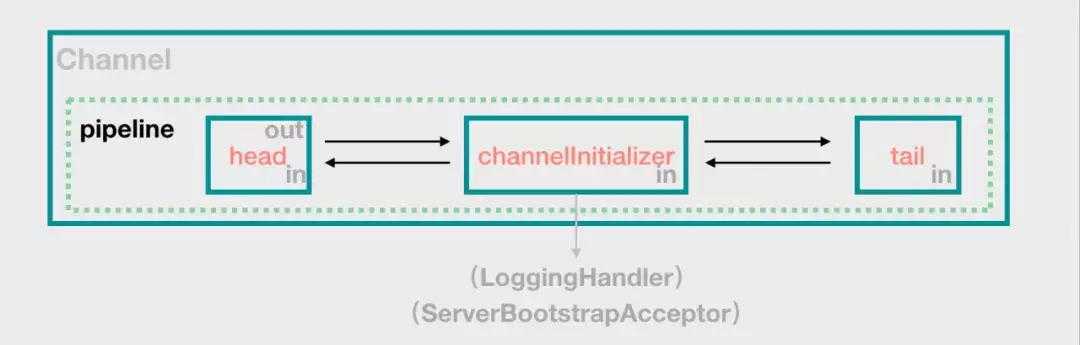
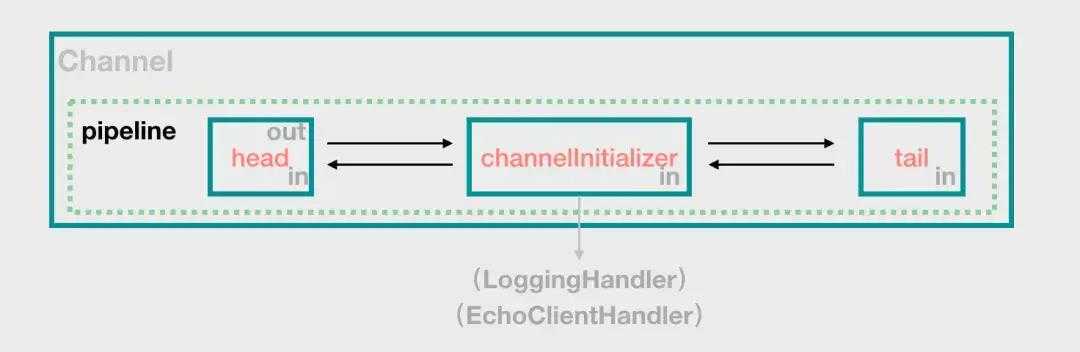
@Override void init(Channel channel) throws Exception {
    ......
    // 拿到刚刚创建的 channel 内部的 pipeline 实例
    ChannelPipeline p = channel.pipeline();
    ...
    // 开始往 pipeline 中添加一个 handler,这个 handler 是 ChannelInitializer 的实例
    p.addLast(new ChannelInitializer<Channel>() {
        // 我们以后会看到,下面这个 initChannel 方法何时会被调用
        @Override
        public void initChannel(final Channel ch) throws Exception {
            final ChannelPipeline pipeline = ch.pipeline();
            // 这个方法返回我们最开始指定的 LoggingHandler 实例
            ChannelHandler handler = config.handler();
            if (handler != null) {
                // 添加 LoggingHandler
                pipeline.addLast(handler);
                }
            // 先不用管这里的 eventLoop
            ch.eventLoop().execute(new Runnable() {
                @Override
                public void run() {
                    // 添加一个 handler 到 pipeline 中:
                    ServerBootstrapAcceptor
                    // 从名字可以看到,这个 handler 的目的是用于接收客户端请求
                    pipeline.addLast(new ServerBootstrapAcceptor(
                            ch, currentChildGroup,
                            currentChildHandler,
                            currentChildOptions,
                            currentChildAttrs));
                    }
                });
            }
        });
    }
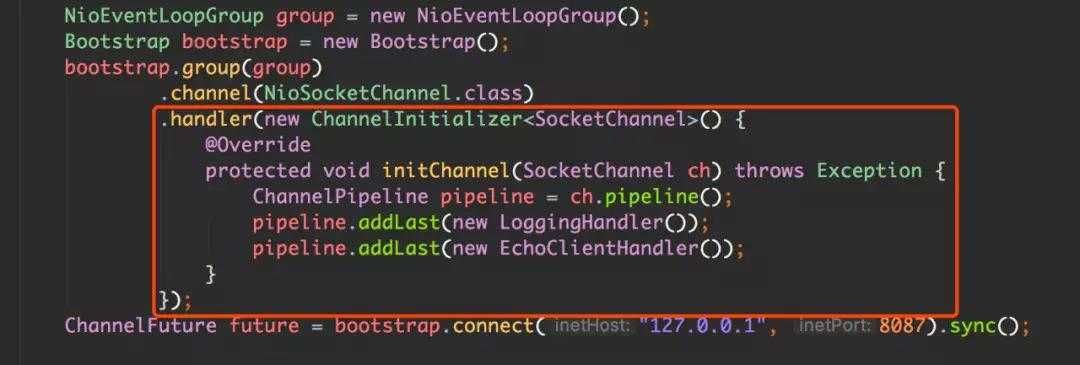
void init(Channel channel) throws Exception {
     ChannelPipeline p = channel.pipeline();
     p.addLast(config.handler());
     ...
}
援引原文链接:https://juejin.im/post/5eacc88f6fb9a0437f73a713
Netty 源码解析: Netty 的 ChannelPipeline
原文:https://www.cnblogs.com/lhdeng1991/p/13083486.html