在前两篇文章中,我们讲述了代理的概念,以及如何使用代理来改造我们的事务代码;将事务抽出来,放到代理类中,业务代码保持纯净来实现我们的事务控制;
这一章我们来实践如果使用spring中aop来改造我们的代码;
JoinPoint(连接点):被拦截到的点,在Spring中这些点都是方法;
PointCut(切入点):是指对哪些JoinPoint进行拦截的定义
Advice(通知/增强):拦截到JoinPoint之后,要做的事情就是通知;
通知的类型有前置通知、后置通知、异常通知、最终通知和环绕通知;
Target(目标对象):代理的目标对象;
Weaving(织入):把增强应用到目标对象来创建新的代理对象的过程;
Proxy(代理):一个类被Aop织入增强后,就产生一个增强的代理类;
Aspect(切面):是切入点和通知的结合。
为了更好的理解aop,我们写一个简单的示例来学习;
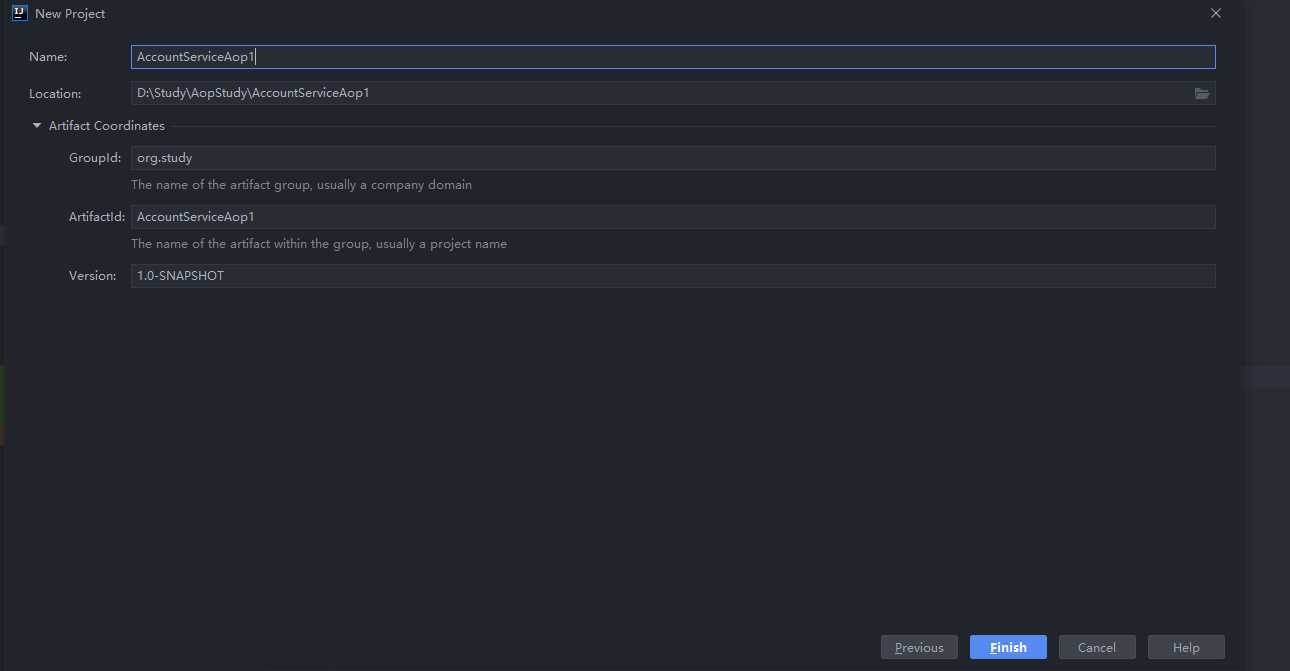
选择创建maven项目

引入maven包,如下:
    <dependencies>
        <dependency>
            <groupId>org.springframework</groupId>
            <artifactId>spring-context</artifactId>
            <version>5.2.6.RELEASE</version>
        </dependency>
        <dependency>
            <groupId>org.aspectj</groupId>
            <artifactId>aspectjweaver</artifactId>
            <version>1.9.5</version>
        </dependency>
    </dependencies>
创建一个模拟的service接口和实现:
package org.study.service;
public interface IAccountService {
    void getList();
    int getCount();
    void updateUserAccount(int id);
}
实现类如下:
package org.study.service.impl;
import org.study.service.IAccountService;
public class AccountServiceImpl implements IAccountService {
    @Override
    public void getList() {
        System.out.println("getList 执行了...");
    }

    @Override
    public int getCount() {
        System.out.println("getCount 执行了...");
        return 0;
    }

    @Override
    public void updateUserAccount(int id) {
        System.out.println("updateUserAccount 执行了...");
    }
}
我们的通知类是也是一个模拟类,用于增强方法,该类中我们写了五个方法,分别模拟前置通知、后置通知、异常通知、最终通知和环绕通知;
代码如下:
package org.study.util;
import org.aspectj.lang.ProceedingJoinPoint;
public class Logger {
    public void beforePrintLog(){
        System.out.println("Logger.beforePrintLog...");
    }

    public void afterPrintLog(){
        System.out.println("Logger.afterPrintLog...");
    }

    public void throwingPrintLog(){
        System.out.println("Logger.throwingPrintLog...");
    }

    public void finallyPrintLog(){
        System.out.println("Logger.finallyPrintLog...");
    }

    /**
     * 环绕通知
     */
    public Object aroundPrintLog(ProceedingJoinPoint pjp) {
        try {
            Object returnVal;
            Object[] args = pjp.getArgs();
            System.out.println("Logger.前置...");
            returnVal = pjp.proceed(args);
            System.out.println("Logger.return...");
            return returnVal;
        } catch (Throwable throwable) {
            System.out.println("Logger.Exception...");
            throw new RuntimeException(throwable);
        } finally {
            System.out.println("Logger.finally...");
        }
    }
}
接下来我们开始在xml文件中进行配置:
配置的步骤如下:
(1)配置目标对象
(2)配置切面类
(3)配置aop:定义切入点表达式,配置通知类型
最终我们的配置如下
<?xml version="1.0" encoding="UTF-8"?>
<beans xmlns="http://www.springframework.org/schema/beans"
       xmlns:xsi="http://www.w3.org/2001/XMLSchema-instance"
       xmlns:aop="http://www.springframework.org/schema/aop"
       xsi:schemaLocation="http://www.springframework.org/schema/beans
        https://www.springframework.org/schema/beans/spring-beans.xsd
        http://www.springframework.org/schema/aop
        https://www.springframework.org/schema/aop/spring-aop.xsd">

    <!--配置目标对象-->
    <bean id="accountService" class="org.study.service.impl.AccountServiceImpl" >
    </bean>
    <!--配置切面类-->
    <bean id="logger" class="org.study.util.Logger">
    </bean>
    <aop:config>
        <!--定义切入点表达式-->
        <aop:pointcut expression=" execution(* org.study.service.*.*(..))" id="myPointCut"/>
        <aop:aspect id="aspect" ref="logger">
            <!--前置-->
            <aop:before method="beforePrintLog" pointcut-ref="myPointCut"/>
            <!--后置通知-->
            <aop:after-returning method="afterPrintLog" pointcut-ref="myPointCut"/>
            <!--异常通知-->
            <aop:after-throwing method="throwingPrintLog" pointcut-ref="myPointCut"/>
            <!--最终通知-->
            <aop:after method="finallyPrintLog" pointcut-ref="myPointCut"/>
<!--            <aop:around method="aroundPrintLog" pointcut-ref="myPointCut"/>-->
        </aop:aspect>
    </aop:config>
</beans>
编写测试方法:
package org.study;
import org.springframework.context.ApplicationContext;
import org.springframework.context.support.ClassPathXmlApplicationContext;
import org.study.service.IAccountService;

public class AccountServiceTest {
    public static void main(String[] args) {
        ApplicationContext context=new ClassPathXmlApplicationContext("bean.xml");
        IAccountService accountService=context.getBean("accountService", IAccountService.class);
        int count= accountService.getCount();
    }
}
查看运行结果:

通过上面的代码,我们可以发现,我们在配置xml文件时,注释掉了环绕通知,这一步我们把环绕通知的注释打开,运行一下测试类

我们发现,环绕通知的结果和配置四种不同的通知结果一致。
1、我们通过spring框架的aop很方便快捷地帮我们实现了代码的增强;
2、通过aop我们可以把很多重复代码提取到公共类中,比如记录日志、事务控制等,这样业务代码会更清爽,便于阅读。
原文:https://www.cnblogs.com/zqllove/p/13085973.html