第一篇笔记仅仅是安装了pve,并且添加了cockpit和docker,这篇配置存储部分。
我的服务器目前是1块120G固态,上次已经装了系统。
还有2块320G机械盘、2块500G机械盘。
我们未必每次都能使用全新的硬盘,那么旧硬盘在ZFS或PVE当中都是不能直接发现的,它怕你误操作把有数据的硬盘给洗白白。
看我现在就是挂的几块用过的硬盘。

这些硬盘PVE默认不作为新硬盘给你用。需要重新初始化一下。
dd if=/dev/zero of=/dev/sd[X] bs=1M count=200
X代表你要初始化的磁盘。
根据我的情况:
root@pve01:/dev# dd if=/dev/zero of=/dev/sdb bs=1M count=200
200+0 records in
200+0 records out
209715200 bytes (210 MB, 200 MiB) copied, 1.53484 s, 137 MB/s
root@pve01:/dev# dd if=/dev/zero of=/dev/sdc bs=1M count=200
200+0 records in
200+0 records out
209715200 bytes (210 MB, 200 MiB) copied, 1.6981 s, 123 MB/s
root@pve01:/dev# dd if=/dev/zero of=/dev/sdd bs=1M count=200
200+0 records in
200+0 records out
209715200 bytes (210 MB, 200 MiB) copied, 2.16789 s, 96.7 MB/s
root@pve01:/dev# dd if=/dev/zero of=/dev/sde bs=1M count=200
200+0 records in
200+0 records out
209715200 bytes (210 MB, 200 MiB) copied, 2.1021 s, 99.8 MB/s
root@pve01:/dev#
PVE可以看到 硬盘了。
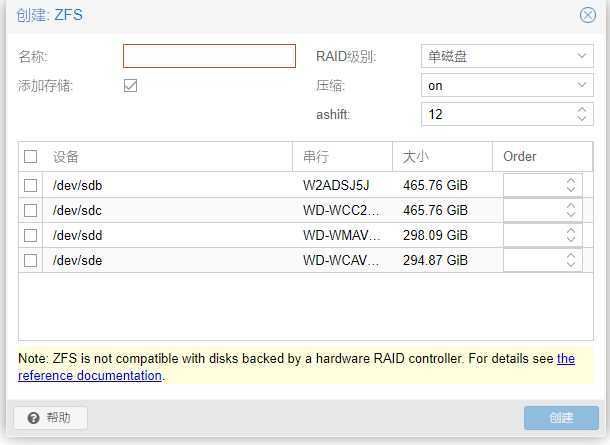
反正我也不知道为什么PVE的web界面无法创建ZFS。
我们用命令行来创建:
先看帮助:

root@pve01:/dev# zpool  --help
usage: zpool command args ...
where ‘command‘ is one of the following:

        version

        create [-fnd] [-o property=value] ...
            [-O file-system-property=value] ...
            [-m mountpoint] [-R root] <pool> <vdev> ...
        destroy [-f] <pool>

        add [-fgLnP] [-o property=value] <pool> <vdev> ...
        remove [-nps] <pool> <device> ...

        labelclear [-f] <vdev>

        checkpoint [--discard] <pool> ...

        list [-gHLpPv] [-o property[,...]] [-T d|u] [pool] ...
            [interval [count]]
        iostat [[[-c [script1,script2,...][-lq]]|[-rw]] [-T d | u] [-ghHLpPvy]
            [[pool ...]|[pool vdev ...]|[vdev ...]] [[-n] interval [count]]
        status [-c [script1,script2,...]] [-igLpPstvxD]  [-T d|u] [pool] ...
            [interval [count]]

        online [-e] <pool> <device> ...
        offline [-f] [-t] <pool> <device> ...
        clear [-nF] <pool> [device]
        reopen [-n] <pool>

        attach [-f] [-o property=value] <pool> <device> <new-device>
        detach <pool> <device>
        replace [-f] [-o property=value] <pool> <device> [new-device]
        split [-gLnPl] [-R altroot] [-o mntopts]
            [-o property=value] <pool> <newpool> [<device> ...]

        initialize [-c | -s] <pool> [<device> ...]
        resilver <pool> ...
        scrub [-s | -p] <pool> ...
        trim [-d] [-r <rate>] [-c | -s] <pool> [<device> ...]

        import [-d dir] [-D]
        import [-o mntopts] [-o property=value] ...
            [-d dir | -c cachefile] [-D] [-l] [-f] [-m] [-N] [-R root] [-F [-n]] -a
        import [-o mntopts] [-o property=value] ...
            [-d dir | -c cachefile] [-D] [-l] [-f] [-m] [-N] [-R root] [-F [-n]]
            [--rewind-to-checkpoint] <pool | id> [newpool]
        export [-af] <pool> ...
        upgrade
        upgrade -v
        upgrade [-V version] <-a | pool ...>
        reguid <pool>

        history [-il] [<pool>] ...
        events [-vHf [pool] | -c]

        get [-Hp] [-o "all" | field[,...]] <"all" | property[,...]> <pool> ...
        set <property=value> <pool>
        sync [pool] ...
我们只关心creat
 create [-fnd] [-o property=value] ...
            [-O file-system-property=value] ...
            [-m mountpoint] [-R root] <pool> <vdev> ...
fdisk -l
root@pve01:/dev# fdisk -l
Disk /dev/sda: 118 GiB, 126701535232 bytes, 247463936 sectors
Disk model: Lenovo SSD ST510
Units: sectors of 1 * 512 = 512 bytes
Sector size (logical/physical): 512 bytes / 512 bytes
I/O size (minimum/optimal): 512 bytes / 512 bytes
Disklabel type: gpt
Disk identifier: E893CBE0-FA66-448B-A718-33EB51C6DD96

Device       Start       End   Sectors   Size Type
/dev/sda1       34      2047      2014  1007K BIOS boot
/dev/sda2     2048   1050623   1048576   512M EFI System
/dev/sda3  1050624 247463902 246413279 117.5G Linux LVM


Disk /dev/sdb: 465.8 GiB, 500107862016 bytes, 976773168 sectors
Disk model: ST500DM002-1BD14
Units: sectors of 1 * 512 = 512 bytes
Sector size (logical/physical): 512 bytes / 4096 bytes
I/O size (minimum/optimal): 4096 bytes / 4096 bytes


Disk /dev/sdc: 465.8 GiB, 500107862016 bytes, 976773168 sectors
Disk model: WDC WD5000AAKX-0
Units: sectors of 1 * 512 = 512 bytes
Sector size (logical/physical): 512 bytes / 512 bytes
I/O size (minimum/optimal): 512 bytes / 512 bytes


Disk /dev/sdd: 298.1 GiB, 320072933376 bytes, 625142448 sectors
Disk model: WDC WD3200AAJS-0
Units: sectors of 1 * 512 = 512 bytes
Sector size (logical/physical): 512 bytes / 512 bytes
I/O size (minimum/optimal): 512 bytes / 512 bytes


Disk /dev/sde: 294.9 GiB, 316616827392 bytes, 618392241 sectors
Disk model: WDC WD3200AAJS-2
Units: sectors of 1 * 512 = 512 bytes
Sector size (logical/physical): 512 bytes / 512 bytes
I/O size (minimum/optimal): 512 bytes / 512 bytes


Disk /dev/mapper/pve-swap: 8 GiB, 8589934592 bytes, 16777216 sectors
Units: sectors of 1 * 512 = 512 bytes
Sector size (logical/physical): 512 bytes / 512 bytes
I/O size (minimum/optimal): 512 bytes / 512 bytes


Disk /dev/mapper/pve-root: 29.3 GiB, 31406948352 bytes, 61341696 sectors
Units: sectors of 1 * 512 = 512 bytes
Sector size (logical/physical): 512 bytes / 512 bytes
I/O size (minimum/optimal): 512 bytes / 512 bytes
root@pve01:/dev#
可以看出有
sda 120G 固态
sdb 500G 机械
sdc 500G 机械
sdd 320G 机械
sde 320G 机械
示例以两块320来做
root@pve01:/dev# zpool create -f Storage sdd sde
示例以两块500来做
root@pve01:/dev# zpool create -f Virtual mirror sdb sdc
root@pve01:/dev# zpool status
  pool: Storage
 state: ONLINE
  scan: none requested
config:

        NAME        STATE     READ WRITE CKSUM
        Storage     ONLINE       0     0     0
          sdd       ONLINE       0     0     0
          sde       ONLINE       0     0     0

errors: No known data errors

  pool: Virtual
 state: ONLINE
  scan: none requested
config:

        NAME        STATE     READ WRITE CKSUM
        Virtual     ONLINE       0     0     0
          mirror-0  ONLINE       0     0     0
            sdb     ONLINE       0     0     0
            sdc     ONLINE       0     0     0

errors: No known data errors
root@pve01:/dev#
root@pve01:/dev# df -lh
Filesystem            Size  Used Avail Use% Mounted on
udev                  7.7G  4.0K  7.7G   1% /dev
tmpfs                 1.6G  9.1M  1.6G   1% /run
/dev/mapper/pve-root   30G  2.2G   28G   8% /
tmpfs                 7.8G   43M  7.7G   1% /dev/shm
tmpfs                 5.0M     0  5.0M   0% /run/lock
tmpfs                 7.8G     0  7.8G   0% /sys/fs/cgroup
/dev/fuse              30M   16K   30M   1% /etc/pve
tmpfs                 1.6G     0  1.6G   0% /run/user/0
Storage               574G  128K  574G   1% /Storage
Virtual               450G  128K  450G   1% /Virtual
我会告诉你 最近几天我装了几遍PVE么?不会。
但是我会告诉你,我在使用UEFI引导XFS格式的6.2版PVE,会出现关机时拔掉硬盘电源线或数据线,再插上,会出现无法引导的故障。
现在我在使用传统逻辑bios引导的PVE。
zpool import
 1 root@pve01:/# zpool import
 2    pool: Docker
 3      id: 2962035019617846026
 4   state: ONLINE
 5  action: The pool can be imported using its name or numeric identifier.
 6  config:
 7
 8         Docker      ONLINE
 9           mirror-0  ONLINE
10             sdd     ONLINE
11             sde     ONLINE
12
13    pool: Virtual
14      id: 16203971317369074769
15   state: ONLINE
16  action: The pool can be imported using its name or numeric identifier.
17  config:
18
19         Virtual     ONLINE
20           mirror-0  ONLINE
21             sdb     ONLINE
22             sdc     ONLINE
zpool import -f 老名字
zpool import -f Docker
zpool import -f 老名字 新名字
root@pve01:/#  zpool import -f Docker
cannot import ‘Docker‘: a pool with that name already exists
use the form ‘zpool import <pool | id> <newpool>‘ to give it a new name
root@pve01:/# cannot import ‘Docker‘: a pool with that name already exists
-bash: cannot: command not found
root@pve01:/# use the form ‘zpool import <pool | id> <newpool>‘ to give it a new name
-bash: use: command not found
root@pve01:/#  zpool import -f Virtual Storage
root@pve01:/#
原来的文件还都在的。
其实这是迁移ZFS当中的导入操作。可以完整的将一组ZFS存储池,通过变更接线,甚至搬迁硬盘的方式将一组ZFS存储池变更到另一个主机上。
zpool export 存储池名字
root@pve01:/# zpool status
  pool: Docker
 state: ONLINE
  scan: none requested
config:

        NAME        STATE     READ WRITE CKSUM
        Docker      ONLINE       0     0     0
          mirror-0  ONLINE       0     0     0
            sdd     ONLINE       0     0     0
            sde     ONLINE       0     0     0

errors: No known data errors

  pool: Storage
 state: ONLINE
  scan: none requested
config:

        NAME        STATE     READ WRITE CKSUM
        Storage     ONLINE       0     0     0
          mirror-0  ONLINE       0     0     0
            sdb     ONLINE       0     0     0
            sdc     ONLINE       0     0     0

errors: No known data errors
root@pve01:/# zpool export Storage
root@pve01:/# zpool status
  pool: Docker
 state: ONLINE
  scan: none requested
config:

        NAME        STATE     READ WRITE CKSUM
        Docker      ONLINE       0     0     0
          mirror-0  ONLINE       0     0     0
            sdd     ONLINE       0     0     0
            sde     ONLINE       0     0     0

errors: No known data errors
root@pve01:/#
PVE Proxmox Virtual Environment 学习笔记(二)添加磁盘阵列,分配存储
原文:https://www.cnblogs.com/jackadam/p/13096206.html
