SpringBoot 1.3后才拥有SpringBoot devtools热部署
①:spring-boot-devtools ②:Spring Loaded
方式一:在项目的pom文件中添加依赖:
1 <!--热部署jar-->
2 <dependency>
3     <groupId>org.springframework.boot</groupId>
4     <artifactId>spring-boot-devtools</artifactId>
5 </dependency>
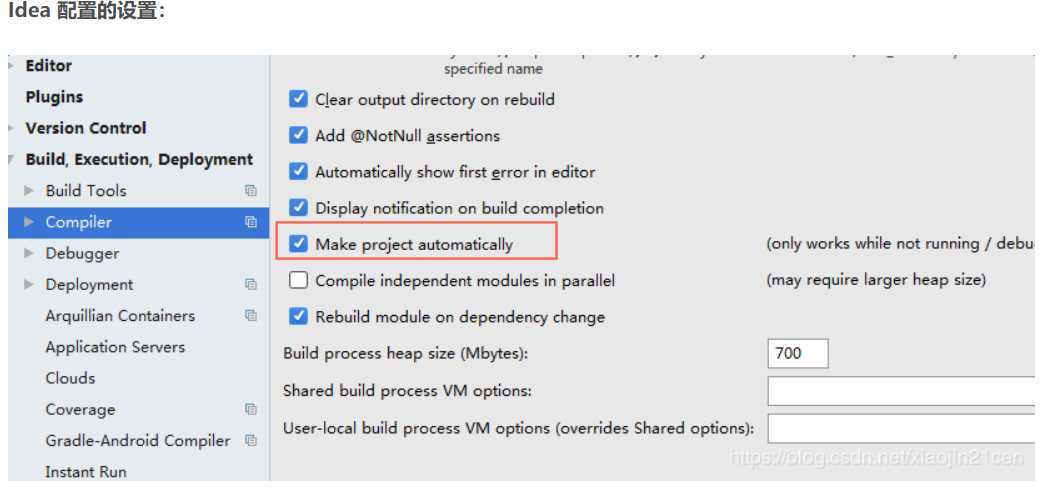
然后开启自动编译功能
如果使用 Thymeleaf 模板引擎,需要把模板默认缓存设置为 false
在 application.properties 中添加:
#禁止thymeleaf缓存(建议:开发环境设置为false,生成环境设置为true )
spring.thymeleaf.cache=false
然后:使用 shift+ctrl+alt+"/" (IDEA中的快捷键) 选择"Registry" 然后勾选 compiler.automake.allow.when.app.running
最后重启IDEA。
方式二:
在项目中添加如下代码
    <build>
        <plugins>
            <plugin>
                <!-- springBoot编译插件-->
                <groupId>org.springframework.boot</groupId>
                <artifactId>spring-boot-maven-plugin</artifactId>
                <dependencies>
                    <!-- spring热部署 -->
                    <!-- 该依赖在此处下载不下来,可以放置在build标签外部下载完成后再粘贴进plugin中 -->
                    <dependency>
                        <groupId>org.springframework</groupId>
                        <artifactId>springloaded</artifactId>
                        <version>1.2.6.RELEASE</version>
                    </dependency>
                </dependencies>
            </plugin>
        </plugins>
    </build>
添加完毕后需要使用mvn指令运行:
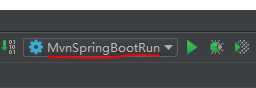
首先找到IDEA中的Edit configurations ,然后进行如下操作:(点击左上角的"+",然后选择maven将出现右侧面板,在红色划线部位输入如图所示指令,你可以为该指令命名(此处命名为MvnSpringBootRun))

点击保存将会在IDEA项目运行部位出现,点击绿色箭头运行即可
原文:https://www.cnblogs.com/gaojiaqi4433/p/13184614.html