一、乱码解决
二、单元测试
三、idea中springboot热部署
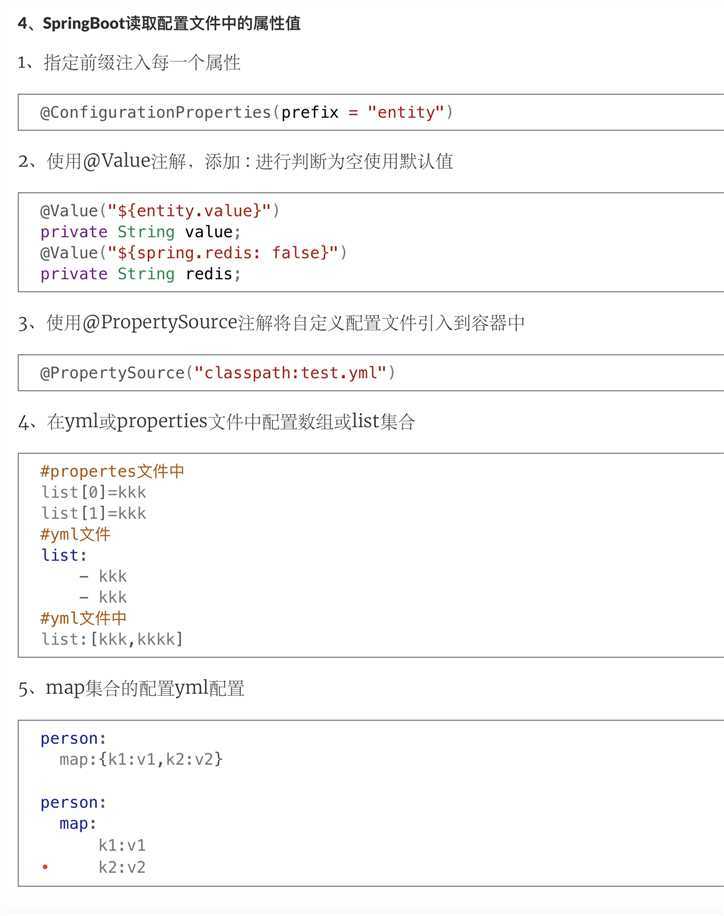
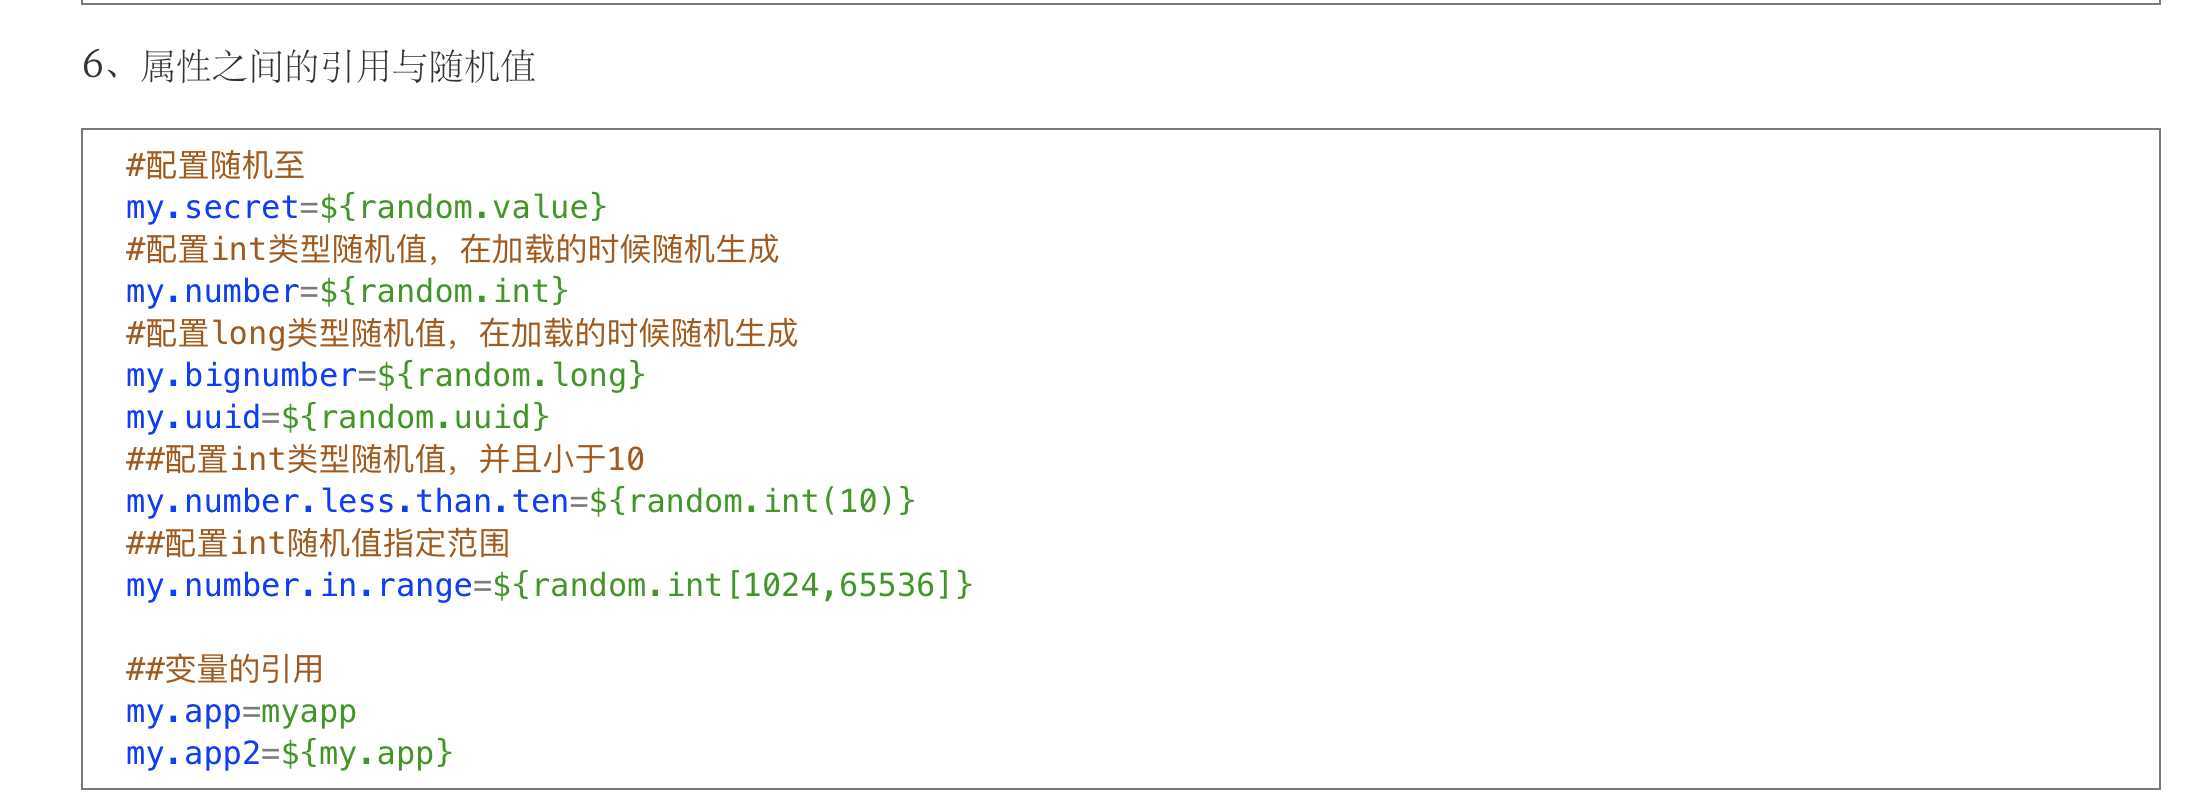
四、springboot配置文件读取属性
方式一 、
@RequestMapping(value = "/demo", produces = "application/json;charset=utf-8")
方式二、
# 设置utf-8,
spring.http.encoding.force-response=true
项目一般配置server.tomcat.uri-encoding=utf-8
引入pom.xml 依赖
      <dependency>
            <groupId>org.springframework.boot</groupId>
            <artifactId>spring-boot-starter-test</artifactId>
            <scope>test</scope>
        </dependency>
编写测试类注意@SpringBootTest与@RunWith配合
package city.albert.springboot01;

import org.junit.jupiter.api.Test;
import org.junit.runner.RunWith;
import org.springframework.boot.test.context.SpringBootTest;
import org.springframework.test.context.junit4.SpringRunner;

/**
 * @SpringBootTest  注解表明是springboot的测试类需要加载applicationContext的上下文
 * @RunWith 启动测试类,SpringRunner.class 指定springboot方式加载
 */
@SpringBootTest
@RunWith(SpringRunner.class)
class Springboot01ApplicationTests {

   @Test
   void contextLoads() {
      //业务测试
   }
}
        <dependency>
            <groupId>org.springframework.boot</groupId>
            <artifactId>spring-boot-devtools</artifactId>
            <version>2.2.6.RELEASE</version>
        </dependency>
idea桌的File?->?Settings?配置文件中->Compiler设置(或者File->Other Settings->Default Settings->Compiler)
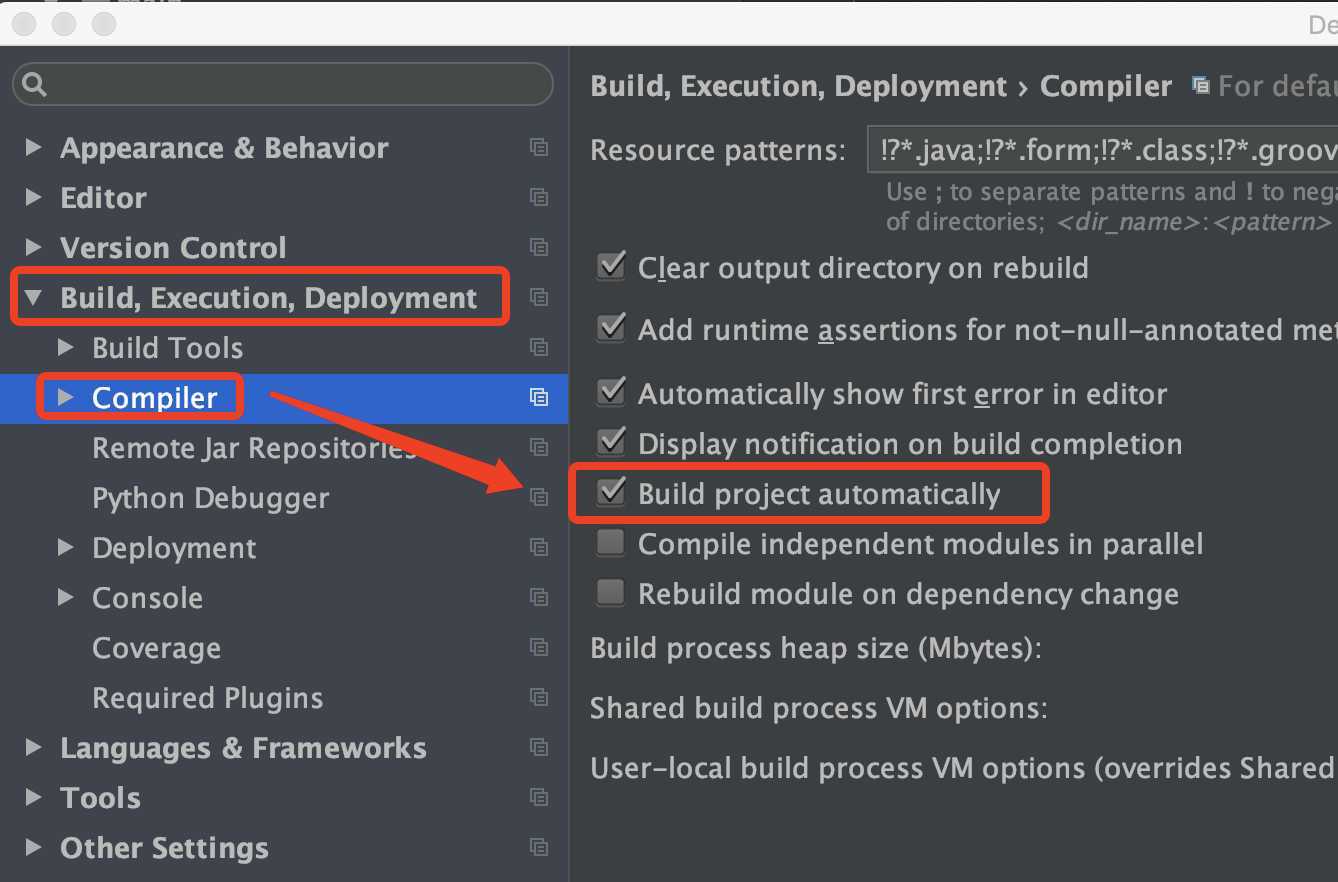
然后点击下面的apply 进行配置生效,然后点击ok

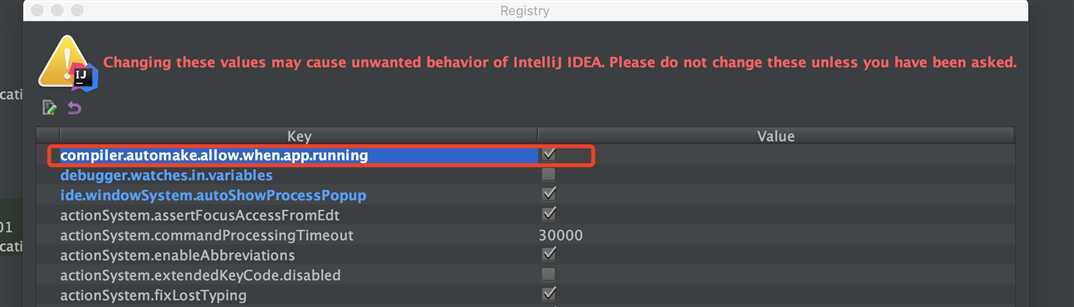
使用快捷键“Ctrl+Shift+Alt+/” 选择Maintenance中的选项框Registry然后确认,如下图,勾选compiler.automake.allow.when.app.running,然后在close
原文:https://www.cnblogs.com/niunafei/p/13195731.html