由于在网上都没有找到关于这两种模式的简单实现,所以自己撸一个:
代码简单实现:
<!DOCTYPE html>
<html lang="en">
<head>
<meta charset="UTF-8">
<meta name="viewport" content="width=device-width, initial-scale=1.0">
<!--宽度为设备宽度,初始缩放比例为 1 倍,禁止用户缩放-->
<meta name="viewport" content="width=device-width,initial-scale=1.0,maximum-scale=1.0,user-scalable=0">
<title>hash-mode-demo</title>
<style>
html,body{
width: 100%;
height: 100%;
padding-left: 10px;
padding-top: 10px;
box-sizing: border-box;
}
.btn{
width:140px;
height:60px;
line-height:60px;
text-align: center;
background: #f60;
color:#fff;
margin-bottom: 50px;
box-shadow: 0 0 7px 7px rgba(0,0,0,0.2);
}
.content{
line-height: 20px;
color:red;
font-size: 14px;
}
</style>
</head>
<body>
<script>
//单页面切换监听:触发渲染
window.onhashchange = function(event){
console.log("event.oldURL:",event.oldURL);
console.log("event.newURL:", event.newURL);
console.log("location.hash:", location.hash);
let hash = location.hash.slice(1);
render(hash);
}
//组件路由
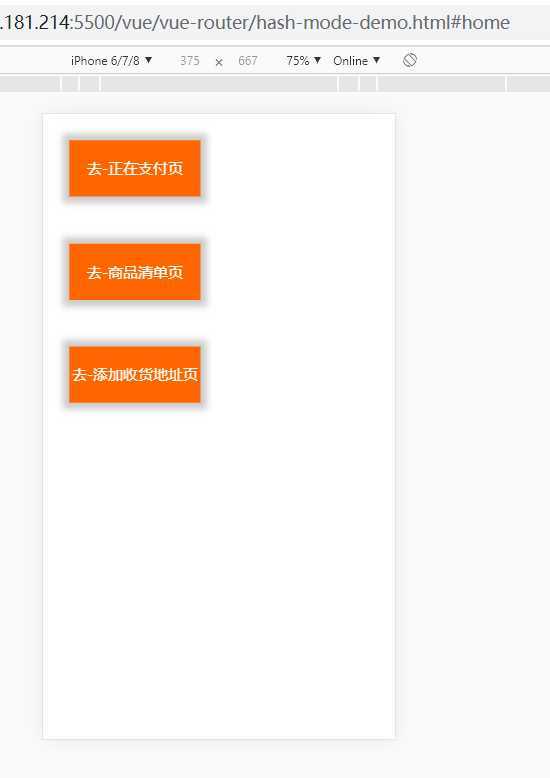
const Router = [
{
path: ‘/home‘,
name: ‘home‘,
meta: {title: ‘首页‘},
component:`
<div class="btn btn1" onclick="location.hash = ‘paying‘">去-正在支付页</div>
<div class="btn btn2" onclick="location.hash = ‘productList‘">去-商品清单页</div>
<div class="btn btn3" onclick="location.hash = ‘addAddress‘">去-添加收货地址页</div>
`
},
{
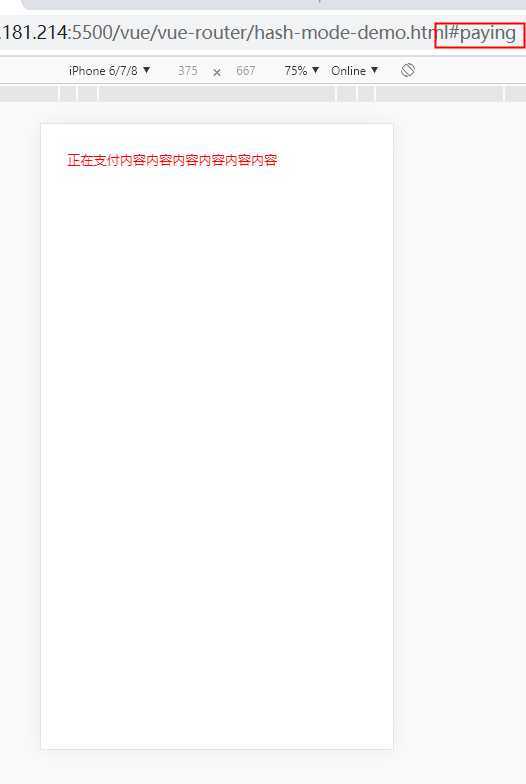
path: ‘/paying‘,
name: ‘paying‘,
meta: {title: ‘正在支付‘},
component:`<div class="content">正在支付内容内容内容内容内容内容</div>`
},
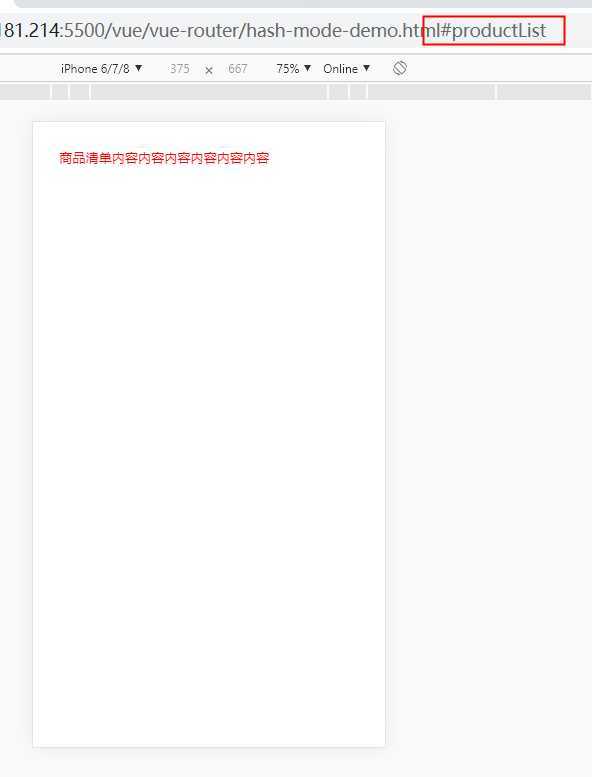
{
path: ‘/product-list‘,
name: ‘productList‘,
meta: {title: ‘商品清单‘},
component:`<div class="content">商品清单内容内容内容内容内容内容</div>`
},
{
path: ‘/add-address‘,
name: ‘addAddress‘,
meta: {title: ‘添加收货地址‘},
component:`<div class="content">添加收货地址内容内容内容内容内容内容</div>`
}
]
//首页渲染
window.location.hash = ‘home‘;
render();
//组件渲染
function render(){
let hash = location.hash.slice(1);
Router.forEach(item=>{
if(item.name != hash) return;
document.title = item.meta.title;
document.body.innerHTML = item.component;
})
}
</script>
</body>
</html>
模拟vue单页面应用hash模式切换效果简单实现
原文:https://www.cnblogs.com/ivan5277/p/13215220.html