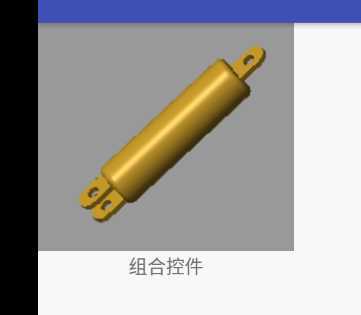
写Android代码一直都是用的自带控件,有时候一些部分有重复使用,改起来有麻烦。如果把这部分组装起来,形成一个独立的控件,那不是非常爽。于是,就可以使用组合控件。
就比如:一个搜索框里面带有一些按钮,toolbar等等
其实自定义控件分为两种:
一种是这种组合控件,将原有的控件组装为一个常用的控件;
另一种是完全自己画出来的控件,无法使用自带的控件实现
为你的重复使用一组控件,单独写一个xml文件
例如:一个图片和一个文字组成一个组合控件
<?xml version="1.0" encoding="utf-8"?>
<androidx.constraintlayout.widget.ConstraintLayout
      xmlns:android="http://schemas.android.com/apk/res/android"
      android:layout_width="match_parent"
      android:layout_height="match_parent"
      xmlns:app="http://schemas.android.com/apk/res-auto">

<ImageView
	android:id="@+id/image"
	android:layout_width="wrap_content"
	android:layout_height="wrap_content"
	app:layout_constraintTop_toTopOf="parent"
	app:layout_constraintLeft_toLeftOf="parent"/>

<TextView
	android:id="@+id/text"
	android:layout_width="wrap_content"
	android:layout_height="wrap_content"
	android:layout_marginTop="2dp"
	app:layout_constraintTop_toBottomOf="@+id/image"
	app:layout_constraintLeft_toLeftOf="@+id/image"
	app:layout_constraintRight_toRightOf="@+id/image"/>

</androidx.constraintlayout.widget.ConstraintLayout>
这样就不用在一个布局文件多次重复写一个东西了。不过,也可以使用merge,这样就不会多一层布局了。当前是在一个constrainlayout布局里面,自定义也是一个constraintlayout。在自定义里面,又去插入xml文件的布局,就多了一层。使用merge的话,就少一层。相应,应该会提高效率。
先自定义一个view继承自constraintlayout
在构造函数中,绑定布局文件
public class MyView extends ConstraintLayout {

      private String text;
	private Drawable image;
	private TextView textView;
	private ImageView imageView;

      public MyView(Context context) {
	      this(context, null);
      }

      public MyView(Context context, AttributeSet attrs) {
	      this(context, attrs, -1);
      }

      public MyView(Context context, AttributeSet attrs, int defStyleAttr) {
            super(context, attrs, defStyleAttr);
	      //获取布局
	      inflate(context, R.layout.my_view, this);
	      textView = findViewById(R.id.text);
	      imageView = findViewById(R.id.image);

	      }

	public void setText(String text){
	      this.text = text;
	      textView.setText(text);
	}

	public void setImage(Drawable drawable){
		this.image = drawable;
		this.imageView.setImageDrawable(drawable);
	}
}
在values文件下,新建一个attrs.xml , 声明自己的属性和属性类型。name为自定义控件的类名,attr的name为属性名,formart为属性类型,(图片这种就是对象引用了)。
<?xml version="1.0" encoding="utf-8"?>
<resources>
	<declare-styleable name="MyView" >
		//自定义属性
		<attr name="myText" format="string"/>
		<attr name="myImage" format="reference"/>
	</declare-styleable>
</resources>
然后,在代码中去解析这个自定义的属性,自己定义的xml解析是无法解析到的。
public MyView(Context context, AttributeSet attrs, int defStyleAttr) {
	super(context, attrs, defStyleAttr);
	//1.获取布局
	inflate(context, R.layout.my_view, this);
	textView = findViewById(R.id.text);
	imageView = findViewById(R.id.image);

	//2.获取属性
	TypedArray typedArray;
	typedArray = context.obtainStyledAttributes(attrs, R.styleable.MyView);

    //获取到属性值
	text = typedArray.getString(R.styleable.MyView_myText);
	textView.setText(text);
    //设置属性值
	image = typedArray.getDrawable(R.styleable.MyView_myImage);
	imageView.setImageDrawable(image);
    //记得回收
	typedArray.recycle();
}
自定义属性,其实也是由于你要重复使用,因此一些控件的显示内容要是动态的。要是能像这个textview一样可以在xml中配置,或者使用代码setText(),于是就可以使用自定义属性来配置(纯属个人猜想)。突然想到,如果看了源码,textview的源码,这个textview的属性是不是也都是这么弄。后面再来研究一下。
在main_activity.xml文件中添加如下控件引用:
<com.example.transition.MyView
	android:layout_width="wrap_content"
	android:layout_height="wrap_content"
	app:myImage="@drawable/tol"
	app:myText="组合控件"/>
然后,运行一下,就可以看到效果了。那么这个图片和text就合成了一个控件。但是应该还有很多细节,需要考虑,让它成为一个真的可以完美使用view。

原文:https://www.cnblogs.com/wisdomzhang/p/13237277.html