Effective November 2020:
This article will be updated soon to reflect the latest terminology.
This topic shows you how to create business rules and recommendations to apply form logic in a model-driven app without writing JavaScript code or creating plug-ins. Business rules provide a simple interface to implement and maintain fast-changing and commonly used rules. They can be applied to Main and Quick Create forms, and they work in model-driven apps, legacy web apps, Dynamics 365 for tablets, and Dynamics 365 for Outlook (online or offline mode).
By combining conditions and actions, you can do any of the following with business rules:
Set column values
Clear column values
Set column requirement levels
Show or hide columns
Enable or disable columns
Validate data and show error messages
Create business recommendations based on business intelligence.
Note
To define a business rule for a table so that it applies to all forms, see Create a business rule for a table.
Business rules don’t work with multi-select choices.
Sign in to Power Apps.
Expand Data, select Tables, select the table you want, and then select the Business rules tab.
On the command bar, select Add business rule.
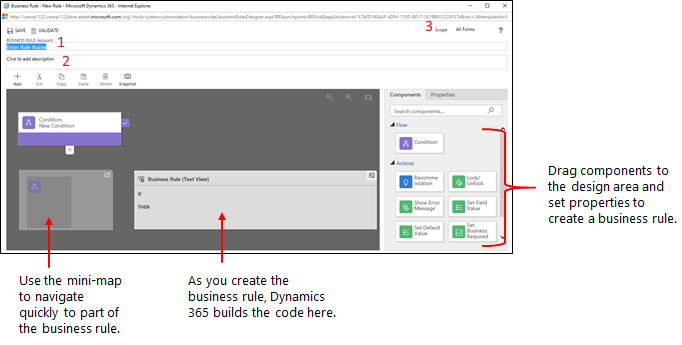
The Business Rule designer window opens with a single condition already created for you. Every rule starts with a condition. The business rule takes one or more actions based on that condition.

Tip
If you want to modify an existing business rule, you must deactivate it before you can modify it.
Add a description, if you want, in the description box in the upper-left corner of the window.
Set the scope, according to the following:
| If you select this item... | The scope is set to... |
| Table | All forms and server |
| All Forms | All forms |
| Specific form (Account form, for example) | Just that form |
Add conditions. To add more conditions to your business rule:
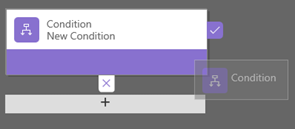
Drag the Condition component from the Components tab to a plus sign in the designer.

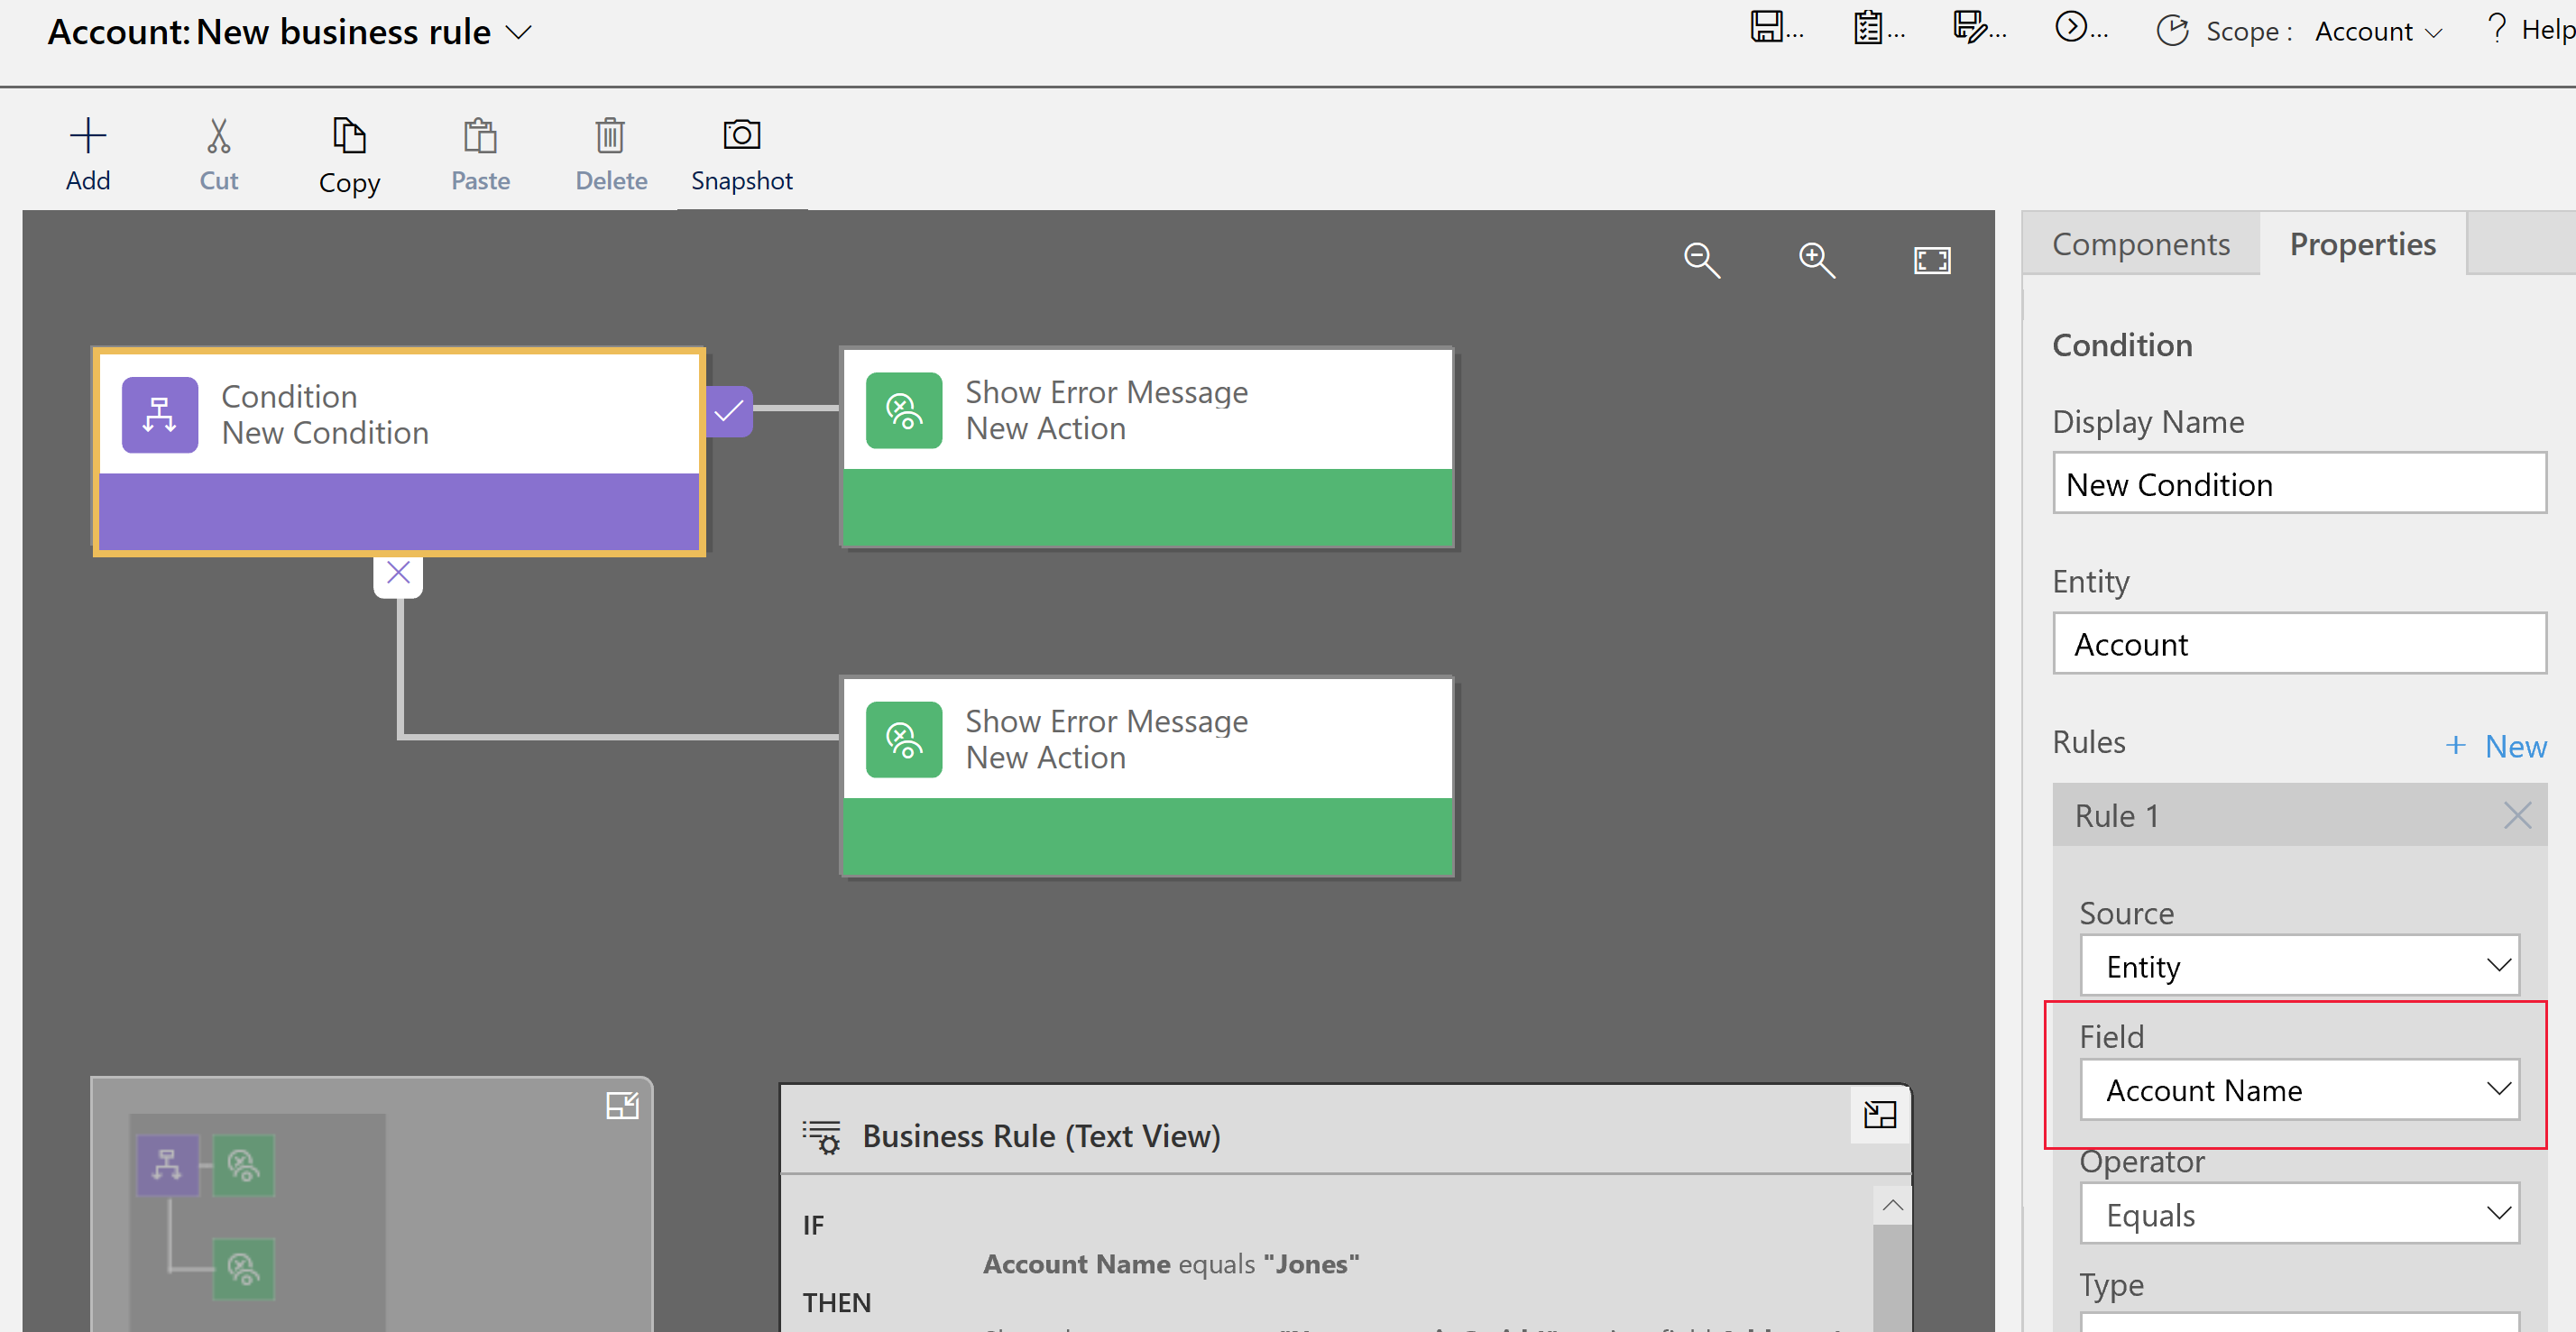
To set properties for the condition, select the Condition component in the designer window, and then set the properties in the Properties tab on the right side of the screen. As you set properties, an expression is created at the bottom of the Properties tab.
To add an additional clause (an AND or OR) to the condition, select New in the Properties tab to create a new rule, and then set the properties for that rule. In the Rule Logic column, you can specify whether to add the new rule as an AND or an OR.

When you‘re done setting properties for the condition, select Apply.
Add actions. To add an action:
Drag one of the action components from the Components tab to a plus sign next to Condition component. Drag the action to a plus sign next to a check mark if you want the business rule to take that action when the condition is met, or to a plus sign next to an x if you want the business rule to take that action if the condition is not met.

To set properties for the action, select the Action component in the designer window, and then set the properties in the Properties tab.
When you‘re done setting properties, select Apply.
Add a business recommendation. To add a business recommendation:
Drag the Recommendation component from the Components tab to a plus sign next to a Conditioncomponent. Drag the Recommendation component to a plus sign next to a check mark if you want the business rule to take that action when the condition is met, or to a plus sign next to an x if you want the business rule to take that action if the condition is not met.
To set properties for the recommendation, select the Recommendation component in the designer window, and then set the properties in the Properties tab.
To add more actions to the recommendation, drag them from the Components tab, and then set properties for each action in the Properties tab.
Note
When you create a recommendation, a single action is added by default. To see all the actions in a recommendation, select Details on the Recommendation component.
When you‘re done setting properties, select Apply.
To validate the business rule, select Validate on the action bar.
To save the business rule, select Save on the action bar.
To activate the business rule, select it in the Solution Explorer window, and then select Activate. You can‘t activate the business rule from the designer window.
Tip
Here are a few tips to keep in mind as you work on business rules in the designer window:
If you have more than one language provisioned for your organization, you will want to localize any error messages that you have set. Each time you set a message, a label is generated by the system. If you export the translations in your organization, you can add localized versions of your messages and then import those labels back into the system, so that people using languages other than your base language can view the translated messages.
This section describes common issues that may occur when you use business rules.
Actions or conditions that use a composite column like the Full Name (fullname) column or an Address column aren‘t supported in apps based on the Unified Interface. Alternatively, you can use actions or conditions with the constituent columns. For example, for the Full Name column, you can use actions or conditions on the First Name(firstname) and Last Name (lastname) columns.
Entity scoped business rules will not fire on an editable grid when the editable grid is configured on a dashboard page.
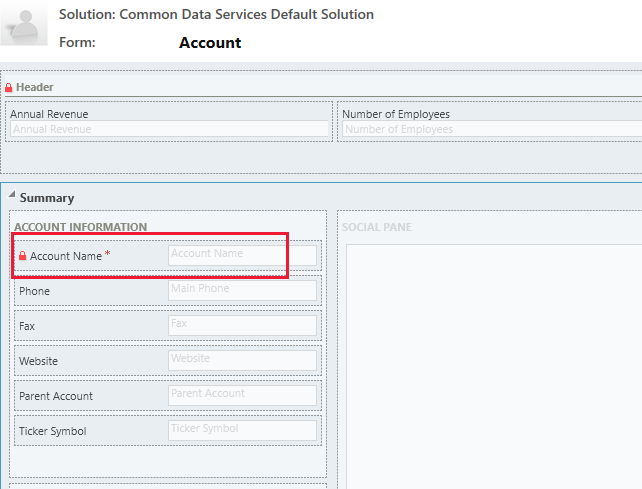
A business rule may not execute because the column referenced in the business rule isn‘t included with the form.
Open solution explorer. Expand the table that you want and then select Forms.
Open the form that you want and then on the form designer ribbon select Business Rules.
In the form designer, open the business rule.
In the business rule designer select each condition and action to verify all the columns referenced in each condition and action.

Verify that each column referenced in the business rule is also included on the form. If not, add the missing column to the form.

A business rule may also not execute because a column referenced in the business rule is a composite column. You can use the constituent columns of the composite column instead.
business logic on Power App with Modern driven
原文:https://www.cnblogs.com/lingdanglfw/p/13992548.html