一、squid概述
Squid(Squid cache,简称Squid)是Linux系统中最常用的一款开源代理服务软件,可以很好地实现HTTP和FTP,以及DNS查询、SSL等应用的缓存代理,功能十分强大,本篇博客详细介绍了传统代理、透明代理,squid日志分析的配置。squid的官方网站为http://www.squid-cache.org
二、代理的基本问题
传统代理:适用于lnernet,需明确指定服务器
透明代理:客户机不需指定代理服务器的地址和端口,而是通过默认路由、防火墙策略将web访问重定向给代理服务器处理
三、使用代理的好处
提高web访问速度
隐藏客户机的真实IP地址
四、Squid各种代理的定义
4.1、传统代理
| 主机 | IP地址 |
| squid代理服务器 | 20.0.0.10 |
| web网站服务 | 20.0.0.20 |
| 客户机 | 20.0.0.50 |
(1)squid代理服务器配置
安装依赖环境
[root@squid ~]# yum -y install gcc gcc-c++ make
(2)编译安装squid服务
[root@squid ~]# tar zxf squid-3.5.23.tar.gz -C /opt
[root@squid ~]# cd /opt/squid-3.5.23/
[root@squid squid-3.5.23]# ./configure --prefix=/usr/local/squid \
> --sysconfdir=/etc \ ###指定配置文件位置
> --enable-arp-acl \ ###支持acl访问控制列表
> --enable-linux-netfilter \ ###打开网络筛选
> --enable-linux-tproxy \ ###支持透明代理
> --enable-async-io=100 \ ###io优化
> --enable-err-language="Simplify_Chinese" \ ###报错显示简体中文
> --enable-underscore \ ###支持下划线
> --enable-poll \ ###默认使用poll模式,开启epoll模式时提升性能
> --enable-gnuregex ###支持正则表达式
[root@squid squid-3.5.23]# make && make install
(3)优化路径
[root@squid squid-3.5.23]# ln -s /usr/local/squid/sbin/* /usr/local/sbin
[root@squid squid-3.5.23]# useradd -M -s /sbin/nologin squid ###创建不可登录的程序用户
[root@squid squid-3.5.23]# chown -R squid.squid /usr/local/squid/var
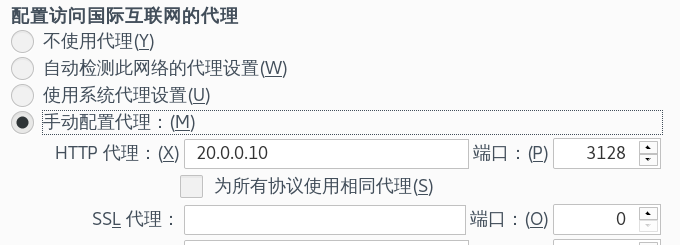
(4)修改配置
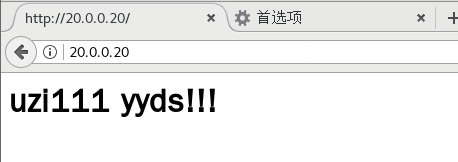
再网页上进行代理配置并测试
查看web日志文件,看访问的IP
[root@web html]# cat /var/log/httpd/access_log
20.0.0.10 - - [18/Nov/2020:08:46:39 +0800] "GET / HTTP/1.1" 304 - "-" "Mozilla/5.0 (X11; Linux x86_64; rv:52.0) Gecko/20100101 Firefox/52.0"
20.0.0.10 - - [18/Nov/2020:08:46:40 +0800] "GET / HTTP/1.1" 304 - "-" "Mozilla/5.0 (X11; Linux x86_64; rv:52.0) Gecko/20100101 Firefox/52.0"
变成Squid服务器的IP,说明代理成功。
4.2、透明代理
| 主机 | IP地址 |
| squid代理服务器 | 20.0.0.10(外网)192.168.100.10(内网,手动添加一块网卡) |
| web网站服务(源主机) | 20.0.0.20(外网) |
| 客户机 | 192.168.100.20,网关NETMASK设置成squid内网地址 |
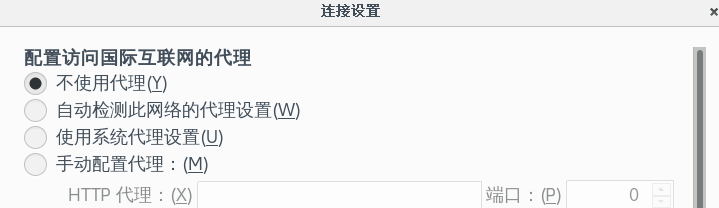
访问查看IP
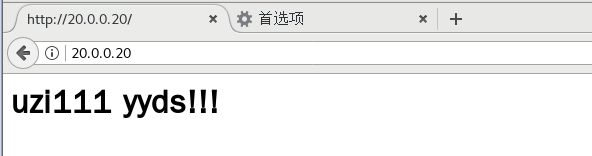
[root@web1 ~]# cat /var/log/httpd/access_log
20.0.0.10 - - [18/Nov/2020:09:00:43 +0800] "GET / HTTP/1.1" 304 - "-" "Mozilla/5.0 (X11; Linux x86_64; rv:52.0) Gecko/20100101 Firefox/52.0"
20.0.0.10 - - [18/Nov/2020:09:00:44 +0800] "GET / HTTP/1.1" 304 - "-" "Mozilla/5.0 (X11; Linux x86_64; rv:52.0) Gecko/20100101 Firefox/52.0"
20.0.0.10 - - [18/Nov/2020:09:00:45 +0800] "GET / HTTP/1.1" 304 - "-" "Mozilla/5.0 (X11; Linux x86_64; rv:52.0) Gecko/20100101 Firefox/52.0"
4.3、squid反向代理
在透明代理的基础上做反向代理
记得关闭squid服务器中的httpd服务
web1设置
[root@web1 ~]# yum -y install httpd
[root@web1 ~]# echo "<h1>this is test01 web</h1>" > /var/www/html/index.html
[root@web1 ~]# systemctl start httpd
[root@web1 ~]# netstat -anpt | grep httpd
tcp6 0 0 :::80 :::* LISTEN 58987/httpd
[root@web1 ~]# route add -net 192.168.100.0/24 gw 20.0.0.10 ###添加静态路由
web2设置
[root@web2 ~]# yum -y install httpd
[root@web2 ~]# echo "<h1>this is test02 web</h1>" > /var/www/html/index.html
[root@web2 ~]# systemctl start httpd
[root@web2 ~]# route add -net 192.168.100.0/24 gw 20.0.0.10 ###添加静态路由
web3设置
[root@web3 ~]# yum -y install httpd
[root@web3 ~]# echo "<h1>this is test03 web</h1>" > /var/www/html/index.html
[root@web3 ~]# systemctl start httpd
[root@web3 ~]# route add -net 192.168.100.0/24 gw 20.0.0.10 ###添加静态路由
squid配置
[root@squid ~]# iptables -F
[root@squid ~]# iptables -t nat -F
[root@squid ~]# iptables -I INPUT -p tcp --dport 3128 -j ACCEPT
[root@squid ~]# vi /etc/squid.conf
# Squid normally listens to port 3128
http_port 20.0.0.10:80 accel vhost vport
cache_peer 20.0.0.20 parent 80 0 no-query originserver round-robin max_conn=30 weight=1 name=web1
cache_peer 20.0.0.30 parent 80 0 no-query originserver round-robin max_conn=30 weight=1 name=web2
cache_peer 20.0.0.40 parent 80 0 no-query originserver round-robin max_conn=30 weight=1 name=web3
cache_peer_domain web1 web2 web3 www.yun878.com
[root@squid ~]# systemctl restart squid
客户机添加hosts文件
vi /etc/hosts
127.0.0.1 localhost localhost.localdomain localhost4 localhost4.localdomain4
::1 localhost localhost.localdomain localhost6 localhost6.localdomain6
20.0.0.10 www.yun878.com
客户机访问
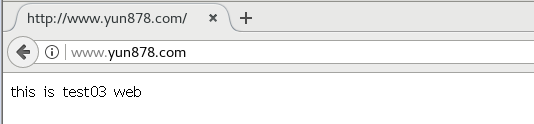
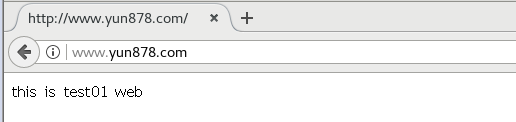
可以看到,客户机访问是以轮询的方式
原文:https://www.cnblogs.com/liuwei186/p/13995897.html