Spring框架是由于软件开发的复杂性而创建的。Spring使用的是基本的JavaBean来完成以前只可能由EJB完成的事情。然而,Spring的用途不仅仅限于服务器端的开发。从简单性、可测试性和松耦合性角度而言,绝大部分Java应用都可以从Spring中受益。
依赖注入:Set注入!
环境搭建
1.复杂类型Address对象
public class Address {
    private String address;

    public String getAddress() {
        return address;
    }

    public void setAddress(String address) {
        this.address = address;
    }

    @Override
    public String toString() {
        return "Address{" +
                "address=‘" + address + ‘\‘‘ +
                ‘}‘;
    }
}
2.真实测试对象Student对象
public class Student {
    private String name;
    private Address address;
    private String[] books;
    private List<String> hobbies;
    private Map<String,String> card;
    private Set<String> games;
    private String wife;
    private Properties info;

    public String getName() {
        return name;
    }

    public void setName(String name) {
        this.name = name;
    }

    public Address getAddress() {
        return address;
    }

    public void setAddress(Address address) {
        this.address = address;
    }

    public String[] getBooks() {
        return books;
    }

    public void setBooks(String[] books) {
        this.books = books;
    }

    public List<String> getHobbies() {
        return hobbies;
    }

    public void setHobbies(List<String> hobbies) {
        this.hobbies = hobbies;
    }

    public Map<String, String> getCard() {
        return card;
    }

    public void setCard(Map<String, String> card) {
        this.card = card;
    }

    public Set<String> getGames() {
        return games;
    }

    public void setGames(Set<String> games) {
        this.games = games;
    }

    public String getWife() {
        return wife;
    }

    public void setWife(String wife) {
        this.wife = wife;
    }

    public Properties getInfo() {
        return info;
    }

    public void setInfo(Properties info) {
        this.info = info;
    }

    @Override
    public String toString() {
        return "Student{" +
                "name=‘" + name + ‘\‘‘ +
                ", \n address=" + address.toString() +
                ", \n books=" + Arrays.toString(books) +
                ", \n hobbies=" + hobbies +
                ", \n card=" + card +
                ", \n games=" + games +
                ", \n wife=‘" + wife + ‘\‘‘ +
                ", \n info=" + info +
                ‘}‘;
    }
}
3.applicationContext.xml
<?xml version="1.0" encoding="UTF-8"?>
<beans xmlns="http://www.springframework.org/schema/beans"
       xmlns:xsi="http://www.w3.org/2001/XMLSchema-instance"
       xsi:schemaLocation="http://www.springframework.org/schema/beans http://www.springframework.org/schema/beans/spring-beans.xsd">

    <bean id="student" class="com.gong.pojo.Student">
<!--        第一种,普通值注入,value-->
        <property name="name" value="龚成龙"/>
    </bean>
</beans>
测试:
测试代码:
@Test
    public void setTest(){
        ClassPathXmlApplicationContext context = new ClassPathXmlApplicationContext("applicationContext.xml");
        Student student = (Student) context.getBean("student");
        System.out.println(student.toString());
    }
测试结果:

完善applicationContext.xml注入信息:
<?xml version="1.0" encoding="UTF-8"?>
<beans xmlns="http://www.springframework.org/schema/beans"
       xmlns:xsi="http://www.w3.org/2001/XMLSchema-instance"
       xsi:schemaLocation="http://www.springframework.org/schema/beans http://www.springframework.org/schema/beans/spring-beans.xsd">

    <bean id="address" class="com.gong.pojo.Address">
        <property name="address" value="武汉"/>
    </bean>

    <bean id="student" class="com.gong.pojo.Student">
<!--        第一种,普通值注入,value-->
        <property name="name" value="龚成龙"/>

<!--        第二种,Bean注入,ref-->
        <property name="address" ref="address"/>

<!--        第三种,数组注入-->
        <property name="books">
            <array>
                <value>Python</value>
                <value>Java</value>
                <value>C语言</value>
                <value>C++</value>
                <value>微信小程序</value>
            </array>
        </property>

<!--        第三种,list注入-->
        <property name="hobbies">
            <list>
                <value>听歌</value>
                <value>敲代码</value>
                <value>看火影忍者</value>
            </list>
        </property>

<!--        第四种,Map注入-->
        <property name="card">
            <map>
                <entry key="身份证" value="420684202020202020"/>
                <entry key="银行卡" value="3654616546515153"/>
            </map>
        </property>

<!--        第五种,Set注入-->
        <property name="games">
            <set>
                <value>COC</value>
                <value>开心消消乐</value>
                <value>王者荣耀</value>
                <value>原神</value>
            </set>
        </property>

<!--        第六种,空值null注入-->
        <property name="wife">
            <null/>
        </property>

<!--        第七种,Properties注入-->
        <property name="info">
            <props>
                <prop key="driver">com.mysql.cj.jdbc.Driver</prop>
                <prop key="url">jdbc:mysql://127.0.0.1:3306/mybatis</prop>
                <prop key="username">root</prop>
                <prop key="password">123456</prop>
            </props>
        </property>
    </bean>
</beans>
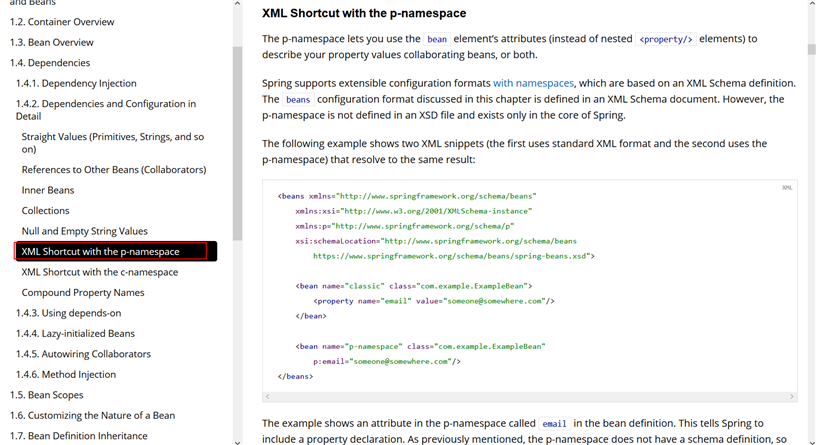
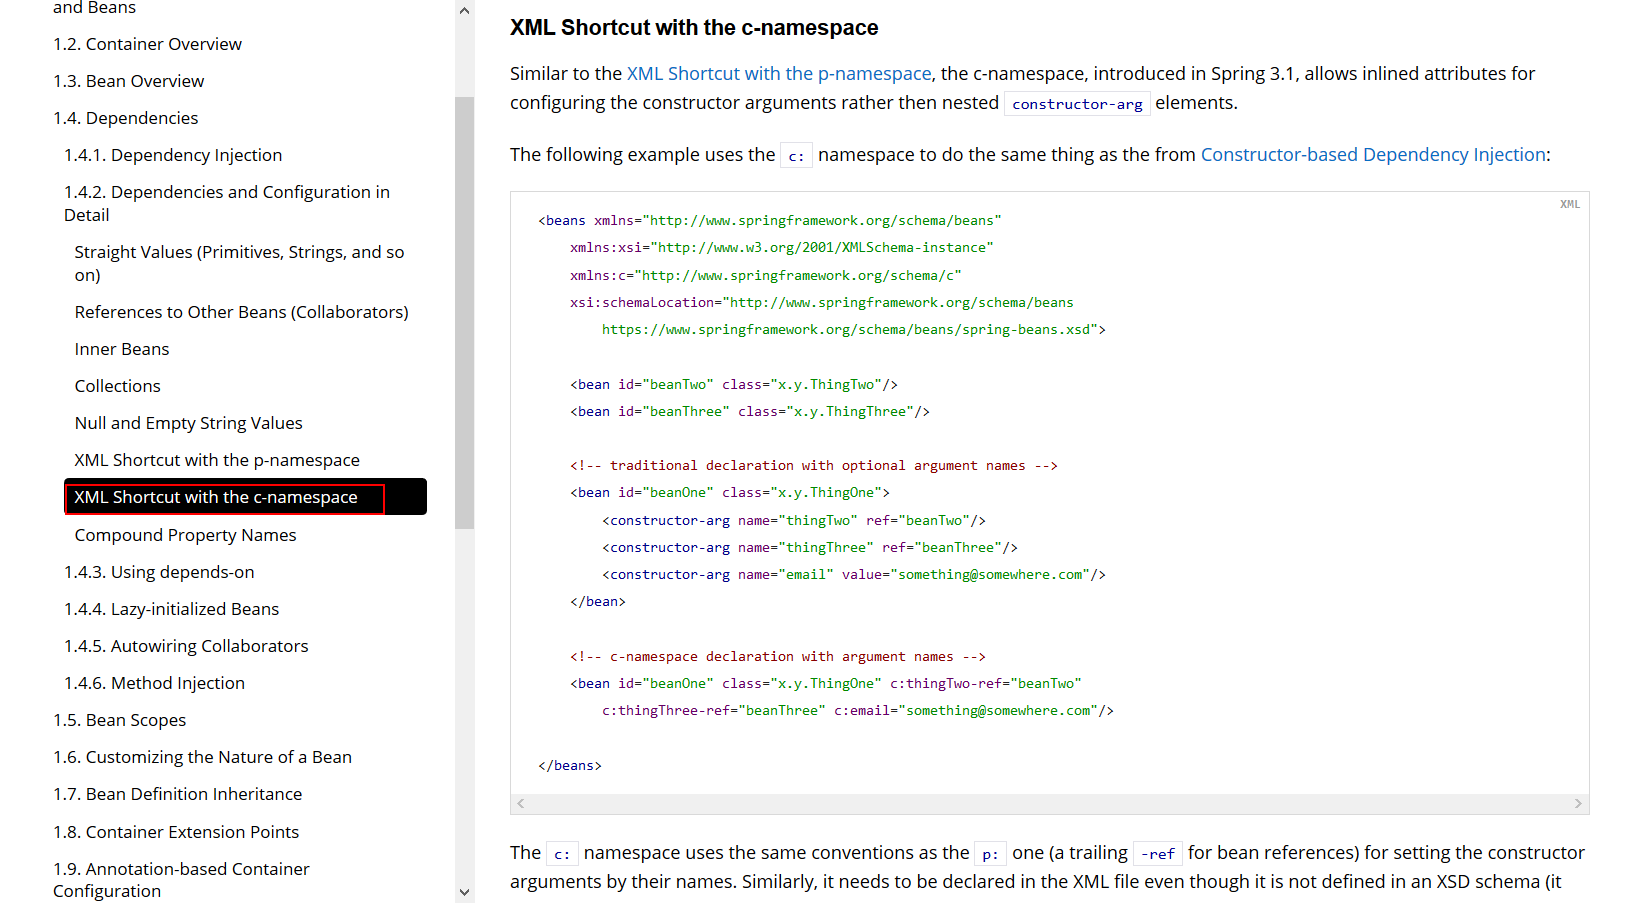
我们可以使用p命名空间和c命名空间进行注入
官方解释:


环境搭建:
1、User对象搭建:
public class User {
    private String name;
    private int age;

    public User() {
    }

    public User(String name, int age) {
        this.name = name;
        this.age = age;
    }

    public String getName() {
        return name;
    }

    public void setName(String name) {
        this.name = name;
    }

    public int getAge() {
        return age;
    }

    public void setAge(int age) {
        this.age = age;
    }

    @Override
    public String toString() {
        return "User{" +
                "name=‘" + name + ‘\‘‘ +
                ", age=" + age +
                ‘}‘;
    }
}
2、配置文件userBeans.xml:
<?xml version="1.0" encoding="UTF-8"?>
<beans xmlns="http://www.springframework.org/schema/beans"
       xmlns:xsi="http://www.w3.org/2001/XMLSchema-instance"
       xmlns:p="http://www.springframework.org/schema/p"
       xmlns:c="http://www.springframework.org/schema/c"
       xsi:schemaLocation="http://www.springframework.org/schema/beans http://www.springframework.org/schema/beans/spring-beans.xsd">

<!--    p命名空间注入,可以直接注入属性的值,是property的缩写-->
    <bean id="user1" class="com.gong.pojo.User" p:age="20" p:name="龚成龙"/>

<!--    c命名空间注入,可以通过构造器注入,是constructor-arg的缩写-->
    <bean id="user2" class="com.gong.pojo.User" c:age="20" c:name="龚成龙"/>

</beans>
测试:
p命名空间测试代码:
@Test
    public void test1(){
        ClassPathXmlApplicationContext context = new ClassPathXmlApplicationContext("userBeans.xml");
        User user1 = context.getBean("user1", User.class);
        System.out.println(user1);
    }
控制台输出结果:

c命名空间测试代码:
@Test
    public void test2(){
        ClassPathXmlApplicationContext context = new ClassPathXmlApplicationContext("userBeans.xml");
        User user2 = context.getBean("user2", User.class);
        System.out.println(user2);
    }
控制台输出结果:

注意点:p命名和c命名空间不能直接使用,需要导入xml约束
xmlns:p="http://www.springframework.org/schema/p"
 xmlns:c="http://www.springframework.org/schema/c"
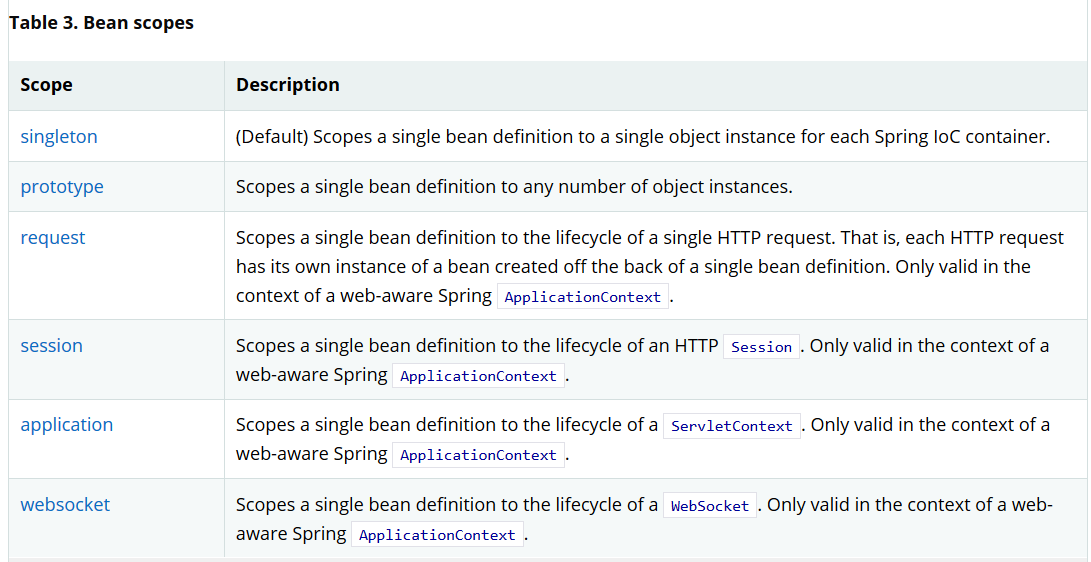
官方bean的作用域如下:

1.单例模式(spring默认机制):
使用:
<bean id="user1" class="com.gong.pojo.User" p:age="20" p:name="龚成龙" scope="singleton"/>
测试:
@Test
    public void test1(){
        ClassPathXmlApplicationContext context = new ClassPathXmlApplicationContext("userBeans.xml");
        User user1 = context.getBean("user1", User.class);
        User user2 = context.getBean("user1", User.class);
        System.out.println(user1.equals(user2));
    }
结果可以看出每次从容器get出来的对象都是同一对象:

2.原型模式(每次从容器中get对象的时候,都会获取一个新的对象):
使用:
<bean id="user2" class="com.gong.pojo.User" c:age="20" c:name="龚成龙" scope="prototype"/>
测试:
    @Test
    public void test2(){
        ClassPathXmlApplicationContext context = new ClassPathXmlApplicationContext("userBeans.xml");
        User user1 = context.getBean("user2", User.class);
        User user2 = context.getBean("user2", User.class);
        System.out.println(user1.equals(user2));
    }
运行结果:

其余的request、session、application、只有在web应用中使用到!
在Spring中有三种装配方式:
1.在xml中显式的装配
2.在java中显式的装配
3.隐式的自动装配【重要】
1.环境搭建
一个人有一个手机和一个宠物
People类
package com.gong.pojo;

public class People {
    private String name;
    private Dog dog;
    private XiaoMi xiaoMi;

    public String getName() {
        return name;
    }

    public void setName(String name) {
        this.name = name;
    }

    public Dog getDog() {
        return dog;
    }

    public void setDog(Dog dog) {
        this.dog = dog;
    }

    public XiaoMi getXiaoMi() {
        return xiaoMi;
    }

    public void setXiaoMi(XiaoMi xiaoMi) {
        this.xiaoMi = xiaoMi;
    }
}
Dog
package com.gong.pojo;

public class Dog {
    public void show(){
        System.out.println("我是一只可爱的小狗");
    }
}
XiaoMi
package com.gong.pojo;

public class XiaoMi {
    public void show(){
        System.out.println("我是一部小米手机手机");
    }
}
<?xml version="1.0" encoding="UTF-8"?>
<beans xmlns="http://www.springframework.org/schema/beans"
       xmlns:xsi="http://www.w3.org/2001/XMLSchema-instance"
       xsi:schemaLocation="http://www.springframework.org/schema/beans http://www.springframework.org/schema/beans/spring-beans.xsd">

    <bean id="dog" class="com.gong.pojo.Dog"/>
    <bean id="xiaoMi" class="com.gong.pojo.XiaoMi"/>

    <!--
    byName:会自动在容器上下文中寻找,和自己对象Set方法后的值一样的bean id
    -->
    <bean id="people" class="com.gong.pojo.People" autowire="byName">
        <property name="name" value="龚成龙"/>
    </bean>

</beans>
<?xml version="1.0" encoding="UTF-8"?>
<beans xmlns="http://www.springframework.org/schema/beans"
       xmlns:xsi="http://www.w3.org/2001/XMLSchema-instance"
       xsi:schemaLocation="http://www.springframework.org/schema/beans http://www.springframework.org/schema/beans/spring-beans.xsd">

    <bean id="dog" class="com.gong.pojo.Dog"/>
    <bean id="xiaoMi" class="com.gong.pojo.XiaoMi"/>

    <!--
    byType:会自动在容器上下文中寻找,和自己对象属性类型相同的bean
    -->
    <bean id="people" class="com.gong.pojo.People" autowire="byType">
        <property name="name" value="龚成龙"/>
    </bean>

</beans>
小结:
1.导入约束【context】
2.配置注解的支持context:annotation-config/
<?xml version="1.0" encoding="UTF-8"?>
<beans xmlns="http://www.springframework.org/schema/beans"
    xmlns:xsi="http://www.w3.org/2001/XMLSchema-instance"
    xmlns:context="http://www.springframework.org/schema/context"
    xsi:schemaLocation="http://www.springframework.org/schema/beans
        https://www.springframework.org/schema/beans/spring-beans.xsd
        http://www.springframework.org/schema/context
        https://www.springframework.org/schema/context/spring-context.xsd">

    <context:annotation-config/>

</beans>
@Autowired
直接在属性上使用即可,也可以在set方式上使用!
使用@Autowired我们可以不用编写set方法了,前提是你这个自动装配的属性在IOC(Spring)容器中存在,且符合名字byName!
如果@Autowired自动装配的环境比较复杂,自动装配无法通过一个注解完成的时候我们可以使用@Qualifier(value=“id”)配合使用,指定一个唯一的bean对象注入!
public class People {
    private String name;
    @Autowired
    private Dog dog;
    @Autowired
    @Qualifier("xiaoMi1")
    private XiaoMi xiaoMi;
}
@Resource(name = "id")注解,上面的注解都是spring中的注解,这个是java自己的注解,也可以指定id去查找对应的bean
public class People {

    private String name;
    @Resource(name = "dog1")
    private Dog dog;
    @Autowired
    @Qualifier("xiaoMi1")
    private XiaoMi xiaoMi;
}
小结@Resource和@Autowired的区别:
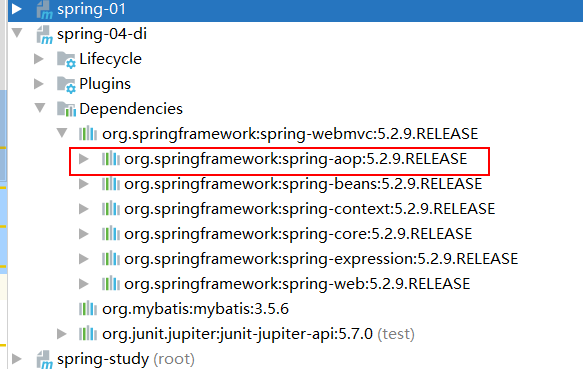
在spring4之后要求使用注解开发需要导入aop的包

1.bean
@Component//相当于<bean id="user" class="com.gong.pojo.User" />
public class User {

    private String name;
}
2.属性如何注入
@Component//相当于<bean id="user" class="com.gong.pojo.User" />
public class User {
    @Value("龚成龙")//相当于<property name="name" value="龚成龙"/>
    private String name;
}
3.衍生的注解
@Component有几个衍生的注解,只是在web开发中,会按照mvc三层架构分层!
dao【@Repository】
service【@Service】
controller【@Controller】
四个注解的功能都是一样的,都是代表将某个类注册到spring中,装配Bean
4.自动装配
@Autowired
@Resource
5.作用域
@Component//相当于<bean id="user" class="com.gong.pojo.User" />
@Scope("prototype")
public class User {
    @Value("龚成龙")//相当于<property name="name" value="龚成龙"/>
    private String name;
}
6.小结
xml与注解:
xml与注解最佳实践:
xml用来管理bean;
注解只负责完成属性的注入;
我们在使用的过程中,只需要注意一个问题:必须让注解生效,就需要开解注解的支持
<!--    指定要扫描的包,这个包下的注解就会生效-->
    <context:component-scan base-package="com.gong"/>
    <context:annotation-config/>
原文:https://www.cnblogs.com/gongchenglong/p/14128987.html