安装完路径默认为:/usr/local/nginx/conf/nginx.conf。
#user  nobody;
worker_processes  1;

#error_log  logs/error.log;
#error_log  logs/error.log  notice;
#error_log  logs/error.log  info;

#pid        logs/nginx.pid;


events {
    worker_connections  1024;
}


http {
    include       mime.types;
    default_type  application/octet-stream;

    #log_format  main  ‘$remote_addr - $remote_user [$time_local] "$request" ‘
    #                  ‘$status $body_bytes_sent "$http_referer" ‘
    #                  ‘"$http_user_agent" "$http_x_forwarded_for"‘;

    #access_log  logs/access.log  main;

    sendfile        on;
    #tcp_nopush     on;

    #keepalive_timeout  0;
    keepalive_timeout  65;

    #gzip  on;

    server {
        listen       80;
        server_name  localhost;

        #charset koi8-r;

        #access_log  logs/host.access.log  main;

        location / {
            root   html;
            index  index.html index.htm;
        }

        #error_page  404              /404.html;

        # redirect server error pages to the static page /50x.html
        #
        error_page   500 502 503 504  /50x.html;
        location = /50x.html {
            root   html;
        }

        # proxy the PHP scripts to Apache listening on 127.0.0.1:80
        #
        #location ~ \.php$ {
        #    proxy_pass   http://127.0.0.1;
        #}

        # pass the PHP scripts to FastCGI server listening on 127.0.0.1:9000
        #
        #location ~ \.php$ {
        #    root           html;
        #    fastcgi_pass   127.0.0.1:9000;
        #    fastcgi_index  index.php;
        #    fastcgi_param  SCRIPT_FILENAME  /scripts$fastcgi_script_name;
        #    include        fastcgi_params;
        #}

        # deny access to .htaccess files, if Apache‘s document root
        # concurs with nginx‘s one
        #
        #location ~ /\.ht {
        #    deny  all;
        #}
    }


    # another virtual host using mix of IP-, name-, and port-based configuration
    #
    #server {
    #    listen       8000;
    #    listen       somename:8080;
    #    server_name  somename  alias  another.alias;

    #    location / {
    #        root   html;
    #        index  index.html index.htm;
    #    }
    #}


    # HTTPS server
    #
    #server {
    #    listen       443 ssl;
    #    server_name  localhost;

    #    ssl_certificate      cert.pem;
    #    ssl_certificate_key  cert.key;

    #    ssl_session_cache    shared:SSL:1m;
    #    ssl_session_timeout  5m;

    #    ssl_ciphers  HIGH:!aNULL:!MD5;
    #    ssl_prefer_server_ciphers  on;

    #    location / {
    #        root   html;
    #        index  index.html index.htm;
    #    }
    #}

}
配置文件主要由四部分组成:main(全局设置),events事件配置、http块(http全局块和server配置)。其中server(主机配置)里面通常可以看到upstream(负载均衡服务器设置)和location(URL匹配特定位置设置)
//Nginx用户及组:用户 组。window下不指定
#user  nobody nobody;

//工作进程:数目。根据硬件调整,通常等于CPU数量或者2倍于CPU。
worker_processes  4;

#error_log  logs/error.log;
#error_log  logs/error.log  notice;
//日志文件与级别
#error_log  logs/error.log  info;

//指定存储nginx主进程进程号码的文件路径; 文件
#pid        logs/nginx.pid;

worker_rlimit_nofile 65535;
123456789101112131415
从配置文件开始到 events 块之间的内容,主要会设置一些影响nginx 服务器整体运行的配置指令,主要包括配置运行 Nginx 服务器的用户(组)、允许生成的 worker process 数,进程 PID 存放路径、日志存放路径和类型以及配置文件的引入等。
比如上面第一行配置的:
worker_processes 4;
这是 Nginx 服务器并发处理服务的关键配置,worker_processes 值越大,可以支持的并发处理量也越多,但是会受到硬件、软件等设备的制约。
指定进程可以打开的最大描述符数目。
worker_rlimit_nofile 65535;
这个指令是指当一个nginx进程打开的最多文件描述符数目,理论值应该是最多打开文件数(ulimit -n)与nginx进程数相除。
但是nginx分配请求并不是那么均匀,所以最好与ulimit -n 的值保持一致。现在在linux 2.6内核下开启文件打开数为65535,worker_rlimit_nofile就相应应该填写65535。
events 块涉及的指令主要影响 Nginx 服务器与用户的网络连接。常用的设置包括是否开启对多 work process 下的网络连接进行序列化,是否允许同时接收多个网络连接,选取哪种事件驱动模型来处理连接请求,每个 word process 可以同时支持的最大连接数等。
events {
	use epoll;
    worker_connections  1024;
}
事件处理模型配置
use [ kqueue | rtsig | epoll | /dev/poll | select | poll ]
linux建议epoll,FreeBSD建议采用kqueue,window下不指定。与apache相比nginx针对不同的操作系统,有不同的事件模型:
A)标准事件模型

select、poll属于标准事件模型,如果当前系统不存在更有效的方法,nginx会选择select或poll

B)高效事件模型

kqueue:使用于FreeBSD 4.1+, OpenBSD 2.9+, NetBSD 2.0 和 MacOS X.使用双处理器的MacOS X系统使用kqueue可能会造成内核崩溃。

epoll:使用于Linux内核2.6版本及以后的系统。

/dev/poll:使用于Solaris 7 11/99+,HP/UX 11.22+ (eventport),IRIX 6.5.15+ 和 Tru64 UNIX 5.1A+。

eventport:使用于Solaris 10。 为了防止出现内核崩溃的问题, 有必要安装安全补丁。
每个工作进程的最大连接数量
worker_connections 1024;
理论值:worker_rlimit_nofile/worker_processes。理论上每台nginx服务器的最大连接数为:worker_processes*worker_connections。注意:最大连接数也由系统的可用socket连接数限制(~64K)。
Nginx 服务器配置中最频繁的部分,代理、缓存和日志定义等绝大多数功能和第三方模块的配置都在这里。http 块也可以包括 http全局块、server 块。
http全局块
http全局块配置的指令包括文件引入、MIME-TYPE 定义、日志自定义、连接超时时间、单链接请求数上限等。
server 块
这块和虚拟主机有密切关系,虚拟主机从用户角度看,和一台独立的硬件主机是完全一样的,该技术的产生是为了节省互联网服务器硬件成本。 每个 http 块可以包括多个 server 块,而每个 server 块就相当于一个虚拟主机。 而每个 server 块也分为全局 server 块,以及可以同时包含多个 locaton 块。
http{
	#文件扩展名与文件类型映射表
    include mime.types;
    #默认文件类型
    default_type application/octet-stream;

#日志相关定义
    #log_format  main  ‘$remote_addr - $remote_user [$time_local] "$request" ‘
    #                  ‘$status $body_bytes_sent "$http_referer" ‘
    #                  ‘"$http_user_agent" "$http_x_forwarded_for"‘;
    #定义日志的格式。后面定义要输出的内容。
    #1.$remote_addr 与$http_x_forwarded_for 用以记录客户端的ip地址;
    #2.$remote_user :用来记录客户端用户名称;
    #3.$time_local :用来记录访问时间与时区;
    #4.$request  :用来记录请求的url与http协议;
    #5.$status :用来记录请求状态;
    #6.$body_bytes_sent :记录发送给客户端文件主体内容大小;
    #7.$http_referer :用来记录从那个页面链接访问过来的;
    #8.$http_user_agent :记录客户端浏览器的相关信息
    #连接日志的路径,指定的日志格式放在最后。
    #access_log  logs/access.log  main;
    #只记录更为严重的错误日志,减少IO压力
    error_log logs/error.log crit;
    #关闭日志
    #access_log  off;

    #默认编码
    #charset utf-8;
   	server_tokens off;

    #服务器名字的hash表大小
    server_names_hash_bucket_size 128;

    #客户端请求单个文件的最大字节数,比如文件上传时,如果文件超过该参数限制,就会直接被挡回去
    client_max_body_size 8m;

    #指定来自客户端请求头的hearerbuffer大小
    client_header_buffer_size 32k;

    #指定客户端请求中较大的消息头的缓存最大数量和大小。
    large_client_header_buffers 4 64k;

    #开启高效传输模式。sendfile 指向sendfile()函数。
    #sendfile()在磁盘和TCP端口(或者任意两个文件描述符)之间复制数据。
    #sendfile()直接从磁盘上读取数据到操作系统缓冲,因此会更有效率。
    sendfile        on;

    #防止网络阻塞:配置nginx在一个包中发送全部的头文件,而不是一个一个发送。
    tcp_nopush on;

    #配置nginx不要缓存数据,快速发送小数据。
    tcp_nodelay on;

    #客户端连接超时时间,单位是秒
    keepalive_timeout 60;

    #客户端请求头读取超时时间
    client_header_timeout 10;

    #设置客户端请求主体读取超时时间
    client_body_timeout 10;

    #响应客户端超时时间
    send_timeout 10;

#FastCGI相关参数是为了改善网站的性能:减少资源占用,提高访问速度。
    fastcgi_connect_timeout 300;
    fastcgi_send_timeout 300;
    fastcgi_read_timeout 300;
    fastcgi_buffer_size 64k;
    fastcgi_buffers 4 64k;
    fastcgi_busy_buffers_size 128k;
    fastcgi_temp_file_write_size 128k;

#gzip模块设置
    #开启gzip压缩输出
    gzip on;
    #前端缓存服务器缓存经过压缩的页面
    gzip_vary on;
    #为指定的客户端禁用 gzip 功能。
    gzip_disable "msie6"
    #允许或禁止基于请求、响应的压缩。设置为any,就可以gzip所有的请求。
    gzip_proxied any;
    #最小压缩文件大小
    gzip_min_length 1k;
    #压缩缓冲区
    gzip_buffers 4 16k;
    #压缩版本(默认1.1,前端如果是squid2.5请使用1.0)
    gzip_http_version 1.0;
    #压缩等级 1-9 等级越高,压缩效果越好,节约宽带,但CPU消耗大
    gzip_comp_level 2;
    #压缩类型,默认就已经包含text/html,所以下面就不用再写了,写上去也不会有问题,但是会有一个warn。
    gzip_types text/plain text/css application/json application/x-javascript text/xml application/xml application/xml+rss text/javascript;

	open_file_cache max=102400 inactive=20s;
	#这个指令指定缓存是否启用。

	open_file_cache_errors on
	语法:open_file_cache_errors on | off
	默认值:open_file_cache_errors off
	使用字段:http, server, location
	这个指令指定是否在搜索一个文件是记录cache错误.

	open_file_cache_min_uses
	语法:open_file_cache_min_uses number
	默认值:open_file_cache_min_uses 1
	使用字段:http, server, location
	这个指令指定了在open_file_cache指令无效的参数中一定的时间范围内可以使用的最小文件数,如果使用更大的值,文件描述符在cache中总是打开状态.

	open_file_cache_valid
	语法:open_file_cache_valid time
	默认值:open_file_cache_valid 60
	使用字段:http, server, location
	这个指令指定了何时需要检查open_file_cache中缓存项目的有效信息.

	例:
	open_file_cache max=1000 inactive=20s;
	open_file_cache_valid 30s;
	open_file_cache_min_uses 2;
	open_file_cache_errors on;
 }
server块分为全局server块和location块。全局 server 块 最常见的配置是本虚拟机主机的监听配置和本虚拟主机的名称或IP配置。
一个 server 块可以配置多个 location 块。 这块的主要作用是基于 Nginx 服务器接收到的请求字符串(例如 server_name/uri-string),对虚拟主机名称(也可以是IP别名)之外的字符串(例如 前面的 /uri-string)进行匹配,对特定的请求进行处理。地址定向、数据缓存和应答控制等功能,还有许多第三方模块的配置也在这里进行。
	#虚拟主机定义
    server {
        #监听端口
        listen       80;
        #访问域名 #域名可以有多个,用空格隔开
        server_name  localhost;
        #编码格式,若网页格式与此不同,将被自动转码
        #charset koi8-r;
        #虚拟主机访问日志定义
        #access_log  logs/host.access.log  main;
        #对URL进行匹配
        location / {
            #访问路径,可相对也可绝对路径
            //设置web资源路径映射;用于指明用户请求的url所对应的本地文件系统上的文档所在目录路径;
            root   html;
            #首页文件。以下按顺序匹配
            index  index.html index.htm;
        }

		#错误信息返回页面
        #error_page  404              /404.html;
        # redirect server error pages to the static page /50x.html
        #
        error_page   500 502 503 504  /50x.html;
        location = /50x.html {
            root   html;
        }

		#访问URL以.php结尾则自动转交给127.0.0.1
        # proxy the PHP scripts to Apache listening on 127.0.0.1:80

        #location ~ \.php$ {
        #    proxy_pass   http://127.0.0.1;
        #}
		#php脚本请求全部转发给FastCGI处理
        # pass the PHP scripts to FastCGI server listening on 127.0.0.1:9000
        #
        #location ~ \.php$ {
        #    root           html;
        #    fastcgi_pass   127.0.0.1:9000;
        #    fastcgi_index  index.php;
        #    fastcgi_param  SCRIPT_FILENAME  /scripts$fastcgi_script_name;
        #    include        fastcgi_params;
        #}

		#禁止访问.ht页面 (需ngx_http_access_module模块)
        # deny access to .htaccess files, if Apache‘s document root
        # concurs with nginx‘s one
        #
        #location ~ /\.ht {
        #    deny  all;
        #}
    }

	#HTTPS虚拟主机定义
    # HTTPS server
    #
    #server {
    #    listen       443 ssl;
    #    server_name  localhost;
    #    ssl_certificate      cert.pem;
    #    ssl_certificate_key  cert.key;
    #    ssl_session_cache    shared:SSL:1m;
    #    ssl_session_timeout  5m;
    #    ssl_ciphers  HIGH:!aNULL:!MD5;
    #    ssl_prefer_server_ciphers  on;
    #    location / {
    #        root   html;
    #        index  index.html index.htm;
    #    }
    #}
#Nginx运行状态,StubStatus模块获取Nginx自启动的工作状态(编译时要开启对应功能)
        #location /NginxStatus {
        #    #启用StubStatus的工作访问状态
        #    stub_status    on;
        #    #指定StubStaus模块的访问日志文件
        #    access_log    logs/Nginxstatus.log;
        #    #Nginx认证机制(需Apache的htpasswd命令生成)
        #    #auth_basic    "NginxStatus";
        #    #用来认证的密码文件
        #    #auth_basic_user_file    ../htpasswd;
        #}
访问:http://IP/NginxStatus(测试就不加密码验证相关)
#以下配置追加在HTTP的全局变量中

#nginx跟后端服务器连接超时时间(代理连接超时)
proxy_connect_timeout      5;
#后端服务器数据回传时间(代理发送超时)
proxy_send_timeout         5;
#连接成功后,后端服务器响应时间(代理接收超时)
proxy_read_timeout         60;
#设置代理服务器(nginx)保存用户头信息的缓冲区大小
proxy_buffer_size          16k;
#proxy_buffers缓冲区,网页平均在32k以下的话,这样设置
proxy_buffers              4 32k;
#高负荷下缓冲大小(proxy_buffers*2)
proxy_busy_buffers_size    64k;
#设定缓存文件夹大小,大于这个值,将从upstream服务器传
proxy_temp_file_write_size 64k;
#反向代理缓存目录
proxy_cache_path /data/proxy/cache levels=1:2 keys_zone=cache_one:500m inactive=1d max_size=1g;
#levels=1:2 设置目录深度,第一层目录是1个字符,第2层是2个字符
#keys_zone:设置web缓存名称和内存缓存空间大小
#inactive:自动清除缓存文件时间。
#max_size:硬盘空间最大可使用值。
#指定临时缓存文件的存储路径(路径需和上面路径在同一分区)
proxy_temp_path /data/proxy/temp

#服务配置
server {
    #侦听的80端口
    listen       80;
    server_name  localhost;
    location / {
        #反向代理缓存设置命令(proxy_cache zone|off,默认关闭所以要设置)
        proxy_cache cache_one;
        #对不同的状态码缓存不同时间
        proxy_cache_valid 200 304 12h;
        #设置以什么样参数获取缓存文件名
        proxy_cache_key $host$uri$is_args$args;
        #后7端的Web服务器可以通过X-Forwarded-For获取用户真实IP
        proxy_set_header Host $host;
        proxy_set_header X-Real-IP $remote_addr;
        proxy_set_header X-Forwarded-For $proxy_add_x_forwarded_for;
        #代理设置
        proxy_pass   http://IP;
        #文件过期时间控制
        expires    1d;
    }
    #配置手动清楚缓存(实现此功能需第三方模块 ngx_cache_purge)
    #http://www.123.com/2017/0316/17.html访问
    #http://www.123.com/purge/2017/0316/17.html清楚URL缓存
    location ~ /purge(/.*) {
        allow    127.0.0.1;
        deny    all;
        proxy_cache_purge    cache_one    $host$1$is_args$args;
    }
    #设置扩展名以.jsp、.php、.jspx结尾的动态应用程序不做缓存
    location ~.*\.(jsp|php|jspx)?$ {
        proxy_set_header Host $host;
        proxy_set_header X-Real-IP $remote_addr;
        proxy_set_header X-Forwarded-For $proxy_add_x_forwarded_for;
        proxy_pass http://http://IP;
    }
#负载均衡服务器池
upstream my_server_pool {
    #调度算法
    #1.轮循(默认)(weight轮循权值)
    #2.ip_hash:根据每个请求访问IP的hash结果分配。(会话保持)
    #3.fair:根据后端服务器响应时间最短请求。(upstream_fair模块)
    #4.url_hash:根据访问的url的hash结果分配。(需hash软件包)
    #参数:
    #down:表示不参与负载均衡
    #backup:备份服务器
    #max_fails:允许最大请求错误次数
    #fail_timeout:请求失败后暂停服务时间。
    server 192.168.1.109:80 weight=1 max_fails=2 fail_timeout=30;
    server 192.168.1.108:80 weight=2 max_fails=2 fail_timeout=30;
}
#负载均衡调用
server {
    ...
    location / {
    proxy_pass http://my_server_pool;
    }
}
#根据不同的浏览器URL重写
if($http_user_agent ~ Firefox){
	rewrite ^(.*)$  /firefox/$1 break;
}
if($http_user_agent ~ MSIE){
	rewrite ^(.*)$  /msie/$1 break;
}

#实现域名跳转
location / {
    rewrite ^/(.*)$ https://web8.example.com$1 permanent;
}
#限制IP访问
location / {
    deny 192.168.0.2;
    allow 192.168.0.0/24;
    allow 192.168.1.1;
    deny all;
}
更多详细配置说明参考:http://blog.csdn.net/wos1002/article/details/59212509
location简单实例如下:
location / {
        root   html;
        #首页文件。以下按顺序匹配
        index  index.html index.htm;
    }

123456
location语法格式:
location [ = | ~ | ~* | ^~ ] uri { ... }
location @name { ... }
12
在一个server中location配置段可存在多个,用于实现从uri到文件系统的路径映射。ngnix会根据用户请求的URI来检查定义的所有location,并找出一个最佳匹配,而后应用其配置。
= :用于不含正则表达式的 uri 前,要求请求字符串与 uri 严格匹配,如果匹配成功,就停止继续向下搜索并立即处理该请求。~:用于表示 uri 包含正则表达式,并且区分大小写。~*:用于表示 uri 包含正则表达式,并且不区分大小写。^~:用于不含正则表达式的 uri 前,要求 Nginx 服务器找到标识 uri 和请求字符串匹配度最高的 location 后,立即使用此 location 处理请求,而不再使用 location 块中的正则 uri 和请求字符串做匹配。注意:如果 uri 包含正则表达式,则必须要有 ~ 或者 ~* 标识
匹配优先级:=, ^~, ~/~*,不带符号。
root
设置web资源路径映射,用于指明用户请求的url所对应的本地文件系统上的文档所在目录路径,可指定相对路径也可使用绝对路径。可用的位置:http, server, location, if in location。如请求/i/top.gif,则按照如下配置目标文件为/data/w3/i/top.gif:
location /i/ {
    root /data/w3;
}
alias path
为指定路径定义一个替代值,仅能用于location上下文。如访问/i/top.gif,按照如下location配置,则目标文件为/data/w3/images/top.gif :
location /i/ {
    alias /data/w3/images/;
}
location中使用root指令和alias指令的意义不同:
参考官网文档示例:
A path to the file is constructed by merely adding a URI to the value of the root directive.
If a URI has to be modified, the alias directive should be used.
12
也就是说当使用root指令时,文件的路径构造只是把URI的值拼接在了root指令值的后面!
/3.1 location中的/
location如果没有“/”时,请求就可以模糊匹配以字符串开头的所有字符串,而有“/”时,只能精确匹配字符本身。
目标访问地址:http://192.168.88.129/edu/index.html
实例如下
  location ~  /edu/ {
	proxy_pass http://127.0.0.1:8080;
	}

 location ~  /edu {
	proxy_pass http://127.0.0.1:8080;
	}
/edu 可以匹配/edu*/*格式的路径URL,而/edu/ 只能匹配/edu/*格式的URL。这里注意到proxy_pass后面没有加/也没有加目录,则会把location的值直接拼接到proxy_pass后面。
3.2 proxy_pass中的/
目标URL地址:http://192.168.88.129/edu/index.jsp
3.2.1 location加/,proxy_pass加/不加目录
#  http://127.0.0.1:8080/edu/index.jsp --->http://127.0.0.1:8080/index.jsp
location   /edu/ {
	proxy_pass http://127.0.0.1:8080/;
	#8080后面加了/ 则将URI中index.jsp拼接到后面
}
3.2.2 location加/,proxy_pass不加/不加目录
#  http://127.0.0.1:8080/edu/index.jsp --->http://127.0.0.1:8080/edu/index.jsp
location   /edu/ {
	proxy_pass http://127.0.0.1:8080;
	#这里8080后面没有加/ 也没有加目录,则直接将请求URI拼接到后面
}
3.2.3 location加/,proxy_pass不加/加目录
#  http://127.0.0.1:8080/edu/index.jsp --->http://127.0.0.1:8080/aaindex.jsp
location   /edu/ {
	proxy_pass http://127.0.0.1:8080/aa;
}
proxy_pass加了一级目录/aa但是末尾没有加/,而且location中末尾加了/,则将请求URI进行切割得到index.jsp拼接到proxy_pass后面。
3.2.4 location加/,proxy_pass加/加目录
#  http://127.0.0.1:8080/edu/index.jsp --->http://127.0.0.1:8080/aa/index.jsp
location   /edu/ {
	proxy_pass http://127.0.0.1:8080/aa/;
}
也就是说如果proxy_pass加了目录,则会从URI-location得到的结果进行拼接。
3.2.5 location末尾不加/,proxy_pass加/不加目录
#  http://127.0.0.1:8080/edu/index.jsp --->http://127.0.0.1:8080//index.jsp
# 注意//
location   /edu {
	proxy_pass http://127.0.0.1:8080/;
	#8080后面加了/ 则将URI中/index.jsp拼接到后面
}
3.2.6 location末尾不加/,proxy_pass不加/不加目录
#  http://127.0.0.1:8080/edu/index.jsp --->http://127.0.0.1:8080/edu*/index.jsp
location   /edu {
	proxy_pass http://127.0.0.1:8080;
	#这里8080后面没有加/ 也没有加目录,则直接将请求URI拼接到后面
}
3.2.7 location末尾不加/,proxy_pass不加/加目录
#  http://127.0.0.1:8080/edu/index.jsp --->http://127.0.0.1:8080/aa/index.jsp
location   /edu {
	proxy_pass http://127.0.0.1:8080/aa;
}
3.2.8 location末尾不加/,proxy_pass加/加目录
#  http://127.0.0.1:8080/edu/index.jsp --->http://127.0.0.1:8080/aa//index.jsp
location   /edu {
	proxy_pass http://127.0.0.1:8080/aa/;
}
也就是说如果proxy_pass加了目录,则会从URI-location得到的结果进行拼接。
但是如下配置将会提示错误:
  location  ~ /edu {
	proxy_pass http://127.0.0.1:8080/;
	}

  location  ~ /edu/ {
	proxy_pass http://127.0.0.1:8080/;
	}
nginx: [emerg] “proxy_pass” cannot have URI part in location given by regular expression, or inside named location, or inside “if” statement, or inside “limit_except” block in /usr/local/nginx/conf/nginx.conf:54
这里以图片实例,将图片存储在/usr/local/nginx/image路径下。
nginx配置文件实例如下:
 location ~* \.(jpg|png|jpeg)$ {
        root /usr/local/nginx/;
        expires 3d;
  }
通过 location 指定不同的后缀名实现不同的请求转发。通过 expires 参数设置,可以使浏览器缓存过期时间,减少与服务器之前的请求和流量。具体 Expires 定义:是给一个资源设定一个过期时间,也就是说无需去 服务端验证,直接通过浏览器自身确认是否过期即可,所以不会产生额外的流量。此种方法非常适合不经常变动的资源。(如果经常更新的文件,不建议使用 Expires 来缓存)。
如这里设置 3d ,表示在这 3 天之内访问这个 URL ,发送一个请求,比对服务器该文件最后更新时间没有变化,则不会从服务器抓取,返回状态码 304如果有修改,则直接从服务器重新下载,返回状态码 200 。
浏览器访问如下http://192.168.88.129/image/1.jpg:

这里需要注意浏览器访问uri是/image/1.jpg,这个location拦截后会拼接到root后去服务器找,也就是/usr/local/nginx/image/1.jpg!
如下所示,访问image路径然后展示其下(location里面映射的路径)的文件列表。
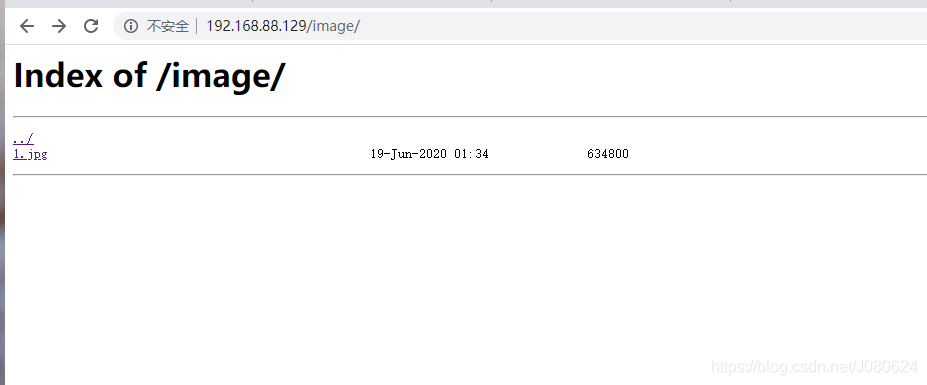
这里需要用到autoindex 指令,也就是ngx_http_autoindex_module 模块。其往往用于处理以/结尾的请求并展示一个路径下内容列表。配置实例如下:
 location /image/ {
	root /usr/local/nginx/;
	autoindex on;
}
1234
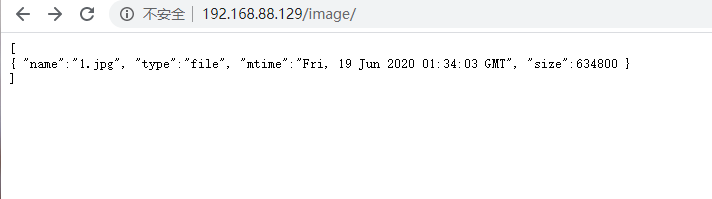
也可以返回json格式:
  location /image/ {
	root /usr/local/nginx/;
	autoindex on;
	autoindex_format json;
 }
12345
更多内容可以参考官网:http://nginx.org/en/docs/http/ngx_http_autoindex_module.html
当配置文件修改后并不会立即生效,nginx会仍旧使用原先的nginx.conf。除非你重启nginx或者使用命令nginx -s reload重新加载配置文件。
nginx -s reload 执行命令后发生哪些事情?当master process接收到重载配置的信号时,首先会检测nginx.conf配置文件的语法。如果语法格式正确,它将会创建新的worker processes去处理请求并发送指令给原先的worker processes 要求他们退出。如果语法格式不正确,master会回滚那些改变并继续使用老的配置文件工作。
老的worker processes接收到退出命令后,将会停止接收新的请求然后继续服务当前已接收到的请求,直到当前请求处理完时,老的worker processes 将会退出。
日志实例如下:
//接收到重新读取配置文件指令
2020/06/12 17:16:57 [notice] 14793#0: signal process started
2020/06/12 17:16:57 [notice] 3983#0: signal 1 (SIGHUP) received from 14793, reconfiguring  //3983是master  process的进程ID
2020/06/12 17:16:57 [notice] 3983#0: signal 1 (SIGHUP) received from 14793, reconfiguring
2020/06/12 17:16:57 [notice] 3983#0: reconfiguring
2020/06/12 17:16:57 [notice] 3983#0: reconfiguring
2020/06/12 17:16:57 [notice] 3983#0: using the "epoll" event method
2020/06/12 17:16:57 [notice] 3983#0: using the "epoll" event method
2020/06/12 17:16:57 [notice] 3983#0: start worker processes  //启动新的进程14794
2020/06/12 17:16:57 [notice] 3983#0: start worker processes
2020/06/12 17:16:57 [notice] 3983#0: start worker process 14794
2020/06/12 17:16:57 [notice] 3983#0: start worker process 14794
2020/06/12 17:16:57 [notice] 14747#0: gracefully shutting down  //老的进程平滑退出
2020/06/12 17:16:57 [notice] 14747#0: gracefully shutting down
2020/06/12 17:16:57 [notice] 14747#0: exiting
2020/06/12 17:16:57 [notice] 14747#0: exiting
2020/06/12 17:16:57 [notice] 14747#0: exit
2020/06/12 17:16:57 [notice] 3983#0: signal 17 (SIGCHLD) received from 14747
2020/06/12 17:16:57 [notice] 3983#0: signal 17 (SIGCHLD) received from 14747
2020/06/12 17:16:57 [notice] 3983#0: worker process 14747 exited with code 0
2020/06/12 17:16:57 [notice] 3983#0: worker process 14747 exited with code 0
2020/06/12 17:16:57 [notice] 3983#0: signal 29 (SIGIO) received
2020/06/12 17:16:57 [notice] 3983#0: signal 29 (SIGIO) received

123456789101112131415161718192021222324
首先,对于每个worker 进程来说,独立的进程,不需要加锁,所以省掉了锁带来的开销,同时在编程以及问题查找时,也会方便很多。其次,采用独立的进程,可以让互相之间不会影响,一个进程退出后,其它进程还在工作,服务不会中断, master 进程则很快启动新的worker 进程。当然, worker 进程的异常退出,肯定是程序有 bug 了,异常退出,会导致当前 worker 上的所有请求失败,不过不会影响到所有请求,所以降低了风险。
Nginx同 redis 类似都采用了 io 多路复用机制,每个 worker 都是一个独立的进程,但每个进程里只有一个主线程,通过异步非阻塞的方式来处理请求, 即使是千上万个请求也不在话下。每个 worker 的线程可以把一个 cpu 的性能发挥到极致。
所以 worker 数和服务器的 cpu数相等是最为适宜的。设少了会浪费 cpu ,设多了会造成 cpu 频繁切换上下文带来的损耗。
这个值是表示每个worker 进程所能建立连接的最大值。所以,一个 nginx 能建立的最大连接
数,应该是 worker_connections * worker_processes 。理论值:worker_rlimit_nofile/worker_processes。注意:最大连接数也由系统的可用socket连接数限制(~64K)。
当然,这里说的是最大连接数。那么请求并发数呢?
对于HTTP 请求本地资源来说,能够支持的最大连接数量是 worker_connections *worker_processes 。如果是支持 http1.1 的浏览器每次访问要占两个连接,所以普通的静态访问最大并发数是:worker_connections*worker_processes /2 。
而如果是 HTTP 作 为反向代理来说,最大并发数量应该是 worker_connections*worker_processes/4。因为作为反向代理服务器,每个并发会建立与客户端的连接和与后端服务的连接,会占用两个连接。
发送请求,占用了worker几个连接数?
2个或者四个。如果访问静态资源,那么worker可以找静态资源然后返回,这时是两个。但是如果作为反向代理服务器,访问Java项目,这时是四个。
原文:https://www.cnblogs.com/ly447742/p/14241768.html