日常开始种难免会需要定时的去调用某些功能,这个时候就需要写一个定时任务。
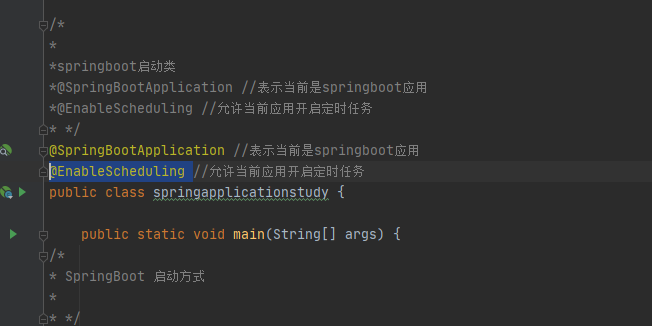
@EnableScheduling
package com.caicai.springboot.study;

import org.springframework.boot.Banner;
import org.springframework.boot.SpringApplication;
import org.springframework.boot.WebApplicationType;
import org.springframework.boot.autoconfigure.SpringBootApplication;
import org.springframework.boot.builder.SpringApplicationBuilder;
import org.springframework.scheduling.annotation.EnableScheduling;

/*
*
*springboot启动类
*@SpringBootApplication //表示当前是springboot应用
*@EnableScheduling //允许当前应用开启定时任务
* */
@SpringBootApplication //表示当前是springboot应用
@EnableScheduling //允许当前应用开启定时任务
public class springapplicationstudy {

    public static void main(String[] args) {
/*
* SpringBoot 启动方式
*
* */
        //1.通过静态run方式启动
//        SpringApplication.run(springapplicationstudy.class,args);
        //2、通过API 来调整应用行为
//        SpringApplication application = new SpringApplication(springapplicationstudy.class);
//         //不打印Spring boot LOGe
//        application.setBannerMode(Banner.Mode.OFF);
//        //修改启动属性不是web形式。运行程序会自动退出,如不设置这个,则不会自动退出
//        application.setWebApplicationType(WebApplicationType.NONE);
//
//        application.run(args);
           //3. SpringApplicationBuilder Fluent Api ,链式调用.
           //直接使用‘.‘
          new SpringApplicationBuilder(springapplicationstudy.class)
                  .bannerMode(Banner.Mode.OFF)
                  //.web(WebApplicationType.NONE)
                  .run(args);


    }
}
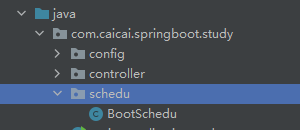
2、在目录文件下创建一个包,然后一个class
3、SpringBoot 定时任务是需要一个Springboot Bean 虽然不需要主动调用它,但是还是需要spring 能够扫描到它
在类前面加入 注解
@Component  //表示当前是spring Bean

在类里面需要写多个定时任务方法,需要在方法之前加入一个
@Scheduled注解

Scheduled 具体方法如下:
//
// Source code recreated from a .class file by IntelliJ IDEA
// (powered by FernFlower decompiler)
//

package org.springframework.scheduling.annotation;

import java.lang.annotation.Documented;
import java.lang.annotation.ElementType;
import java.lang.annotation.Repeatable;
import java.lang.annotation.Retention;
import java.lang.annotation.RetentionPolicy;
import java.lang.annotation.Target;

@Target({ElementType.METHOD, ElementType.ANNOTATION_TYPE})
@Retention(RetentionPolicy.RUNTIME)
@Documented
@Repeatable(Schedules.class)
public @interface Scheduled {
    String CRON_DISABLED = "-";

    String cron() default "";

    String zone() default "";

    long fixedDelay() default -1L;

    String fixedDelayString() default "";

    long fixedRate() default -1L;

    String fixedRateString() default "";

    long initialDelay() default -1L;

    String initialDelayString() default "";
}
使用示例:
package com.caicai.springboot.study.schedu;

import lombok.extern.slf4j.Slf4j;
import org.springframework.scheduling.annotation.Scheduled;
import org.springframework.stereotype.Component;

import java.time.LocalDateTime;
import java.time.format.DateTimeFormatter;

/*
* Springboot 定时任务
*  @Component  bean注解
*   @Slf4j   日志注解
*springboot 要求定时任务要是一个spring bean,虽然不用主动调用,但是还是需要让spring能到扫描到这个bean
* */
@Component  //让程序知道这个是一个bean
@Slf4j   //直接调用log4j
public class BootSchedu {

    private final DateTimeFormatter fmt = DateTimeFormatter.ofPattern("HH:mm:ss");
    /*
    * 上一次开始执行时间之后3000毫秒在执行
    * */
    @Scheduled(fixedRate = 3000)
    public void schedu01(){
         log.info("schedu01: {}", LocalDateTime.now().format(fmt));
    }
    /*
    * 上次一次执行完毕之后3000毫秒执行
    *
    * */
    @Scheduled(fixedDelay = 3000)
    public void schedu02(){
        log.info("schedu02: {}", LocalDateTime.now().format(fmt));
    }

    /*
    * 第一次延迟2000毫秒之后执行,之后按照每3000毫秒执行
    *
    * */
    @Scheduled(initialDelay = 2000,fixedRate = 3000)
    public void schedu03(){
        log.info("schedu03: {}", LocalDateTime.now().format(fmt));
    }
    /*
    * 每三秒执行一次
    *
    * */

    @Scheduled(cron = "*/3 * * * * ?")
    public void  schedu04(){

        log.info("schedu04: {}",LocalDateTime.now().format(fmt));

    }

}
原文:https://www.cnblogs.com/caicai920/p/14337270.html