1、创建springboot-web工程
2、添加依赖
    <dependency>
            <groupId>io.springfox</groupId>
            <artifactId>springfox-swagger2</artifactId>
            <version>2.9.2</version>
        </dependency>

        <dependency>
            <groupId>io.springfox</groupId>
            <artifactId>springfox-swagger-ui</artifactId>
            <version>2.9.2</version>
        </dependency>
3、添加配置类
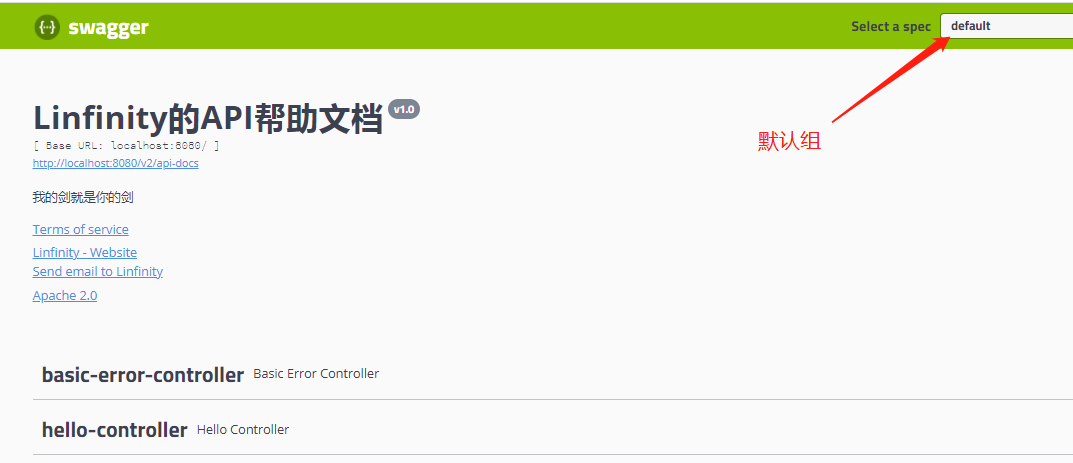
@Configuration
@EnableSwagger2 //启用Swagger
public class SwaggerConfig {

    @Bean
    public Docket docket(){
        return new Docket(DocumentationType.SWAGGER_2)
                //配置Swagger信息
                .apiInfo(apiInfo())
                //配置是否启动Swagger,默认为true不需要配置
                .enable(true)
                //配置扫描范围
                .select()
                .apis(RequestHandlerSelectors.basePackage("com.linfinity.swagger.web"))
                .build();
    }

    //配置Swagger描述信息
    private ApiInfo apiInfo(){
        //作者信息
        Contact contact = new Contact("Linfinity", "https://www.cnblogs.com/dominik/", "ljl1056@gmail.com");

        return new ApiInfo(
                "Linfinity的API帮助文档",   //Swager帮助文档标题
                "我的剑就是你的剑",     //个人描述
                "v1.0",                 //版本号
                "https://www.cnblogs.com/dominik/",  //关于你团队的网站
                contact,
                "Apache 2.0",   //开源版本号
                "http://www.apache.org/licenses/LINCENSES-2.0",
                new ArrayList()
        );
    }
}
4、测试访问
http://localhost:8080/swagger-ui.html
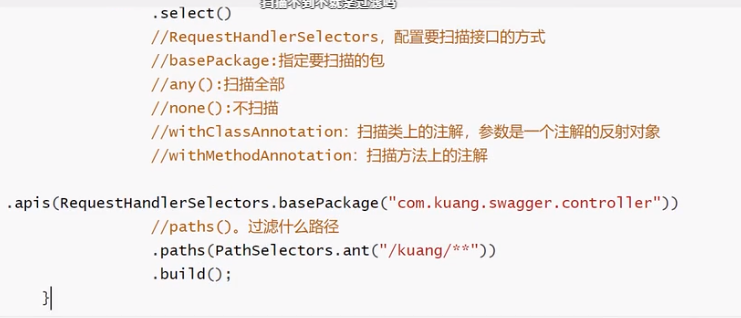
1、扫描范围功能
2、配置只在开发环境时启用Swagger
1)配置环境启用dev
spring.profiles.active=dev
2)通过env判断是否在dev环境
3)设置enable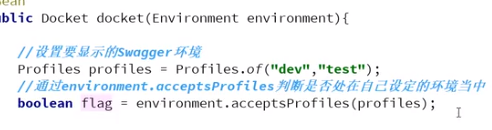

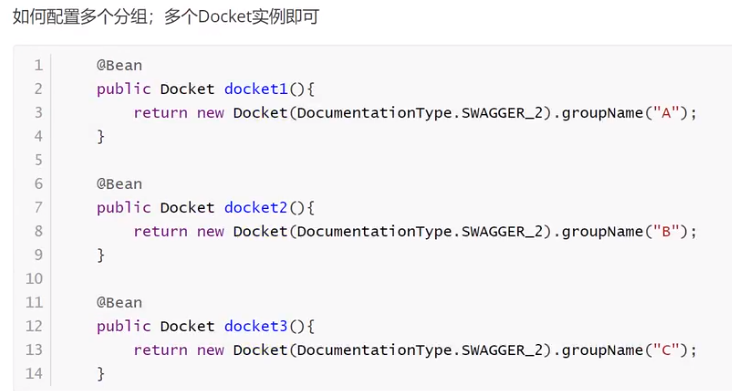
3、配置多个分组
每个开发者应该有一个自己的分组,分组内扫描自己写的api
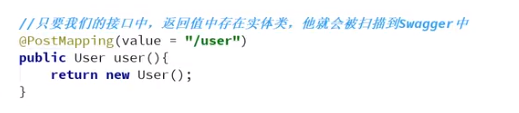
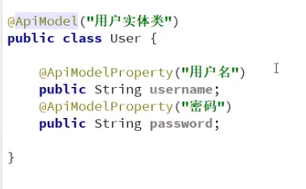
1、实体类注解
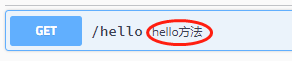
2、方法注释
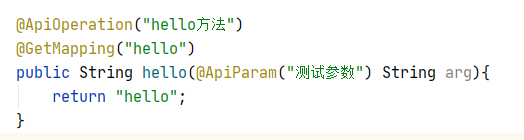
3、参数注释


原文:https://www.cnblogs.com/dominik/p/14347047.html