使用jenkins动态slave的优势:
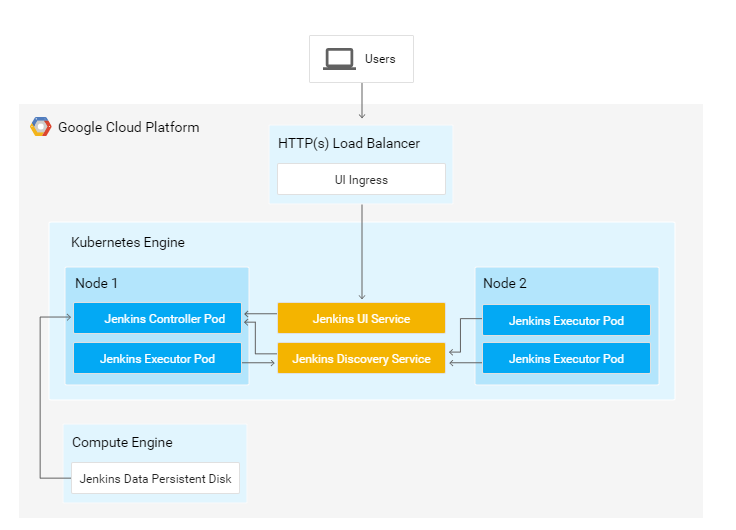
架构图如下:
1、创建namespace
kubectl create ns kube-ops
2、设置rba授权
[root@node1 mingyang]# cat rbac.yaml
apiVersion: v1
kind: ServiceAccount
metadata:
  name: jenkins
  namespace: kube-ops

---
kind: ClusterRole
apiVersion: rbac.authorization.k8s.io/v1beta1
metadata:
  name: jenkins
rules:
  - apiGroups: ["extensions", "apps"]
    resources: ["deployments"]
    verbs: ["create", "delete", "get", "list", "watch", "patch", "update"]
  - apiGroups: [""]
    resources: ["services"]
    verbs: ["create", "delete", "get", "list", "watch", "patch", "update"]
  - apiGroups: [""]
    resources: ["pods"]
    verbs: ["create","delete","get","list","patch","update","watch"]
  - apiGroups: [""]
    resources: ["pods/exec"]
    verbs: ["create","delete","get","list","patch","update","watch"]
  - apiGroups: [""]
    resources: ["pods/log"]
    verbs: ["get","list","watch"]
  - apiGroups: [""]
    resources: ["secrets"]
    verbs: ["get"]

---
apiVersion: rbac.authorization.k8s.io/v1beta1
kind: ClusterRoleBinding
metadata:
  name: jenkins
  namespace: kube-ops
roleRef:
  apiGroup: rbac.authorization.k8s.io
  kind: ClusterRole
  name: jenkins
subjects:
  - kind: ServiceAccount
    name: jenkins
    namespace: kube-ops
3、创建jenkins deployment文件
[root@node1 mingyang]# cat  jenkins.yaml
---
apiVersion: apps/v1
kind: Deployment
metadata:
  name: jenkins
  namespace: kube-ops
spec:
  selector:
     matchLabels:
       app: jenkins
  template:
    metadata:
      labels:
        app: jenkins
    spec:
      terminationGracePeriodSeconds: 10
      serviceAccount: jenkins
      containers:
      - name: jenkins
        image: jenkins/jenkins:lts
        imagePullPolicy: IfNotPresent
        ports:
        - containerPort: 8080
          name: web
          protocol: TCP
        - containerPort: 50000
          name: agent
          protocol: TCP
        resources:
          limits:
            cpu: 1000m
            memory: 1Gi
          requests:
            cpu: 500m
            memory: 512Mi
        livenessProbe:
          httpGet:
            path: /login
            port: 8080
          initialDelaySeconds: 60
          timeoutSeconds: 5
          failureThreshold: 12
        readinessProbe:
          httpGet:
            path: /login
            port: 8080
          initialDelaySeconds: 60
          timeoutSeconds: 5
          failureThreshold: 12
        volumeMounts:
        - name: jenkinshome
          subPath: jenkins
          mountPath: /var/jenkins_home
        env:
        - name: LIMITS_MEMORY
          valueFrom:
            resourceFieldRef:
              resource: limits.memory
              divisor: 1Mi
        - name: JAVA_OPTS
          value: -Xmx$(LIMITS_MEMORY)m -XshowSettings:vm -Dhudson.slaves.NodeProvisioner.initialDelay=0 -Dhudson.slaves.NodeProvisioner.MARGIN=50 -Dhudson.slaves.NodeProvisioner.MARGIN0=0.85 -Duser.timezone=Asia/Shanghai
      securityContext:
        fsGroup: 1000
      volumes:
      - name: jenkinshome
        hostPath:
          path: /data/jenkins_home
          type: DirectoryOrCreate

---
apiVersion: v1
kind: Service
metadata:
  name: jenkins
  namespace: kube-ops
  labels:
    app: jenkins
spec:
  selector:
    app: jenkins
  type: NodePort
  ports:
  - name: web
    port: 8080
    targetPort: web
    nodePort: 30002
  - name: agent
    port: 50000
    targetPort: agent
4、给jenkins家目录授权
chown -R 1000 /data/jenkins_home/
5、运行情况

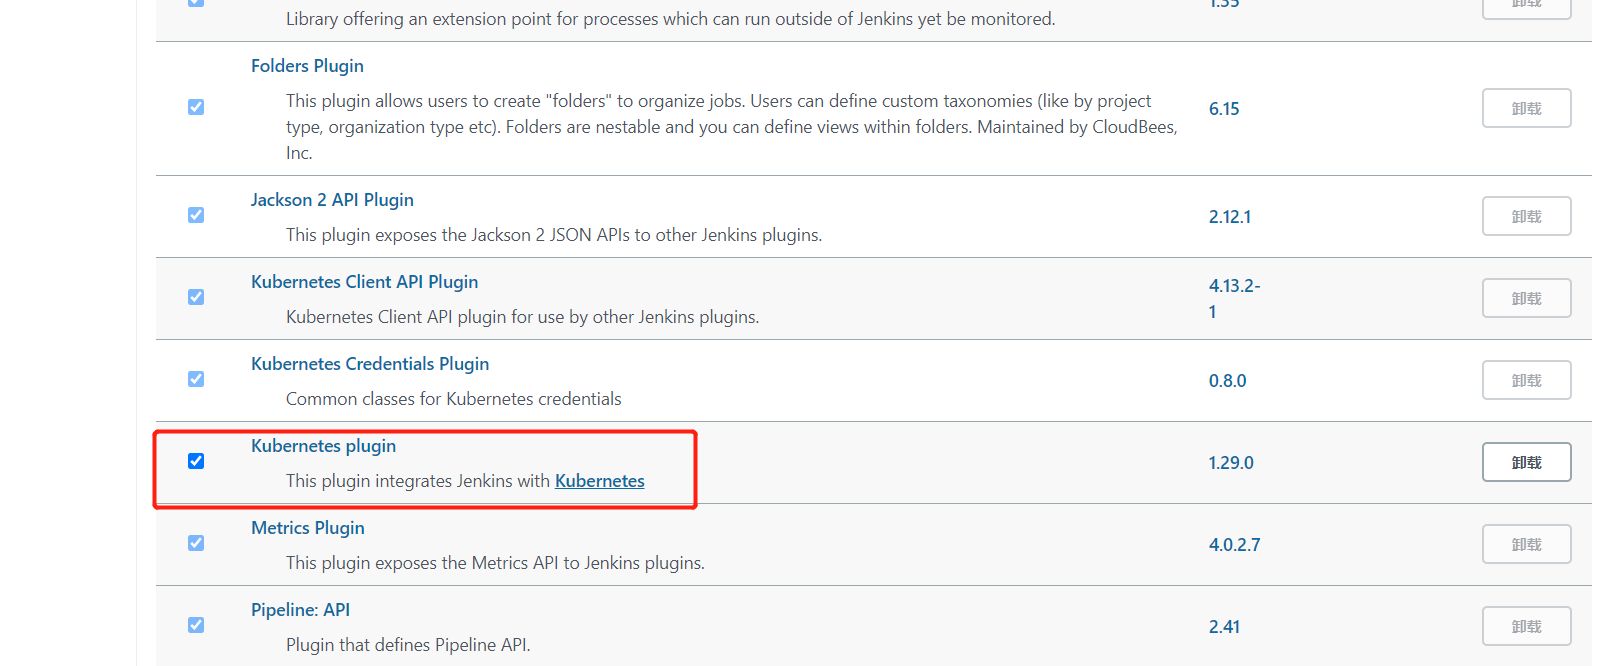
6、安装kubernetes插件Kubernetes plugin。
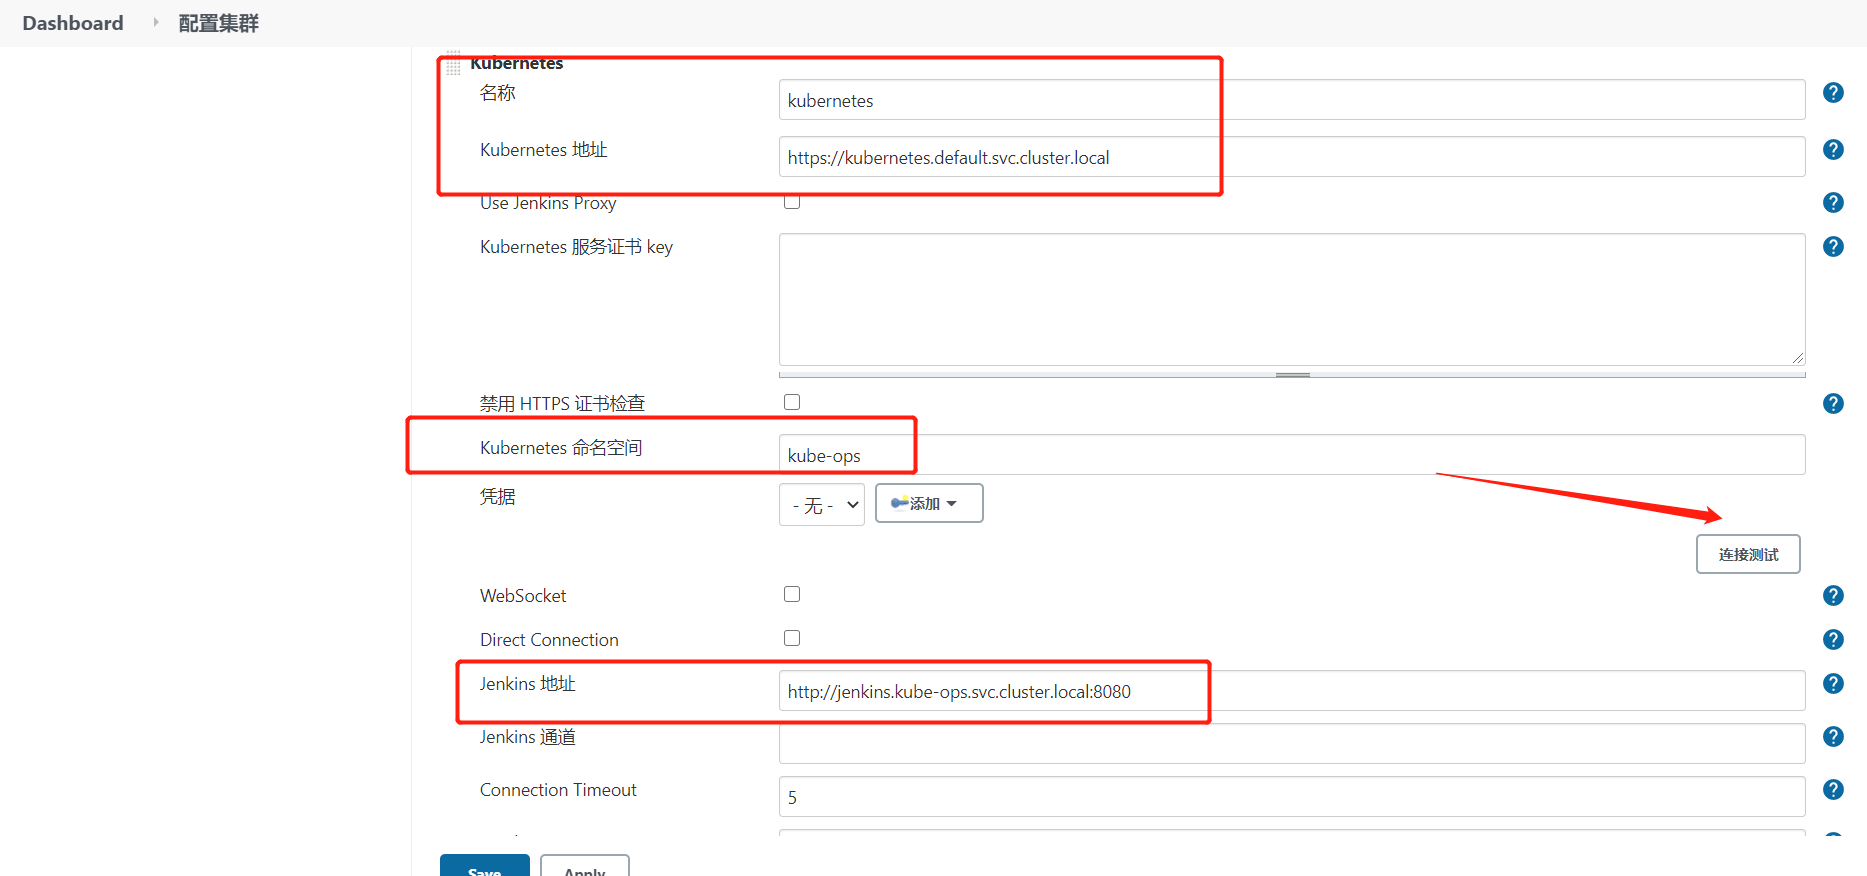
7、配置kubernetes
8、这一步是核心,添加pod templates。标签列表是到时编写pipeline要关联的。
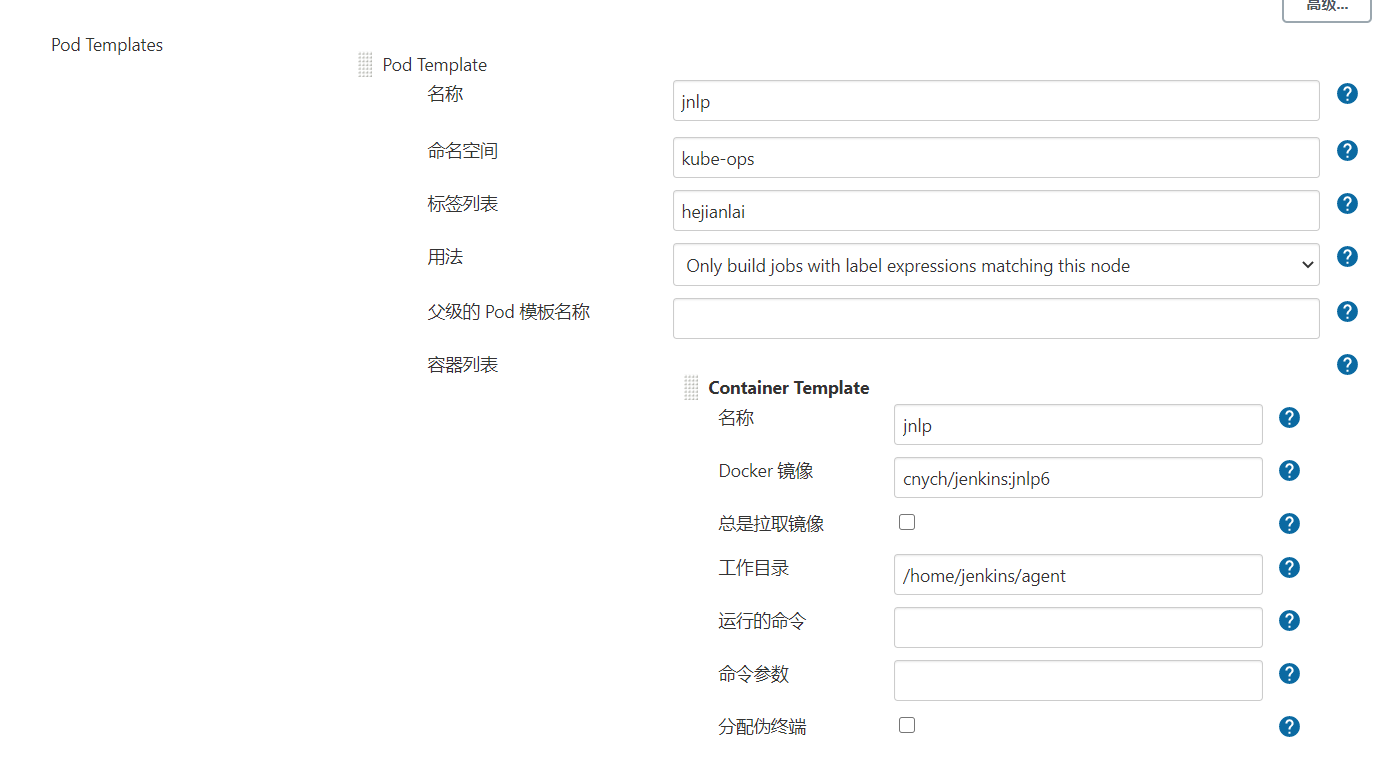
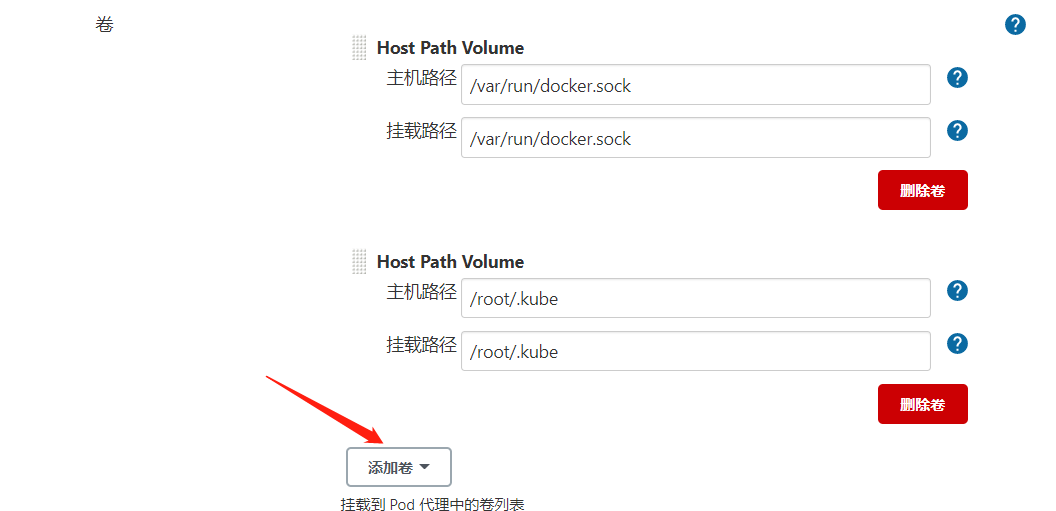
9、添加两个挂载卷 分别是docker及kubectl 工具
10、测试pipeline
node(‘hejianlai‘) {
    stage(‘Clone‘) {
      echo "1.Clone Stage"
    }
    stage(‘Test‘) {
      echo "2.Test Stage"
    }
    stage(‘Build‘) {
      echo "3.Build Docker Image Stage"
    }
    stage(‘Push‘) {
      echo "4.Push Docker Image Stage"
    }
    stage(‘YAML‘) {
      echo "5. Change YAML File Stage"
    }
    stage(‘Deploy‘) {
      echo "6. Deploy Stage"
    }
}
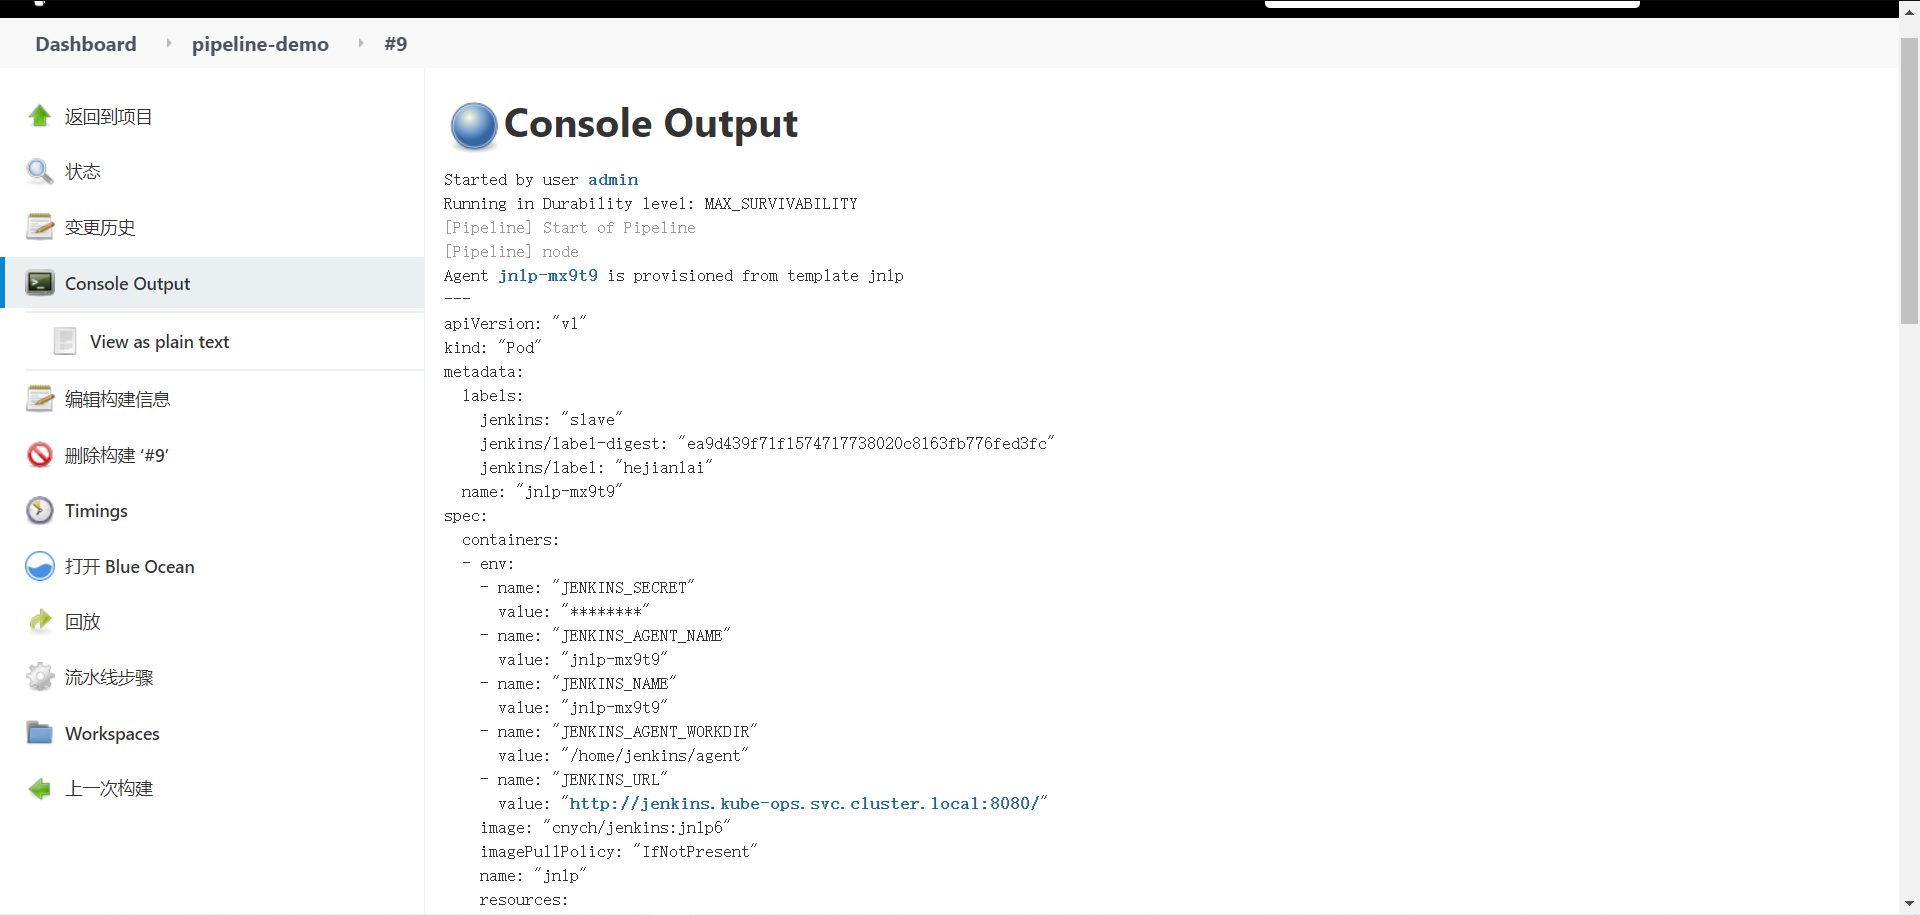
11、运行结果,slave执行完任务之后自动销毁。

原文:https://www.cnblogs.com/Dev0ps/p/14398329.html