背景:
网络安全法第三章第二十一条明确规定“采取监测、记录网络运行状态、网络安全事件的技术措施,并按照规定留存相关的网络日志不少于六个月”。
为了满足合规性的要求,应当建设相应的日志采集存储系统。
市面上不少日志系统价格不菲,所以考虑在Centos 7.6环境下,基于MariaDB 和 Rsyslog,搭建开源免费的日志采集分析系统LogAnalyzer。
当然啦,ELK也可以,Prometheus + Grafana也OK。
本文参考了不少网络资料,感谢热爱分享的人们!
-------------------------------------------------------------------------------------------------------------------------------------------------------------
软件:
① VMware Workstation 15 Player
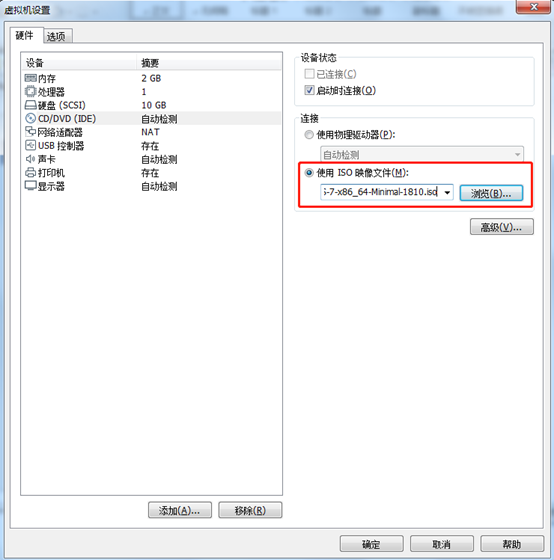
② CentOS-7-x86_64-Minimal-1810.iso
③ loganalyzer-4.1.11.tar.gz
④ loganalyzer-4.1.11中文语言包.zip
-------------------------------------------------------------------------------------------------------------------------------------------------------------
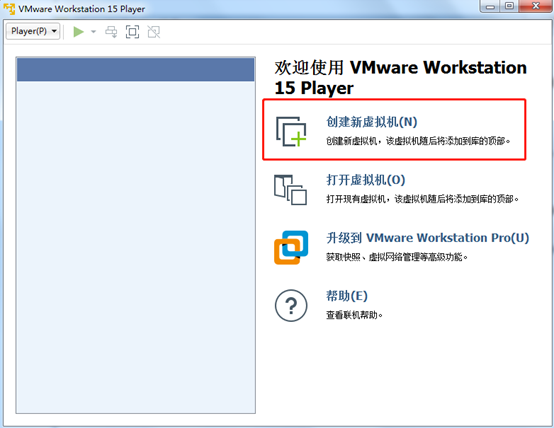
1、创建新虚拟机
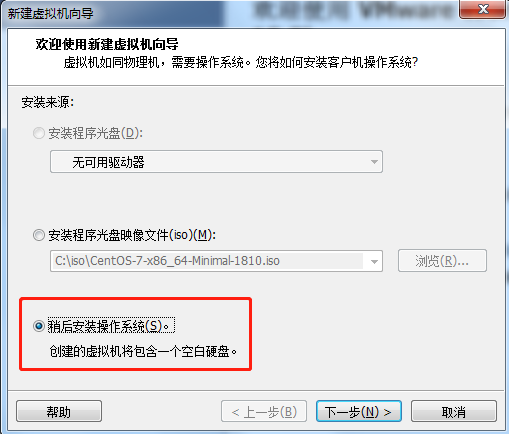
2、稍后安装操作系统
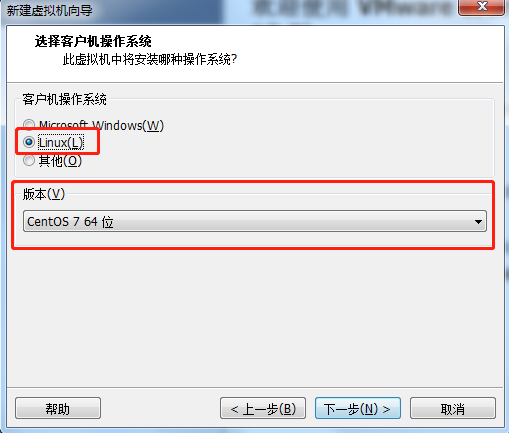
3、选择Linux,版本为CentOS 7 64位
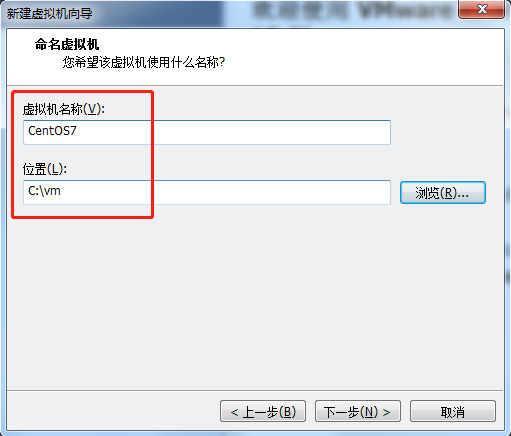
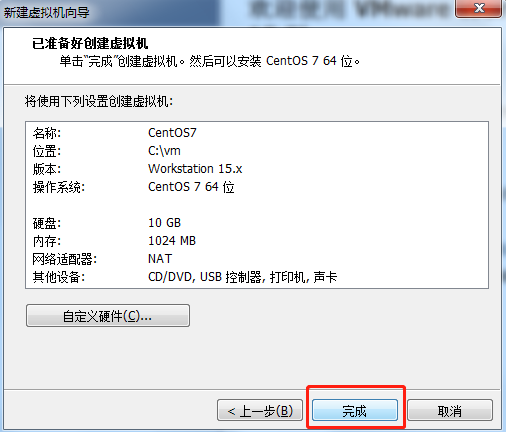
4、填写虚拟机名称:CentOS7,位置为C:\vm
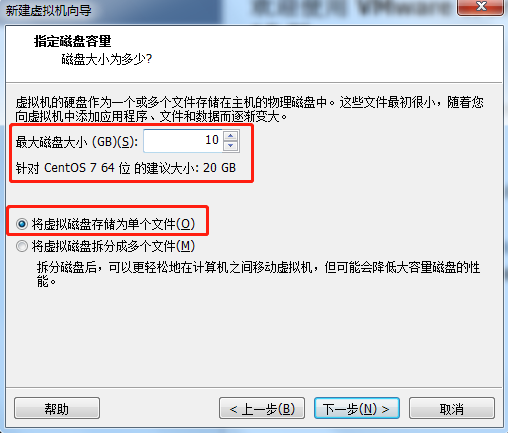
5、设置磁盘大小为10G,选择将虚拟磁盘存储为单个文件
6、点击完成
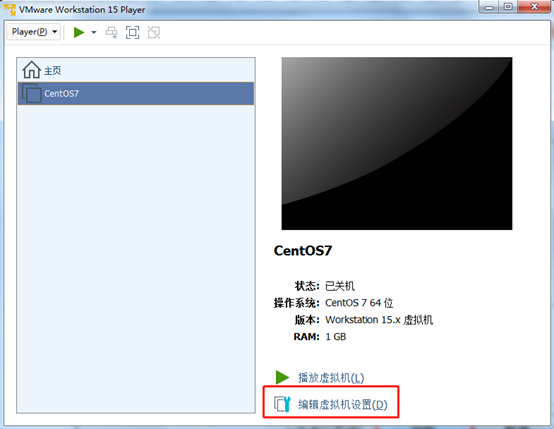
7、点击编辑虚拟机设置
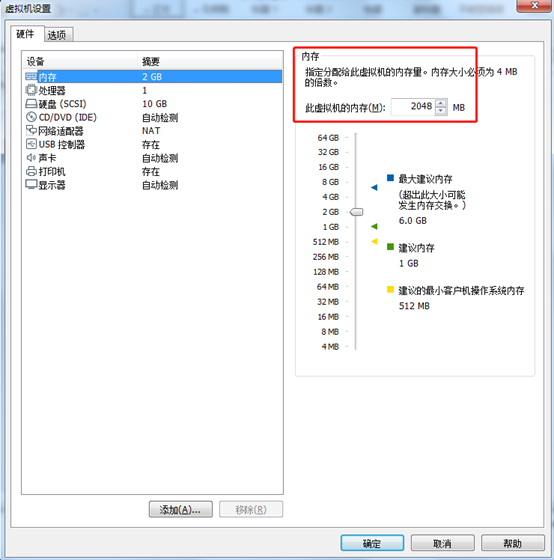
8、设置内存为2048MB
9、设置CD/DVD,使用的ISO文件为CentOS-7-x86_64-Minimal-1810.iso
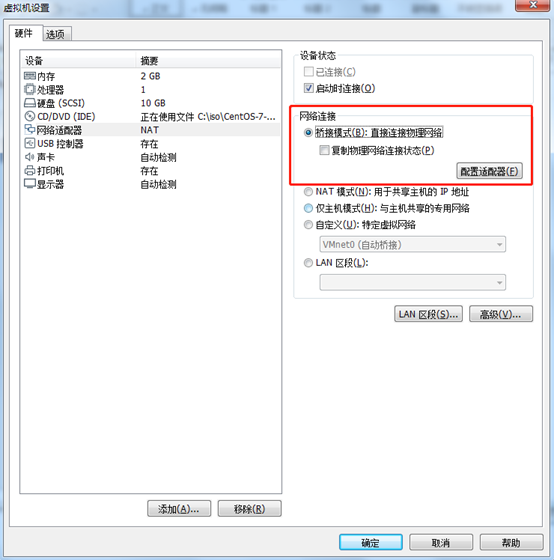
10、设置网络适配器,网络连接为桥接模式
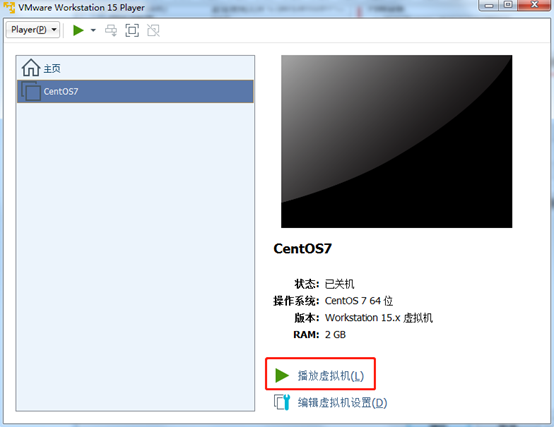
11、播放虚拟机
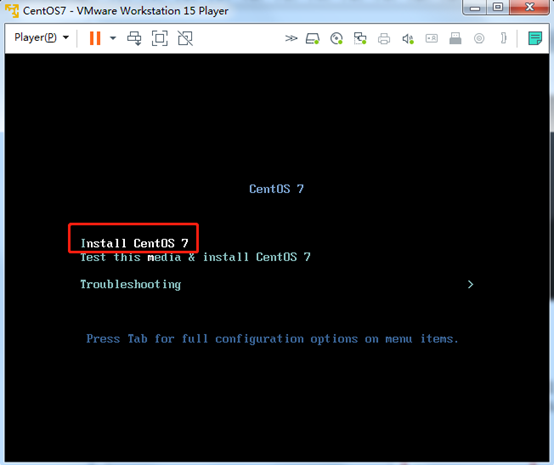
12、键盘上下键选中Install CentOS 7
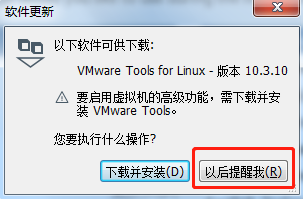
13、出现VMware Tools,点击以后提醒我
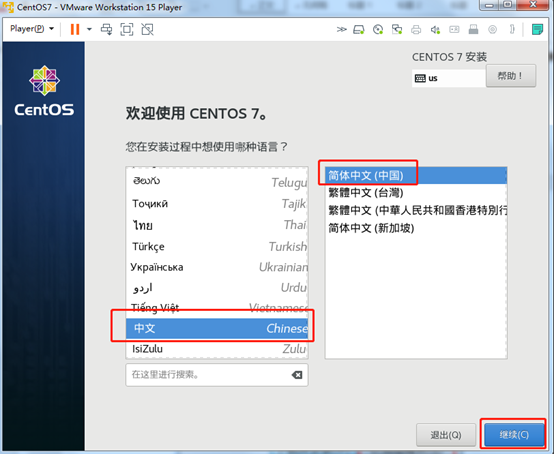
14、选中语言为中文
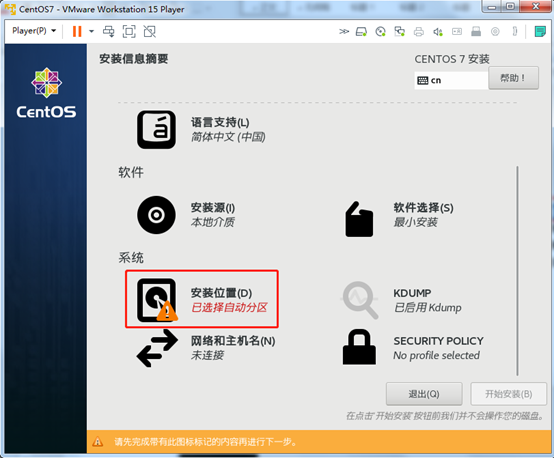
15、点击系统,选择安装位置
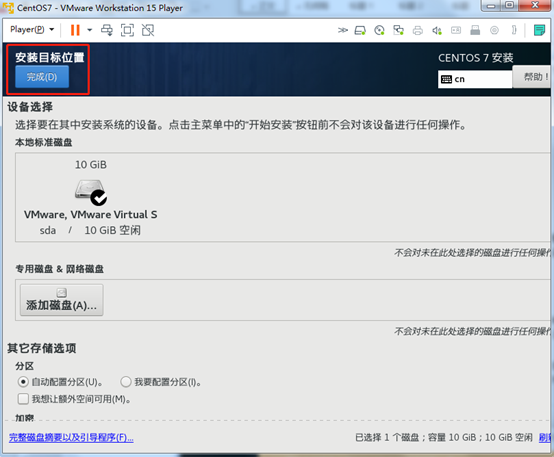
16、使用自动配置分区,点击完成
17、点击开始安装
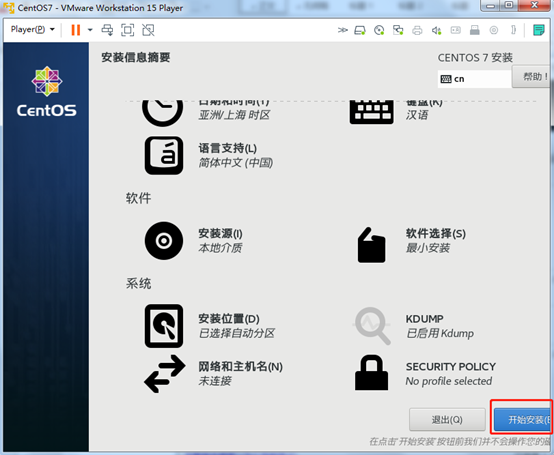
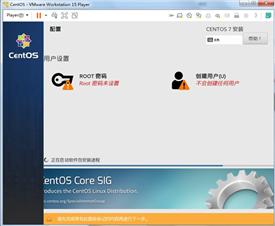
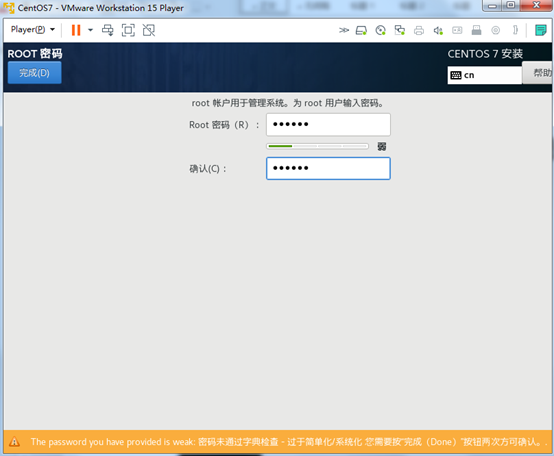
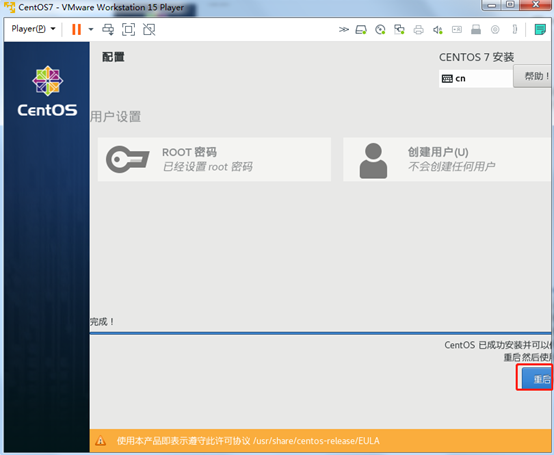
18、点击ROOT密码进行设置
19、设置ROOT密码为123456
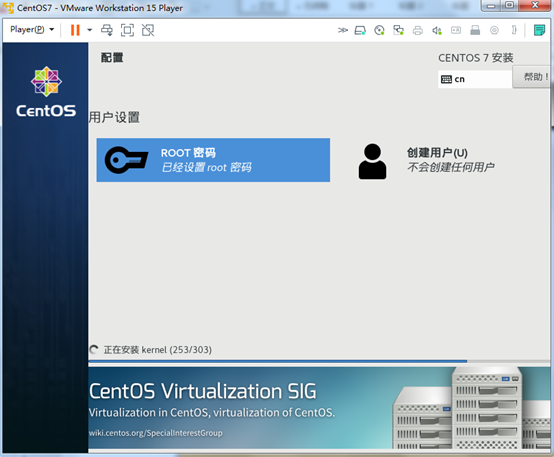
20、正在安装
21、安装完成后重启虚拟机
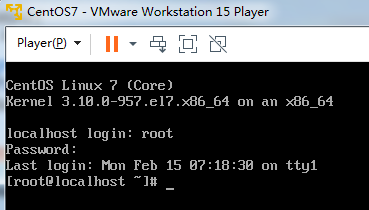
22、重启后,输入账号:root,输入密码:123456进入系统
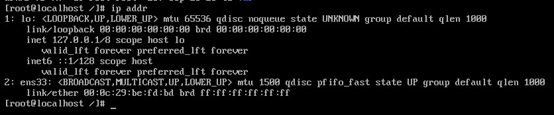
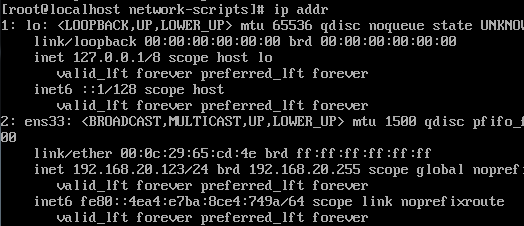
23、输入:cd /,输入:ip addr查看网络配置
24、输入:cd /etc/sysconfig/network-scripts/,输入:ls查看目录

25、输入:vi ifcfg-ens33,默认配置如下:
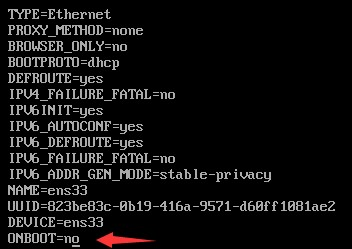
修改为如下:
BOOTPROTO=static
ONBOOT=yes
IPADDR=192.168.20.123
NETMASK=255.255.255.0
GATEWAY=192.168.20.240
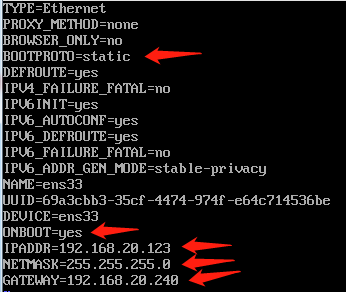
输入:wq,进行保存
26、输入:service network restart,重启网络服务
27、尝试ping一下百度,输入:ping www.baidu.com,发现ping不通,怀疑是DNS问题

28、需要设置DNS,
输入:vi /etc/resolv.conf

29、填写DNS内容,
输入:nameserver 114.114.114.114
输入:nameserver 8.8.8.8

输入:wq,进行保存
30、再次重启网络服务,
输入:service network restart
31、再次输入:ping www.baidu.com,这下能ping通了

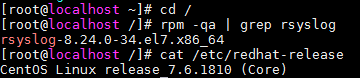
32、查看rsyslog是否安装,以及CentOS版本信息,
输入:cd /,输入:rpm –qa | grep rsyslog
输入:cat /etc/redhat-release
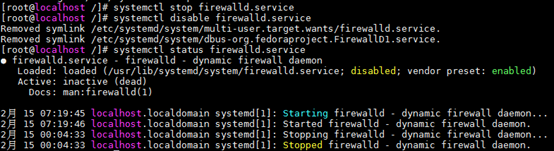
33、关闭防火墙,
输入:systemctl stop firewalld.service
输入:systemctl disable firewalld.service
输入:systemctl status firewalld.service
34、关闭selinux,输入:vi /etc/selinux/config,修改后重启操作系统

默认如下

设置SELINUX=disabled

35、查看MariaDB是否安装,输入:cd /,输入:rpm –qa | grep mariadb,发现只有mariadb-libs

36、安装MariaDB服务,
输入:yum -y install mariadb mariadb-server
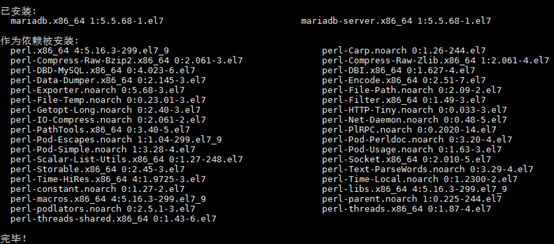
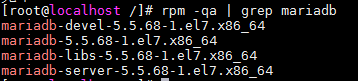
37、再次查看MariaDB安装情况,输入:rpm –qa | grep mariadb
38、启动MariaDB服务,并设置为开机启动,
输入:systemctl start mariadb.service,
输入:systemctl enable mariadb

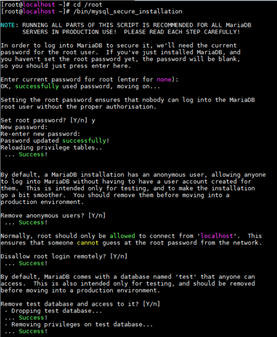
39、设置MariaDB的密码,
输入:cd /root
输入:/bin/mysql_secure_installation
设置账号root,密码123456
NOTE: RUNNING ALL PARTS OF THIS SCRIPT IS RECOMMENDED FOR ALL MySQL
SERVERS IN PRODUCTION USE! PLEASE READ EACH STEP CAREFULLY!
In order to log into MySQL to secure it, we’ll need the current
password for the root user. If you’ve just installed MySQL, and
you haven’t set the root password yet, the password will be blank,
so you should just press enter here.
Enter current password for root (enter for none):<– 初次运行直接回车
OK, successfully used password, moving on…
Setting the root password ensures that nobody can log into the MySQL
root user without the proper authorisation.
Set root password? [Y/n] <– 是否设置root用户密码,输入y并回车或直接回车
New password: <– 设置root用户的密码
Re-enter new password: <– 再输入一次设置的密码
Password updated successfully!
Reloading privilege tables…
… Success!
By default, a MySQL installation has an anonymous user, allowing anyone
to log into MySQL without having to have a user account created for
them. This is intended only for testing, and to make the installation
go a bit smoother. You should remove them before moving into a
production environment.
Remove anonymous users? [Y/n] <– 是否删除匿名用户,生产环境建议删除,所以直接回车
… Success!
Normally, root should only be allowed to connect from ‘localhost’. This
ensures that someone cannot guess at the root password from the network.
Disallow root login remotely? [Y/n] <– 是否禁止root远程登录,根据自己的需求选择y并回车,建议禁止
… Success!
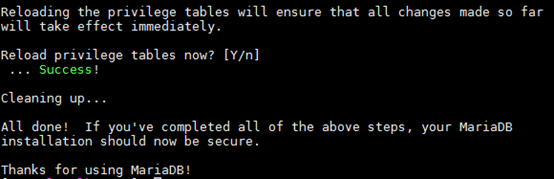
By default, MySQL comes with a database named ‘test’ that anyone can
access. This is also intended only for testing, and should be removed
before moving into a production environment.
Remove test database and access to it? [Y/n] <– 是否删除test数据库,直接回车
Dropping test database…
… Success!
Removing privileges on test database…
… Success!
Reloading the privilege tables will ensure that all changes made so far
will take effect immediately.
Reload privilege tables now? [Y/n] <– 是否重新加载权限表,直接回车
… Success!
Cleaning up…
All done! If you’ve completed all of the above steps, your MySQL
installation should now be secure.
Thanks for using MySQL!
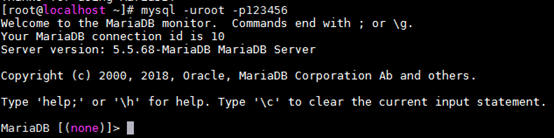
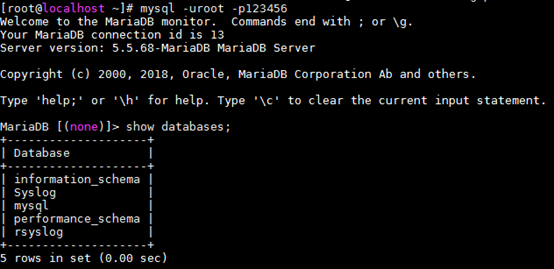
40、输入:mysql -uroot –p123456,进入MariaDB
41、创建rsyslog数据库(用来存放LogAnalyzer系统的配置信息),字符编码设置为utf-8,
输入:create database rsyslog character set utf8 collate utf8_bin;

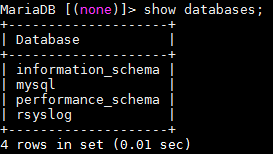
42、查看当前有几个数据库,
输入:show databases;
43、为rsyslog数据库创建本地用户rsyslog,设置密码为rsyslog,权限为全部权限,
输入:grant all privileges on rsyslog.* to ‘rsyslog’@’localhost’ identified by ‘rsyslog’;flush privileges;

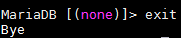
44、输入:exit
退出MariaDB
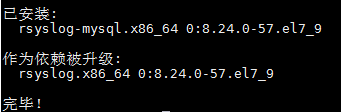
45、安装rsyslog的MySQL扩展程序包rsyslog-mysql,
输入:yum -y install rsyslog-mysql
46、将rsyslog的MySQL表导入创建的rsyslog数据库,
输入:mysql -uroot -p < /usr/share/doc/rsyslog-8.24.0/mysql-createDB.sql

47、查看当前有几个数据库,输入:show databases;
多了一个Syslog数据库
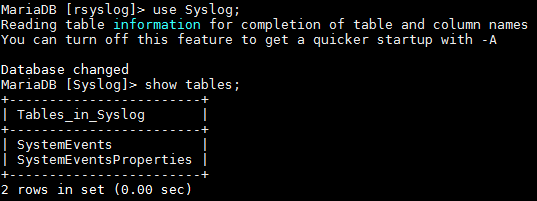
48、使用Syslog数据库,输入:use Syslog;
查看Syslog数据库下有几个表,输入:show tables;
显然SystemEvents表用来存放日志记录
49、为Syslog数据库创建本地用户rsyslog,设置密码为rsyslog,权限为全部权限,
输入:grant all privileges on Syslog.* to ‘rsyslog’@’%’ identified by ‘rsyslog’;flush privileges;

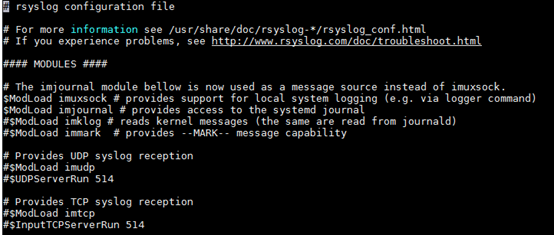
50、修改rsyslog配置文件,
输入:vi /etc/rsyslog.conf
默认如下:
修改为如下:
新增:
$ModLoad ommysql
*.*:ommysql:localhost,Syslog,rsyslog,rsyslog
去除如下内容前面的#:
$ModLoad imudp
$UDPServerRun 514
$ModLoad imtcp
$InputTCPServerRun 514
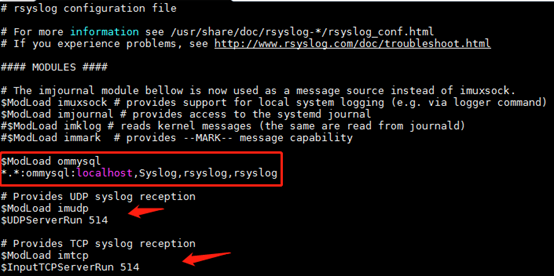
输入:wq,保存并退出
51、启动rsyslog服务并设置为开机启动,
输入:systemctl restart rsyslog.service
输入:systemctl enable rsyslog.service

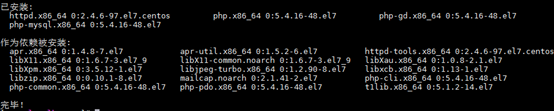
52、安装LAMP环境,
输入:yum install httpd php php-mysql php-gd –y
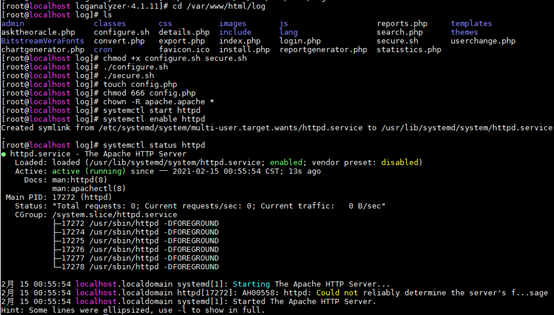
53、创建相应的目录用来存放loganalyzer的解压文件和运行后生成的日志,
输入:mkdir -p /var/www/html/log
输入:mkdir -p /var/log/httpd/log
54、把loganalyzer-4.1.11.tar.gz上传到/opt目录下,并解压,
输入:tar –zxvf loganalyzer-4.1.11.tar.gz

55、输入:cd loganalyzer-4.1.11
输入:cp -r src/* /var/www/html/log
输入:cp -r contrib/* /var/www/html/log

56、输入:cd /var/www/html/log
输入:chmod +x configure.sh secure.sh
输入:./configure.sh
输入:./secure.sh
输入:touch config.php
输入:chmod 666 config.php
输入:chown -R apache.apache *
输入:systemctl start httpd
输入:systemctl enable httpd
输入:systemctl status httpd
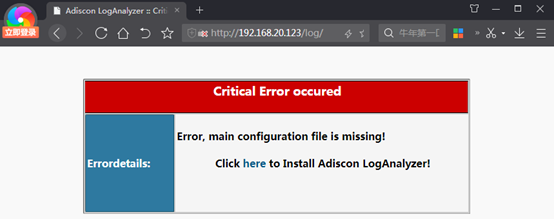
57、地址栏输入:http://192.168.20.123/log,
点击Click here开始安装
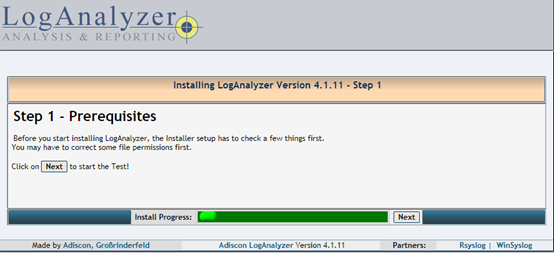
58、第一步,准备工作
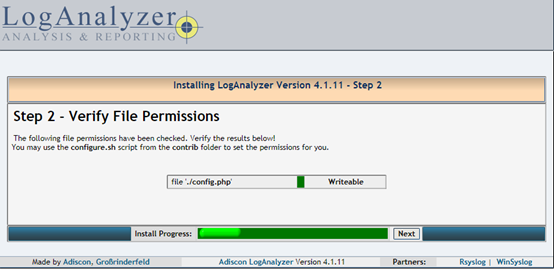
59、第二步、验证文件权限
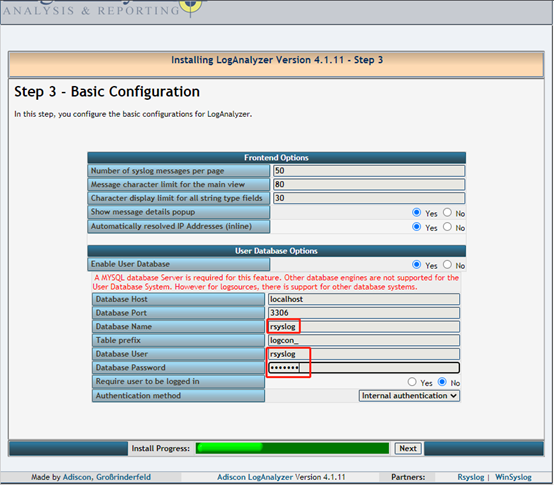
60、第三步、基础配置,设置用户数据库,填写前面创建的rsyslog数据库,账号和密码都是rsyslog
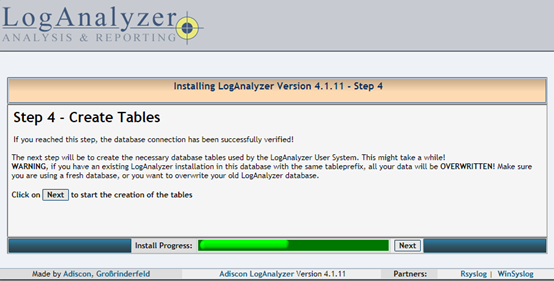
61、第四步、创建表
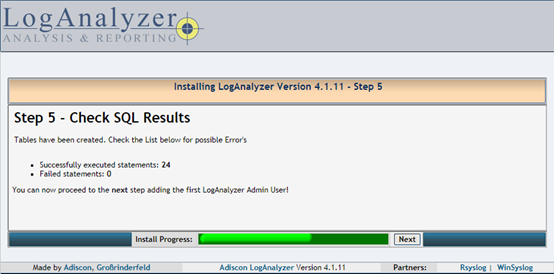
62、第五步、检查SQL结果
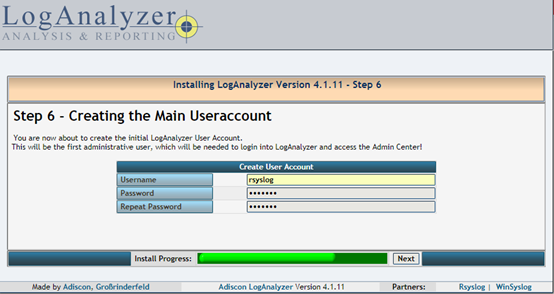
63、第六步、创建系统的用户和密码,这儿都用的rsyslog
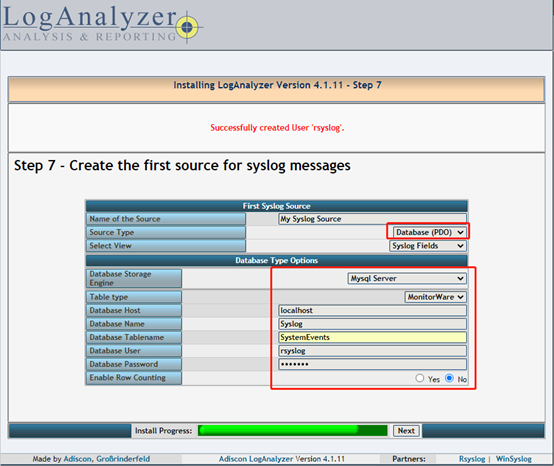
64、第七步、创建第一个数据源用来接收syslog数据,选择数据源类型为数据库,填写使用Syslog数据库的SystemEvents表,账号密码也是前面创建并赋了全部权限的rsyslog
65、第八步,前面都操作成功,完成安装
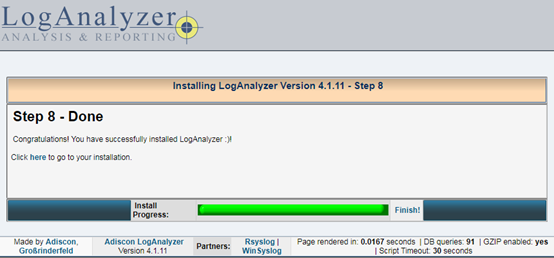
66、点击上图的Finish就能看到首页
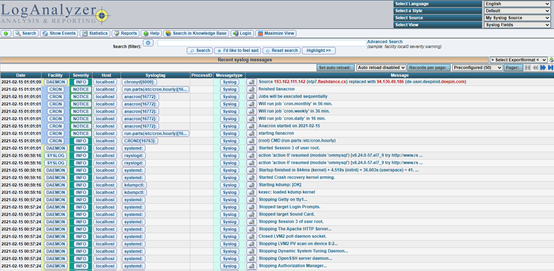
67、点击Login,输入账号和密码,都是rsyslog

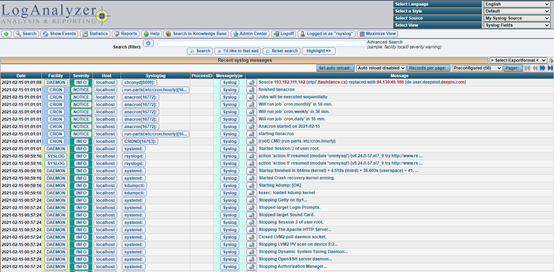
68、登录后看见下图
69、系统的基本设置,显示的字体设置为了Courier New
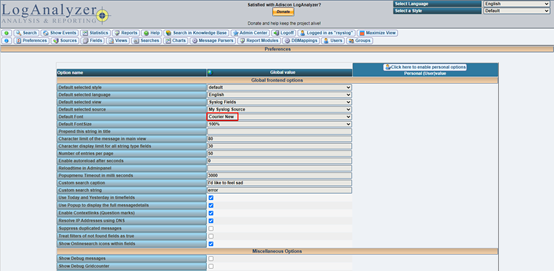
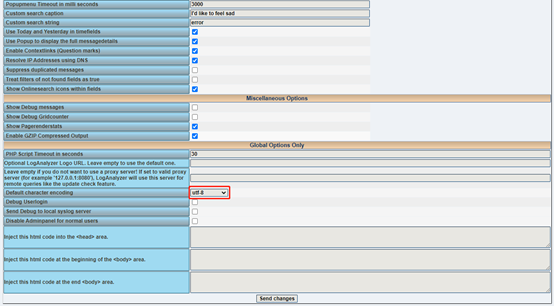
默认的字符编码设置为utf-8
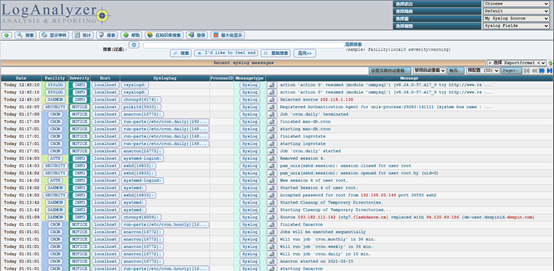
70、中文语言包只是对菜单等进行了汉化,把中文语言包文件放入/var/www/html/log/lang目录下即可
【原】无脑操作:Centos 7.6 + MariaDB + Rsyslog + LogAnalyzer环境搭建
原文:https://www.cnblogs.com/iflytek/p/14403664.html