https://github.com/zq2599/blog_demos
内容:所有原创文章分类汇总及配套源码,涉及Java、Docker、Kubernetes、DevOPS等;
《JUnit5学习》系列旨在通过实战提升SpringBoot环境下的单元测试技能,一共八篇文章,链接如下:
本文是《JUnit5学习》系列的第五篇,一起来学习JUnit5的标签(Tag)功能,设想一个工程中的有很多测试类和测试方法,有的场景只需执行其中一部分测试方法,如何实现呢?此时Junit的标签功能就派上用场了,咱们可以按需要给测试类或者方法打标签,在执行单元测试时按照标签进行过滤,学完了标签再来了解JUnit5对自定义注解的支持情况,本篇大纲如下:
| 名称 | 链接 | 备注 |
|---|---|---|
| 项目主页 | https://github.com/zq2599/blog_demos | 该项目在GitHub上的主页 |
| git仓库地址(https) | https://github.com/zq2599/blog_demos.git | 该项目源码的仓库地址,https协议 |
| git仓库地址(ssh) | git@github.com:zq2599/blog_demos.git | 该项目源码的仓库地址,ssh协议 |

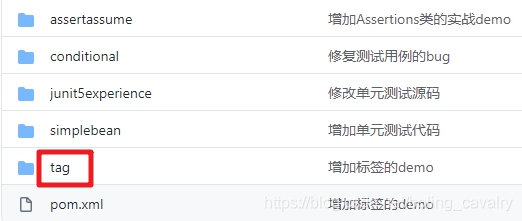
package com.bolingcavalry.tag.service.impl;

import lombok.extern.slf4j.Slf4j;
import org.junit.jupiter.api.DisplayName;
import org.junit.jupiter.api.Tag;
import org.junit.jupiter.api.Test;
import org.springframework.boot.test.context.SpringBootTest;
import static org.junit.jupiter.api.Assertions.assertEquals;

@SpringBootTest
@Slf4j
@Tag("first")
public class FirstTest {

    @Test
    @Tag("easy")
    @Tag("important")
    @DisplayName("first-1")
    void first1Test() {
        log.info("first1Test");
        assertEquals(2, Math.addExact(1, 1));
    }

    @Test
    @Tag("easy")
    @DisplayName("first-2")
    void first2Test() {
        log.info("first2Test");
        assertEquals(2, Math.addExact(1, 1));
    }

    @Test
    @Tag("hard")
    @DisplayName("first-3")
    void first3Test() {
        log.info("first3Test");
        assertEquals(2, Math.addExact(1, 1));
    }
}
package com.bolingcavalry.tag.service.impl;

import lombok.extern.slf4j.Slf4j;
import org.junit.jupiter.api.DisplayName;
import org.junit.jupiter.api.Tag;
import org.junit.jupiter.api.Test;
import org.springframework.boot.test.context.SpringBootTest;
import static org.junit.jupiter.api.Assertions.assertEquals;

@SpringBootTest
@Slf4j
@Tag("second")
public class SecondTest {

    @Test
    @Tag("easy")
    @DisplayName("second-1")
    void second1Test() {
        log.info("second1Test");
        assertEquals(2, Math.addExact(1, 1));
    }

    @Test
    @Tag("easy")
    @DisplayName("second-2")
    void second2Test() {
        log.info("second2Test");
        assertEquals(2, Math.addExact(1, 1));
    }

    @Test
    @Tag("hard")
    @Tag("important")
    @DisplayName("second-3")
    void second3Test() {
        log.info("second3Test");
        assertEquals(2, Math.addExact(1, 1));
    }
}

2. 如下图红框,在弹出的窗口上新增一个JUnit配置:

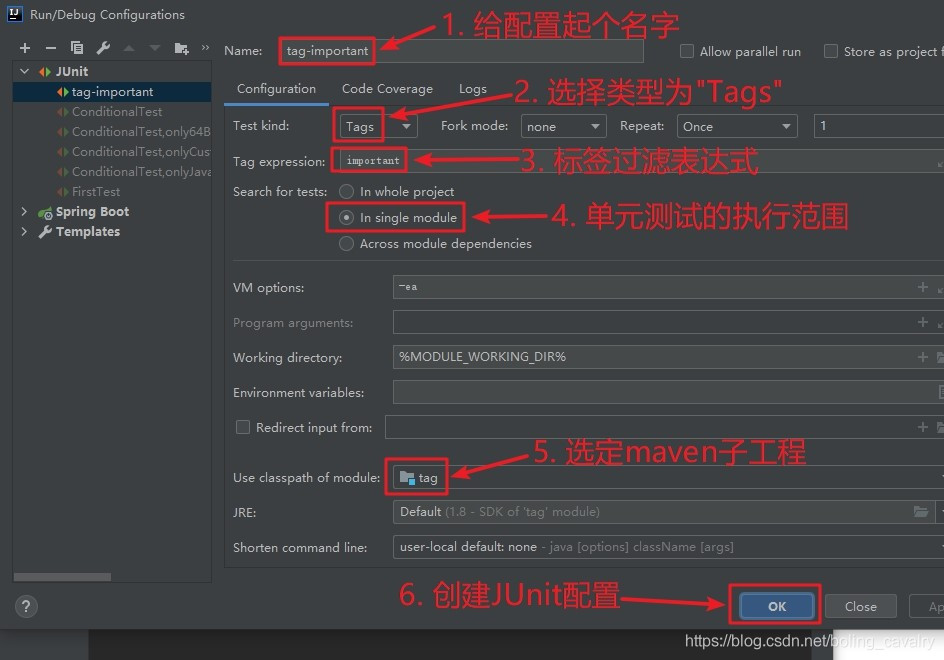
3. 接下来的操作如下图所示,Test kind选择Tags,就会按照标签过滤测试方法,Tag expression里面填写过滤规则,后面会详细讲解这个规则,这里先填个已存在的标签important:
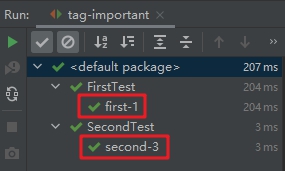
4. 创建好JUnit配置后,执行下图红框中的操作即可执行单元测试:

mvn clean test -Dgroups="important"
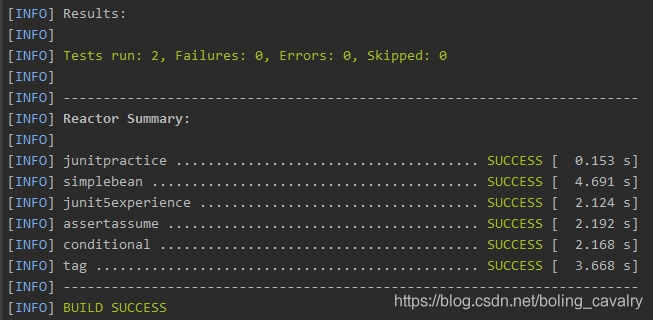
4. 翻看日志,可见只有打了important标签的测试方法被执行了,如下图红框所示:
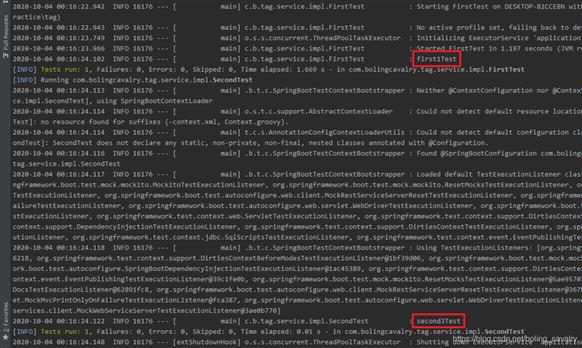
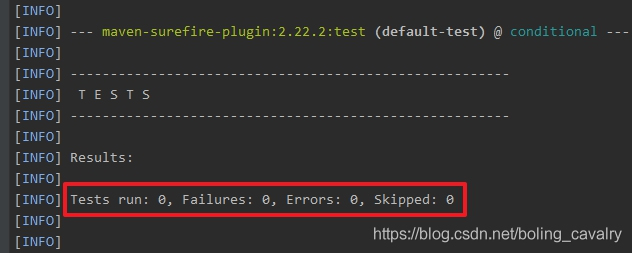
再去看看surefire插件给出的测试报告,报告文件在junitpractice\tag\target\surefire-reports目录下,下图红框中的文件就是测试报告:

打开上图红框中的一个文件,如下图红框,可见只有打了important标签的测试方法被执行了:

    <build>
        <plugins>
            <plugin>
                <groupId>org.springframework.boot</groupId>
                <artifactId>spring-boot-maven-plugin</artifactId>
            </plugin>
            <plugin>
                <artifactId>maven-surefire-plugin</artifactId>
                <version>2.22.2</version>
                <configuration>
                    <!--要执行的标签-->
                    <groups>important</groups>
                    <!--不要执行的标签-->
                    <excludedGroups>hard</excludedGroups>
                </configuration>
            </plugin>
        </plugins>
    </build>

| 操作符 | 作用 | 举例 | 举例说明 |
|---|---|---|---|
| & | 与 | important & easy | 既有important,又有easy标签, 在本文是first1Test |
| ! | 非 | important & !easy | 有important,同时又没有easy标签, 在本文是second3Test |
| | | 或 | important | hard | 有important标签的,再加上有hard标签的, 在本文是first1Test、first3Test、second3Test |
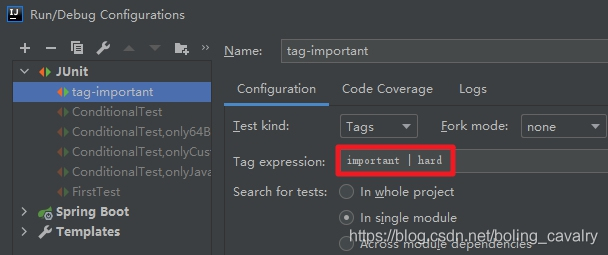
5. 再次执行这个配置,结果如下图红框所示,只有这三个方法被执行:first1Test、first3Test、second3Test,可见标签表达式生效了:

6. 在maven命令和surefire插件中使用标签表达式的操作就不在文中执行了,请您自行验证;
    @Test
    @Tag("hard")
    @DisplayName("first-3")
    void first3Test() {
        log.info("first3Test");
        assertEquals(2, Math.addExact(1, 1));
    }
package com.bolingcavalry.tag.service.impl;

import org.junit.jupiter.api.Tag;
import java.lang.annotation.ElementType;
import java.lang.annotation.Retention;
import java.lang.annotation.RetentionPolicy;
import java.lang.annotation.Target;

@Target({ ElementType.TYPE, ElementType.METHOD })
@Retention(RetentionPolicy.RUNTIME)
@Tag("hard")
public @interface Hard {
}
    @Test
    @Hard
    @DisplayName("first-3")
    void first3Test() {
        log.info("first3Test");
        assertEquals(2, Math.addExact(1, 1));
    }
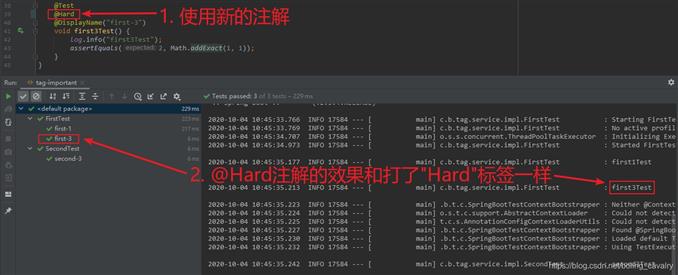
package com.bolingcavalry.tag.service.impl;

import org.junit.jupiter.api.Tag;
import org.junit.jupiter.api.Test;
import java.lang.annotation.ElementType;
import java.lang.annotation.Retention;
import java.lang.annotation.RetentionPolicy;
import java.lang.annotation.Target;

@Target({ ElementType.TYPE, ElementType.METHOD })
@Retention(RetentionPolicy.RUNTIME)
@Tag("hard")
@Test
public @interface HardTest {
}
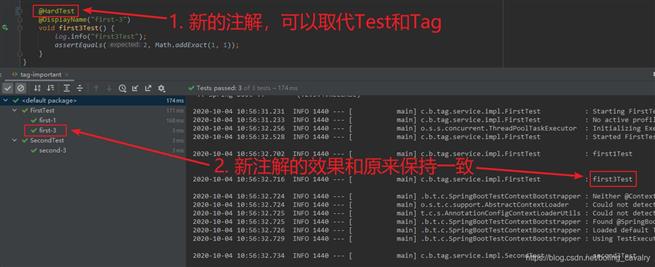
    @HardTest
    @DisplayName("first-3")
    void first3Test() {
        log.info("first3Test");
        assertEquals(2, Math.addExact(1, 1));
    }
最后一起来看看给标签取名时有哪些要注意的地方:
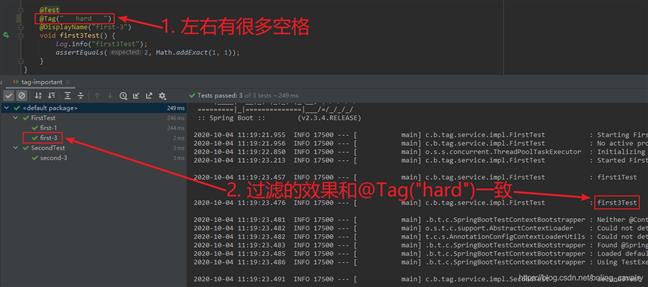
2. 标签名不能有这六个符号, ( ) & | !
微信搜索「程序员欣宸」,我是欣宸,期待与您一同畅游Java世界...
https://github.com/zq2599/blog_demos
原文:https://www.cnblogs.com/bolingcavalry/p/14450356.html