提高程序性能
实现实例化数据源,初始化部分连接资源
使用链接资源时从数据源中获取
使用完毕后将连接资源归还给数据源
DBCP
C3P0
BoneCP
Druid
    <dependencies>
        <dependency>
            <groupId>junit</groupId>
            <artifactId>junit</artifactId>
            <version>4.13</version>
        </dependency>
        <dependency>
            <groupId>c3p0</groupId>
            <artifactId>c3p0</artifactId>
            <version>0.9.1.1</version>
        </dependency>
        <dependency>
            <groupId>com.alibaba</groupId>
            <artifactId>druid</artifactId>
            <version>1.2.3</version>
        </dependency>
        <dependency>
            <groupId>mysql</groupId>
            <artifactId>mysql-connector-java</artifactId>
            <version>5.1.47</version>
        </dependency>
    </dependencies>
jdbc.driver=com.mysql.jdbc.Driver
jdbc.url=jdbc:mysql://localhost:3306/test
jdbc.username=root
jdbc.password=123456
?
        <dependency>
            <groupId>org.springframework</groupId>
            <artifactId>spring-context</artifactId>
            <version>5.2.11.RELEASE</version>
        </dependency>
引入命名空间
xmlns:context="http://www.springframework.org/schema/context"
?
http://www.springframework.org/schema/context http://www.springframework.org/schema/context/spring-context.xsd
注解开发代替xml
| 注解 | 说明 |
|---|---|
| @Component | 使用在类上用于实例化Bean |
| @Controller | 使用在Web层类上用于实例化Bean |
| @Service | 使用在Service层类上用于实例化Bean |
| @Repository | 使用在Dao层类上用于实例化Bean |
| @Autowired | 使用在字段上用于根据类型依赖注入 |
| @Qualifier | 结合@Autowired一起使用根据名称进行依赖注入 |
| @Resource | 相当于@Autowired+@Qualifier,按照名称进行注入 |
| @Value | 注入普通属性 |
| @Scope | 标注Bean的作用范围 |
| @PostConstruct | 使用在方法上标注方法是Bean的初始化方法 |
| @PreDestory | 使用在方法上标注该方法是Bean的销毁方法 |
依赖
 <dependency>
            <groupId>org.springframework</groupId>
            <artifactId>spring-context</artifactId>
            <version>5.2.11.RELEASE</version>
        </dependency>
package com.cyz.dao;
?
public interface UserDao {
    public void save();
}
package com.cyz.dao.Impl;
?
import com.cyz.dao.UserDao;
?
public class UserDaoImpl implements UserDao {
package com.cyz.service;
?
public interface UserService {
    public void save();
}
package com.cyz.service.impl;
?
import com.cyz.dao.UserDao;
import com.cyz.service.UserService;
?
public class UserServiceImpl implements UserService {
?
private UserDao userDao;
?
public void setUserDao(UserDao userDao) {
this.userDao = userDao;
}
?
package com.cyz.web;
?
import com.cyz.service.UserService;
import org.springframework.context.support.ClassPathXmlApplicationContext;
?
public class UserController {
    public static void main(String[] args) {
        ClassPathXmlApplicationContext app = new ClassPathXmlApplicationContext("applicationContext.xml");
        UserService userService = (UserService)app.getBean("userService");
        userService.save();
    }
}
替换
public interface UserDao {
    public void save();
}
package com.cyz.dao.Impl;
?
import com.cyz.dao.UserDao;
import org.springframework.stereotype.Component;
?
//<bean id="userDao" class="com.cyz.dao.Impl.UserDaoImpl"></bean>
//@Component("userDao")
替换
package com.cyz.service;
?
public interface UserService {
    public void save();
}
package com.cyz.service.impl;
?
import com.cyz.dao.UserDao;
import com.cyz.service.UserService;
import org.springframework.beans.factory.annotation.Autowired;
import org.springframework.beans.factory.annotation.Qualifier;
import org.springframework.stereotype.Component;
import org.springframework.stereotype.Service;
?
import javax.annotation.Resource;
?
//<bean id="userService" class="com.cyz.service.impl.UserServiceImpl">
// </bean>
//@Component("userService")
配置
模拟
package com.cyz.web;
?
import com.cyz.service.UserService;
import org.springframework.context.support.ClassPathXmlApplicationContext;
?
public class UserController {
    public static void main(String[] args) {
        ClassPathXmlApplicationContext app = new ClassPathXmlApplicationContext("applicationContext.xml");
        UserService userService = (UserService)app.getBean("userService");
        userService.save();
    }
}
普通类型注入
package com.cyz.service.impl;
?
import com.cyz.dao.UserDao;
import com.cyz.service.UserService;
import org.springframework.beans.factory.annotation.Autowired;
import org.springframework.beans.factory.annotation.Qualifier;
import org.springframework.beans.factory.annotation.Value;
import org.springframework.stereotype.Component;
import org.springframework.stereotype.Service;
?
import javax.annotation.Resource;
?
| 注解 | 说明 |
|---|---|
| @Configuration | 用于指定当前类是一个Spring配置类,当创建容器时会从类上加载注解 |
| @ComponentScan | 用于指定Spring在初始化容器时要扫描的包 作用额在Spring的xml配置文件中的 <context:component-scan base-package="com.cyz"/>一样 |
| @Bean | 使用在方法上,标注将该方法的返回值存储到Spring容器中 |
| @PropertySource | 用于加载.properties文件中的配置 |
| @Import | 用于导入其他配置类 |
package com.cyz.config;
?
import com.alibaba.druid.pool.DruidDataSource;
import org.springframework.beans.factory.annotation.Value;
import org.springframework.context.annotation.Bean;
import org.springframework.context.annotation.Configuration;
import org.springframework.context.annotation.PropertySource;
?
import javax.sql.DataSource;
// <context:property-placeholder location="classpath:jdbc.properties"/>
package com.cyz.config;
?
import org.springframework.context.annotation.ComponentScan;
import org.springframework.context.annotation.Configuration;
import org.springframework.context.annotation.Import;
import org.springframework.context.annotation.PropertySource;
?
import javax.sql.DataSource;
?
//标志该类是Spring的核心配置文件
package com.cyz.web;
?
import com.cyz.config.SpringConfguration;
import com.cyz.service.UserService;
import org.springframework.context.ApplicationContext;
import org.springframework.context.annotation.AnnotationConfigApplicationContext;
import org.springframework.context.support.ClassPathXmlApplicationContext;
?
import javax.sql.DataSource;
import java.sql.Connection;
import java.sql.SQLException;
?
public class UserController {
    public static void main(String[] args) throws SQLException {
//        ClassPathXmlApplicationContext app = new ClassPathXmlApplicationContext("applicationContext.xml");
        ApplicationContext app = new AnnotationConfigApplicationContext(SpringConfguration.class);
        UserService userService = (UserService)app.getBean("userService");
        userService.save();
?
        DataSource dataSource = (DataSource)app.getBean("dataSource");
        Connection connection = dataSource.getConnection();
        System.out.println(connection);
    }
}
在测试类中,每个测试方法都有以下两行代码
 ApplicationContext app = new ClassPathXmlApplicationContext("applicationContext.xml");
        UserDao userDao = app.getBean("userDao", UserDao.class);
这两行代码的作用是获取容器,如果不写的话,直接回提示空指针
使用Junit,将配置文件告知,直接将测试Bean注入
导入依赖
使用@Runwith注解替换原来的运行期
使用@ContextConfiguration指定配置文件或配置类
使用@Autowired注入需要测试的对象
创建测试方法进行测试
  <dependency>
            <groupId>junit</groupId>
            <artifactId>junit</artifactId>
            <version>4.13</version>
            <scope>test</scope>
        </dependency>
?
        <dependency>
            <groupId>org.springframework</groupId>
            <artifactId>spring-test</artifactId>
            <version>5.2.11.RELEASE</version>
        </dependency>
package com.cyz;
?
import com.cyz.config.SpringConfguration;
import com.cyz.service.UserService;
import org.junit.Test;
import org.junit.runner.RunWith;
import org.springframework.beans.factory.annotation.Autowired;
import org.springframework.test.context.ContextConfiguration;
import org.springframework.test.context.junit4.SpringJUnit4ClassRunner;
?
import javax.sql.DataSource;
?
面向切面编程
通过 预编译方式 和 运行期间 动态代理 实现程序功能的统一维护的一种技术
AOP是OOP的延续
是函数式编程的一种衍生范型
降低程序之间的耦合度,提高程序可重用性,提高开发效率
在运行期间,在不修改源码的情况下对方法进行功能增强
减少重复代码,提高开发效率,并且便于维护
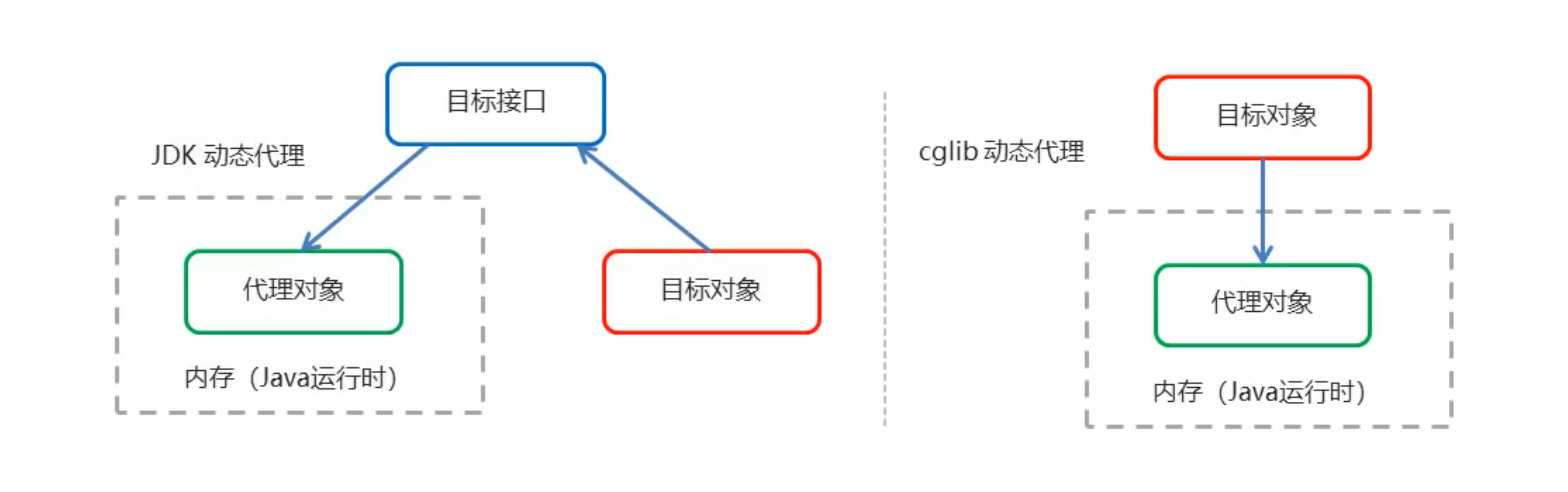
动态代理技术
JDK代理:基于接口的动态代理技术
cglib代理:基于父类动态代理技术
接口
package com.cyz.proxy.jdk;
?
public interface TargetInterfack {
   public void save();
}
目标代理对象实现接口
package com.cyz.proxy.jdk;
?
public class Target implements TargetInterfack{
增强对象
package com.cyz.proxy.jdk;
?
public class Advice {
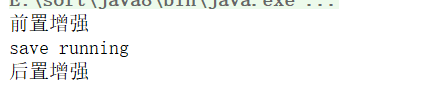
public void before(){
System.out.println("前置增强");
}
?
public void after(){
System.out.println("后置增强");
}
}
实现代理
package com.cyz.proxy.jdk;
?
import java.lang.reflect.InvocationHandler;
import java.lang.reflect.Method;
import java.lang.reflect.Proxy;
?
public class ProxyTest {
?
public static void main(String[] args) {
// 目标对象
Target target = new Target();
?
// 增强对象
Advice advice = new Advice();
?
// 返回值 就是动态生成的代理对象
TargetInterfack proxy = (TargetInterfack)Proxy.newProxyInstance(
target.getClass().getClassLoader(),//目标对象类加载器
target.getClass().getInterfaces(),//目标对象相同的接口字节码对象数组
new InvocationHandler() {
// 调用代理对象的任意方法,实质执行的都是invoke方法

    <dependencies>
<!--        spring-context  包含cglib-->
        <dependency>
            <groupId>org.springframework</groupId>
            <artifactId>spring-context</artifactId>
            <version>5.2.11.RELEASE</version>
        </dependency>
        <dependency>
            <groupId>junit</groupId>
            <artifactId>junit</artifactId>
            <version>4.13</version>
            <scope>test</scope>
        </dependency>
    </dependencies>
package com.cyz.proxy.cglib;
?
import com.cyz.proxy.jdk.TargetInterfack;
?
public class Target{
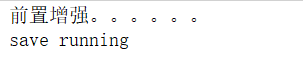
public void save(){
System.out.println("save running");
}
}
package com.cyz.proxy.cglib;
?
public class Advice {
    public void before(){
        System.out.println("前置增强");
    }
?
    public void after(){
        System.out.println("后置增强");
    }
}
package com.cyz.proxy.cglib;
?
import org.springframework.cglib.proxy.Enhancer;
import org.springframework.cglib.proxy.MethodInterceptor;
import org.springframework.cglib.proxy.MethodProxy;
import java.lang.reflect.Method;
?
public class ProxyTest {
?
public static void main(String[] args) {
// 目标对象
Target target = new Target();
?
// 增强对象
Advice advice = new Advice();
?
// 返回值 就是动态生成的代理对象 基于cglib
// 1. 创建增强器
Enhancer enhancer = new Enhancer();
?
// 2. 设置父类(目标)
enhancer.setSuperclass(Target.class);
?
// 3. 设置回调
enhancer.setCallback(new MethodInterceptor() {
AOP实现底层就是对上面的动态代理的代码进行了封装,封装后我们只需要对需要关注的部分进行代码编写,并通过配置的方式完成指定目标的方法增强
Target(目标对象):代理的目标对象
Proxy(代理):一个类被AOP植入增强后,就产生一个结果代理类
Joinpoint(连接点):所谓连接点是指那些被拦截到的点,在Spring中,这些点指的是可以被增强的方法。因为spring只支持方法类型的连接点
Pointcut (切入点):所谓切入点是指我们要对那些JoinPoint进行拦截的定义
Advie(通知、增强):所谓通知是指拦截到Jjoinpoint之后所要做的事情就是通知
Aspect(切面):是切入点和通知(引介)的结合
Weaving (织入):是指把增强应用到目标对象来创建新的代理对象的过程,spring采用动态代理织入,而AspectJ采用编译器织入和类装载期织入
编写业务核心代码 (目标类的目标方法)
编写切面类,切面类中有通知(增强功能方法)
在配置文件中,配置织入关系,即将哪些通知与哪些连接点进行结合
Spring框架监控切入点的执行,一旦监控到切入点方法被运行,使用代理机制,动态创建目标对戏的代理对象,根据通知类别,在代理对象的对应位置,将通知对应的功能织入,完成完整的代理逻辑运行。
在Spring中,框架会根据目标类是否实现了接口来决定采用哪种动态代理的方式
aop:面向切面编程
aop:底层实现,基于jdk的动态代理和cglib的动态代理
aop的中重要概念:
pointcut(切点):被增强的方法
Advice(通知/增强):封装增强业务逻辑的方法
Aspect(切面):切点+通知
Weaving(织入):将切点与通知结合的过程
开发明确事项:
谁是切点(切点表达式配置)
谁是通知(切面类中的增强方法)
将切点和通知进行织入配置
导入依赖
创建目标接口和目标类(内部有切点)
创建切面类(内部有增强方法)
将目标类和切面类的对象创建权交由Spring
在applicationContext.xml中配置织入关系
测试代码
  <!--    有原生的aop配置-->
<dependency>
            <groupId>org.springframework</groupId>
            <artifactId>spring-context</artifactId>
            <version>5.2.11.RELEASE</version>
        </dependency>
<!--    集成aspect aop配置 更优   -->
        <dependency>
            <groupId>org.aspectj</groupId>
            <artifactId>aspectjweaver</artifactId>
            <version>1.9.6</version>
        </dependency>
 <dependencies>
<!--        spring-context  包含cglib-->
        <!--    有原生的aop配置-->
        <dependency>
            <groupId>org.springframework</groupId>
            <artifactId>spring-context</artifactId>
            <version>5.2.11.RELEASE</version>
        </dependency>
<!--    集成aspect aop配置 更优   -->
        <dependency>
            <groupId>org.aspectj</groupId>
            <artifactId>aspectjweaver</artifactId>
            <version>1.9.6</version>
        </dependency>
        <dependency>
            <groupId>junit</groupId>
            <artifactId>junit</artifactId>
            <version>4.13</version>
            <scope>test</scope>
        </dependency>
        <dependency>
            <groupId>org.springframework</groupId>
            <artifactId>spring-test</artifactId>
            <version>5.2.11.RELEASE</version>
        </dependency>
    </dependencies>
package com.cyz.aop;
?
public interface TargetInterfack {
   public void save();
}
package com.cyz.aop;
?
public class Target implements TargetInterfack {
package com.cyz.aop;
?
//切面类
public class MyAspect {
    public void before(){
        System.out.println("前置增强。。。。。。");
    }
}
package com.cyz;
?
import com.cyz.aop.TargetInterfack;
import org.junit.Test;
import org.junit.runner.RunWith;
import org.springframework.beans.factory.annotation.Autowired;
import org.springframework.test.context.ContextConfiguration;
import org.springframework.test.context.junit4.SpringJUnit4ClassRunner;
?
切点表达式的写法
表达式语法:
execution([修饰符] 返回值类型 包名.类名.方法名(参数))
访问修饰符可以省略
返回值类型,包名,类名,方法名可以使用星号*代表任意
包名于类名之间一个点.代表当前包下的类,两个点..代表当前包及其子包下的类
参数列表可以使用两个点..表示任意个数,任意类型的参数列表
execution(public void com.cyz.aop.Target.method())
execution(void com.cyz.aop.Target.*(..))
execution(* com.cyz.aop.*.*(..))
execution(* com.cyz.aop..*.*(..))
execution(* *..*.*(..))
  <aop:config>
        <!--        声明切面-->
        <aop:aspect ref="myAspect">
<!--            切面:切点+通知-->
<!--            <aop:before method="before" pointcut="execution(public void com.cyz.aop.Target.save())"/>-->
            <aop:before method="before" pointcut="execution(* com.cyz.aop.*.*(..))"/>
        </aop:aspect>
    </aop:config>
通知的配置语法
<aop:通知类型 method="切面类中的方法名" pointcut="切点表达式"></aop:通知类型>
| 名称 | 标签 | 说明 |
|---|---|---|
| 前置通知 | <aop:before> |
用于配置前置通知,指定增强的方法在切入点方法之前执行 |
| 后置通知 | <aop:after-returning> |
用于配置后置通知,指定增强的方法在切入点方法之后执行 |
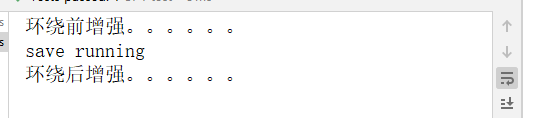
| 环绕通知 | <aop:around> |
用于配置环绕通知,指定增强的方法在切入点方法之前和之后都执行 |
| 异常抛出通知 | <aop:throwing> |
用于配置异常抛出通知,指定增强的方法在出现异常时执行 |
| 最终通知 | <aop:after> |
用于配置最终通知,无论增强方式执行是否有异常都会执行 |
import org.aspectj.lang.ProceedingJoinPoint;
?
//切面类
public class MyAspect {
    public void before() {
        System.out.println("前置增强。。。。。。");
    }
?
    public void afterReturrning() {
        System.out.println("后置增强。。。。。。");
    }
}
    <aop:config>
        <!--        声明切面-->
        <aop:aspect ref="myAspect">
<!--            切面:切点+通知-->
           <aop:before method="before" pointcut="execution(public void com.cyz.aop.Target.save())"/>
           <aop:before method="before" pointcut="execution(* com.cyz.aop.*.*(..))"/>
        </aop:aspect>
    </aop:config>

package com.cyz.aop;
?
import org.aspectj.lang.ProceedingJoinPoint;
?
//切面类
public class MyAspect {
//    Proceeding JoinPoint   正在执行的接点===切点
    public Object around(ProceedingJoinPoint pjp) throws Throwable {
        System.out.println("环绕前增强。。。。。。");
?
//        切点方法
        Object proceed =pjp.proceed();//切点方法
?
        System.out.println("环绕后增强。。。。。。");
        return proceed;
    }
}
    <aop:config>
        <!--        声明切面-->
        <aop:aspect ref="myAspect">
<!--            切面:切点+通知-->
<!--            <aop:before method="before" pointcut="execution(public void com.cyz.aop.Target.save())"/>-->
<!--            <aop:before method="before" pointcut="execution(* com.cyz.aop.*.*(..))"/>-->
<!--            <aop:after-returning method="afterReturrning" pointcut="execution(* com.cyz.aop.*.*(..))"/>-->
            <aop:around method="around" pointcut="execution(* com.cyz.aop.*.*(..))"/>
        </aop:aspect>
    </aop:config>
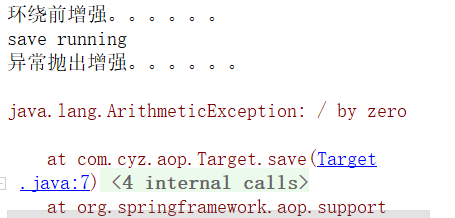
package com.cyz.aop;
?
import org.aspectj.lang.ProceedingJoinPoint;
?
//切面类
public class MyAspect {
//    Proceeding JoinPoint   正在执行的接点===切点
    public Object around(ProceedingJoinPoint pjp) throws Throwable {
        System.out.println("环绕前增强。。。。。。");
?
//        切点方法
        Object proceed =pjp.proceed();//切点方法
?
        System.out.println("环绕后增强。。。。。。");
        return proceed;
    }
?
    public void afterThrowing() {
        System.out.println("异常抛出增强。。。。。。");
    }
}
    <aop:config>
        <!--        声明切面-->
        <aop:aspect ref="myAspect">
<!--            切面:切点+通知-->
<!--            <aop:before method="before" pointcut="execution(public void com.cyz.aop.Target.save())"/>-->
<!--            <aop:before method="before" pointcut="execution(* com.cyz.aop.*.*(..))"/>-->
<!--            <aop:after-returning method="afterReturrning" pointcut="execution(* com.cyz.aop.*.*(..))"/>-->
            <aop:around method="around" pointcut="execution(* com.cyz.aop.*.*(..))"/>
            <aop:after-throwing method="afterThrowing" pointcut="execution(* com.cyz.aop.*.*(..))"/>
        </aop:aspect>
    </aop:config>
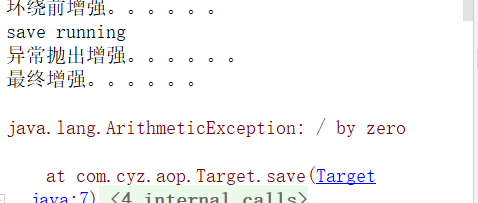
package com.cyz.aop;
?
import org.aspectj.lang.ProceedingJoinPoint;
?
//切面类
public class MyAspect {
    public void before() {
        System.out.println("前置增强。。。。。。");
    }
?
    public void afterReturrning() {
        System.out.println("后置增强。。。。。。");
    }
?
//    Proceeding JoinPoint   正在执行的接点===切点
    public Object around(ProceedingJoinPoint pjp) throws Throwable {
        System.out.println("环绕前增强。。。。。。");
?
//        切点方法
        Object proceed =pjp.proceed();//切点方法
?
        System.out.println("环绕后增强。。。。。。");
        return proceed;
    }
?
    public void afterThrowing() {
        System.out.println("异常抛出增强。。。。。。");
    }
?
    public void after() {
        System.out.println("最终增强。。。。。。");
    }
}
    <aop:config>
        <!--        声明切面-->
        <aop:aspect ref="myAspect">
<!--            切面:切点+通知-->
<!--            <aop:before method="before" pointcut="execution(public void com.cyz.aop.Target.save())"/>-->
<!--            <aop:before method="before" pointcut="execution(* com.cyz.aop.*.*(..))"/>-->
<!--            <aop:after-returning method="afterReturrning" pointcut="execution(* com.cyz.aop.*.*(..))"/>-->
            <aop:around method="around" pointcut="execution(* com.cyz.aop.*.*(..))"/>
            <aop:after-throwing method="afterThrowing" pointcut="execution(* com.cyz.aop.*.*(..))"/>
            <aop:after method="after" pointcut="execution(* com.cyz.aop.*.*(..))"/>
        </aop:aspect>
    </aop:config>
当多个增强的切点表达式相同时,可以将切点表达式进行抽取,在增强中使用pointcut-ref属性替代pointcut属性来引用抽取的切点表达式
 <!--    配置织入:告诉spring框架 哪些方法(切点)需要进行哪些增强(前置、后置。。)-->
    <!--    命名空间-->
    <aop:config>
        <!--        声明切面-->
        <aop:aspect ref="myAspect">
            <!--            抽取切点表达式-->
            <aop:pointcut id="myPointcut" expression="execution(* com.cyz.aop.*.*(..))"/>
            <!--            切面:切点+通知-->
            <!--            <aop:before method="before" pointcut="execution(public void com.cyz.aop.Target.save())"/>-->
            <!--            <aop:before method="before" pointcut="execution(* com.cyz.aop.*.*(..))"/>-->
            <!--            <aop:after-returning method="afterReturrning" pointcut="execution(* com.cyz.aop.*.*(..))"/>-->
            <!--        <aop:around method="around" pointcut="execution(* com.cyz.aop.*.*(..))"/>-->
            <!--        <aop:after-throwing method="afterThrowing" pointcut="execution(* com.cyz.aop.*.*(..))"/>-->
            <!--        <aop:after method="after" pointcut="execution(* com.cyz.aop.*.*(..))"/>-->
?
            <aop:around method="around" pointcut-ref="myPointcut"/>
            <aop:after-throwing method="afterThrowing" pointcut-ref="myPointcut"/>
            <aop:after method="after" pointcut-ref="myPointcut"/>
        </aop:aspect>
    </aop:config>
aop织入配置
  <aop:config>
        <!--        声明切面-->
        <aop:aspect ref="切面类">
            <!--            抽取切点表达式-->
            <aop:pointcut id="myPointcut" expression="切点表达式"/>
            <!--            切面:切点+通知-->
            <aop:around method="通知方法名称" pointcut-ref="引用切点"/>
            <aop:after method="after" pointcut="切点表达式"/>
        </aop:aspect>
    </aop:config>
通知的类型
前置通知 后置通知 环绕通知 异常抛出通知 最终通知
切点表达式的写法
expression([修饰符] 返回值类型 包名.类名.方法名(参数))
创建目标接口和目标类 (内部有切点)
创建切面类 (内部有增强方法)
将目标类和切面类的对象创建权交给Sprng
在切面类中使用注解配置织入关系
在配置文件中开启组件扫描和AOP的自动代理
测试
package com.cyz.anon;
?
public interface TargetInterfack {
   public void save();
}
package com.cyz.anon;
import org.springframework.stereotype.Component;
?
package com.cyz.anon;
?
import org.aspectj.lang.ProceedingJoinPoint;
import org.aspectj.lang.annotation.*;
import org.springframework.stereotype.Component;
?
//切面类
package com.cyz;
?
import com.cyz.aop.TargetInterfack;
import org.junit.Test;
import org.junit.runner.RunWith;
import org.springframework.beans.factory.annotation.Autowired;
import org.springframework.test.context.ContextConfiguration;
import org.springframework.test.context.junit4.SpringJUnit4ClassRunner;
?
通知的配置语法:@通知注解("切点表达式")
| 名称 | 标签 | 说明 |
|---|---|---|
| 前置通知 | @Before | 用于配置前置通知,指定增强的方法在切入点方法之前执行 |
| 后置通知 | @AfterReturning | 用于配置后置通知,指定增强的方法在切入点方法之后执行 |
| 环绕通知 | @Around | 用于配置环绕通知,指定增强的方法在切入点方法之前和之后都执行 |
| 异常抛出通知 | @AfterThrowing | 用于配置异常抛出通知,指定增强的方法在出现异常时执行 |
| 最终通知 | @After | 用于配置最终通知,无论增强方式执行是否有异常都会执行 |
在切面定义切点方法
使用@Pointcut注解定义切点表达式,然后在增强注解中进行引用
package com.cyz.anon;
?
import org.aspectj.lang.ProceedingJoinPoint;
import org.aspectj.lang.annotation.*;
import org.springframework.stereotype.Component;
?
//切面类
注解aop开发步骤
使用@Aspect注解标注切面类
使用@通知注解注解通知方法
在配置文件中配置aop自动代理<aop:aspectj-autoproxy/>
通知的类型
前置 后置 环绕 异常抛出 最终
原文:https://www.cnblogs.com/liang-chen-fly/p/14527601.html