新建Maven工程添加依赖
<dependency>
    <groupId>org.springframework</groupId>
    <artifactId>spring-context</artifactId>
    <version>5.3.4</version>
</dependency>
创建实体类Student
package pojo;

public class Student {
    private long id;
    private String name;
    private int age;

    public Student(long id, String name, int age) {
        this.id = id;
        this.name = name;
        this.age = age;
    }
      public Student() {

    }
    @Override
    public String toString() {
        return "Student{" +
                "id=" + id +
                ", name=‘" + name + ‘\‘‘ +
                ", age=" + age +
                ‘}‘;
    }
    public long getId() {
        return id;
    }
    public void setId(long id) {
        this.id = id;
    }
    public String getName() {
        return name;
    }
    public void setName(String name) {
        this.name = name;
    }
    public int getAge() {
        return age;
    }
    public void setAge(int age) {
        this.age = age;
    }
}
通过IOC创建对象,在配置文件中添加需要管理的对象,xml格式的配置文件,文件名可以自定义
<?xml version="1.0" encoding="UTF-8"?>
<beans xmlns="http://www.springframework.org/schema/beans"
       xmlns:xsi="http://www.w3.org/2001/XMLSchema-instance"
       xsi:schemaLocation="http://www.springframework.org/schema/beans
        https://www.springframework.org/schema/beans/spring-beans.xsd">
<bean id="student" class="pojo.Student">
    <property name="id" value="1"></property>
    <property name="name" value="wcy"></property>
    <property name="age" value="21"></property>
</bean>
</beans>
1、通过bean标签来完成对象的管理
id:对象名
class对象的模板类。(所有交给IoC容器来管理的类必须有无参构造函数,因为Spring底层是通过反射机制来创建对象,调用的是无参构造)
2、成员变量通过property标签完成赋值
name:成员变量名value:成员变量(基本数据类型,String等可以直接赋值,如果是其他引用类型,不能通过value赋值)ref:将IoC中的另外一个Bean赋给当前的成员变量(DI)通过IoC容器创建对象
package test;

import org.springframework.context.ApplicationContext;
import org.springframework.context.support.ClassPathXmlApplicationContext;
import pojo.Student;

public class Test {
    public static void main(String[] args) {
        //加载配置文件
        ApplicationContext applicationContext = new ClassPathXmlApplicationContext("spring.XML");
        //通过运行时类获取
        Student student = (Student) applicationContext.getBean(Student.class);
        System.out.println(student);
    }
}
ApplicationContext是BenaFactor的一个子接口,也被称为应用上下文,是另一种常用的Spring核心容器。它不仅包含了BeanFactor的所有功能,还添加了对国际化,资源访问,事件传播等方面的支持。建议使用该接口。
BeanFactory(IoC容器)
使用BeanFactory加载spring.xml
 XmlBeanFactory xmlBeanFactory = new XmlBeanFactory(new FileSystemResource("D:\\files\\idea\\JAVA\\spring_2021.3.22\\src\\main\\resources\\spring.xml"));
        Student student =(Student) xmlBeanFactory.getBean("student");
        System.out.println(student);
通过绝对路径拿到spring.xml配置文件
ApplicationContext(IoC容器)
通过FileSystemXmlApplicationContext创建:通过绝对路径
ApplicationContext applicationContext = new FileSystemXmlApplicationContext("D:\\files\\idea\\JAVA\\spring_2021.3.22\\src\\main\\resources\\spring.xml");
        Student student = (Student) applicationContext.getBean("student");
        System.out.println(student);
通过ClassPathXmlApplicationContext创建:通过类路径
 ApplicationContext applicationContext = new ClassPathXmlApplicationContext("spring.xml");
        Student student =(Student)applicationContext.getBean("student");
        System.out.println(student);
从IoC中获取对象
通过配置文件已经创建了IoC容器,下面通过两种方式从IoC容器中获取对象
通过Bean的id属性获取Bean
package test;

import org.springframework.context.ApplicationContext;
import org.springframework.context.support.ClassPathXmlApplicationContext;
import pojo.Student;

public class Test {
    public static void main(String[] args) {
        //加载配置文件
        ApplicationContext applicationContext = new ClassPathXmlApplicationContext("spring.XML");
        //通过id获取
        Student student = (Student) applicationContext.getBean("student");
        System.out.println(student);
    }
}
通过运行时类获取Bean
package test;

import org.springframework.context.ApplicationContext;
import org.springframework.context.support.ClassPathXmlApplicationContext;
import pojo.Student;

public class Test {
    public static void main(String[] args) {
        //加载配置文件
        ApplicationContext applicationContext = new ClassPathXmlApplicationContext("spring.XML");
        //通过运行时类获取
        Student student = (Student) applicationContext.getBean(Student.class);
        System.out.println(student);
    }
}
但是这种方式有一种弊端,配置文件中只能有一个实例。否则会抛出异常,因为没有唯一的bean
Spring 最认同的技术是控制反转的依赖注入(DI)模式。控制反转(IoC)是一个通用的概念,它可以用许多不同的方式去表达,依赖注入仅仅是控制反转的一个具体的例子。
构造注入
通过有参构造方法
 <!-- 构造方式注入的三种方式 -->
    <!--下标-->
    <bean id="student2" class="www.sheep.pojo.Student2">
        <constructor-arg index="0" value="1"/>
        <constructor-arg index="1" value="c罗"/>
        <constructor-arg index="2" value="36"/>
    </bean>
    <!--名字-->
    <bean id="student3" class="www.sheep.pojo.Student2">
        <constructor-arg name="id" value="2"/>
        <constructor-arg name="name" value="内马尔"/>
        <constructor-arg name="age" value="29"/>
    </bean>
    <!--数据类型-->
    <bean id="student4" class="www.sheep.pojo.Student2">
        <constructor-arg type="int" value="3"/>
        <constructor-arg type="java.lang.String" value="林语堂"/>
        <constructor-arg type="java.lang.String" value="100"/>
    </bean>
通过有参构造注入(pojo、String[]、List、Map)
private wangchaoyu wangchaoyu;
private String[] strings;
private List<wangchaoyu> list;
private Map<String,wangchaoyu> map;
 		<!-- 引用类型 -->
        <constructor-arg name="wangchaoyu" ref="wangchaoyu"/>
        <!-- 数组类型 -->
        <constructor-arg name="strings">
            <array>
                <value>三国演义</value>
                <value>西游记</value>
                <value>红楼梦</value>
                <value>水浒传</value>
            </array>
        </constructor-arg>
        <!-- List集合 -->
        <constructor-arg name="list">
            <list>
                <ref bean="wangchaoyu2"/>
            </list>
        </constructor-arg>
        <!-- Map集合 -->
        <constructor-arg name="map">
            <map>
                <entry key="功夫" value-ref="wangchaoyu3"/>
            </map>
        </constructor-arg>
Set注入
通过Set方法(通过Set方法注入要写无参构造)
基本数据类型注入
<bean id="student2" class="www.sheep.pojo.Student">
        <property name="id" value="1"/>
        <property name="name" value="我们梦想奔赴大海"/>
        <property name="age" value="21"/>
</bean>
复杂类型注入
private wangchaoyu wangchaoyu;
private String[] strings;
private List<wangchaoyu> list;
private Map<String,wangchaoyu> map;
	<bean id="student2" class="www.sheep.pojo.Student">
        <!-- javaBean -->
        <property name="wangchaoyu" ref="wangchaoyu"/>
        <!-- String[] -->
        <property name="strings">
            <array>
                <value>红楼梦</value>
                <value>西游记</value>
                <value>三国演义</value>
                <value>水浒传</value>
            </array>
        </property>
        <!-- List -->
        <property name="list">
            <list>
                <ref bean="wangchaoyu2"/>
            </list>
        </property>
        <!-- Map -->
        <property name="map">
            <map>
                <entry key="hello" value-ref="wangchaoyu3"/>
            </map>
        </property>
    </bean>
p命名空间注入、c名门空间注入
导入C命名空间依赖、实体类中必须存在有参构造器。属于:<property/>
xmlns:c="http://www.springframework.org/schema/c"
<!-- C命名空间注入 -->
<bean id="wangchaoyu4" class="www.sheep.pojo.wangchaoyu" c:id="1" c:name="梅西" c:age="36"/>
实体类中必须有set方法、实体类中必须有无参构造器(默认存在)。属于:<constructor-arg/>
xmlns:p="http://www.springframework.org/schema/p"
<!-- p命名空间注入 -->
<bean id="wangchaoyu5" class="www.sheep.pojo.wangchaoyu" p:id="2" p:name="c罗" c:age="34"/>
Bean的实例化三种方式
构造器实例化:构造器实例化是指IoC容器通过Bean对应类中默认的无参构造方法来实例化Bean。
静态工厂实例化
创建一个实体类
package www.sheep.pojo;

public class Car {
    private long id;
    private String name;

    public long getId() {
        return id;
    }
    public void setId(long id) {
        this.id = id;
    }
    public String getName() {
        return name;
    }
    public void setName(String name) {
        this.name = name;
    }
    public Car(long id, String name) {
        this.id = id;
        this.name = name;
    }
    @Override
    public String toString() {
        return "Car{" +
                "id=" + id +
                ", name=‘" + name + ‘\‘‘ +
                ‘}‘;
    }
}
创建一个静态工厂类
public class StaticCarFactory {
    private static Map<Long, Car> carMap;
    static {
        carMap = new HashMap<Long,Car>();
        carMap.put(1L,new Car(1L,"宝马"));
        carMap.put(2L,new Car(2L,"奔驰"));
        carMap.put(3L,new Car(3L,"奥迪"));
    }
    public static Car getCar(long id){
        return carMap.get(id);
    }
}
在spring.xml中配置静态工厂,通过factory-method:调用静态工厂的方法创建对象
<?xml version="1.0" encoding="UTF-8"?>
<beans xmlns="http://www.springframework.org/schema/beans"
       xmlns:xsi="http://www.w3.org/2001/XMLSchema-instance"
       xsi:schemaLocation="http://www.springframework.org/schema/beans http://www.springframework.org/schema/beans/spring-beans.xsd">
    <!-- 配置静态工厂创建Car -->
    <bean id="car" class="www.sheep.factory.StaticCarFactory" factory-method="getCar">
        <constructor-arg value="2"/>
    </bean>
</beans>
创建Handler类
public class Test3 {
    public static void main(String[] args) {
        ApplicationContext applicationContext = new ClassPathXmlApplicationContext("spring-staticfactory.xml");
        Car car =(Car) applicationContext.getBean("car");
        System.out.println(car);
    }
}
实例工厂实例化
创建实体类
package www.sheep.pojo;

public class Car {
    private long id;
    private String name;

    public long getId() {
        return id;
    }
    public void setId(long id) {
        this.id = id;
    }
    public String getName() {
        return name;
    }
    public void setName(String name) {
        this.name = name;
    }
    public Car(long id, String name) {
        this.id = id;
        this.name = name;
    }
    @Override
    public String toString() {
        return "Car{" +
                "id=" + id +
                ", name=‘" + name + ‘\‘‘ +
                ‘}‘;
    }
}
创建实例工厂
public class InstanceCarFactory {
    private Map<Long, Car> carMap;
    public InstanceCarFactory(){
        carMap = new HashMap<Long,Car>();
        carMap.put(1L,new Car(1L,"宝马"));
        carMap.put(2L,new Car(2L,"奔驰"));
        carMap.put(3L,new Car(3L,"奥迪"));
    }
    public Car getCar(long id){
        return carMap.get(id);
    }
}
在spring.xml中配置调用动态工厂的方法创建对象,先创建InstanceCarFactory工厂,在通过InstanceCarFactory调用getCar方法创建对象。
<?xml version="1.0" encoding="UTF-8"?>
<beans xmlns="http://www.springframework.org/schema/beans"
       xmlns:xsi="http://www.w3.org/2001/XMLSchema-instance"
       xsi:schemaLocation="http://www.springframework.org/schema/beans http://www.springframework.org/schema/beans/spring-beans.xsd">
    <!-- 创建实例工厂bean -->
    <bean id="carFactory" class="www.sheep.factory.InstanceCarFactory"/>
    <!-- 赔偿实例工厂创建Car -->
    <bean id="car2" factory-bean="carFactory" factory-method="getCar">
        <constructor-arg value="1"/>
    </bean>
</beans>
Bean的作用域
Spring管理的bean是根据scope来生成的,表示bean的作用域,共有7种。(默认单例模式)
	<!-- 单例模式 -->
	<!-- singleton模式无论业务代码是否获取IoC容器中的bean时,Spring在加载spring.xml时就会创建bean -->
	<bean id="student" class="www.sheep.pojo.Student" scope="singleton">
    <!-- 原型模式 -->
    <!-- prototype模式当业务代码获取IoC容器中的bean时,Spring才去调用无参构造创建对应的bean -->
    <bean id="student" class="www.sheep.pojo.Student" scope="prototype">
Spring的继承
Spring的继承关注点在于具体对象,而不在于类,即不同的两个类的实例化对象可以完成继承,IoC容器会自动将父bean的数据类型和属性名与子类的数据类型与属性名进行匹配,同时可以在此基础上添加其他属性, 子 Bean 也可以覆盖从父 Bean 继承过来的配置。
<!-- twoectends继承oneectends -->
<bean id="oneextends" class="www.sheep.pojo.oneExtends"></bean>
<bean id="twoectends" class="www.sheep.pojo.twoExtends" parent="oneextends"></bean>
Spring的依赖
与继承类似,依赖也是描述bean和bean之间的一种关系,配置依赖之后,被依赖的bean一定先创建,再创建依赖的bean,A依赖于B,先创建B,再创建A。
<!-- twoectends依赖于oneectends -->
<bean id="oneextends" class="www.sheep.pojo.oneExtends">
<bean id="twoectends" class="www.sheep.pojo.twoExtends" depends-on="twoectends">
Bean的装载三种方式
Bean的装配可以理解为依赖关系注入,Bean的装配方式即Bean依赖注入的方式。
XML装载:IoC容器通过了通过XML方式装配的两种方式:Set、构造。
注解(Annotation)的装载
spring.xml中开启注解功能
<?xml version="1.0" encoding="UTF-8"?>
<beans xmlns="http://www.springframework.org/schema/beans"
    xmlns:xsi="http://www.w3.org/2001/XMLSchema-instance"
    xmlns:context="http://www.springframework.org/schema/context"
    xsi:schemaLocation="http://www.springframework.org/schema/beans
        http://www.springframework.org/schema/beans/spring-beans.xsd
        http://www.springframework.org/schema/context
        http://www.springframework.org/schema/context/spring-context.xsd">

    <context:annotation-config/>
 	<!--在使用注解功能之前要告诉IoC现在需要启用注解相关的
		功能,通过上下文级别的配置即可开启所有注解相关的功能-->
</beans>
三个实体类
public class Tools {
    public void minTool(){
        System.out.println("我是小扳手。。。。。");
    }
}
public class Utils {
    private int id;
    private String name;
    private String type;
}
/**
 * @Autowired注解:当bean中的id名与变量名相同时自动装载,当变量名不同时通过数据类型装载。
 * @Autowired
 *     @Qualifier(value = "utils"):当有多个相同类型的bena时可以使用该注解指定与id对应的名称。
 * */
public class Mankind {
    private String name;
    private String age;
    @Autowired
    private Tools tools;
    @Autowired
    @Qualifier(value = "utils")
    private Utils utils;
}
在spring.xml中添加bean
<?xml version="1.0" encoding="UTF-8"?>
<beans xmlns="http://www.springframework.org/schema/beans"
       xmlns:xsi="http://www.w3.org/2001/XMLSchema-instance"
       xmlns:context="http://www.springframework.org/schema/context"
       xsi:schemaLocation="http://www.springframework.org/schema/beans
        http://www.springframework.org/schema/beans/spring-beans.xsd
        http://www.springframework.org/schema/context
        http://www.springframework.org/schema/context/spring-context.xsd">
    <context:annotation-config/>
    <!-- Tools -->
    <bean id="tools" class="www.sheep.pojo.Tools"/>
    <!-- Utils -->
    <bean id="utils" class="www.sheep.pojo.Utils">
        <property name="id" value="1"/>
        <property name="name" value="鼠标"/>
        <property name="type" value="学习"/>
    </bean>
    <!-- Utils -->
    <bean id="utils2" class="www.sheep.pojo.Utils">
        <property name="id" value="1"/>
        <property name="name" value="鼠标"/>
        <property name="type" value="学习.com"/>
    </bean>
    <!-- Mankind -->
    <bean id="mankind" class="www.sheep.pojo.Mankind">
        <property name="name" value="梅西"/>
        <property name="age" value="21"/>
        <!-- 没有通过ref的方式,而是通过注解的方式进行装载 -->
    </bean>
</beans>
Handler
public class Test5 {
    public static void main(String[] args) {
        ApplicationContext applicationContext = new ClassPathXmlApplicationContext("spring-annotation.xml");
        Mankind mankind = (Mankind) applicationContext.getBean("mankind");
        mankind.getTools().minTool();
        System.out.println(mankind);
    }
}
自动装载(Autowrie)
IoC负责创建对象,DI负责完成对象注入,通过配置property标签的ref属性完成,同时Spring提供了另外一个更加简便的依赖注入方式:自动装载,不需要手动配置property,IoC容器会自动选择bean完成注入。
自动装载有两种方式:
byName:通过属性名自动装载
创建实体类
public class Person {
    private long id;
    private String name;
    private Car car;
}
public class Car {
    private long id;
    private String name;
}
spring.xml
	<bean id="car" class="www.sheep.pojo.Car">
        <property name="id" value="1"/>
        <property name="name" value="宝马"/>
    </bean>
    <bean id="person" class="www.sheep.pojo.Person" autowire="byName">
        <property name="id" value="1"/>
        <property name="name" value="编程"/>
    </bean>
Handler
public class Test4 {
    public static void main(String[] args) {
        ApplicationContext applicationContext = new ClassPathXmlApplicationContext("spring-autowire.xml");
        Person person = (Person) applicationContext.getBean("person");
        System.out.println(person);
    }
}
byType:通过属性的数据类型自动装载
spring.xml
    <!-- 当bean的id不同时根据数据类型装载 -->
	<bean id="car123" class="www.sheep.pojo.Car">
        <property name="id" value="1"/>
        <property name="name" value="宝马"/>
    </bean>
    <bean id="person" class="www.sheep.pojo.Person" autowire="byType">
        <property name="id" value="1"/>
        <property name="name" value="编程"/>
    </bean>
Bean的装载总结:
byName:使用时根据Bean的id自动装载可以有多个Bean。
byType:使用byType时只能由一个与之对应的Bean如果有多个会抛出异常。
注解装载和自动装载:都只能对引用数据类型装载(ref)。
springIoC中的注解
现在完全不使用Spring的.xml配置,全权交给Java来做!
JavaConfig是Spring的一个子项目,在Spring4之后,它成为了一个核心功能!
使用Java方式配置SPring的简单使用
创建实体类
package com.sheep.pojo;

import org.springframework.beans.factory.annotation.Value;
import org.springframework.stereotype.Component;

//通过@Component注解将该类交给IoC容器接管,注册到容器中
@Component
public class User {
    private  String name;

    public String getName() {
        return name;
    }
    public User(){
        System.out.println("Program Sheep!!!");
    }
    @Value("Program Sheep") //属性注入值
    public void setName(String name) {
        this.name = name;
    }
    @Override
    public String toString() {
        return "User{" +
                "name=‘" + name + ‘\‘‘ +
                ‘}‘;
    }
}
创建管理类
package com.sheep.config;

import com.sheep.pojo.User;
import org.springframework.context.annotation.Bean;
import org.springframework.context.annotation.ComponentScan;
import org.springframework.context.annotation.Configuration;
import org.springframework.stereotype.Component;

//这个也会被IoC容器接管,注册到容器中,应为他本来就是一个@Component。
//@Configuration 代表一个配置类,就相当于bean.xml,扫描com.sheep.pojo包下的所有bean
@Configuration
@ComponentScan("com.sheep.pojo")
public class SheepConfig {
    @Bean
    public User getUser(){
        return new User();//就是返回要注入到bean的对象
    }
    //注册一个bean,就相当于我之前写的一个bean标签
    //这个方法的名字,就相当于bean标签中的id属性
    //这个方法的返回值,就相当于bean标签中的class属性
}
创建测试类
import com.sheep.config.SheepConfig;
import com.sheep.pojo.User;
import org.springframework.context.ApplicationContext;
import org.springframework.context.annotation.AnnotationConfigApplicationContext;

public class MySheepConfig {
    public static void main(String[] args) {
        //如果完全使用了配置类方式去做,就只能通过AnnotationConfigApplicationContext上下文来获取容器,通过配置运行时类加载
        ApplicationContext applicationContext = new AnnotationConfigApplicationContext(SheepConfig.class);
        User user = (User) applicationContext.getBean("getUser");
        System.out.println(user);
    }
}
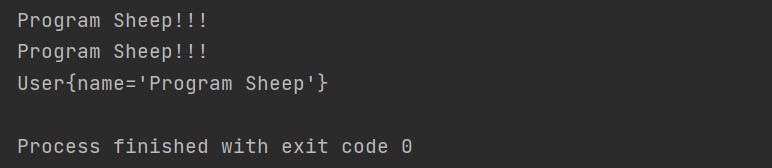
全程并没有使用spring.xml方式配置Bean而是使用纯Java代码配置实现的。
什么是AOP
AOP的优点
AOP术语
Aspect(切面):横切关注点被模块化的抽象对象。
Advice(通知):切面对象完成的工作
Target Object(目标对象):被通知的对象,即被横切的对象
Proxy(代理):切面、通知、目标混合之后的对象
Joinpoint(连接点):通知要插入业务代码的具体位置
Pointcut(切入点):AOP通过切点定位到连接点。
Weaving(织入):将切面代码插入到目标对象上,从而生成代理对象的过程。
创建Maven工程,pom.xml添加
   <dependencies>
        <dependency>
            <groupId>org.springframework</groupId>
            <artifactId>spring-aop</artifactId>
            <version>5.3.4</version>
        </dependency>
        <dependency>
            <groupId>org.springframework</groupId>
            <artifactId>spring-aspects</artifactId>
            <version>5.3.5</version>
        </dependency>
    </dependencies>
创建一个计数器接口Cal,定义4个方法。
package com.sheep.utils;

public interface Cal {
    public int add(int num1,int num2);
    public int sud(int num1,int num2);
    public int mul(int num1,int num2);
    public int div(int num1,int num2);
}
创建接口的实现类Callmpl
package com.sheep.utils.impl;
import com.sheep.utils.Cal;

public class CalImpl implements Cal {
    public int add(int num1, int num2) {
        System.out.println("add方法的参数是["+num1+","+num2+"]");
        int result = num1+num2;
        System.out.println("add方法的结果是"+result);
        return result;
    }
    public int sub(int num1, int num2) {
        System.out.println("sud方法的参数是["+num1+","+num2+"]");
        int result = num1-num2;
        System.out.println("sub方法的结果是"+result);
        return result;
    }
    public int mul(int num1, int num2) {
        System.out.println("mul方法的参数是["+num1+","+num2+"]");
        int result = num1*num2;
        System.out.println("mul方法的结果是"+result);
        return result;
    }
    public int div(int num1, int num2) {
        System.out.println("div方法的参数是["+num1+","+num2+"]");
        int result = num1/num2;
        System.out.println("div方法的结果是"+result);
        return result;
    }
}
测试
package com.sheep.test;
import com.sheep.utils.Cal;
import com.sheep.utils.MyInvocationHandler;
import com.sheep.utils.impl.CalImpl;

public class Test1 {
    public static void main(String[] args) {
        Cal cal = new CalImpl();
        cal.add(1,1);
        cal.sub(4,2);
        cal.mul(2,3);
        cal.div(6,2);
    }
}
上述代码中,日志信息和业务逻辑的耦合性很高,不利于系统的维护,使用AOP可以进行优化,如何来实现AOP?使用动态代理的方式来实现。
使用动态代理
创建代理类
package com.sheep.utils;
import java.lang.reflect.InvocationHandler;
import java.lang.reflect.Method;
import java.lang.reflect.Proxy;
import java.util.Arrays;

public class MyInvocationHandler implements InvocationHandler {
    //接收委托对象
    private Object object = null;
    //返回代理对象
    public Object bind(Object object){
        this.object = object;
        return Proxy.newProxyInstance(object.getClass().getClassLoader(),object.getClass().getInterfaces(),this);
    }
    @Override
    public Object invoke(Object proxy, Method method, Object[] args) throws Throwable {
        System.out.println(method.getName()+"方法的参数是"+ Arrays.toString(args));
        Object result = method.invoke(this.object, args);
        System.out.println(method.getName()+"结果是"+result);
        return result;
    }
}
测试
public class Test1 {
    public static void main(String[] args) {
        //原始
//        Cal cal = new CalImpl();
//        cal.add(1,1);
//        cal.sub(4,2);
//        cal.mul(2,3);
//        cal.div(6,2);
        //代理对象开发
        Cal cal = new CalImpl();  //创建委托对象
        MyInvocationHandler myInvocationHandler = new MyInvocationHandler();//创建代理对象
        Cal proxy = (Cal) myInvocationHandler.bind(cal);//将委托对象交给代理对象实现
        proxy.add(1,1);
        proxy.sub(2,1);
        proxy.mul(2,3);
        proxy.div(6,2);
    }
}
以上是通过动态代理实现AOP的过程,比较复杂,不好理解,Spring框架对AOP进行了封装,使用Spring框架可以用面向对象的思想来实现AOP。
控制台
add方法的参数是[1, 1]
add结果是2
sub方法的参数是[2, 1]
sub结果是1
mul方法的参数是[2, 3]
mul结果是6
div方法的参数是[6, 2]
div结果是3
使用Spring的API接口(获取参数)
添加依赖
<dependency>
    <groupId>org.aspectj</groupId>
    <artifactId>aspectjweaver</artifactId>
    <version>1.9.6</version>
</dependency>
定义一个接口
package com.sheep.service;

public interface UserService {
    public void add();
    public void delete();
    public void update();
    public void select();
}
定义接口实现类
package com.sheep.service;

public class UserServiceImpl implements UserService{
    @Override
    public void add() {
        System.out.println("增加一个用户");
    }
    @Override
    public void delete() {
        System.out.println("删除一个用户");
    }
    @Override
    public void update() {
        System.out.println("更新一个用户");
    }
    @Override
    public void select() {
        System.out.println("查询一个用户");
    }
}
配置前置类
package com.sheep.log;
import org.springframework.aop.MethodBeforeAdvice;
import java.lang.reflect.Method;

public class Log implements MethodBeforeAdvice {
    @Override
    public void before(Method method, Object[] objects, Object o) throws Throwable {
        System.out.println(o.getClass().getName()+"的"+method.getName()+"被执行了");
    }
}
配置后置类
package com.sheep.log;
import org.springframework.aop.AfterReturningAdvice;
import java.lang.reflect.Method;

public class AfterLog implements AfterReturningAdvice {
    @Override
    public void afterReturning(Object o, Method method, Object[] objects, Object o1) throws Throwable {
        System.out.println("执行了"+method.getName()+"方法。返回结果为:"+o);
    }
}
spring.xml中配置AOP约束
<?xml version="1.0" encoding="UTF-8"?>
<beans xmlns="http://www.springframework.org/schema/beans"
       xmlns:xsi="http://www.w3.org/2001/XMLSchema-instance"
       xmlns:aop="http://www.springframework.org/schema/aop"
       xsi:schemaLocation="http://www.springframework.org/schema/beans http://www.springframework.org/schema/beans/spring-beans.xsd http://www.springframework.org/schema/aop http://www.springframework.org/schema/aop/spring-aop.xsd">
</beans>
在spring.xml中将前置类后置类与切入点关联
<?xml version="1.0" encoding="UTF-8"?>
<beans xmlns="http://www.springframework.org/schema/beans"
       xmlns:xsi="http://www.w3.org/2001/XMLSchema-instance"
       xmlns:aop="http://www.springframework.org/schema/aop"
       xsi:schemaLocation="http://www.springframework.org/schema/beans http://www.springframework.org/schema/beans/spring-beans.xsd http://www.springframework.org/schema/aop http://www.springframework.org/schema/aop/spring-aop.xsd">
    <!-- 注册Bean -->
    <bean id="userService" class="com.sheep.service.UserServiceImpl"/>
    <bean id="log" class="com.sheep.log.Log"/>
    <bean id="afterLog" class="com.sheep.log.AfterLog"/>
<!-- 方式一使用原生的SpringAPI接口 -->
    <!-- 配置AOP: 需要导入aop的约束-->
    <aop:config>
        <!-- 切入点 -->
        <aop:pointcut id="pointcut" expression="execution(* com.sheep.service.UserServiceImpl.*(..))"/>
        <!-- 执行环绕增强 -->
        <!-- 通知 -->
        <aop:advisor advice-ref="log" pointcut-ref="pointcut"/>
        <aop:advisor advice-ref="afterLog" pointcut-ref="pointcut"/>
    </aop:config>
</beans>
测试类
import com.sheep.service.UserService;
import org.springframework.context.ApplicationContext;
import org.springframework.context.support.ClassPathXmlApplicationContext;

public class Test01 {
    public static void main(String[] args) {
        ApplicationContext applicationContext = new ClassPathXmlApplicationContext("application.xml");
        //动态代理的必须是接口
        UserService userService = (UserService) applicationContext.getBean("userService");
        userService.add();
        userService.delete();
        userService.update();
        userService.select();
    }
}
控制台
com.sheep.service.UserServiceImpl的add被执行了
增加一个用户
执行了add方法。返回结果为:null
com.sheep.service.UserServiceImpl的delete被执行了
删除一个用户
执行了delete方法。返回结果为:null
com.sheep.service.UserServiceImpl的update被执行了
更新一个用户
执行了update方法。返回结果为:null
com.sheep.service.UserServiceImpl的select被执行了
查询一个用户
执行了select方法。返回结果为:null
在方式一中前置通知与后置通知被抽象为一个类,并在xml中配置该类。
自定义类来实现
将方法一的前后置类变成一个类前后置变成两个方法,并且不要AfterReturningAdvice接口
package com.sheep.diy;

public class DiyPointCut {
    public void before(){
        System.out.println("------方法执行前------");
    }
    public void after(){
        System.out.println("------方法执行后------");
    }
}
在spring.xml中将切面、切入点、通知关联(运行时将方法一注释)
<?xml version="1.0" encoding="UTF-8"?>
<beans xmlns="http://www.springframework.org/schema/beans"
       xmlns:xsi="http://www.w3.org/2001/XMLSchema-instance"
       xmlns:aop="http://www.springframework.org/schema/aop"
       xsi:schemaLocation="http://www.springframework.org/schema/beans http://www.springframework.org/schema/beans/spring-beans.xsd http://www.springframework.org/schema/aop http://www.springframework.org/schema/aop/spring-aop.xsd">

    <bean id="userService" class="com.sheep.service.UserServiceImpl"/>
    <!--===================================================================================-->
    <!-- 方式一使用原生的SpringAPI接口 -->
    <!-- 注册Bean -->
    <bean id="log" class="com.sheep.log.Log"/>
    <bean id="afterLog" class="com.sheep.log.AfterLog"/>
    <!-- 配置AOP: 需要导入aop的约束-->
    <aop:config>
        <!-- 切入点 -->
        <aop:pointcut id="pointcut" expression="execution(* com.sheep.service.UserServiceImpl.*(..))"/>
        <!-- 执行环绕增强 -->
        <aop:advisor advice-ref="log" pointcut-ref="pointcut"/>
        <aop:advisor advice-ref="afterLog" pointcut-ref="pointcut"/>
    </aop:config>
    <!--===================================================================================-->
    <!-- 方式二:自定义类 -->
    <bean id="diy" class="com.sheep.diy.DiyPointCut"/>
    <aop:config>
        <!-- 自定义切面 -->
        <aop:aspect ref="diy">
            <!-- 切入点 -->
            <aop:pointcut id="point" expression="execution(* com.sheep.service.UserServiceImpl.*(..))"/>
            <!-- 通知点 -->
                <!-- 前置通知 -->
            <aop:before method="before" pointcut-ref="point"/>
                <!-- 后置通知 -->
            <aop:after method="after" pointcut-ref="point"/>
        </aop:aspect>
    </aop:config>
    <!--===================================================================================-->
</beans>
测试类
import com.sheep.service.UserService;
import org.springframework.context.ApplicationContext;
import org.springframework.context.support.ClassPathXmlApplicationContext;

public class Test01 {
    public static void main(String[] args) {
        ApplicationContext applicationContext = new ClassPathXmlApplicationContext("application.xml");
        //动态代理的必须是接口
        UserService userService = (UserService) applicationContext.getBean("userService");
        userService.add();
        userService.delete();
        userService.update();
        userService.select();
    }
}
控制台
------方法执行前------
增加一个用户
------方法执行后------
------方法执行前------
删除一个用户
------方法执行后------
------方法执行前------
更新一个用户
------方法执行后------
------方法执行前------
查询一个用户
------方法执行后------
案例一:
自动生成动态
	<!-- 让Spring容器结合切面类和目标对象自动生成动态代理对象-->
    <aop:aspectj-autoproxy/>
新建切面类使用注解配置(延续AOP三种实现方式的类)
package com.sheep.diy;
import org.aspectj.lang.ProceedingJoinPoint;
import org.aspectj.lang.annotation.After;
import org.aspectj.lang.annotation.Around;
import org.aspectj.lang.annotation.Aspect;
import org.aspectj.lang.annotation.Before;
import org.springframework.stereotype.Component;

@Aspect //表示这个类是一个切面
@Component //表示将该类交给IoC容器创建(注意在spring.xml中要配置扫描该该类)
public class Annotation {
    //@Before:表示前置通知的切入点
    @Before("execution(* com.sheep.service.UserServiceImpl.*(..))")
    public void before(){
        System.out.println("-=-=-=方法执行前-=-=-=");
    }
    // @After:表示后置通知的切入点
    @After("execution(* com.sheep.service.UserServiceImpl.*(..))")
    public void after(){
        System.out.println("-=-=-=方法执行后-=-=-=");
    }
    //@Around表示环绕通知切入点
    @Around("execution(* com.sheep.service.UserServiceImpl.*(..))")
    public void around(ProceedingJoinPoint pj) throws Throwable {
        System.out.println("环绕前");
        Object proceed = pj.proceed();		//执行前后置方法
        System.out.println("环绕后");
    }
}
在spring.xml中配置
<?xml version="1.0" encoding="UTF-8"?>
<beans xmlns="http://www.springframework.org/schema/beans"
xmlns:xsi="http://www.w3.org/2001/XMLSchema-instance"
xmlns:aop="http://www.springframework.org/schema/aop"
xmlns:context="http://www.springframework.org/schema/context"
xsi:schemaLocation="http://www.springframework.org/schema/beans http://www.springframework.org/schema/beans/spring-beans.xsd http://www.springframework.org/schema/aop http://www.springframework.org/schema/aop/spring-aop.xsd http://www.springframework.org/schema/context https://www.springframework.org/schema/context/spring-context.xsd">
<!-- 注册Bean -->
<bean id="userService" class="com.sheep.service.UserServiceImpl"/>
<bean id="log" class="com.sheep.log.Log"/>
<bean id="afterLog" class="com.sheep.log.AfterLog"/>
<!-- <!– 方式一使用原生的SpringAPI接口 –>-->
<!-- <!– 配置AOP: 需要导入aop的约束–>-->
<!-- <aop:config>-->
<!-- <!– 切入点 –>-->
<!-- <aop:pointcut id="pointcut" expression="execution(* com.sheep.service.UserServiceImpl.*(..))"/>-->
<!-- <!– 执行环绕增强 –>-->
<!-- <aop:advisor advice-ref="log" pointcut-ref="pointcut"/>-->
<!-- <aop:advisor advice-ref="afterLog" pointcut-ref="pointcut"/>-->
<!-- </aop:config>-->
<!-- <!– 方式二:自定义类 –>-->
<!-- <bean id="diy" class="com.sheep.diy.DiyPointCut"/>-->
<!-- <aop:config>-->
<!-- <!– 自定义切面 –>-->
<!-- <aop:aspect ref="diy">-->
<!-- <!– 切入点 –>-->
<!-- <aop:pointcut id="point" expression="execution(* com.sheep.service.UserServiceImpl.*(..))"/>-->
<!-- <!– 通知点 –>-->
<!-- <!– 前置通知 –>-->
<!-- <aop:before method="before" pointcut-ref="point"/>-->
<!-- <!– 后置通知 –>-->
<!-- <aop:after method="after" pointcut-ref="point"/>-->
<!-- </aop:aspect>-->
<!-- </aop:config>-->
<!-- 方式三 -->
<!-- 将com.sheep.diy包下的所有类交给IOC容器创建 -->
<context:component-scan base-package="com.sheep.diy*"/>
<!-- <bean class="com.sheep.diy.Annotation"/>-->
<!-- 让Spring容器结合切面类和目标对象自动生成动态代理对象-->
<aop:aspectj-autoproxy/>
</beans>
测试类
import com.sheep.log.Log;
import com.sheep.service.UserService;
import org.springframework.context.ApplicationContext;
import org.springframework.context.support.ClassPathXmlApplicationContext;

public class Test01 {
    public static void main(String[] args) {
        ApplicationContext applicationContext = new ClassPathXmlApplicationContext("application.xml");
        //动态代理的必须是接口
        UserService userService = (UserService) applicationContext.getBean("userService");
        userService.add();
        userService.delete();
        userService.update();
        userService.select();
    }
}
控制台
环绕前
-=-=-=方法执行前-=-=-=
增加一个用户
-=-=-=方法执行后-=-=-=
环绕后
环绕前
-=-=-=方法执行前-=-=-=
删除一个用户
-=-=-=方法执行后-=-=-=
环绕后
可以看出该环绕在方法的最前和最后
案例二:(获取参数)
创建接口
package com.sheep.utils;

public interface Cal {
    public int add(int num1,int num2);
    public int sub(int num1,int num2);
    public int mul(int num1,int num2);
    public int div(int num1,int num2);
}
创建接口实习类(交给IoC容器)
package com.sheep.utils.impl;
import com.sheep.utils.Cal;
import org.springframework.stereotype.Component;

@Component	//将该类交给IoC容器
public class CalImpl implements Cal {
    public int add(int num1, int num2) {
        //System.out.println("add方法的参数是["+num1+","+num2+"]");
        int result = num1+num2;
        //System.out.println("add方法的结果是"+result);
        return result;
    }
    public int sub(int num1, int num2) {
        int result = num1-num2;
        return result;
    }
    public int mul(int num1, int num2) {
        int result = num1*num2;
        return result;
    }
    public int div(int num1, int num2) {
        int result = num1/num2;
        return result;
    }
}
使用注解创建切面类
package com.sheep.aop;

import org.aspectj.lang.JoinPoint;
import org.aspectj.lang.annotation.*;
import org.springframework.stereotype.Component;

import java.util.Arrays;

@Aspect //声明该类为切面类
@Component //将来类交给IoC容器
public class LoggerAspect {

    //前置通知
    @Before("execution(public int com.sheep.utils.impl.CalImpl.*(..))")
    public void before(JoinPoint joinPoint){
        //获取方法名
        String name = joinPoint.getSignature().getName();
        //获取参数
        String args = Arrays.toString(joinPoint.getArgs());
        System.out.println(name+"方法的参数是"+args);
    }
    //后置通知
    @After("execution(* com.sheep.utils.impl.CalImpl.*(..)))")
    public void after(JoinPoint joinPoint){
        String name = joinPoint.getSignature().getName();
        System.out.println(name+"执行完毕");
    }
    //返回值通知
    @AfterReturning(value = "execution(* com.sheep.utils.impl.CalImpl.*(..)))",returning = "result")
    public void afterReturning(JoinPoint joinPoint,Object result){
        String name = joinPoint.getSignature().getName();
        System.out.println(name+"方法的结果是"+result);
    }
    //异常通知
    @AfterThrowing(value = "execution(* com.sheep.utils.impl.CalImpl.*(..)))",throwing = "exception")
    public void fterThrowing(JoinPoint joinPoint,Exception exception){
        String name = joinPoint.getSignature().getName();
        System.out.println(name+"方法抛出了"+exception+"异常");
    }
}
在spring.xml中配置注解扫描、和Spring容器结合切面类和目标对象自动生成动态代理对象
<?xml version="1.0" encoding="UTF-8"?>
<beans xmlns="http://www.springframework.org/schema/beans"
       xmlns:xsi="http://www.w3.org/2001/XMLSchema-instance"
       xmlns:aop="http://www.springframework.org/schema/aop"
       xmlns:context="http://www.springframework.org/schema/context"
       xsi:schemaLocation="http://www.springframework.org/schema/beans http://www.springframework.org/schema/beans/spring-beans.xsd http://www.springframework.org/schema/aop http://www.springframework.org/schema/aop/spring-aop.xsd http://www.springframework.org/schema/context https://www.springframework.org/schema/context/spring-context.xsd">
    <!-- 自动扫描 -->
    <context:component-scan base-package="com.sheep.aop*"/>
    <context:component-scan base-package="com.sheep.utils*"/>
    <!-- 让Spring容器结合切面类和目标对象自动生成动态代理对象-->
    <aop:aspectj-autoproxy/>
</beans>
控制台
add方法的参数是[1, 1]
add方法的结果是2
add执行完毕
sub方法的参数是[2, 1]
sub方法的结果是1
sub执行完毕
总结:注解开发中常用的注解、通知的执行先后顺序
@Aspect :表示这个类是一个切面
@Component :表示将该类交给IoC容器创建(注意在spring.xml中要配置扫描该该类)
@Before:表示前置通知
@After:表示后置通知
@AfterReturning:表示返回值通知
@AfterThrowing:异常通知
@Around:表示环绕通知
前环绕通知 >> 前置通知 >> 返回值通知 >> 后置通知 >> 后环绕通知。
原文:https://www.cnblogs.com/w-eye/p/14586243.html