? Keepalived是VRRP协议的软件实现,可以完成IP地址漂移。因为其设计目的是为了实现IPVS服务的高可用,所以可以在VIP地址所在的节点生成ipvs规则并对后端服务器(Read Server)进行健康检测。并且提供了脚本调用节课,可以通过脚本扩展其他功能,从而支持Nginx、HAProxy等服务。
控制组件Control Plane
IO复用器Scheduler - I/O Multiplexer :Keepalived使用select模型实现调度功能。
内存管理Memory Management:该框架实现了内存管理功能。
yum install keepalived
apt install keepalived
安装依赖包
yum install libnfnetlink-devel libnfnetlink ipvsadm libnl libnl-devel libnl3 libnl3-devel lm_sensors-libs net-snmp-agent-libs net-snmp-libs openssl openssl-devel automake iproute
下载源码包
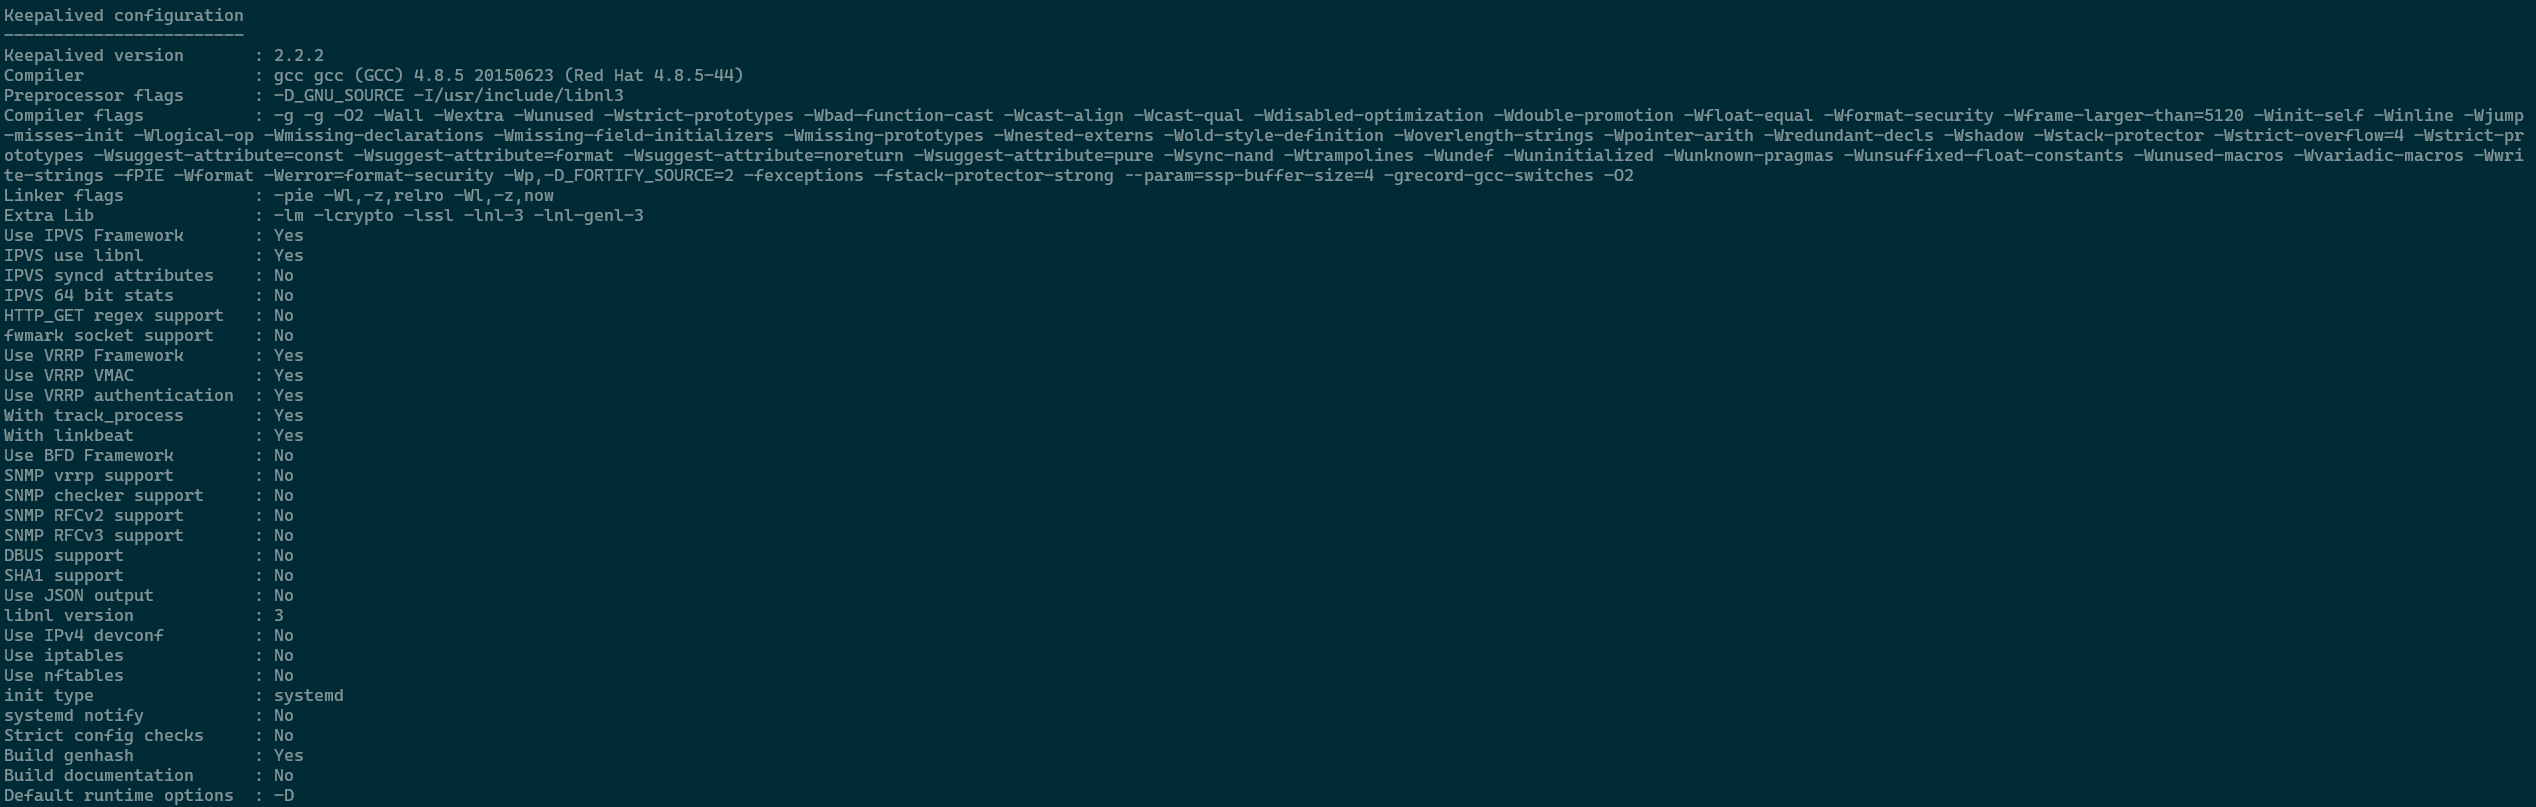
wget http://www.keepalived.org/software/keepalived-2.2.2.tar.gz
解压源码包
tar -xf keepalived-2.2.2.tar.gz
cd keepalived-2.2.2
配置编译选项
./configure --prefix=/usr/local/keepalived --disable-fwmark # --disable-fwmark 禁止keepalived生成防火墙规则,等价于vrrp_iptables选项
确认没有出现报错
安装
make && make install
复制配置文件
mkdir /etc/keepalived
cp keepalived/etc/keepalived/keepalived.conf /etc/keepalived/
测试是否可以正常启动生成VIP
systemctl start keepalived
/etc/keepalived/keepalived.conf(无论是源码安装还是包管理器安装都在这里),可以使用include语句拆分配置文件会在三主配置时演示用法。| 主机名 | IP地址 | 节点角色 | VIP | 软件版本 |
|---|---|---|---|---|
| lb1 | 172.20.1.239 | VRouter1(Master) | 172.20.1.100 | keepalived-1.3.5 |
| lb2 | 172.20.1.223 | VRouter1(Backup) | / | keepalived-1.3.5 |
安装软件包
yum install keepalived -y
修改配置文件
cp /etc/keepalived/keepalived.conf{,.bak}
vim /etc/keepalived/keepalived.conf

! Configuration File for keepalived

global_defs {
   notification_email {
     acassen@firewall.loc   # 告警邮件的接收地址
   }
   notification_email_from Alexandre.Cassen@firewall.loc  # 告警邮件的发送账号
   smtp_server smtp.qq.com  # 邮件服务器地址
   smtp_connect_timeout 30  # 连接邮件服务器的超时时间
   router_id LVS_DEVEL      # 唯一标识,默认为主机名
   vrrp_skip_check_adv_addr # 如果收到的报文和上一个报文是相同的路由器发送则跳过检测报文中的源地址。
   vrrp_strict				# 严格遵守VRRP协议,在以下场景需要关闭该此项 1. 没有VIP地址 2. 配置了单播邻居 3. 在VRRPv2版本中有IPv6地址。
   vrrp_iptables			# 禁止Keepalived启动后自动生成iptable规则(如果使用Nginx和HAProxy)时没有编辑此项,则无法正常访问。
   vrrp_garp_interval 0     # ARP报文的发送延迟ms
   vrrp_gna_interval 0      # 消息发送延迟ms
   vrrp_mcast_group4 224.0.0.18   # vrrp报文的组播地址,默认是224.0.0.18  (224.0.0.0到239.255.255.255)
}

# 定义VRouter
vrrp_instance VRouter1 {  # Vrouter1虚拟路由器的名称
    state MASTER          # 当前节点在此虚拟路由器上的初始状态(MASTER|BACKUP)
    interface eth0        # 绑定当前虚拟路由器使用的物理接口
    virtual_router_id 1   # 当前虚拟路由器的唯一标识(0-255)
    priority 100          # 当前节点在此虚拟路由器中的优先级(1-254)
    advert_int 1		  # VRRP的通告间隔
    authentication {      # 认证
        auth_type PASS    # 使用字符认证
        auth_pass Passw0rd  # 认证字符(仅前8位有效,可以超过8位)
    }
    virtual_ipaddress {   # 配置虚拟IP
        172.20.1.100 dev eth0 label eth0:0   # 设置虚拟IP
    }
}
启动Keepalived
systemctl start keepalived
验证VIP是否正常
eth0:0: flags=4163<UP,BROADCAST,RUNNING,MULTICAST>  mtu 1500
        inet 172.20.1.100  netmask 255.255.255.255  broadcast 0.0.0.0
        ether 52:54:00:9c:43:c8  txqueuelen 1000  (Ethernet)
安装软件包
yum install keepalived -y
修改配置文件
cp /etc/keepalived/keepalived.conf{,.bak}
vim /etc/keepalived/keepalived.conf

! Configuration File for keepalived

global_defs {
   notification_email {
     acassen@firewall.loc   # 告警邮件的接收地址
   }
   notification_email_from Alexandre.Cassen@firewall.loc  # 告警邮件的发送账号
   smtp_server smtp.qq.com  # 邮件服务器地址
   smtp_connect_timeout 30  # 连接邮件服务器的超时时间
   router_id LVS_DEVEL      # 唯一标识,默认为主机名
   vrrp_skip_check_adv_addr # 如果收到的报文和上一个报文是相同的路由器发送则跳过检测报文中的源地址。
   vrrp_strict				# 严格遵守VRRP协议,在以下场景需要关闭该此项 1. 没有VIP地址 2. 配置了单播邻居 3. 在VRRPv2版本中有IPv6地址。
   vrrp_iptables			# 禁止Keepalived启动后自动生成iptable规则(如果使用Nginx和HAProxy)时没有编辑此项,则无法正常访问。
   vrrp_garp_interval 0     # ARP报文的发送延迟ms
   vrrp_gna_interval 0      # 消息发送延迟ms
   vrrp_mcast_group4 224.0.0.18   # vrrp报文的组播地址,默认是224.0.0.18  (224.0.0.0到239.255.255.255)
}

# 定义VRouter
vrrp_instance VRouter1 {  # Vrouter1虚拟路由器的名称
    state BACKUP          # 当前节点在此虚拟路由器上的初始状态(MASTER|BACKUP)
    interface eth0        # 绑定当前虚拟路由器使用的物理接口
    virtual_router_id 1   # 当前虚拟路由器的唯一标识(0-255)
    priority 90           # 当前节点在此虚拟路由器中的优先级(1-254)
    advert_int 1		  # VRRP的通告间隔
    authentication {      # 认证
        auth_type PASS    # 使用字符认证
        auth_pass Passw0rd  # 认证字符(仅前8位有效,可以超过8位)
    }
    virtual_ipaddress {   # 配置虚拟IP
        172.20.1.100 dev eth0 label eth0:0   # 设置虚拟IP
    }
}
启动Keepalived
systemctl start keepalived
验证VIP是否正常
lb1节点关闭keepalived
killall keepalived
lb2节点查看VIP是否可以自动漂移
eth0:0: flags=4163<UP,BROADCAST,RUNNING,MULTICAST>  mtu 1500
        inet 172.20.1.100  netmask 255.255.255.255  broadcast 0.0.0.0
        ether 52:54:00:d3:6a:f5  txqueuelen 1000  (Ethernet)
lb1节点启动之后会自动抢占VIP
systemctl start keepalived

eth0:0: flags=4163<UP,BROADCAST,RUNNING,MULTICAST>  mtu 1500
        inet 172.20.1.100  netmask 255.255.255.255  broadcast 0.0.0.0
        ether 52:54:00:9c:43:c8  txqueuelen 1000  (Ethernet)
| 主机名 | IP地址 | 节点角色 | VIP | 软件版本 |
|---|---|---|---|---|
| lb1 | 172.20.1.239 | VRouter1(Master) VRouter2(Backup) |
172.20.1.100 | keepalived-1.3.5 |
| lb2 | 172.20.1.223 | VRouter1(Backup) VRouter2(Master) |
172.20.1.200 | keepalived-1.3.5 |
安装
yum install keepalived -y
配置
vim /etc/keepalived/keepalived.conf
! Configuration File for keepalived

global_defs {
   notification_email {
     acassen@firewall.loc
   }
   notification_email_from Alexandre.Cassen@firewall.loc
   smtp_server smtp.qq.com
   smtp_connect_timeout 30
   router_id LVS_DEVEL
   vrrp_skip_check_adv_addr
   #vrrp_strict             # 在开启非抢占或延迟抢占时需要关闭此选项
   vrrp_iptables
   vrrp_garp_interval 0
   vrrp_gna_interval 0
}

# 定义VRouter2
vrrp_instance VRouter1 {  # Vrouter1虚拟路由器的名称
    state BACKUP          # 非抢占模式需要当前VRouter的所有节点均配置为BACKUP
    interface eth0
    virtual_router_id 1
    priority 100          # 当前节点在此虚拟路由器中的优先级1-254
    advert_int 1
    nopreempt             # 设置此VRouter为非抢占模式
    authentication {
        auth_type PASS
        auth_pass Passw0rd
    }
    virtual_ipaddress {
        172.20.1.100 dev eth0 label eth0:0
    }
}

# 定义VRouter1
vrrp_instance VRouter2 {
    state BACKUP          # 延迟抢占需要所有VRouter的所有节点均配置为BACKUP
    interface eth0
    virtual_router_id 2   # 路由器唯一标识,不能冲突
    priority 90           # 优先级
    advert_int 1
    preempt_delay 60s     # 配置为延迟抢占模式,默认值为300s
    authentication {
        auth_type PASS
        auth_pass Passw0rd
    }
    virtual_ipaddress {
        172.20.1.200 dev eth0 label eth0:1 # 修改网卡标签
    }
}
启动Keepalived
systemctl start keepalived
验证VIP是否正常
eth0:0: flags=4163<UP,BROADCAST,RUNNING,MULTICAST>  mtu 1500
        inet 172.20.1.100  netmask 255.255.255.255  broadcast 0.0.0.0
        ether 52:54:00:9c:43:c8  txqueuelen 1000  (Ethernet)

eth0:1: flags=4163<UP,BROADCAST,RUNNING,MULTICAST>  mtu 1500   # lb2启动之后会延迟60s将该VIP抢占到lb2节点
        inet 172.20.1.200  netmask 255.255.255.255  broadcast 0.0.0.0
        ether 52:54:00:9c:43:c8  txqueuelen 1000  (Ethernet)
安装
yum install keepalived -y
配置
vim /etc/keepalived/keepalived.conf

! Configuration File for keepalived

global_defs {
   notification_email {
     acassen@firewall.loc
   }
   notification_email_from Alexandre.Cassen@firewall.loc
   smtp_server smtp.qq.com
   smtp_connect_timeout 30
   router_id LVS_DEVEL
   vrrp_skip_check_adv_addr
   #vrrp_strict             # 在开启非抢占或延迟抢占时需要关闭此选项
   vrrp_iptables
   vrrp_garp_interval 0
   vrrp_gna_interval 0
}

# 定义VRouter2
vrrp_instance VRouter1 {
    state BACKUP          # 非抢占模式需要当前VRouter的所有节点均配置为BACKUP
    interface eth0
    virtual_router_id 1
    priority 90          # 当前节点在此虚拟路由器中的优先级1-254
    advert_int 1
    nopreempt             # 设置此VRouter为非抢占模式
    authentication {
        auth_type PASS
        auth_pass Passw0rd
    }
    virtual_ipaddress {
        172.20.1.100 dev eth0 label eth0:0
    }
}

# 定义VRouter1
vrrp_instance VRouter2 {
    state BACKUP          # 延迟抢占需要所有VRouter的所有节点均配置为BACKUP
    interface eth0
    virtual_router_id 2   # 路由器唯一标识,不能冲突
    priority 100          # 优先级
    advert_int 1
    preempt_delay 60s     # 配置为延迟抢占模式,默认值为300s
    authentication {
        auth_type PASS
        auth_pass Passw0rd
    }
    virtual_ipaddress {
        172.20.1.200 dev eth0 label eth0:1 # 修改网卡标签
    }
}
启动Keepalived
systemctl start keepalived
验证VIP是否正常
eth0:1: flags=4163<UP,BROADCAST,RUNNING,MULTICAST>  mtu 1500    # keepalived 服务启动60s之后会将该IP抢占到lb2节点
        inet 172.20.1.200  netmask 255.255.255.255  broadcast 0.0.0.0
        ether 52:54:00:d3:6a:f5  txqueuelen 1000  (Ethernet)
| 主机名 | IP地址 | 节点角色 | VIP | 软件版本 |
|---|---|---|---|---|
| lb1 | 172.20.1.234 | VRouter1(Master) VRouter2(Backup) VRouter3(Backup) |
172.20.1.80 | keepalived-1.3.5 |
| lb2 | 172.20.1.235 | VRouter1(Backup) VRouter2(Master) VRouter3(Backup) |
172.20.1.81 | keepalived-1.3.5 |
| lb3 | 172.20.1.236 | VRouter1(Backup) VRouter2(Backup) VRouter3(Master) |
172.20.1.82 | keepalived-1.3.5 |
安装软件包
yum install keepalived -y
修改配置文件
cd /etc/keepalived/
vim keepalived.conf

! Configuration File for keepalived


global_defs {
   notification_email {
     acassen@firewall.loc
   }
   notification_email_from Alexandre.Cassen@firewall.loc
   smtp_server 192.168.200.1
   smtp_connect_timeout 30
   router_id LVS_DEVEL
   vrrp_skip_check_adv_addr
   # vrrp_strict  # 单播模式必须关闭
   vrrp_iptables
   vrrp_garp_interval 0
   vrrp_gna_interval 0
}


vrrp_instance VRouter1 {
    state BACKUP
    interface eth0
    virtual_router_id 80
    priority 100
    advert_int 1
    unicast_src_ip 172.20.1.234  # 当前VRouter本机地址
    unicast_peer {
        172.20.1.235  # 当前VRouter的其他节点地址
        172.20.1.236
    }
    authentication {
        auth_type PASS
        auth_pass D0cker
    }
    virtual_ipaddress {
        172.20.1.80 dev eth0 label eth0:0
    }
}

vrrp_instance VRouter2 {
    state BACKUP
    interface eth0
    virtual_router_id 81
    priority 90
    advert_int 1
    unicast_src_ip 172.20.1.234
    unicast_peer {
        172.20.1.235
        172.20.1.236
    }
    authentication {
        auth_type PASS
        auth_pass D0cker
    }
    virtual_ipaddress {
        172.20.1.81 dev eth0 label eth0:1
    }
}
include /etc/keepalived/confdir/*.conf

##
mkdir confdir
vim confdir/VRouter3.conf
vrrp_instance VRouter3 {
    state BACKUP
    interface eth0
    virtual_router_id 82
    priority 80
    advert_int 1
    unicast_src_ip 172.20.1.234
    unicast_peer {
        172.20.1.235
        172.20.1.236
    }
    authentication {
        auth_type PASS
        auth_pass D0cker
    }
    virtual_ipaddress {
        172.20.1.82 dev eth0 label eth0:2
    }
}
启动keepalived
systemctp start keepalived
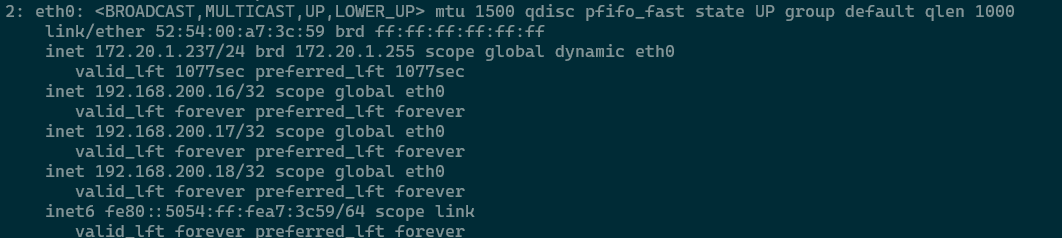
验证VIP是否正常
ifconfig
eth0:0: flags=4163<UP,BROADCAST,RUNNING,MULTICAST>  mtu 1500
        inet 172.20.1.80  netmask 255.255.255.255  broadcast 0.0.0.0
        ether 52:54:00:99:f6:3d  txqueuelen 1000  (Ethernet)

eth0:1: flags=4163<UP,BROADCAST,RUNNING,MULTICAST>  mtu 1500
        inet 172.20.1.81  netmask 255.255.255.255  broadcast 0.0.0.0
        ether 52:54:00:99:f6:3d  txqueuelen 1000  (Ethernet)

eth0:2: flags=4163<UP,BROADCAST,RUNNING,MULTICAST>  mtu 1500
        inet 172.20.1.82  netmask 255.255.255.255  broadcast 0.0.0.0
        ether 52:54:00:99:f6:3d  txqueuelen 1000  (Ethernet)
安装软件包
yum install keepalived -y
修改配置文件
cd /etc/keepalived/
vim keepalived.conf

! Configuration File for keepalived

global_defs {
   notification_email {
     acassen@firewall.loc
   }
   notification_email_from Alexandre.Cassen@firewall.loc
   smtp_server 192.168.200.1
   smtp_connect_timeout 30
   router_id LVS_DEVEL
   vrrp_skip_check_adv_addr
   #vrrp_strict
   vrrp_iptables
   vrrp_garp_interval 0
   vrrp_gna_interval 0
}

vrrp_instance VRouter1 {
    state BACKUP
    interface eth0
    virtual_router_id 80
    priority 80
    advert_int 1
    unicast_src_ip 172.20.1.235
    unicast_peer {
        172.20.1.234
        172.20.1.236
    }
    authentication {
        auth_type PASS
        auth_pass D0cker
    }
    virtual_ipaddress {
        172.20.1.80 dev eth0 label eth0:0
    }
}

vrrp_instance VRouter2 {
    state BACKUP
    interface eth0
    virtual_router_id 81
    priority 100
    advert_int 1
    unicast_src_ip 172.20.1.235
    unicast_peer {
        172.20.1.234
        172.20.1.236
    }
    authentication {
        auth_type PASS
        auth_pass D0cker
    }
    virtual_ipaddress {
        172.20.1.81 dev eth0 label eth0:1
    }
}
include /etc/keepalived/confdir/*.conf

mkdir confdir
vim confdir/VRouter3.conf
vrrp_instance VRouter3 {
    state BACKUP
    interface eth0
    virtual_router_id 82
    priority 90
    advert_int 1
    unicast_src_ip 172.20.1.235
    unicast_peer {
        172.20.1.234
        172.20.1.236
    }
    authentication {
        auth_type PASS
        auth_pass D0cker
    }
    virtual_ipaddress {
        172.20.1.82 dev eth0 label eth0:2
    }
}
启动keepalived
systemctl start keepalived
验证VIP是否正常
eth0:1: flags=4163<UP,BROADCAST,RUNNING,MULTICAST>  mtu 1500
        inet 172.20.1.81  netmask 255.255.255.255  broadcast 0.0.0.0
        ether 52:54:00:d7:fd:30  txqueuelen 1000  (Ethernet)
# 因为lb2的VRouter3  优先级比lb1高,所以会飘到lb2
eth0:2: flags=4163<UP,BROADCAST,RUNNING,MULTICAST>  mtu 1500
        inet 172.20.1.82  netmask 255.255.255.255  broadcast 0.0.0.0
        ether 52:54:00:d7:fd:30  txqueuelen 1000  (Ethernet)
lb1节点查看
eth0:0: flags=4163<UP,BROADCAST,RUNNING,MULTICAST>  mtu 1500
        inet 172.20.1.80  netmask 255.255.255.255  broadcast 0.0.0.0
        ether 52:54:00:99:f6:3d  txqueuelen 1000  (Ethernet)
安装软件包
yum install keepalived -y
修改配置文件
 cat /etc/keepalived/keepalived.conf
! Configuration File for keepalived

# 全局配置
global_defs {
   notification_email {
     acassen@firewall.loc   # 告警邮件的接收地址
   }
   notification_email_from Alexandre.Cassen@firewall.loc  # 告警邮件的发送账号
   smtp_server 192.168.200.1   # 邮件服务器地址
   smtp_connect_timeout 30  # 连接邮件服务器的超时时间
   router_id LVS_DEVEL      # 唯一标识默认为主机名
   vrrp_skip_check_adv_addr # 如果收到的报文和上一个报文是相同的路由器发送则跳过检测报文中的源地址
   #vrrp_strict                         # 严格遵守VRRP协议在以下场景需要关闭该此项 1. 没有VIP地址 2. 配置了单播邻居 3. 在VRRPv2版本中有IPv6地址
   vrrp_iptables                        # 禁止Keepalived启动后自动生成iptable规则(如果使用Nginx和HAProxy)时没有编辑此项则无法正常访问
   vrrp_garp_interval 0     # ARP报文的发送延迟ms
   vrrp_gna_interval 0      # 消息发送延迟ms
}

# 定义VRouter
vrrp_instance VRouter1 {  # Vrouter1虚拟路由器的名称
    state BACKUP          # 当前节点在此虚拟路由器上的初始状态(MASTER|BACKUP)
    interface eth0        # 绑定当前虚拟路由器使用的物理接口
    virtual_router_id 80 # 当前虚拟路由器的唯一标识0-255
    priority 90           # 当前节点在此虚拟路由器中的优先级1-254
    advert_int 1                  # VRRP的通告间隔
    unicast_src_ip 172.20.1.236
    unicast_peer {
        172.20.1.235
        172.20.1.236
    }
    authentication {      # 认证
        auth_type PASS    # 使用字符认证
        auth_pass D0cker  # 认证字符(仅前8位有效可以超过8位)
    }
    virtual_ipaddress {   # 配置虚拟IP
        172.20.1.80 dev eth0 label eth0:0   # 设置虚拟IP
    }
}

vrrp_instance VRouter2 {
    state BACKUP
    interface eth0
    virtual_router_id 81
    priority 80
    advert_int 1
    unicast_src_ip 172.20.1.236
    unicast_peer {
        172.20.1.235
        172.20.1.236
    }
    authentication {
        auth_type PASS
        auth_pass D0cker
    }
    virtual_ipaddress {
        172.20.1.81 dev eth0 label eth0:1
    }
}
include /etc/keepalived/confdir/*.conf

### --------------------------------------------------------
cat /etc/keepalived/confdir/VRouter3.conf
vrrp_instance VRouter3 {
    state BACKUP
    interface eth0
    virtual_router_id 82
    priority 100
    advert_int 1
    #nopreempt
    #preempt_delay 60s
    unicast_src_ip 172.20.1.236
    unicast_peer {
        172.20.1.234
        172.20.1.235
    }
    authentication {
        auth_type PASS
        auth_pass D0cker
    }
    virtual_ipaddress {
        172.20.1.82 dev eth0 label eth0:2
    }
}
启动keepalived
systemctl start keepalived
验证VIP是否正常
eth0:2: flags=4163<UP,BROADCAST,RUNNING,MULTICAST>  mtu 1500
        inet 172.20.1.82  netmask 255.255.255.255  broadcast 0.0.0.0
        ether 52:54:00:cf:42:f9  txqueuelen 1000  (Ethernet)
lb2节点查看
eth0:1: flags=4163<UP,BROADCAST,RUNNING,MULTICAST>  mtu 1500
        inet 172.20.1.81  netmask 255.255.255.255  broadcast 0.0.0.0
        ether 52:54:00:d7:fd:30  txqueuelen 1000  (Ethernet)
lb1节点查看
eth0:0: flags=4163<UP,BROADCAST,RUNNING,MULTICAST>  mtu 1500
        inet 172.20.1.80  netmask 255.255.255.255  broadcast 0.0.0.0
        ether 52:54:00:99:f6:3d  txqueuelen 1000  (Ethernet)
}}| 主机名 | IP地址 | 节点角色 | VIP | 软件版本 |
|---|---|---|---|---|
| lb1 | 172.20.1.221 | LVS(Master) | 172.20.1.100 | keepalived-1.3.5 |
| lb2 | 172.20.1.224 | LVS(Backup) | 172.20.1.100 | keepalived-1.3.5 |
| rs1 | 172.20.1.222 | RealServer1 | 172.20.1.100(lo:0) | nginx-1.16.1 |
| rs2 | 172.20.1.225 | RealServer2 | 172.20.1.100(lo:0) | nginx-1.16.1 |
安装Web服务器
yum install nginx
修改主页
echo "in rs1 web page." > /usr/share/nginx/html/index.htmlecho "in rs2 web page." > /usr/share/nginx/html/index.html绑定VIP到lo:0网卡
cat /usr/local/sbin/setrs
#!/usr/bin/env bash

vip="172.20.1.100"         # VIP 地址
netmask="255.255.255.255"  # 32位掩码
iface="lo:0"               # 配置到lo:0接口
case $1 in
start)
        echo 1 > /proc/sys/net/ipv4/conf/all/arp_ignore
        echo 1 > /proc/sys/net/ipv4/conf/lo/arp_ignore
        echo 2 > /proc/sys/net/ipv4/conf/all/arp_announce
        echo 2 > /proc/sys/net/ipv4/conf/lo/arp_announce
        ifconfig ${iface} ${vip} netmask ${netmask} broadcast ${vip} up
        route add -host ${vip} dev ${iface}
        ;;
stop)
        ifconfig ${iface} down
        echo 0 > /proc/sys/net/ipv4/conf/all/arp_ignore
        echo 0 > /proc/sys/net/ipv4/conf/lo/arp_ignore
        echo 0 > /proc/sys/net/ipv4/conf/all/arp_announce
        echo 0 > /proc/sys/net/ipv4/conf/lo/arp_announce
        ;;
*)
        exit 1
esac

]# chmod +x /usr/local/sbin/setrs
]# setrs start
查看内核参数和网卡配置
cat /proc/sys/net/ipv4/conf/{lo,all}/{arp_ignore,arp_announce}
1
2
1
2

ifconfig lo:0
lo:0: flags=73<UP,LOOPBACK,RUNNING>  mtu 65536
        inet 172.20.1.100  netmask 255.255.255.255
        loop  txqueuelen 1000  (Local Loopback)
安装Keepalived
yum install keepalived
修改配置文件
#!/bin/bash  # 可以使vim打开时具有颜色高亮
! Configuration File for keepalived

global_defs {
   notification_email {
     acassen@firewall.loc
   }
   notification_email_from hello@qq.com
   smtp_server smtp.qq.com
   smtp_connect_timeout 30
   router_id LVS_DEVEL
   vrrp_skip_check_adv_addr
   #vrrp_strict
   vrrp_iptables
   vrrp_garp_interval 0
   vrrp_gna_interval 0
}

vrrp_instance VRouter1 {
    state MASTER
    interface eth0
    virtual_router_id 51
    priority 100
    advert_int 1
    authentication {
        auth_type PASS
        auth_pass Passw0rd
    }
    virtual_ipaddress {
        172.20.1.100 dev eth0 label eth0:0
    }
}

virtual_server 172.20.1.100 80 {
    delay_loop 6  # 检查后端服务器的时间间隔
    lb_algo rr    # 调度方法
    lb_kind DR    # LVS集群类型
    #persistence_timeout 50   # 持久连接时间,默认6分钟  # 测试时要关闭。
    protocol TCP    # 指定服务的协议TCP/UDP/SCTP
    #sorry_server www.liyblog.com  # 所有RS故障时备用服务器的地址
    # 定义后端服务器
    real_server 172.20.1.222 80 {
        weight 1     # 权重

        # RS上线,下线通知脚本
        #notify_up "/etc/keepalived/notify_up.sh 172.20.1.222"
        #notify_down "/etc/keepalived/notify_down.sh 172.20.1.222"

        # 应用层检测
        HTTP_GET {
            url {   # 检测的url
              path /index.html
              status_code 200
            }
            connect_timeout 3      # 健康检测的超时时间
            nb_get_retry 3         # 重试次数
            delay_before_retry 3   # 重试之前的等待时间
            #connect_ip 172.20.1.222  # 指定对后端服务器健康检测时的目的IP
            #connect_port 80          # 指定对后端服务器健康检测时的目的端口
            #bindto 172.20.1.221      # 指定对后端服务器健康检测时的源IP
            # bind_port              # 指定对后端服务器健康检测时的源端口
        }
    }
    real_server 172.20.1.225 80 {
        weight 1     # 权重
        # 应用层检测
        HTTP_GET {
            url {   # 检测的url
              path /index.html
              status_code 200
            }
            connect_timeout 3      # 健康检测的超时时间
            nb_get_retry 3         # 重试次数
            delay_before_retry 3   # 重试之前的等待时间
        }
    }
}
启动Keepalived
systemctl start keepalived
查看VIP
eth0:0: flags=4163<UP,BROADCAST,RUNNING,MULTICAST>  mtu 1500
        inet 172.20.1.100  netmask 255.255.255.255  broadcast 0.0.0.0
        ether 52:54:00:b2:22:24  txqueuelen 1000  (Ethernet)
客户端访问测试
in rs2 web page.
in rs1 web page.
in rs2 web page.
in rs1 web page.
in rs2 web page.
in rs1 web page.
安装Keepalived
yum install keepalived
修改配置文件
#!/bin/bash
! Configuration File for keepalived

global_defs {
   notification_email {
     acassen@firewall.loc
   }
   notification_email_from hello@qq.com
   smtp_server smtp.qq.com
   smtp_connect_timeout 30
   router_id LVS_DEVEL
   vrrp_skip_check_adv_addr
   #vrrp_strict
   vrrp_iptables
   vrrp_garp_interval 0
   vrrp_gna_interval 0
}

vrrp_instance VRouter1 {
    state MASTER
    interface eth0
    virtual_router_id 51
    priority 100
    advert_int 1
    authentication {
        auth_type PASS
        auth_pass Passw0rd
    }
    virtual_ipaddress {
        172.20.1.100 dev eth0 label eth0:0
    }
}

virtual_server 172.20.1.100 80 {
    delay_loop 6  # 检查后端服务器的时间间隔
    lb_algo rr    # 调度方法
    lb_kind DR    # LVS集群类型
    #persistence_timeout 50   # 持久连接时间,默认6分钟
    protocol TCP    # 指定服务的协议TCP/UDP/SCTP
    #sorry_server www.liyblog.com  # 所有RS故障时备用服务器的地址
    # 定义后端服务器
    real_server 172.20.1.222 80 {
        weight 1     # 权重

        # RS上线,下线通知脚本
        #notify_up "/etc/keepalived/notify_up.sh 172.20.1.222"
        #notify_down "/etc/keepalived/notify_down.sh 172.20.1.222"

        # 应用层检测
        HTTP_GET {
            url {   # 检测的url
              path /index.html
              status_code 200
            }
            connect_timeout 3      # 健康检测的超时时间
            nb_get_retry 3         # 重试次数
            delay_before_retry 3   # 重试之前的等待时间
            #connect_ip 172.20.1.222  # 指定对后端服务器健康检测时的目的IP
            #connect_port 80          # 指定对后端服务器健康检测时的目的端口
            #bindto 172.20.1.221      # 指定对后端服务器健康检测时的源IP
            # bind_port              # 指定对后端服务器健康检测时的源端口
        }
    }
    real_server 172.20.1.225 80 {
        weight 1     # 权重
        # 应用层检测
        HTTP_GET {
            url {   # 检测的url
              path /index.html
              status_code 200
            }
            connect_timeout 3      # 健康检测的超时时间
            nb_get_retry 3         # 重试次数
            delay_before_retry 3   # 重试之前的等待时间
        }
    }
}
启动Keepalived
systemctl start keepalived
lb1关闭Master并在客户端访问查看是否会出现无法访问情况
杀掉keepalived进程
killall keepalived
客户端访问
while :; do curl 172.20.1.100 ;sleep 1 ;done
in rs2 web page.
in rs1 web page.
in rs2 web page.
in rs1 web page.
in rs2 web page.
in rs1 web page.
in rs2 web page.
Keepalived可以调用脚本对资源进行监控,并根据监控的结果对优先级动态调整
使用vrrp_script 定义资源监控的脚本,vrrp实例会根据脚本的返回值进行下一步操作。一个脚本可以被多个vrrp实例调用。
track_script可以调用vrrp_script定义的脚本,相关配置文件格式为:
# 定义资源监控脚本(全局唯一)
vrrp_script nginx_check {
    script "/etc/keepalived/nginx_check.sh"  # 检测NGINX状态的脚本路径
    interval 2                               # 执行间隔
    weight -20                               # 检测失败之后则权重+weight的值(如:优先级100+ -20 = 80)
    fall 3								     # 判定服务为异常的检查次数
    rise 2                                   # 判定服务为正常的检测次数
    timeout 2								 # 超时时间
    #user username                           # 执行检测脚本的用户和组
    #init_fail                               # 设置默认为失败状态,在检测成功之后再转换为成功状态
}

# 定义VRouter
vrrp_instance VRouter1 {
	…………options
    track_script {        # 对Nginx进行监控
        nginx_check
    }
}
资源监控脚本cat /etc/keepalived/nginx_check.sh
# 需要安装psmisc包
#! /bin/bash
# killall -0 nginx
A=$(ps -C nginx --no-header|wc -l)
if [ $A -eq 0 ];then
    /usr/sbin/nginx
    if [ `ps -C nginx --no-header |wc -l` -eq 0 ];then
        exit 1
    fi
fi
安装mail命令
yum install mailx -y
修改配置文件
vim /etc/mail.rc
set from=liy36@qq.com
set smtp=smtp.qq.com
set smtp-auth-user=liy36@qq.com
set smtp-auth-password=xxxxxxxxxxxx
set smtp-auth=login
set ssl-verify=ignore
vim /etc/keepalived/notify.sh

#!/usr/bin/env bash
contact="liy36@qq.com"
function notify(){
    mail_title="$(hostname) to be $1,vip 转移"
    mail_content="$(date ‘+%F %T‘): vrrp transfer,$(hostname) changed to be $1"
    echo "${mail_title}" | mail -s "${mail_content}" ${contact}
}
case $1 in
master)
    notify master
    ;;
backup)
    notify backup
    ;;
fault)
    notify fault
    ;;
*)
    echo "Usage: $0 {master|backup|fault}"
    exit 10
    ;;
esac

chmod +x /etc/keepalived/notify.sh
vrrp_instance VRouter1 {  # Vrouter1虚拟路由器的名称
....
    notify_master "/etc/keepalived/notify.sh master"    # 当前节点成为主节点时触发的脚本
    notify_backup "/etc/keepalived/notify.sh backup"    # 当前节点成为备节点时触发的脚本
    notify_fault "/etc/keepalived/notify.sh fault"      # 当前节点转为“失败”状态时触发的脚本
}

| IP | 主机名 | 系统版本 | 软件版本 | 节点角色 | VIP |
|---|---|---|---|---|---|
| 172.20.1.163 | lb-nginx01 | CentOS7.6 | keepalived-1.3.5-19 | VRouter1(Master) | 172.20.1.241 |
| 172.20.1.64 | lb-nginx02 | CentOS7.6 | keepalived-1.3.5-19 | VRouter1(Backup) | 172.20.1.241 |
| 172.20.1.65 | nginx01 | CentOS7.6 | nginx-1.16 | RealServer1 | / |
| 172.20.1.66 | nginx02 | CentOS7.6 | nginx-1.16 | RealServer2 | / |
yum install keepalived -y
[root@lb-nginx01 ~]# rpm -ql keepalived
/etc/keepalived
/etc/keepalived/keepalived.conf  # 配置文件(无论是yum安装还是源码安装,配置文件必须放在此处)
/etc/sysconfig/keepalived
/usr/bin/genhash  # HTTP/SSL检测Hash校验
/usr/lib/systemd/system/keepalived.service  # systemd启动文件
/usr/libexec/keepalived
/usr/sbin/keepalived  # 主程序
…………
/usr/share/doc/keepalived-1.3.5/samples  # 该目录内存放配置文件模板
…………
cp keepalived.conf{,.bak}
vim keepalived.conf
! Configuration File for keepalived

# 全局配置
global_defs {
   notification_email {
     acassen@firewall.loc   # 告警邮件的接收地址
   }
   notification_email_from Alexandre.Cassen@firewall.loc  # 告警邮件的发送账号
   smtp_server 192.168.200.1   # 邮件服务器地址
   smtp_connect_timeout 30  # 连接邮件服务器的超时时间
   router_id LVS_DEVEL      # 唯一标识,默认为主机名
   vrrp_skip_check_adv_addr # 如果收到的报文和上一个报文是相同的路由器发送则跳过检测报文中的源地址。
   vrrp_strict				# 严格遵守VRRP协议,在以下场景需要关闭该此项 1. 没有VIP地址 2. 配置了单播邻居 3. 在VRRPv2版本中有IPv6地址。
   vrrp_iptables			# 禁止Keepalived启动后自动生成iptable规则(如果使用Nginx和HAProxy)时没有编辑此项,则无法正常访问。
   vrrp_garp_interval 0     # ARP报文的发送延迟ms
   vrrp_gna_interval 0      # 消息发送延迟ms
}

# 定期执行的脚本
vrrp_script check_nginx {
    script "/etc/keepalived/nginx_check.sh"  # 检测NGINX状态的脚本路径
    interval 2                               # 执行间隔
    weight -20                               # 如果条件成立,则权重-20
    fall 3								     # 判定服务为异常的检查次数
    rise 2                                   # 判定服务为正常的检测次数
}

# 定义VRouter
vrrp_instance VRouter1 {  # Vrouter1虚拟路由器的名称
    state MASTER          # 当前节点在此虚拟路由器上的初始状态(MASTER|BACKUP)
    interface eth0        # 绑定当前虚拟路由器使用的物理接口
    virtual_router_id 101 # 当前虚拟路由器的唯一标识(0-255)
    priority 100          # 当前节点在此虚拟路由器中的优先级(1-254)
    advert_int 1		  # VRRP的通告间隔
    authentication {      # 认证
        auth_type PASS    # 使用字符认证
        auth_pass D0cker  # 认证字符(仅前8位有效,可以超过8位)
    }
    track_script {        # 对Nginx进行监控
        check_nginx
    }
    virtual_ipaddress {   # 配置虚拟IP
        172.20.1.241 dev eth0 label eth0:0   # 设置虚拟IP
    }
}
cp keepalived.conf{,.bak}
vim keepalived.conf
! Configuration File for keepalived

# 全局配置
global_defs {
   notification_email {
     acassen@firewall.loc   # 告警邮件的接收地址
   }
   notification_email_from Alexandre.Cassen@firewall.loc  # 告警邮件的发送账号
   smtp_server 192.168.200.1   # 邮件服务器地址
   smtp_connect_timeout 30  # 连接邮件服务器的超时时间
   router_id LVS_DEVEL      # 唯一标识,默认为主机名
   vrrp_skip_check_adv_addr # 如果收到的报文和上一个报文是相同的路由器发送则跳过检测报文中的源地址。
   vrrp_strict              # 严格遵守VRRP协议,在以下场景需要关闭该此项 1. 没有VIP地址 2. 配置了单播邻居 3. 在VRRPv2版本中有IPv6地址。
   vrrp_iptables            # 禁止Keepalived启动后自动生成iptable规则(如果使用Nginx和HAProxy)时没有编辑此项,则无法正常访问。
   vrrp_garp_interval 0     # ARP报文的发送延迟ms
   vrrp_gna_interval 0      # 消息发送延迟ms
}

# 定期执行的脚本
vrrp_script check_nginx {
    script "/etc/keepalived/nginx_check.sh"  # 检测NGINX状态的脚本路径
    interval 2                               # 执行间隔
    weight -20                               # 如果条件成立,则权重-20
    fall 3								     # 判定服务为异常的检查次数
    rise 2                                   # 判定服务为正常的检测次数
}

# 定义VRouter
vrrp_instance VRouter1 {  # Vrouter1虚拟路由器的名称
    state BACKUP          # 当前节点在此虚拟路由器上的初始状态(MASTER|BACKUP)
    interface eth0        # 绑定当前虚拟路由器使用的物理接口
    virtual_router_id 101 # 当前虚拟路由器的唯一标识(0-255)
    priority 90           # 当前节点在此虚拟路由器中的优先级(1-254)
    advert_int 1          # VRRP的通告间隔
    authentication {      # 认证
        auth_type PASS    # 使用字符认证
        auth_pass D0cker  # 认证字符(仅前8位有效,可以超过8位)
    }
    track_script {        # 对Nginx进行监控
        check_nginx
    }
    virtual_ipaddress {   # 配置虚拟IP
        172.20.1.241 dev eth0 label eth0:0   # 设置虚拟IP
    }
}
http {
	upstream realserver{
        server 172.20.1.65;
        server 172.20.1.66;
    }

    server {
    	...
        location / {
            index index.html;
            proxy_pass http://realserver;
        }
    }
}
cat /etc/keepalived/nginx_check.sh
#! /bin/bash
A=$(ps -C nginx --no-header|wc -l)
if [ $A -eq 0 ];then
    /usr/sbin/nginx
    if [ `ps -C nginx --no-header |wc -l` -eq 0 ];then
        killall keepalived
    fi
fi
while :;do curl 172.20.1.241 ;sleep 1;done
lb-nginx01关闭keepalived查看访问是否正常,正常情况下访问正常。
原文:https://www.cnblogs.com/liy36/p/14589607.html