一、系统环境配置
1.修改/etc/sysctl.conf
fs.file-max = 655350
net.ipv4.ip_local_port_range = 1024 65535
net.ipv4.tcp_max_tw_buckets = 2000
net.ipv4.tcp_tw_recycle = 1
net.ipv4.tcp_tw_reuse = 1
net.ipv4.tcp_syncookies = 1
net.ipv4.tcp_syn_retries = 2
net.ipv4.tcp_synack_retries = 2
net.ipv4.tcp_keepalive_time = 1200
net.ipv4.tcp_fin_timeout = 15
net.ipv4.tcp_max_syn_backlog = 20000
net.core.somaxconn = 65535
net.core.netdev_max_backlog = 65535

[root@zabbix ~]# sysctl -p
2.修改limits.conf修改
[root@zabbix~]# vim /etc/security/limits.conf

*               soft    nproc           65535
*               hard    nproc           65535
*               soft    nofile          65535
*               hard    nofile          65535

#保存退出
[root@zabbix ~]# vim /etc/pam.d/login

session    required     pam_limits.so
3.关闭防火墙和selinux
[root@zabbix ~]#systemctl stop firewalld
[root@zabbix ~]#systemctl disable firewalld
#关闭selinux
[root@zabbix ~]#sed -i ‘s/SELINUX=enforcing/SELINUX=disabled/g‘ /etc/selinux/config
[root@zabbix ~]#setenforce 0
系统调整完成
二、lnmp环境搭建
1.安装nginx
#下载地址:http://nginx.org/download/nginx-1.19.9.tar.gz
#配置本地阿里云yun源
[root@zabbix ~]# cd /etc/yum.repos.d/
[root@zabbix yum.repos.d]# mkdir bk && mv * bk/
[root@zabbix yum.repos.d]# wget -O /etc/yum.repos.d/CentOS-Base.repo http://mirrors.aliyun.com/repo/Centos-7.repo
安装依赖包
[root@zabbix src]# yum install pcre-devel openssl-devel zlib-devel gcc* -y
# pcre 支持正则表达式
# zlib 支持数据压缩
# openssl支持HTTPS
开始安装
[root@zabbix nginx-1.19.9]# goupadd -g 501 nginx
[root@zabbix nginx-1.19.9]# useradd -u 501 -g 501 -s /sbin/nolog nginx
[root@zabbix nginx-1.19.9]# cd /usr/local/src
[root@zabbix nginx-1.19.9]# tar xf nginx-1.19.9.tar.gz
[root@zabbix nginx-1.19.9]# cd nginx-1.19.9
[root@zabbix nginx-1.19.9]# ./configure --prefix=/u01/nginx --user=nginx --group=nginx --with-http_ssl_module --with-http_stub_status_module --with-http_gzip_static_module --with-http_realip_module  --with-pcre
# --with-http_ssl_module 启用HTTPS加密
# --with-http_stub_status_module 启用nginx状态监控
# --with-http_gzip_static_module  启用静态压缩
# --with-http_realip_module 做代理时获取客户端真实IP
# 这里说下,在编译之前需要安装编译支持环境
[root@zabbix nginx-1.19.9]# make && make install
启动重启
/u01/nginx/sbin/nginx -c /u01/nginx/conf/nginx.conf
/u01/nginx/sbin/nginx -s reload
通过客户端访问正常

2.安装mysql8.0
下载mysql二进制包,以及安装mysql依赖包
#安装mysql所需依赖包
[root@zabbix src]# yum install libaio* -y
#下载mysql二进制安装包
[root@zabbix src]# wget http://mirrors.163.com/mysql/Downloads/MySQL-8.0/mysql-8.0.14-linux-glibc2.12-x86_64.tar.xz
#卸载系统自带mysql/mariadb
[root@zabbix src]# rpm -qa | grep mysql
[root@zabbix src]# rpm -qa | grep mariadb
[root@zabbix src]# rpm -e --nodeps mysql
[root@zabbix src]# rpm -e --nodeps mariadb
创建mysql用户和组
[root@zabbix src]# groupadd mysql
[root@zabbix src]# useradd -r -g mysql -s /sbin/nologin mysql
解压mysql安装包并移至相关目录
#解压
[root@zabbix src]# tar xf mysql-8.0.14-linux-glibc2.12-x86_64.tar.xz
#移动
[root@zabbix src]# mv /usr/local/src/mysql-8.0.14-linux-glibc2.12-x86_64 /u01/mysql
创建Mysql所需data和log目录
[root@zabbix src]# mkdir -p /u01/mysql/data
[root@zabbix src]# mkdir -p /var/log/mysql
[root@zabbix src]# chown -R mysql:mysql /u01/mysql/data
[root@zabbix src]# chown -R mysql:mysql /var/log/mysql
[root@zabbix src]# chmod -R 755 /u01/mysql/data
[root@zabbix src]# chmod -R 755 /var/log/mysql
配置/etc/my.cnf文件
[mysql]
socket=/tmp/mysql.sock
defalut-character-set=utf8
[mysqld]
character-set-server=utf8
port=3306
basedir=/ointall/mysql
datadir=/oradata/data
log-error=/var/log/mysql/error.log
user=mysql
default_authentication_plugin=mysql_native_password
skip_host_cache
skip-name-resolve=1
#skip-grant-tables
default_storage_engine=InnoDB
初始化数据库,这里生成的密码在后面登陆的时候并没用,所以记不记没什么关系
[root@zabbix mysql]# /u01/mysql/bin/mysqld --initialize --user=mysql --basedir=/u01/mysql/ --datadir=/u01/mysql/data/
制作启动文件
cp -a /ointall/mysql/support-files/mysql.server /etc/init.d/mysqld
#更改启动文件路径
vim /etc/init.d/mysqld
将basedir更改为basedir=/ointall/mysql
将basedir更改为basedir=/ointall/mysql/bin
将datadir更改为datadir=/oradata/data
#授予mysqld执行权限
chmod -R 755 /etc/init.d/mysqld
#启动mysql服务
/etc/init.d/mysqld start
#创建软连接,也就是windows里面的快捷方式
ln -vs /ointall/mysql/bin/mysql /usr/bin
注:如果所有操作,所有配置文件都没有错误的情况启动报如下错误,
Starting MySQL.Logging to ‘/var/log/mysql/error.log‘.
 ERROR! The server quit without updating PID file (/oradata/data/rabbitmq.pid).
尝试用一下方法解决,具体原因不得而知。
/u01/mysql/bin/mysqld_safe  --defaults-file=/etc/my.cnf
到这里,mysql安装已经全部结束。接下来是登陆问题,安装完mysql后无法正常登陆,不管是随机密码。还是空密码都不行
[root@zabbix bin]# mysql
ERROR 1045 (28000): Access denied for user ‘root‘@‘localhost‘ (using password: NO)
[root@mysql bin]# mysql -uroot -prgVLupUj0W#
mysql: [Warning] Using a password on the command line interface can be insecure.
ERROR 1045 (28000): Access denied for user ‘root‘@‘localhost‘ (using password: YES)
[root@zabbix bin]# mysql -uroot -p
Enter password:
ERROR 1045 (28000): Access denied for user ‘root‘@‘localhost‘ (using password: YES)
#这时候我们修改/etc/my.cnf配置文件,在[mysqld]里面加一条如下参数。上的配置文件我已经给出了,只要去掉注释即可
skip-grant-tables
#重启mysql服务
/etc/init.d/mysqld restart
重新登陆mysql,按照下面的步骤进行修改密码
[root@zabbix bin]# mysql
Welcome to the MySQL monitor.  Commands end with ; or \g.
Your MySQL connection id is 7
Server version: 8.0.14 MySQL Community Server - GPL

Copyright (c) 2000, 2019, Oracle and/or its affiliates. All rights reserved.

Oracle is a registered trademark of Oracle Corporation and/or its
affiliates. Other names may be trademarks of their respective
owners.

Type ‘help;‘ or ‘\h‘ for help. Type ‘\c‘ to clear the current input statement.

mysql> flush privileges;
Query OK, 0 rows affected (0.01 sec)

mysql> alter user ‘root‘@‘localhost‘ identified by ‘Newings@123‘;
Query OK, 0 rows affected (0.00 sec)

mysql> flush privileges;
Query OK, 0 rows affected (0.00 sec)

mysql> exit
Bye
3、安装php7.3
#先去这个网址下载加密包 https://centos.pkgs.org/ libmcrypt-2.5.8-4.el7.art.x86_64.rpm libmcrypt-devel-2.5.8-4.el7.art.x86_64.rpm mhash-0.9.9.9-3.el7.art.x86_64.rpm mhash-devel-0.9.9.9-3.el7.art.x86_64.rpm
[root@zabbix rpm]# chmod u+x *
[root@zabbix rpm]# rpm -ivh *
#安装cmake编译工具[root@zabbix src]# wget https://cmake.org/files/v3.11/cmake-3.13.2.tar.gz
[root@zabbix src]# tar xzvf cmake-3.13.2.tar.gz
[root@zabbix src]# cd cmake-3.13.2
[root@zabbix cmake-3.13.2]# ./bootstrap
[root@zabbix cmake-3.13.2]# gmake
[root@zabbix cmake-3.13.2]# gmake install
#下载libzip安装包
[root@zabbix src]# curl -O https://libzip.org/download/libzip-1.5.1.tar.gz
[root@zabbix src]# tar xf libzip-1.5.1.tar.gz
[root@zabbix src]# cd libzip-1.5.2/
[root@zabbix libzip-1.5.2]# mkdir build
[root@zabbix libzip-1.5.2]# cd build/
[root@zabbix build]# cmake ..
[root@zabbix build]# make && make install
安装依赖包
[root@zabbix build]# yum install libmhash-devel libmcrypt-devel libxml2-devel libmhash-devel bzip2-devel libcurl-devel gd libjpeg-turbo-devel libpng-devel freetype-devel -y
编译安装php
[root@zabbix build]# cd /usr/local/src/
[root@zabbix src]# tar xf php-7.3.27.tar.gz
[root@zabbix src]# cd php-7.3.27/
[root@zabbix php-7.3.27]# ./configure --prefix=/usr/local/php --enable-fpm --enable-ftp \
--enable-zip --enable-xml --enable-sockets --enable-bcmath --enable-pcntl --enable-shmop \
--enable-soap --enable-sysvsem --enable-mbstring --enable-mbregex --enable-inline-optimization \
--enable-maintainer-zts --with-fpm-user=www --with-fpm-group=www \
--with-pdo-mysql=mysqlnd --with-mysqli=mysqlnd --with-pdo-mysql=mysqlnd --with-openssl --with-freetype-dir \
--with-iconv-dir --with-jpeg-dir --with-png-dir --with-libxml-dir=/usr --with-curl  --with-zlib --with-bz2 \
--with-xmlrpc --with-gd --with-config-file-path=/usr/local/php/etc --with-config-file-scan-dir=/usr/local/php/etc/php.d \
--with-mhash --without-pear --with-gettext --disable-rpath --disable-fileinfo
# 在检查期间,会提示少模块或者文件,缺少什么就安装那个包就好
[root@zabbix php-7.3.27]# make && make install
#时间比较久
[root@zabbix php-7.3.27]# cp -a sapi/fpm/init.d.php-fpm /etc/init.d/php-fpm
[root@zabbix php-7.3.27]# chmod +x /etc/init.d/php-fpm
[root@zabbix php-7.3.27]# cp -a php.ini-production /u01/php/etc/php.ini
[root@zabbix php-7.3.27]# cd /u01/php/etc
[root@zabbix php-7.3.27]# cp -a php-fpm.conf.default php-fpm.conf
[root@zabbix php-7.3.27]# cd cd php-fpm.d/
[root@zabbix php-fpm.d]# cp www.conf.default www.conf
#编辑www.conf,将user=www和group=www作如下修改
user=nginx
group=nginx
#启动php,如未正常启动,请看日志
[root@zabbix php-fpm.d]# /etc/init.d/php-fpm start
[root@zabbix php-fpm.d]# netstat -ntplu | grep php-fpm
tcp        0      0 127.0.0.1:9000          0.0.0.0:*               LISTEN      2512/php-fpm: pool
5.修改nginx配置文件
user  nginx nginx;
worker_processes  2;

error_log  logs/error.log;
#error_log  logs/error.log  notice;
#error_log  logs/error.log  info;

pid        logs/nginx.pid;
worker_rlimit_nofile 65535;


events {
    use epoll;
    multi_accept on;
    worker_connections  1024;
}


http {
    include       mime.types;
    default_type  application/octet-stream;

    log_format  main  ‘$remote_addr - $remote_user [$time_local] "$request" ‘
                      ‘$status $body_bytes_sent "$http_referer" ‘
                      ‘"$http_user_agent" "$http_x_forwarded_for"‘;

    access_log  logs/access.log  main;
    open_log_file_cache max=1000 inactive=20s min_uses=2 valid=1m;
    proxy_set_header X-Real-IP $remote_addr;
    proxy_set_header X-Forwarded-For $proxy_add_x_forwarded_for;

    limit_conn_zone $binary_remote_addr zone=addr:5m;
    limit_conn addr 100;
    sendfile        on;
    tcp_nopush     on;
    tcp_nodelay    on;

    #keepalive_timeout  0;
    keepalive_timeout  65;
    client_header_timeout 2m;
    client_body_timeout 3m;
    reset_timedout_connection on;
    send_timeout 15s;

    open_file_cache max=65535 inactive=20s;
    open_file_cache_valid 30s;
    open_file_cache_min_uses 2;
    open_file_cache_errors on;


    gzip  on;
    gzip_disable "msie6";
    gzip_proxied any;
    gzip_comp_level 4;
    gzip_vary on;
    gzip_min_length 1k;
    gzip_types text/plain text/css application/json application/x-javascript text/xml application/xml application/xml+rss text/javascript;


    server {
        listen       80;
        server_name  localhost;

        #charset koi8-r;

        #access_log  logs/host.access.log  main;

        location / {
            #root   html;
            root   /u01/nginx/html;
            index  index.html index.htm index.php;
        }

        #error_page  404              /404.html;

        # redirect server error pages to the static page /50x.html
        #
        error_page   500 502 503 504  /50x.html;
        location = /50x.html {
            root   html;
        }

        # proxy the PHP scripts to Apache listening on 127.0.0.1:80
        #
        #location ~ \.php$ {
        #    proxy_pass   http://127.0.0.1;
        #}

        # pass the PHP scripts to FastCGI server listening on 127.0.0.1:9000
        #
        location ~ \.php$ {
            root           html;
            fastcgi_pass   127.0.0.1:9000;
            fastcgi_index  index.php;
            #fastcgi_param  SCRIPT_FILENAME  /scripts$fastcgi_script_name;
            fastcgi_param  SCRIPT_FILENAME  $document_root$fastcgi_script_name;
            include        fastcgi_params;
        }

        # deny access to .htaccess files, if Apache‘s document root
        # concurs with nginx‘s one
        #
        #location ~ /\.ht {
        #    deny  all;
        #}
    }


    # another virtual host using mix of IP-, name-, and port-based configuration
    #
    #server {
    #    listen       8000;
    #    listen       somename:8080;
    #    server_name  somename  alias  another.alias;

    #    location / {
    #        root   html;
    #        index  index.html index.htm;
    #    }
    #}


    # HTTPS server
    #
    #server {
    #    listen       443 ssl;
    #    server_name  localhost;

    #    ssl_certificate      cert.pem;
    #    ssl_certificate_key  cert.key;

    #    ssl_session_cache    shared:SSL:1m;
    #    ssl_session_timeout  5m;

    #    ssl_ciphers  HIGH:!aNULL:!MD5;
    #    ssl_prefer_server_ciphers  on;

    #    location / {
    #        root   html;
    #        index  index.html index.htm;
    #    }
    #}

}
测试php异界mysql是否正常,注意mysql5和8所用的函数不一样
[root@zabbix html]# vim test.php
<?php
$conn=mysqli_connect(‘localhost‘,‘zabbix‘,‘root@123‘);
if ($conn)
   echo "success.";
else
   echo "fail.";
?>
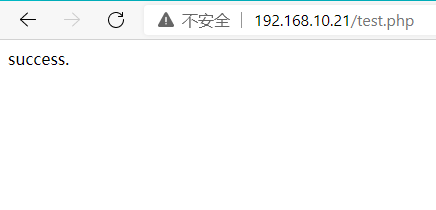
php信息
[root@zabbix html]# vim index.php
<?php
phpinfo()
?>

三、安装zabbix
安装jdk
#卸载自带jdk工具
rpm -qa | grep java
rpm -e --nodeps *
#安装1.8以上jdk
[root@zabbix src]# tar xf jdk-8u151-linux-x64.tar.gz
[root@zabbix src]# mv jdk1.8.0_151/ ../
[root@zabbix src]# cd ../jdk1.8.0_151/
[root@zabbix src]# vim /etc/profile.d/jdk.sh
export JAVA_HOME=/usr/local/jdk1.8.0_151
export JAVA_BIN=$JAVA_HOME/bin
export CLASSPATH=$JAVA_HOME/lib/dt.jar:$JAVA_HOME/lib/tools.jar
export PATH=$PATH:$JAVA_BIN
#查看版本
[root@zabbix src]# java -version
java version "1.8.0_151"
Java(TM) SE Runtime Environment (build 1.8.0_151-b12)
Java HotSpot(TM) 64-Bit Server VM (build 25.151-b12, mixed mode)
安装依赖包
[root@zabbix src]# yum install mysql-devel net-snmp-devel -y
#libevent-devel需要升级
下载地址:https://centos.pkgs.org/

libevent-2.0.21-4.el7.x86_64.rpm
libevent-devel-2.0.21-4.el7.x86_64.rpm
安装zabbix
[root@zabbix src]# useradd -r zabbix
[root@zabbix src]# id zabbix
[root@zabbix src]# tar xf zabbix-5.2.6.tar.gz
[root@zabbix src]# cd zabbix-5.2.6/
[root@zabbix zabbix-5.2.6]# ./configure --prefix=/u01/zabbix --enable-server --enable-agent --enable-java --with-net-snmp --with-libcurl --with-mysql=/usr/bin/mysql_config
[root@zabbix zabbix-5.2.6]# cp misc/init.d/fedora/core/zabbix_* /etc/init.d/
[root@zabbix zabbix-5.2.6]# mkdir -p /u01/nginx/html/zabbix
[root@zabbix zabbix-5.2.6]# cp -a ui/* /u01/nginx/html/zabbix
[root@zabbix zabbix-5.2.6]# chown -R nginx:nginx /u01/nginx/html/zabbix
#修改启动脚本安装路径
[root@zabbix zabbix-5.2.6]# vim /etc/init.d/zabbix_server
[root@zabbix zabbix-5.2.6]# BASEDIR=/u01/zabbix
[root@zabbix zabbix-5.2.6]# vim /etc/init.d/zabbix_agentd
[root@zabbix zabbix-5.2.6]# BASEDIR=/u01/zabbi
#启动客户端和服务端
[root@zabbix zabbix-5.2.6]# systemctl start zabbix_server
[root@zabbix zabbix-5.2.6]# systemctl start zabbix_agentd
创建zabbix用户和数据库
[root@zabbix src]# mysql -uroot -p
Enter password:
Welcome to the MySQL monitor.  Commands end with ; or \g.
Your MySQL connection id is 5111
Server version: 8.0.14 MySQL Community Server - GPL

Copyright (c) 2000, 2019, Oracle and/or its affiliates. All rights reserved.

Oracle is a registered trademark of Oracle Corporation and/or its
affiliates. Other names may be trademarks of their respective
owners.

Type ‘help;‘ or ‘\h‘ for help. Type ‘\c‘ to clear the current input statement.

mysql> create user ‘zabbix‘@‘%‘ identified by ‘root@123‘;
Query OK, 1 rows affected (0.01 sec)
mysql> grant all on zabbix.* to ‘zabbix‘@‘%‘ with grant option;
Query OK, 0 rows affected (0.01 sec)
mysql> flush privileges;
创建数据库并导入zabbix数据
[root@zabbix src]# cd zabbix-5.2.6/database/ [root@zabbix database]# mysql -uzabbix -p Enter password: Welcome to the MySQL monitor. Commands end with ; or \g. Your MySQL connection id is 5351 Server version: 8.0.14 MySQL Community Server - GPL Copyright (c) 2000, 2019, Oracle and/or its affiliates. All rights reserved. Oracle is a registered trademark of Oracle Corporation and/or its affiliates. Other names may be trademarks of their respective owners. Type ‘help;‘ or ‘\h‘ for help. Type ‘\c‘ to clear the current input statement. mysql>create database zabbix character set utf8 collate utf8_bin;
mysql> show databases;
mysql> use zabbix; mysql> source /usr/local/src/zabbix-5.2.6/database/mysql/schema.sql
mysql> source /usr/local/src/zabbix-5.2.6/database/mysql/images.sql
mysql> source /usr/local/src/zabbix-5.2.6/database/mysql/data.sql
浏览器输出ip/zabbix/setup.php开始配置zabbix
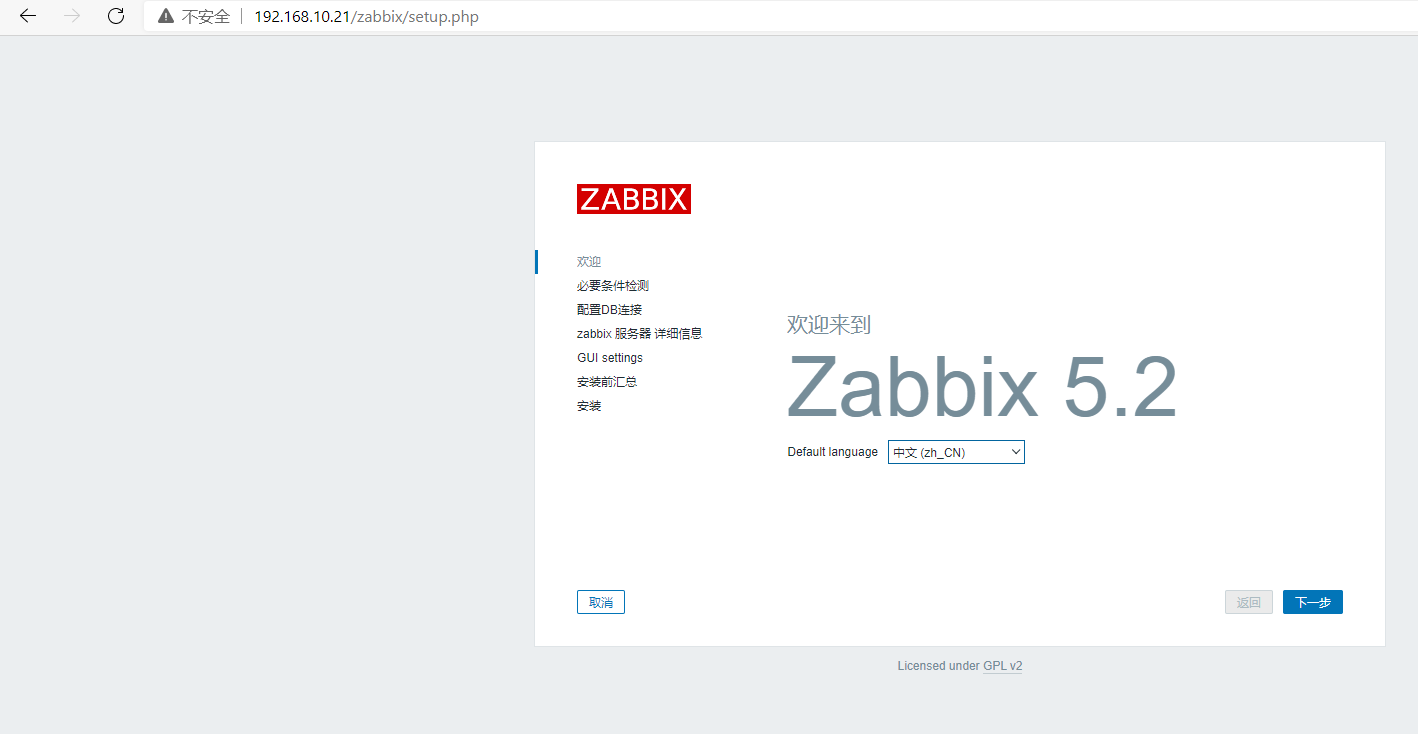
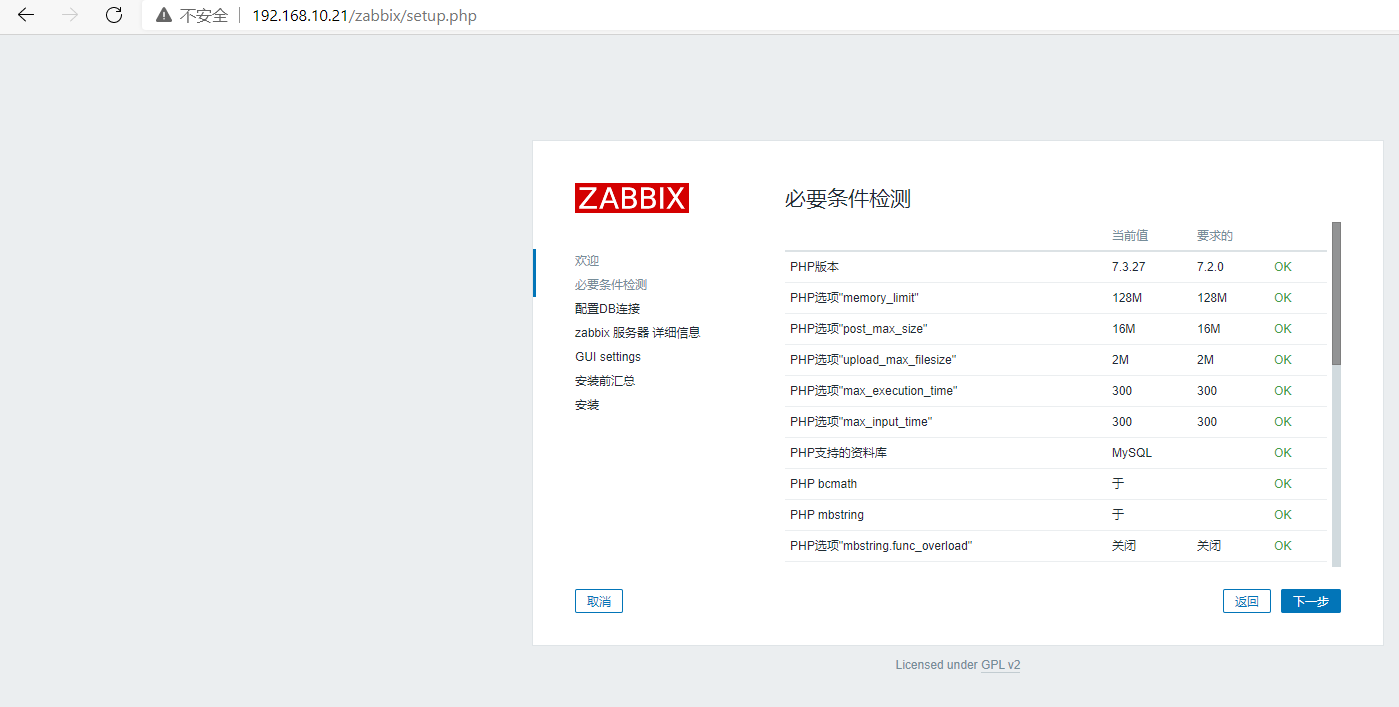
必要条件,如有fail,则去调整php.ini对应参数
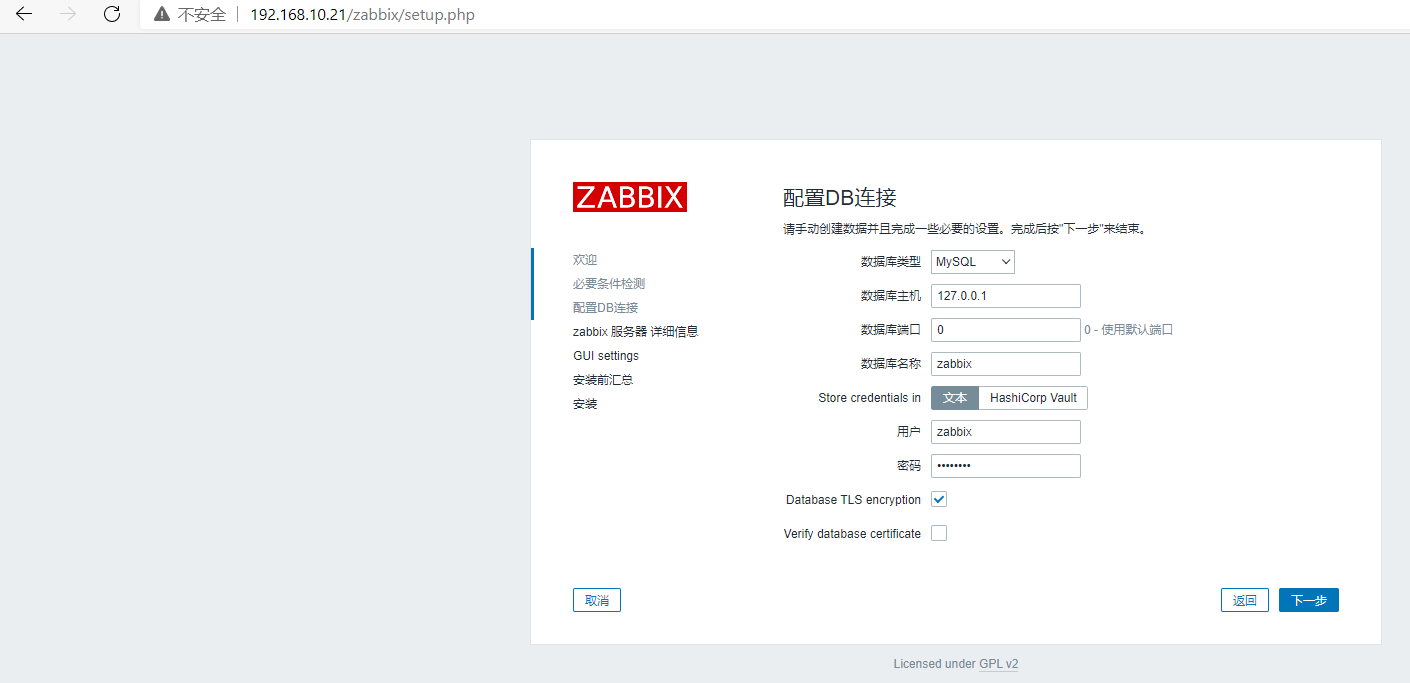
配置DB连接
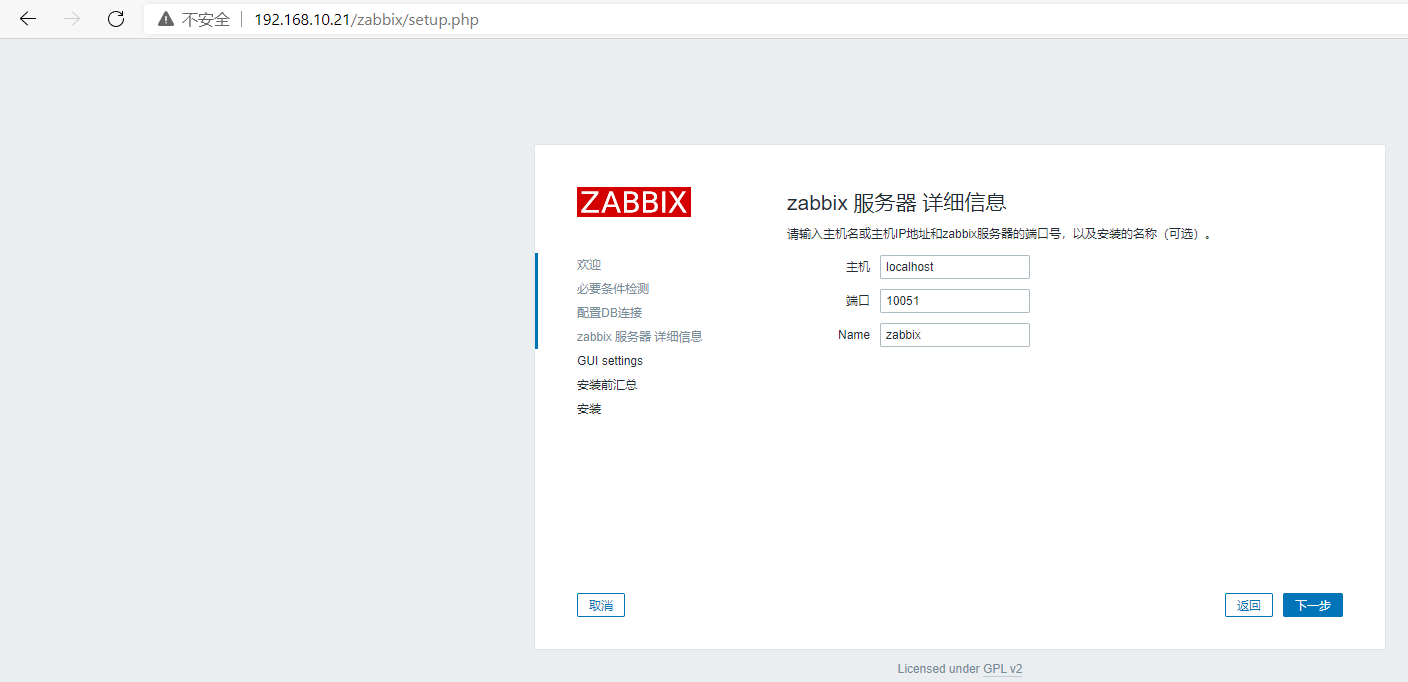
zabbix详细信息
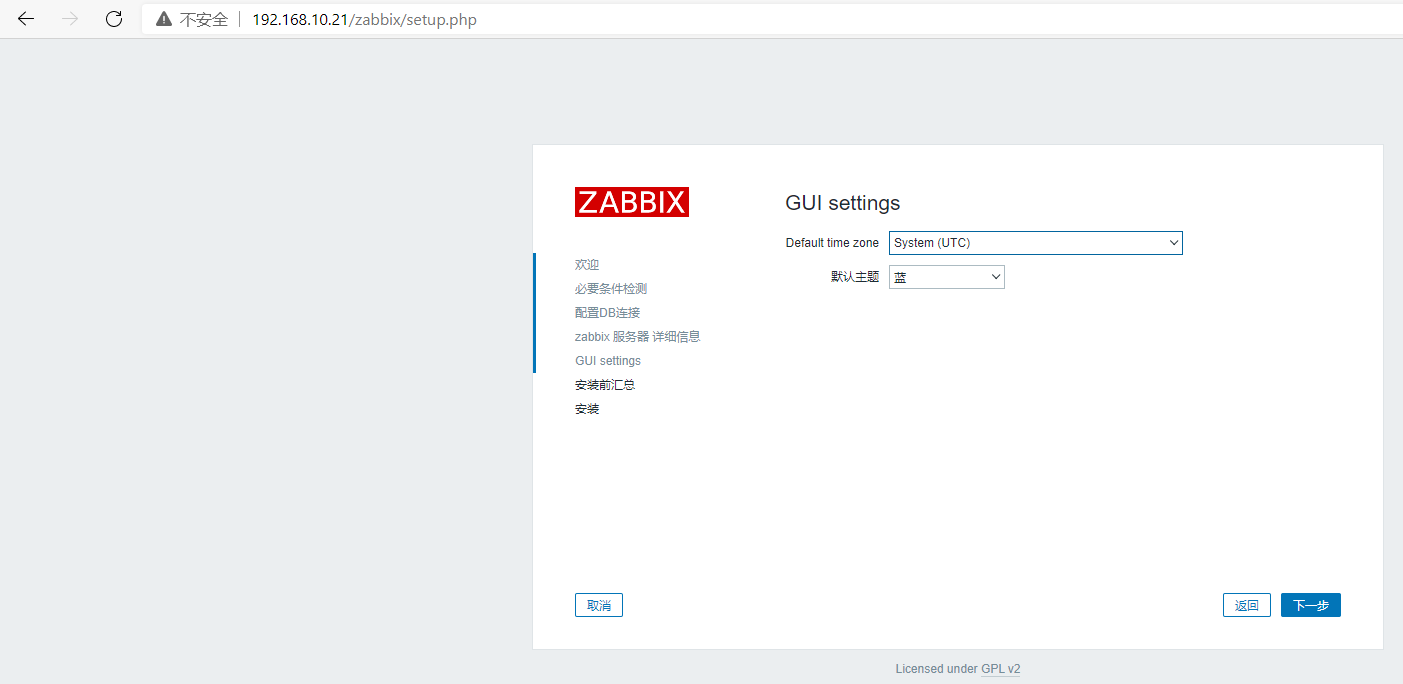
界面设置
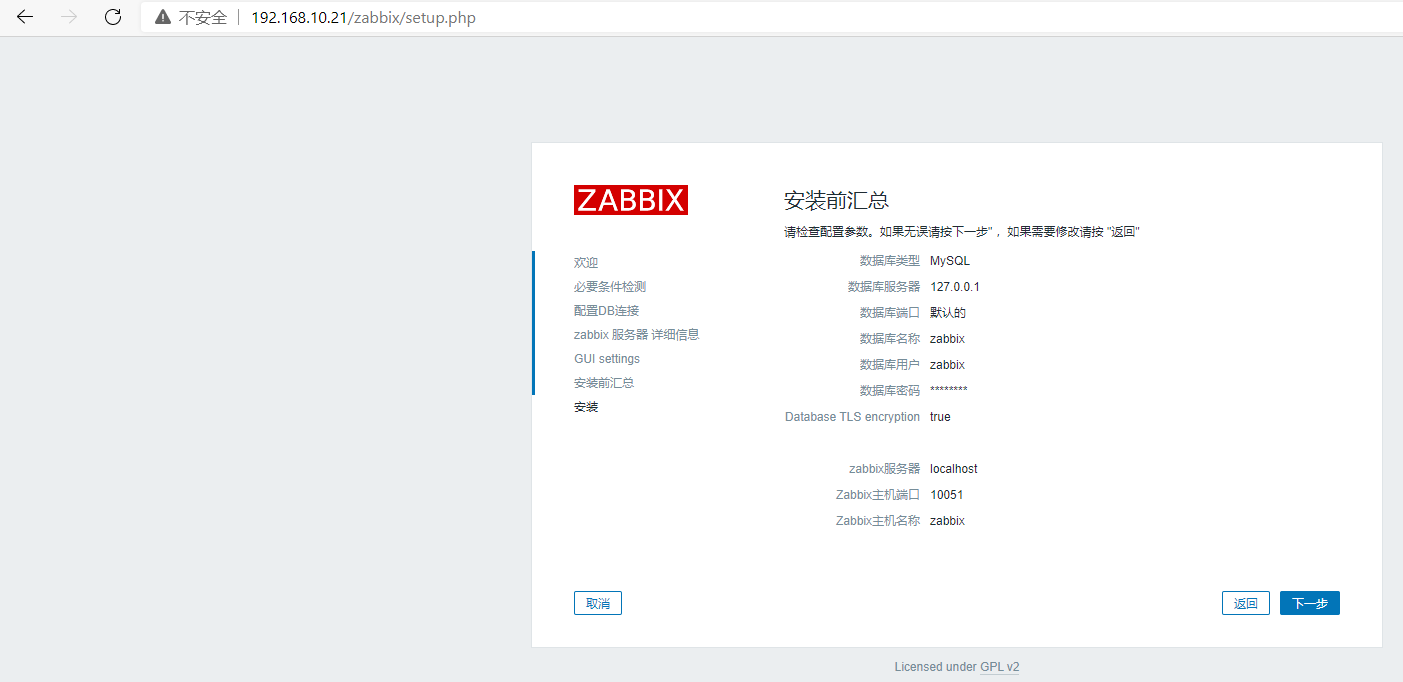
安装汇总
完成配置,
用户:Admin
默认密码:zabbix
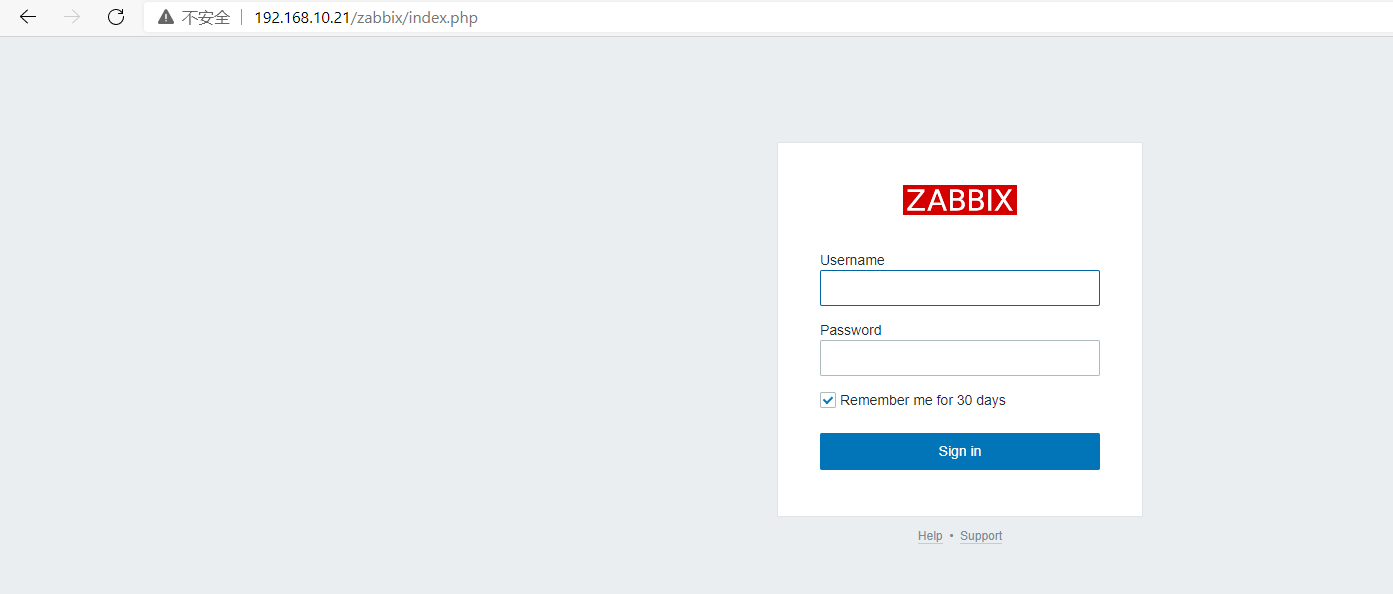
至此,zabbix已完成安装
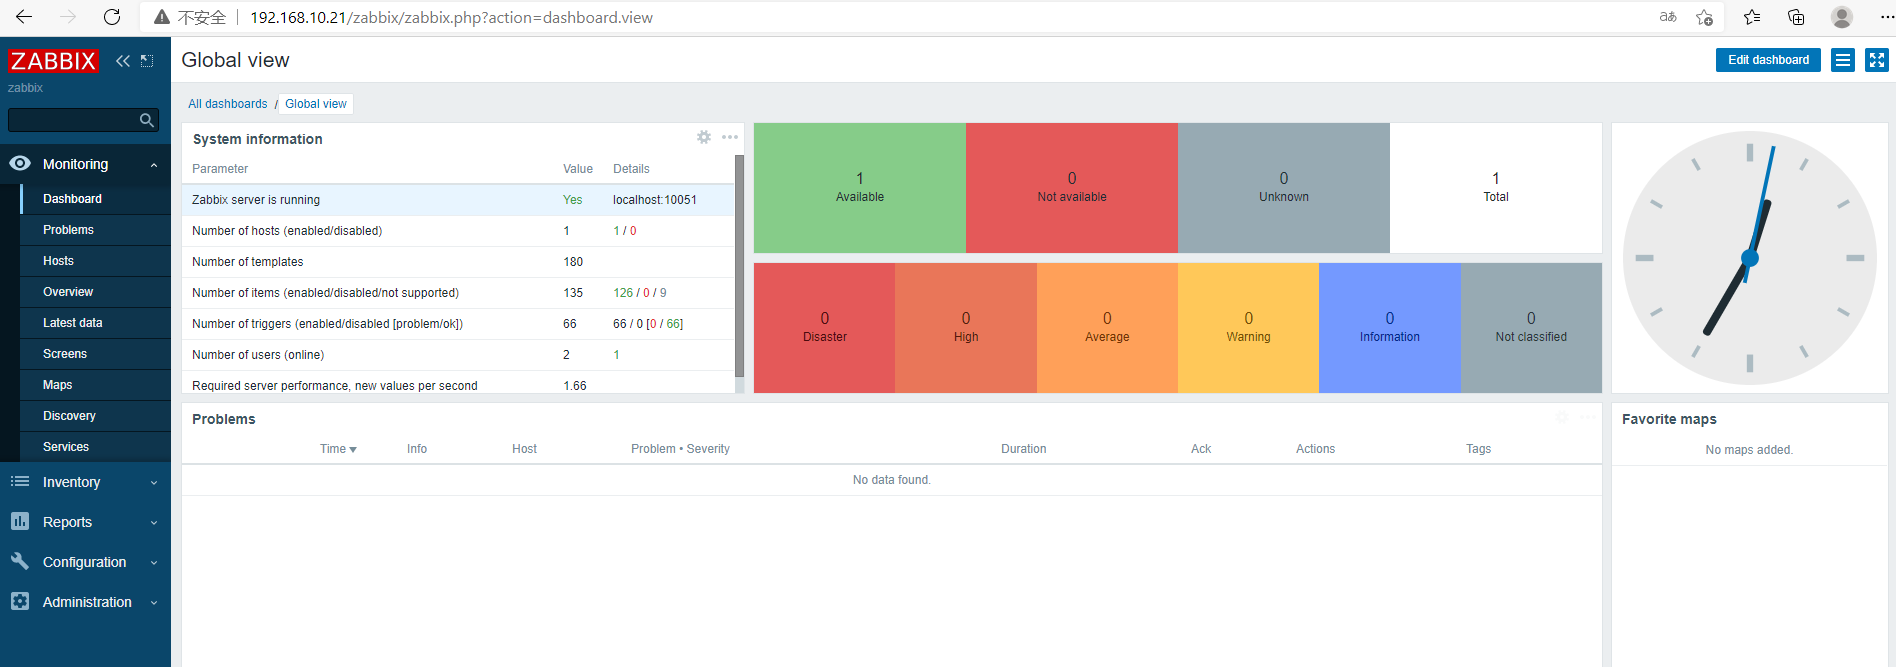
接下来是Grafana的安装及配置
原文:https://www.cnblogs.com/Roobbin/p/14608908.html