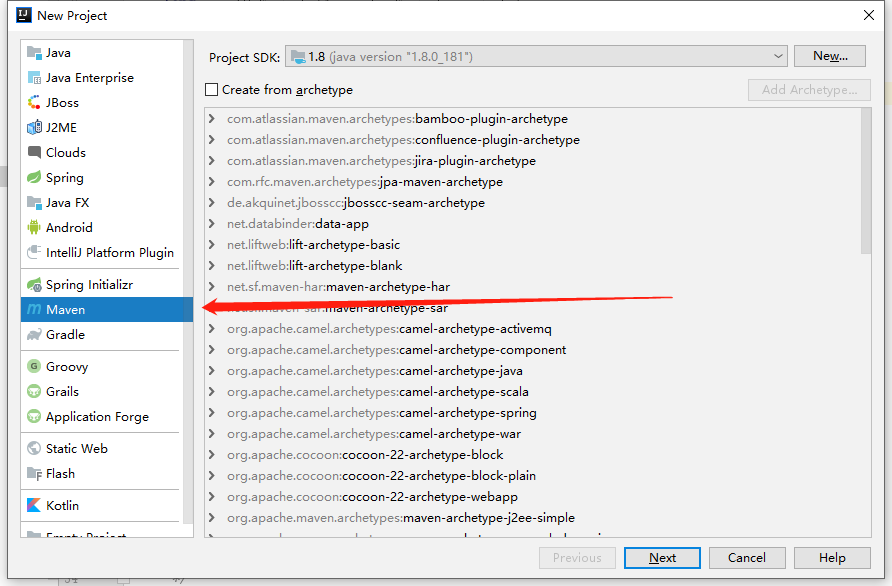
第1步:创建Maven Project(作为工程根目录)

1.1 点击File > New > Project,选择Maven工程
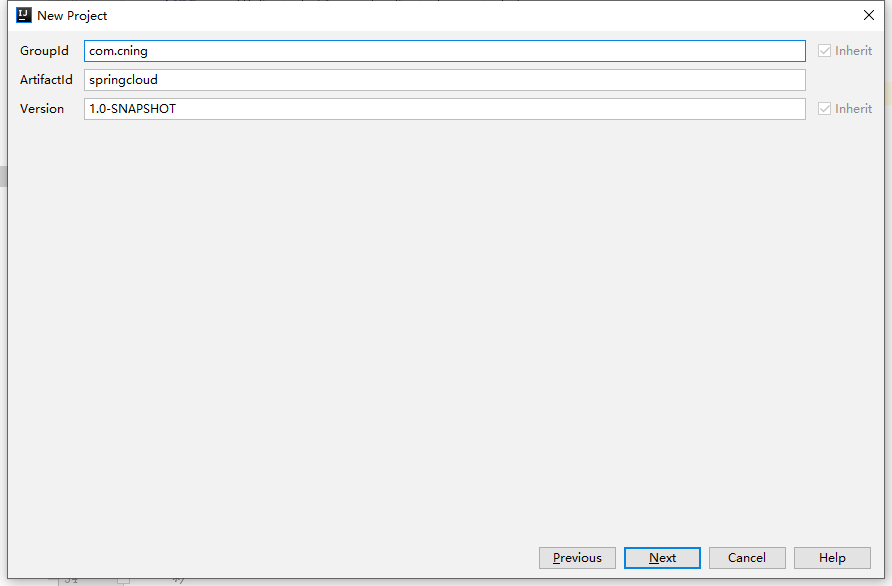
1.2 填写GroupId和ArtifactId,ArtifactId会默认为工程名称,点击Next
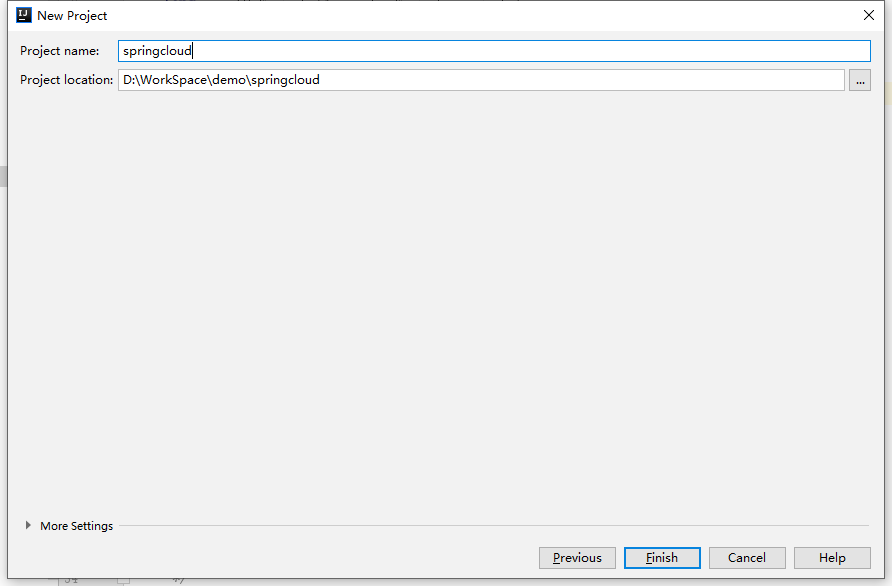
1.3 可以选择指定文件夹创建项目路径,点击Finish,完成创建。
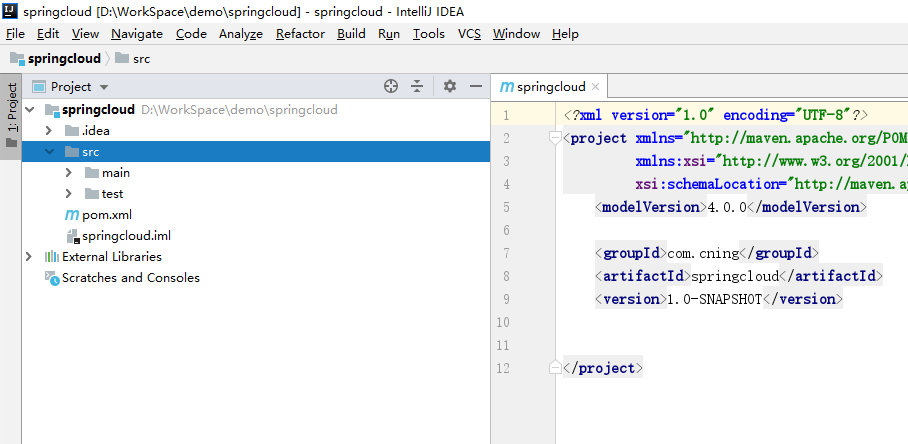
1.4 工程结构如图,因为后面会创建子工程(springcloud实际代码模块),所以src文件夹可以删掉了
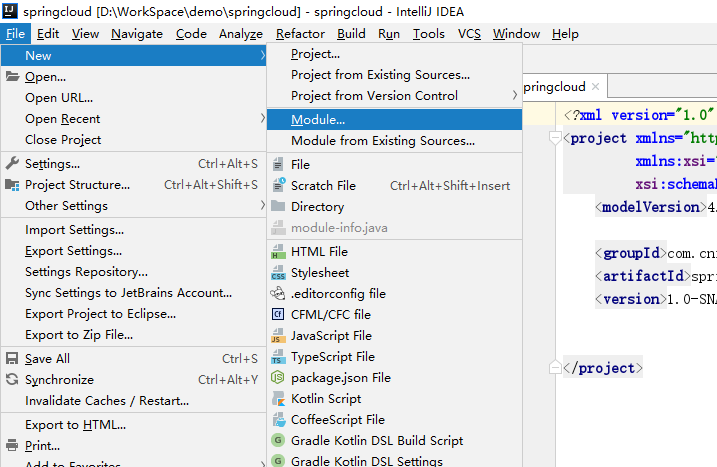
第2步:创建Module(SpringCloud Eureka模块)
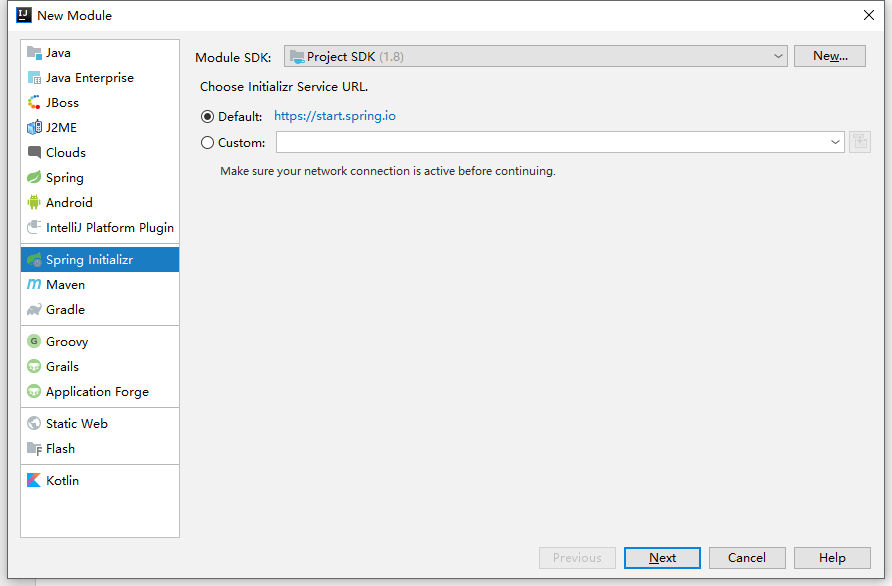
2.1 创建Module,选择Spring Initializr,点击Next
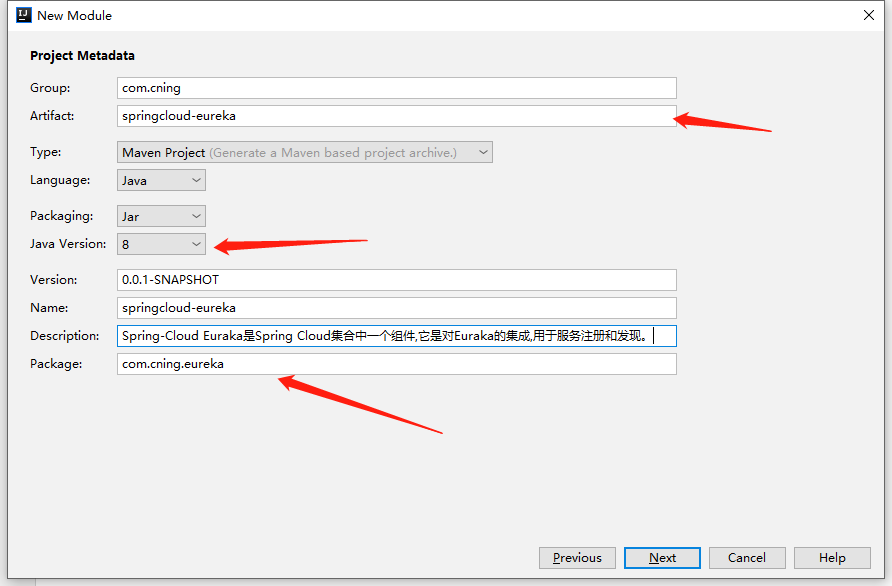
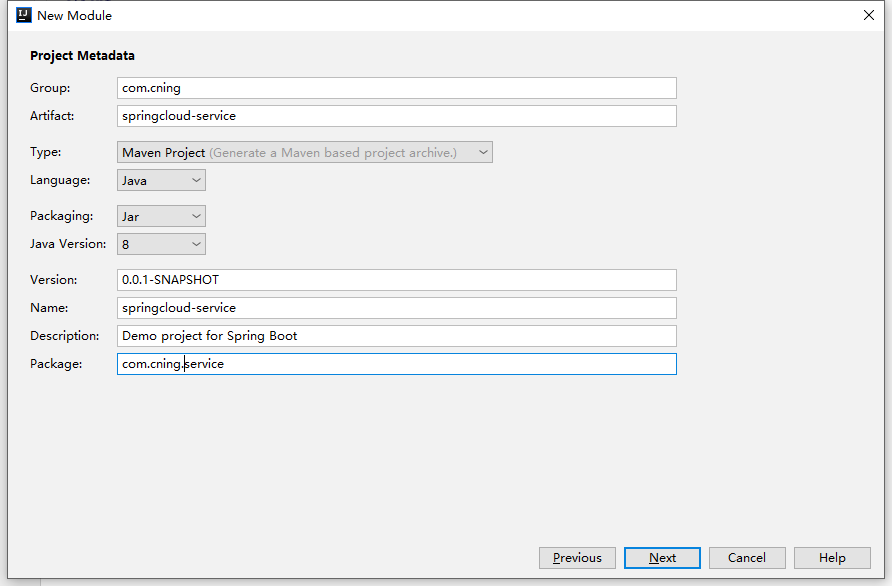
2.2 填写Group和Artifact,选择Java Version,修改Package名称,点击Next
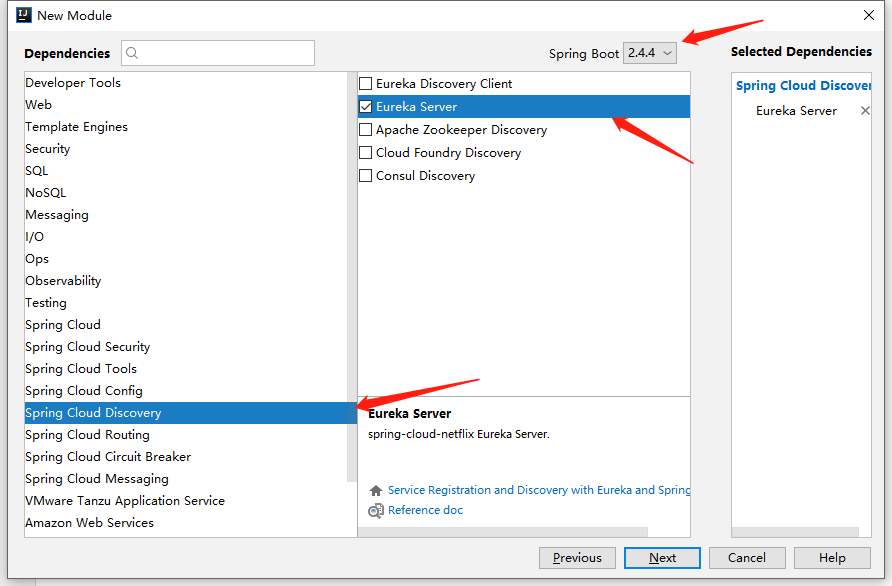
2.3 选择SpringCloud 组件配置,选择左侧Spring Cloud Discovery,然后选择Eureka Server,同时也可以选择工程基于的SpringBoot版本,这里我使用默认的,然后Next。
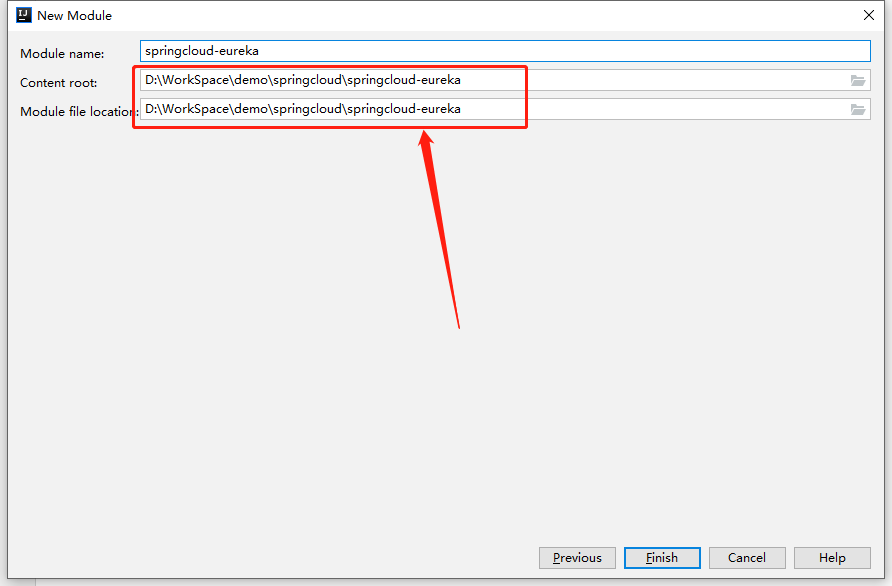
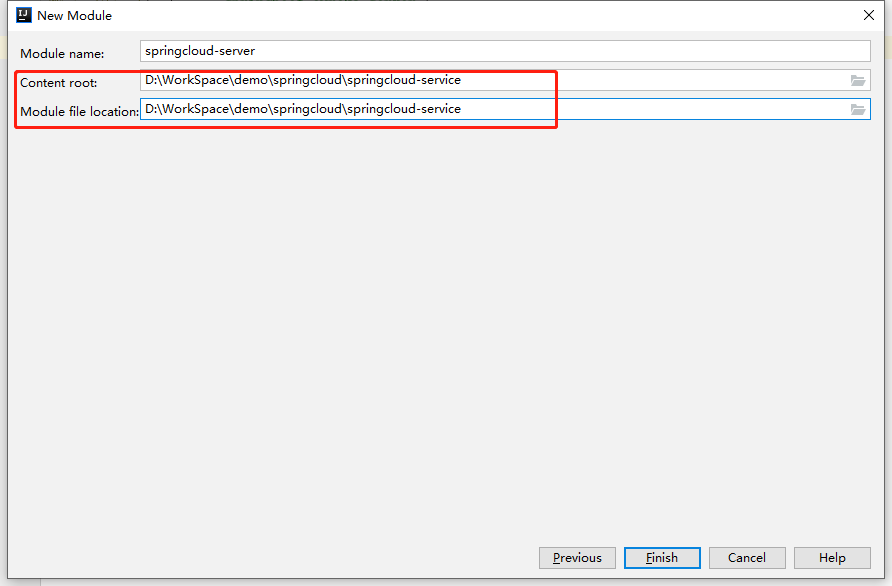
2.4 修改确认模块名称和创建路径,确保路径在刚刚创建的根项目路径下,点击Finish
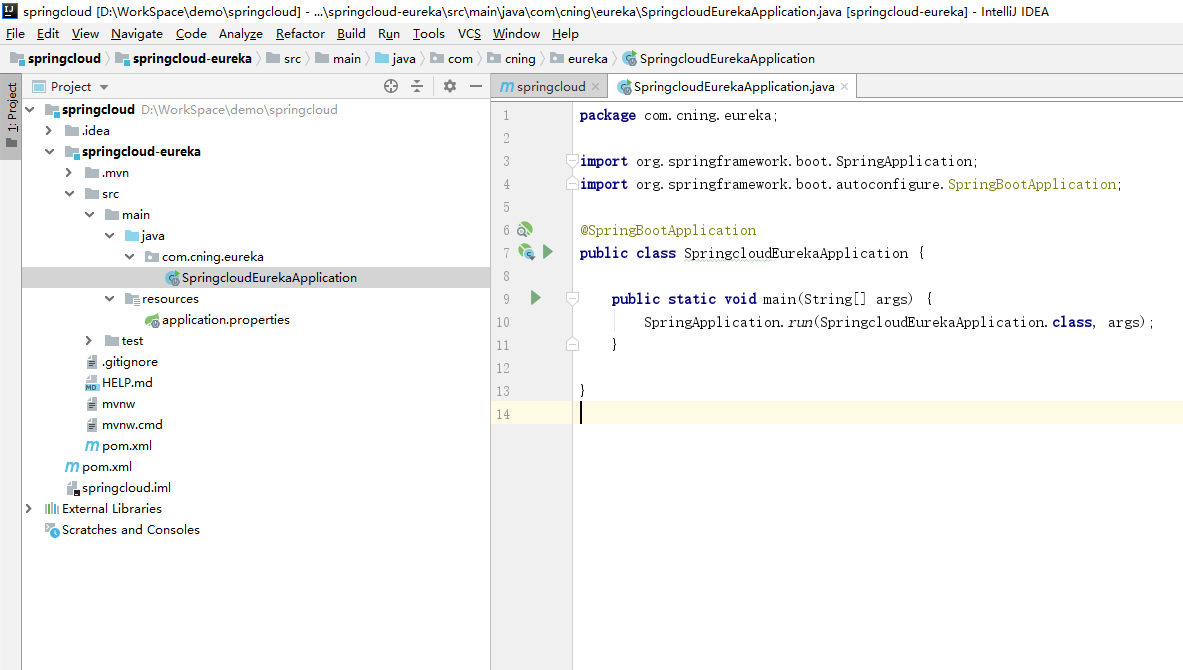
2.5 生成的目录结构如图
2.6 配置application.yml,因为我偏好于使用yaml文件,所以将默认生成的application.properties修改成了application.yml,配置内容如下:
# 配置启动端口
server:
  port: 8000

# 配置eureka服务注册中心
eureka:
  instance:
    hostname: localhost # 实例名称
  client:
    registerWithEureka: false # 是否向注册中心注册自己,本身是服务端,不向自己注册
    fetchRegistry: false  # 是否从Eureka获取注册信息,不需要,所以设置false
    serviceUrl:
      defaultZone: http://${eureka.instance.hostname}:${server.port}/eureka/  # Eureka服务器的地址

# 指定应用名称
spring:
  application:
    name: springcloud-eureka-server
2.7 启动类添加@EurekaServer注解,最终代码如下
package com.cning.eureka;

import org.springframework.boot.SpringApplication;
import org.springframework.boot.autoconfigure.SpringBootApplication;
import org.springframework.cloud.netflix.eureka.server.EnableEurekaServer;

@EnableEurekaServer
@SpringBootApplication
public class SpringcloudEurekaApplication {

    public static void main(String[] args) {
        SpringApplication.run(SpringcloudEurekaApplication.class, args);
    }

}
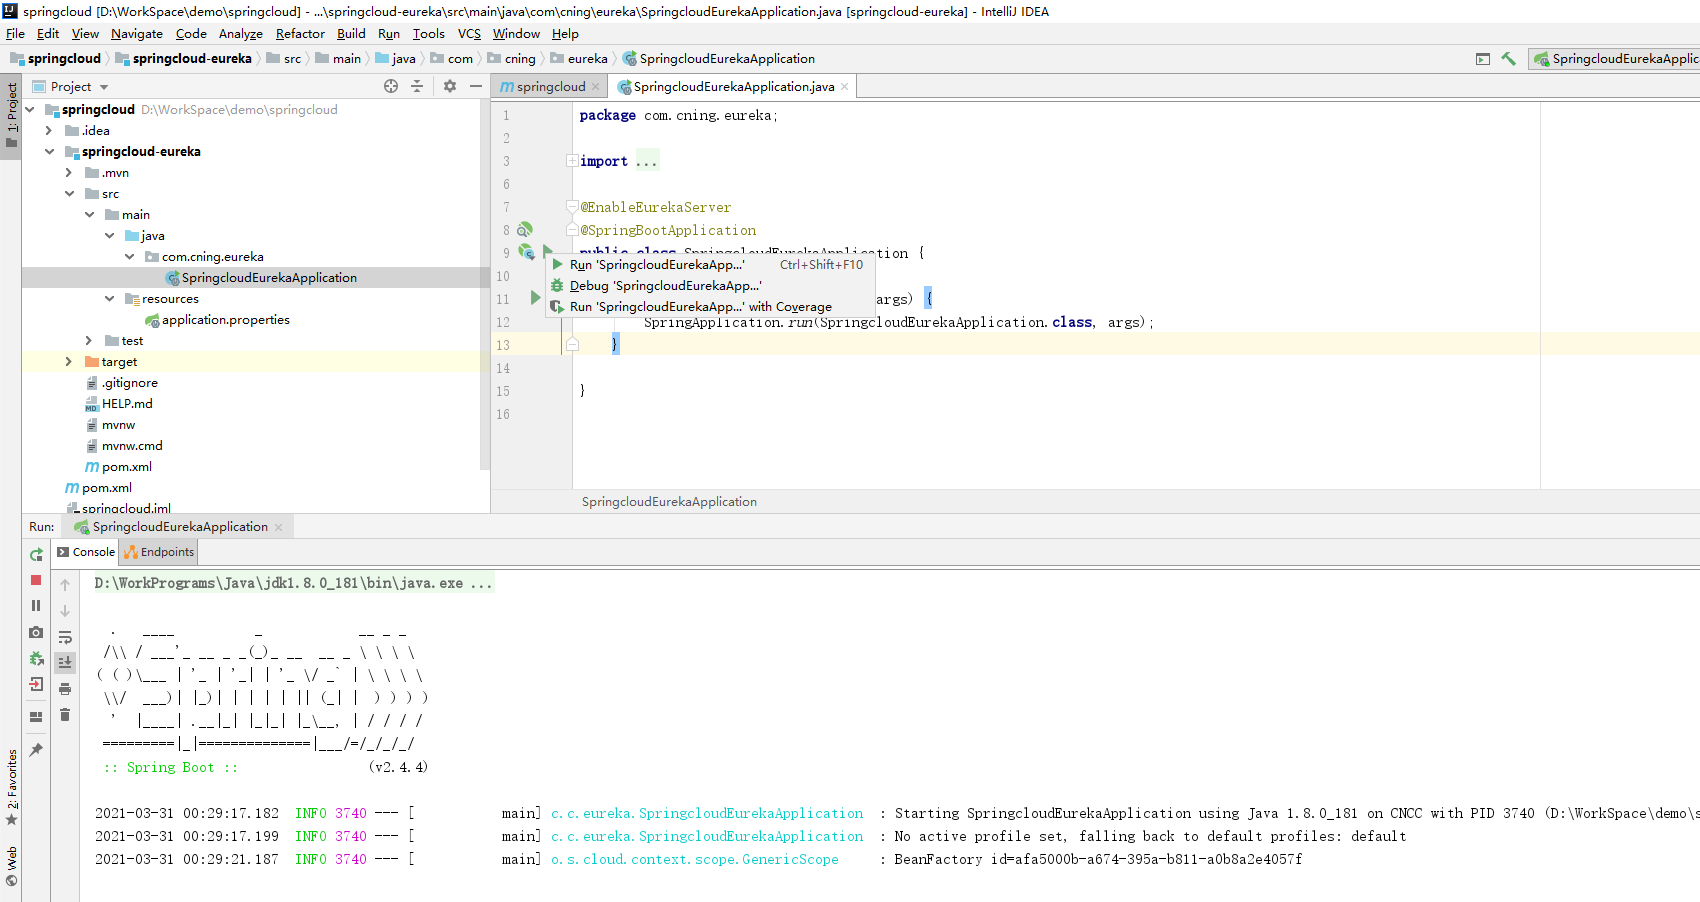
2.8 现在已经可以启动eureka注册中心了,如图
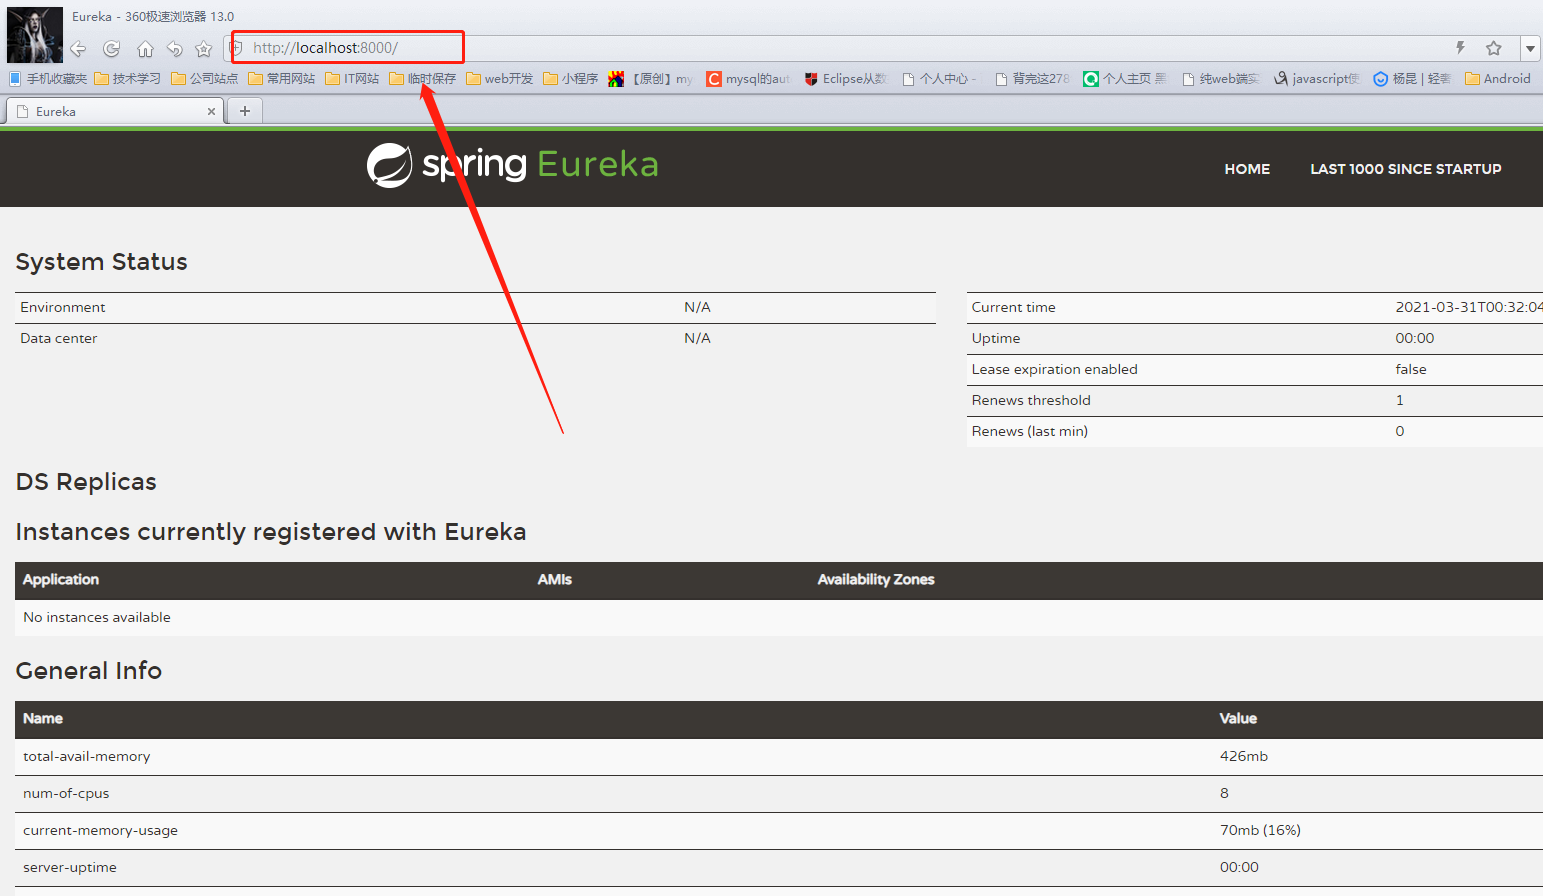
2.9 浏览器中输入localhost:8000,可以看到打开了Eureka控制台界面
第3步:创建Module(Server模块,Eureka Client)
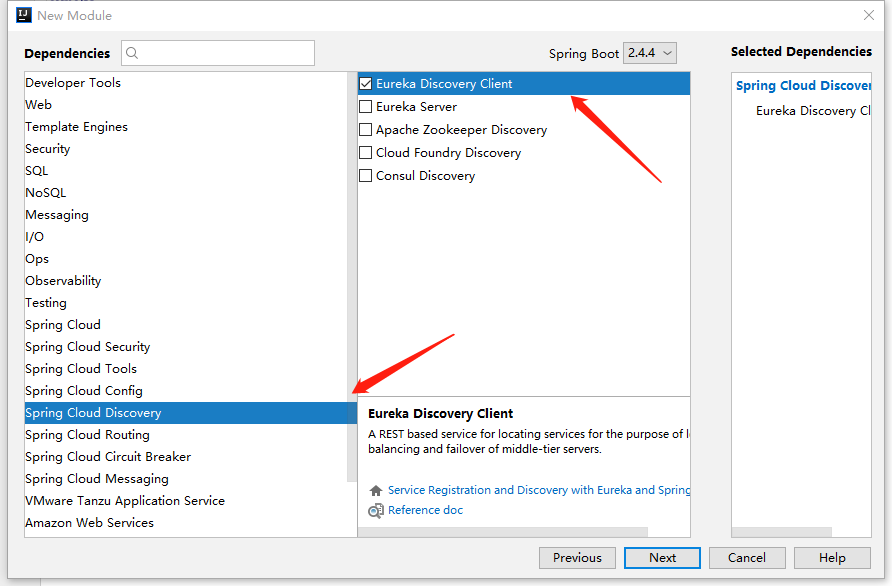
3.1 创建module,选择Spring Initializr,点击Next,填写Group和Artifact,完成后点击Next,选择Spring Cloud Discovery,然后选择Eureka Discovery Client,点击Next


3.2 调整目录,保证module和刚才的springcloud-eureka同级
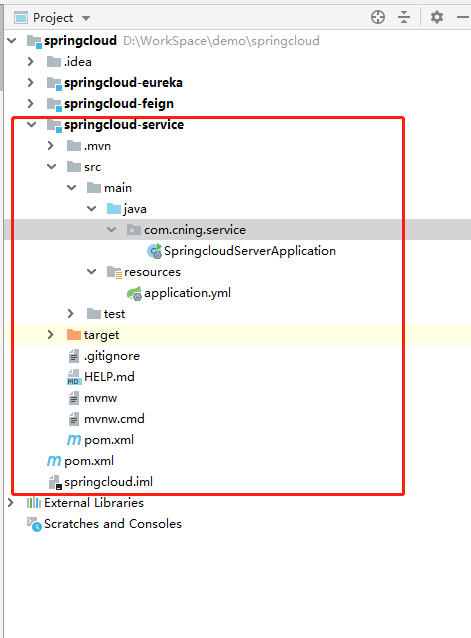
目录结构如下图:
3.3 pom.xml加入SpringBoot的依赖
        <dependency>
            <groupId>org.springframework.boot</groupId>
            <artifactId>spring-boot-starter-web</artifactId>
            <version>2.4.4</version>
            <scope>compile</scope>
        </dependency>
        <dependency>
            <groupId>org.springframework.boot</groupId>
            <artifactId>spring-boot-starter-actuator</artifactId>
        </dependency>
3.4 修改启动类和application.yml,修改后内容如下
SpringcloudServiceApplication.java
package com.cning.service;

import org.springframework.boot.SpringApplication;
import org.springframework.boot.autoconfigure.SpringBootApplication;
import org.springframework.cloud.netflix.eureka.EnableEurekaClient;

// 加入注解
@EnableEurekaClient
@SpringBootApplication
public class SpringcloudServiceApplication {

    public static void main(String[] args) {
        SpringApplication.run(SpringcloudServiceApplication.class, args);
    }

}
application.yml
server:
  port: 8001

#指定当前eureka客户端注册的服务端地址
eureka:
  client:
    service-url:
      defaultZone: http://${eureka.instance.hostname}:8000/eureka
  instance:
    hostname: localhost

# 指定应用名称
spring:
  application:
    name: springcloud-eureka-service
3.5 创建Service和Controller
在com.cning.server下新建package,命名为service,然后新建HelloService.java,内容如下
package com.cning.service.service;

import org.springframework.beans.factory.annotation.Autowired;
import org.springframework.core.env.Environment;
import org.springframework.stereotype.Service;

@Service
public class HelloService {
    @Autowired
    private Environment environment;

    public String hello(){
        return environment.getProperty("server.port");
    }

    public String hello(String msg){
        return String.format("收到消息:%s, 我是:%s", msg, environment.getProperty("server.port"));
    }
}
在com.cning.server下新建package,命名为web,然后新建HelloController.java,内容如下
package com.cning.service.web;

import com.cning.service.service.HelloService;
import org.springframework.beans.factory.annotation.Autowired;
import org.springframework.web.bind.annotation.*;

@RestController
@RequestMapping("/hello")
public class HelloController {

    @Autowired
    HelloService helloService;

    @GetMapping("/")
    @ResponseBody
    public Object hello(@RequestParam(defaultValue = "") String msg){
        System.out.println(msg);
        return helloService.hello(msg);
    }
}
3.6 修改SpringcloudServiceApplication.java,在注解SpringBootApplication后加上(scanBasePackages = {"com.cning.service.service", "com.cning.service.web"})
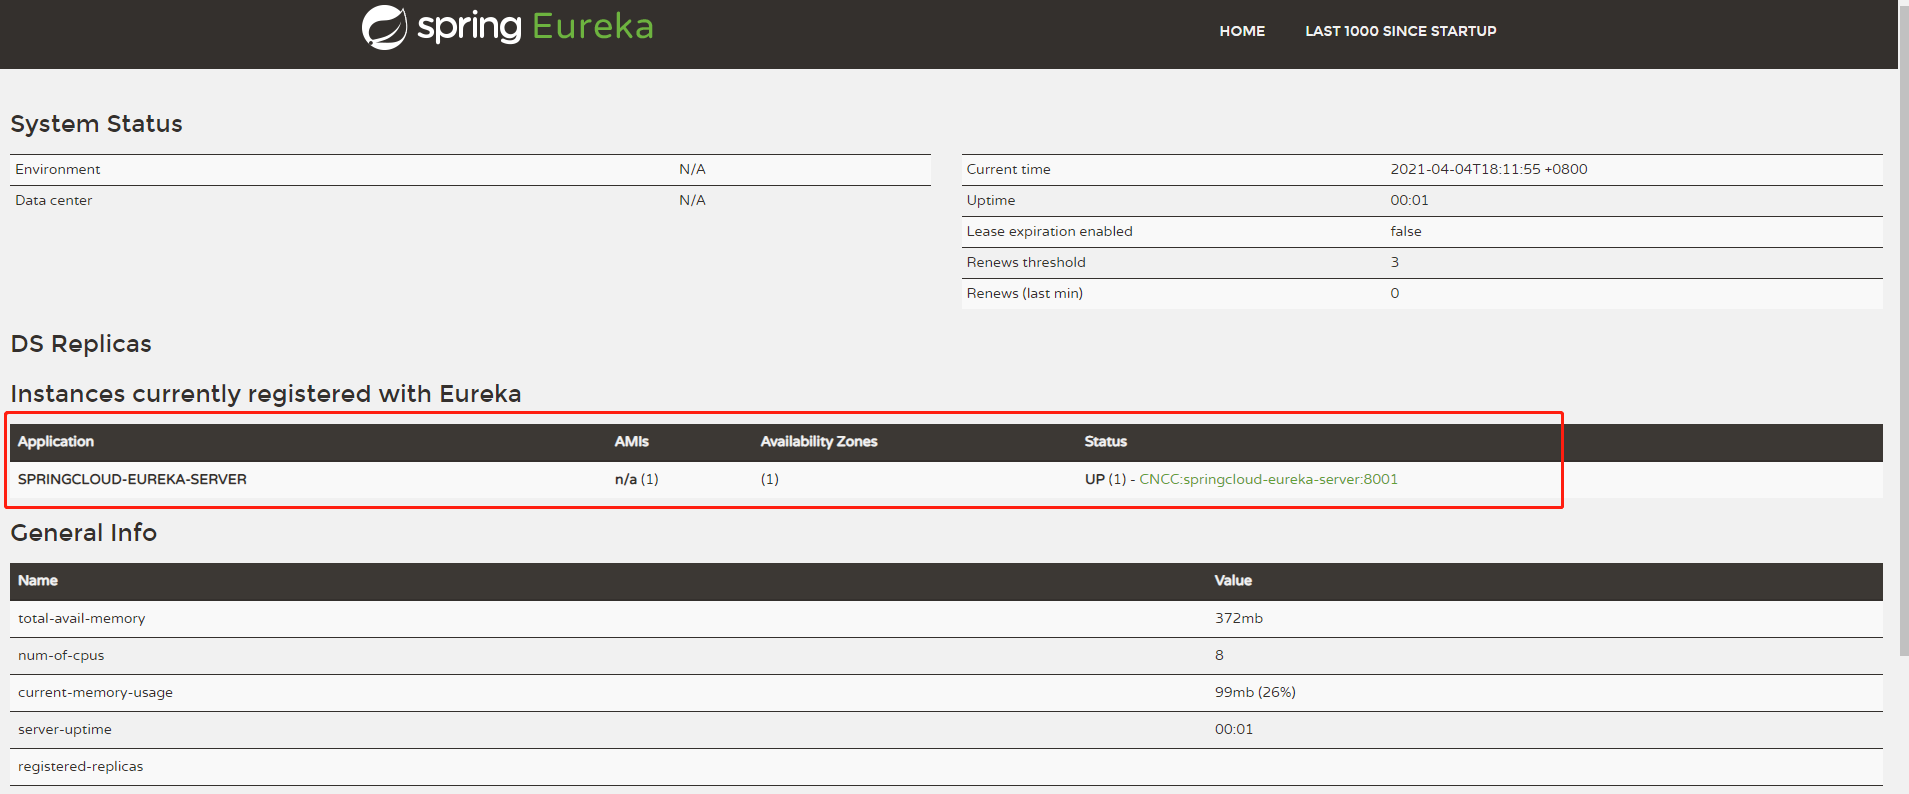
3.7 运行SpringcloudServiceApplication.java,启动成功后从Eureka管理台(localhost:8000)可以看到springcloud-eureka-service已经注册
第4步:创建Module(SpringCloud Feign模块)
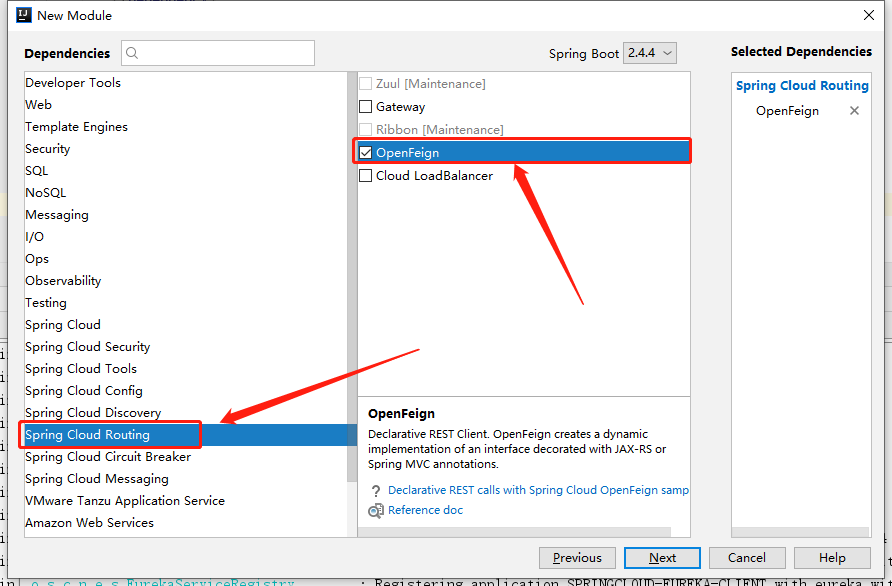
创建和前面一样,就不上图了,注意选择依赖的这一步,选择Spring Cloud Routing中的OpenFeign,然后继续
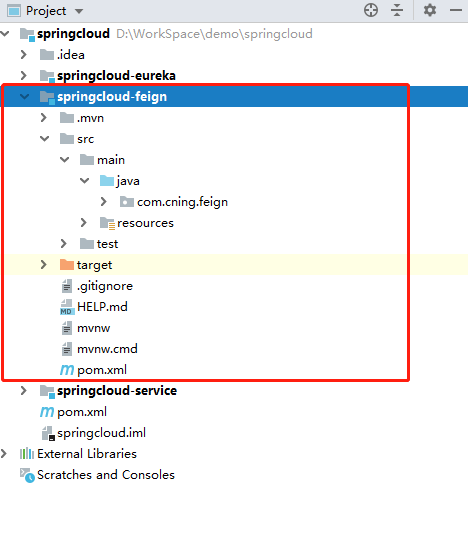
结构如下:
4.1 pom.xml加入eureka依赖
        <dependency>
            <groupId>org.springframework.cloud</groupId>
            <artifactId>spring-cloud-starter-netflix-eureka-server</artifactId>
            <version>3.0.2</version>
        </dependency>
4.2 创建Feign接口类
在com.cning.feign下创建名为client的package,然后新建HelloServiceFeign.java,内容如下(不要忘了加@FeignClient注解)
package com.cning.feign.client;

import org.springframework.cloud.openfeign.FeignClient;
import org.springframework.web.bind.annotation.RequestMapping;
import org.springframework.web.bind.annotation.RequestMethod;

// 指定转发请求的服务器名称 spring.application.name
@FeignClient(value = "springcloud-eureka-service")
public interface HelloServiceFeign {

    @RequestMapping(value = "/hello", method = RequestMethod.GET)
    public String hello(String msg);
}
4.3 创建Controller
在com.cning.feign下创建名为web的package,然后新建Controller.java,内容如下
package com.cning.feign.web;

import com.cning.feign.client.HelloServiceFeign;
import org.springframework.beans.factory.annotation.Autowired;
import org.springframework.web.bind.annotation.RequestMapping;
import org.springframework.web.bind.annotation.RequestParam;
import org.springframework.web.bind.annotation.RestController;

@RestController
@RequestMapping("/feign")
public class Controller {

    @Autowired
    HelloServiceFeign helloServiceFeign;

    @RequestMapping("/hello")
    public String hello(@RequestParam(defaultValue = "") String msg) {
        System.out.println("收到请求参数:"+msg+",调用服务");
        return helloServiceFeign.hello(msg);
    }
}
4.3 修改启动类SpringcloudFeignApplication.java和application.yml
SpringcloudFeignApplication.java
package com.cning.feign;

import org.springframework.boot.SpringApplication;
import org.springframework.boot.autoconfigure.SpringBootApplication;
import org.springframework.cloud.client.discovery.EnableDiscoveryClient;
import org.springframework.cloud.openfeign.EnableFeignClients;

@EnableFeignClients
@EnableDiscoveryClient
@SpringBootApplication(scanBasePackages = {"com.cning.feign.client", "com.cning.feign.web"})
public class SpringcloudFeignApplication {

    public static void main(String[] args) {
        SpringApplication.run(SpringcloudFeignApplication.class, args);
    }

}
application.yml
server:
  port: 8100

#指定当前eureka客户端注册地址
eureka:
  client:
    service-url:
      defaultZone: http://${eureka.instance.hostname}:8000/eureka
  instance:
    hostname: localhost

# 指定应用名称
spring:
  application:
    name: springcloud-feign
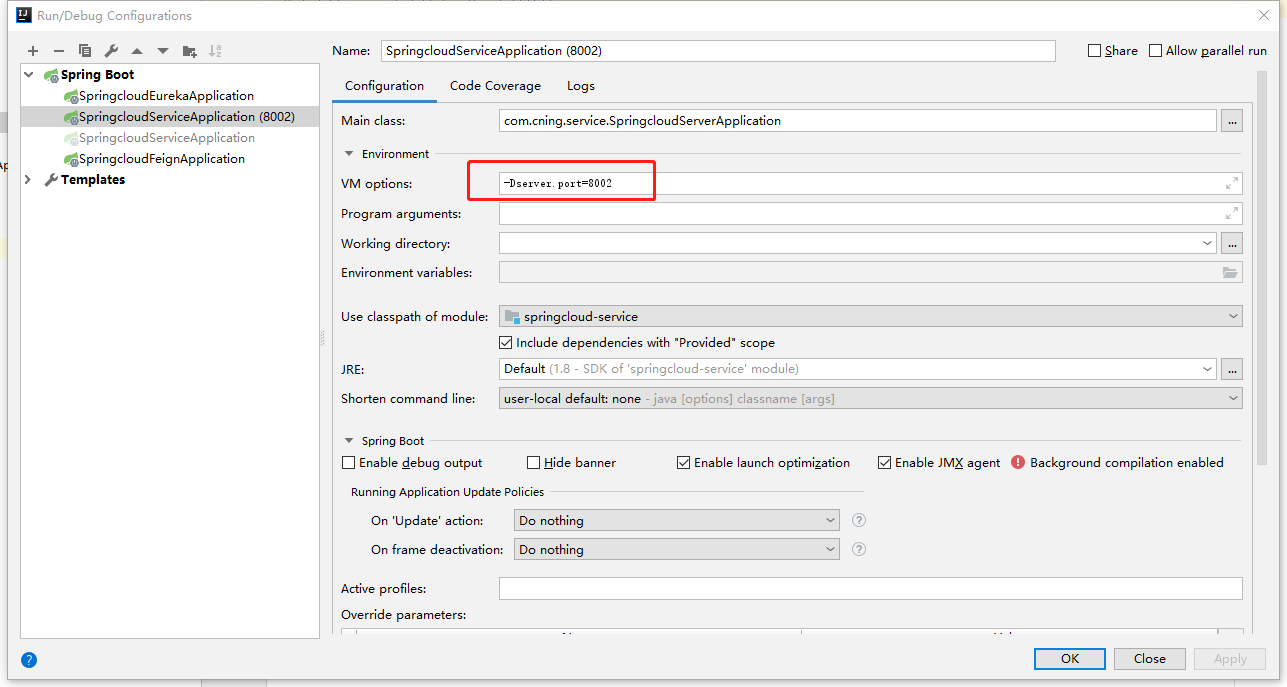
4.4 此时feign已经配置完成,为了验证feign的负载均衡,我们在idea的Run/Debug配置中复制一个SpringcloudServiceApplication,如图,设置端口为8002
4.5 启动SpringcloudServiceApplication(8002)和SpringcloudFeignApplication,刷新Eureka控制台(localhost:8000),可以看到8002和feign都注册到了Eureka
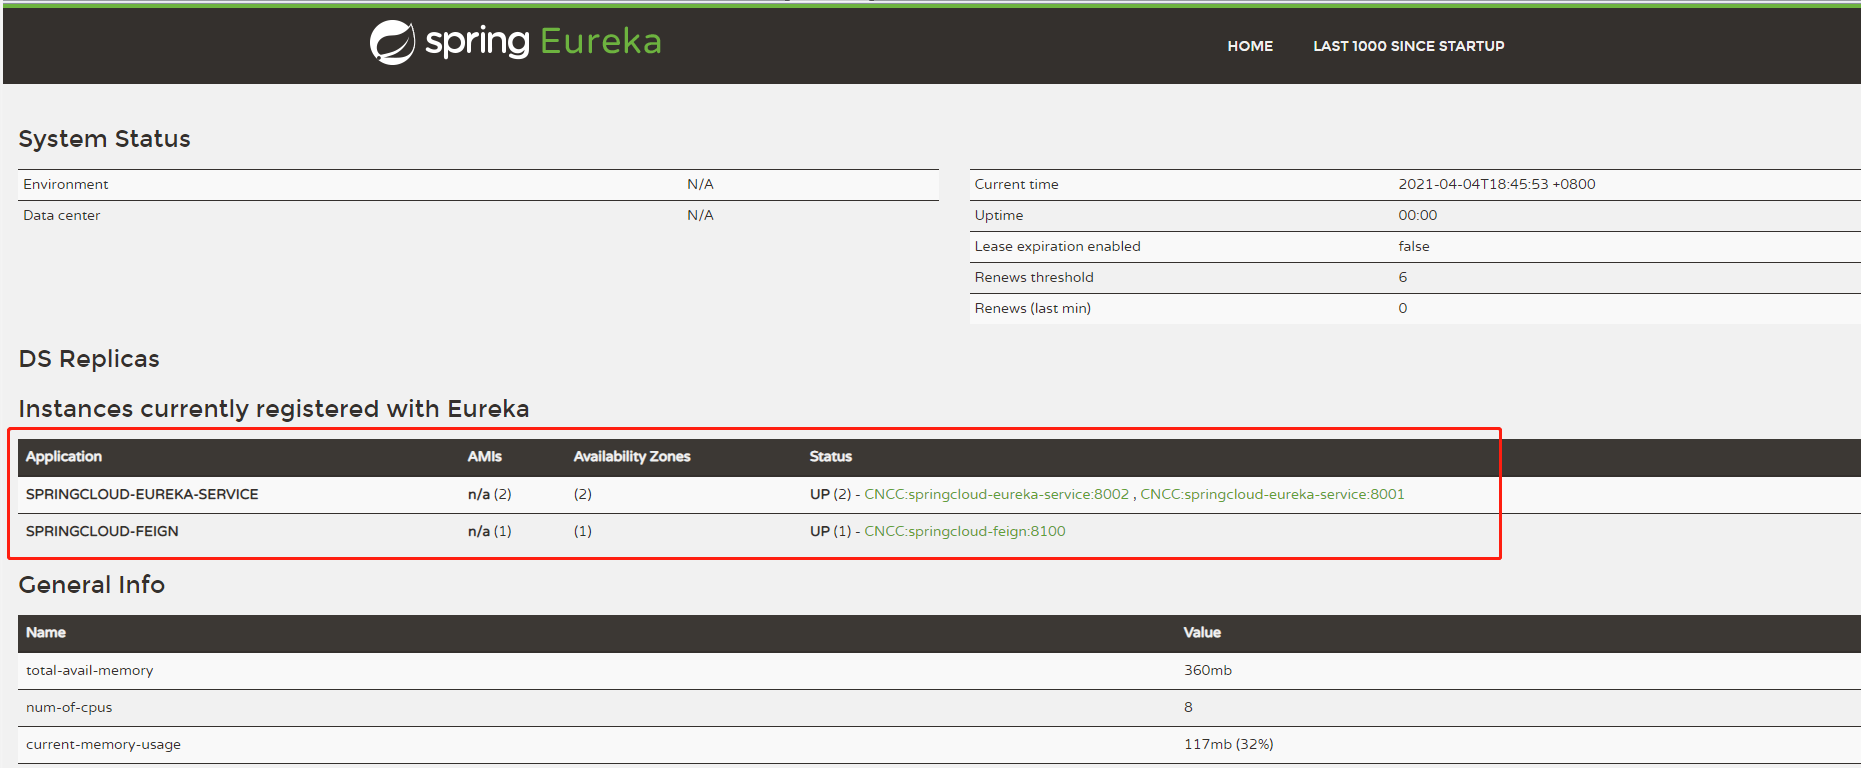
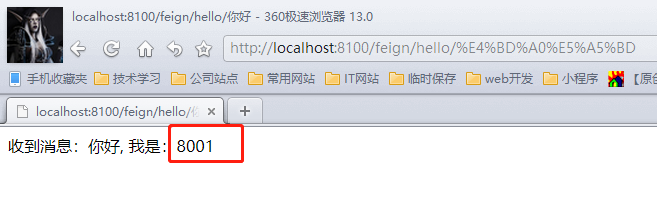
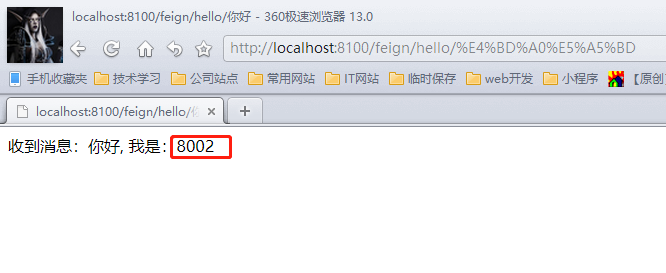
4.6 浏览器中访问localhost:8100/feign/hello/你好,可以看到springcloud-service中的方法被调用,再次刷新访问,可以发现每次调用不同端口。
参考:
https://blog.csdn.net/sinat_36665930/article/details/104698095
https://www.cnblogs.com/sharpest/p/13714079.html
SpringCloud学习(一)——搭建springcloud工程
原文:https://www.cnblogs.com/cning/p/14599643.html