下载rancher服务镜像
[root@k8s-node01 ~]# docker pull rancher/rancher:stable

查看镜像
[root@k8s-node01 ~]# docker images
REPOSITORY                                                TAG                 IMAGE ID            CREATED             SIZE
rancher/rancher                                           stable              fb0772b142fe        13 days ago         856MB
.........
启动rancher容器
[root@k8s-node01 ~]# docker run -d -v /tmp/rancher:/tmp/rancher --restart=unless-stopped -p 80:80 -p 443:443 rancher/rancher:stable

查看rancher容器
[root@k8s-node01 ~]# docker ps|grep rancher
2c2b36cb138b        rancher/rancher:stable                                        "entrypoint.sh"          3 hours ago         Up 3 hours          0.0.0.0:80->80/tcp, 0.0.0.0:443->443/tcp   lucid_robinson
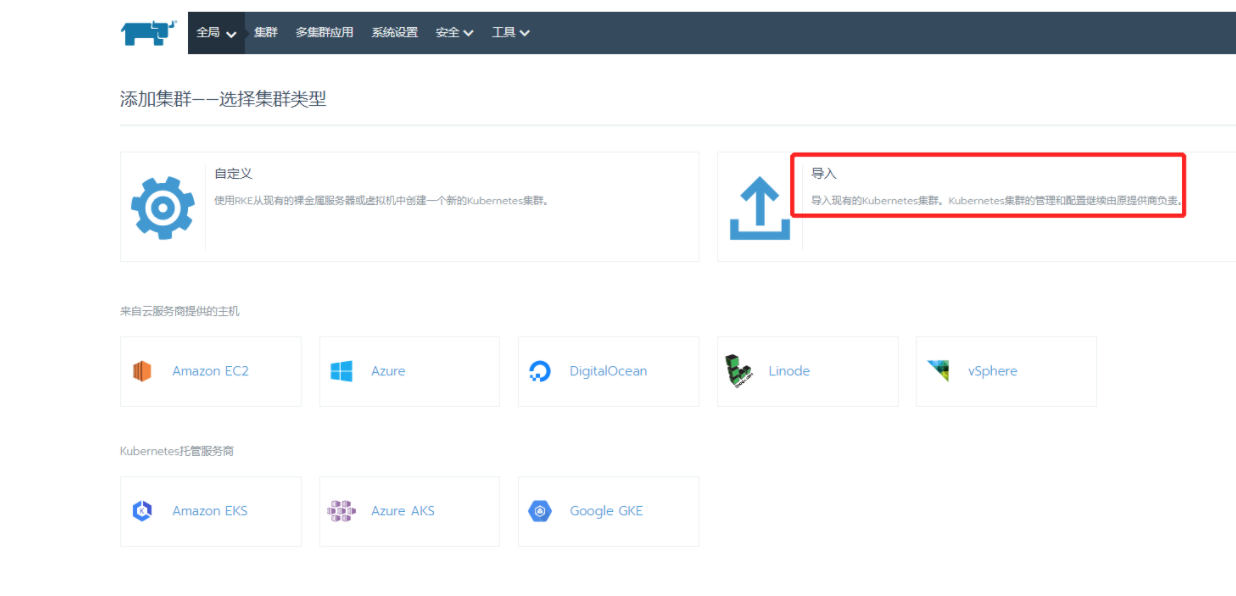
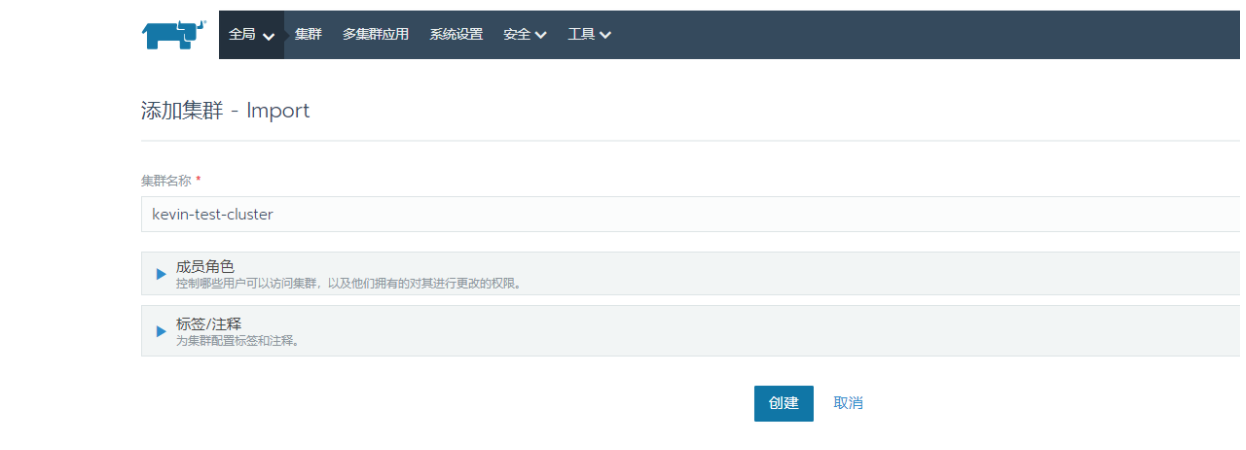
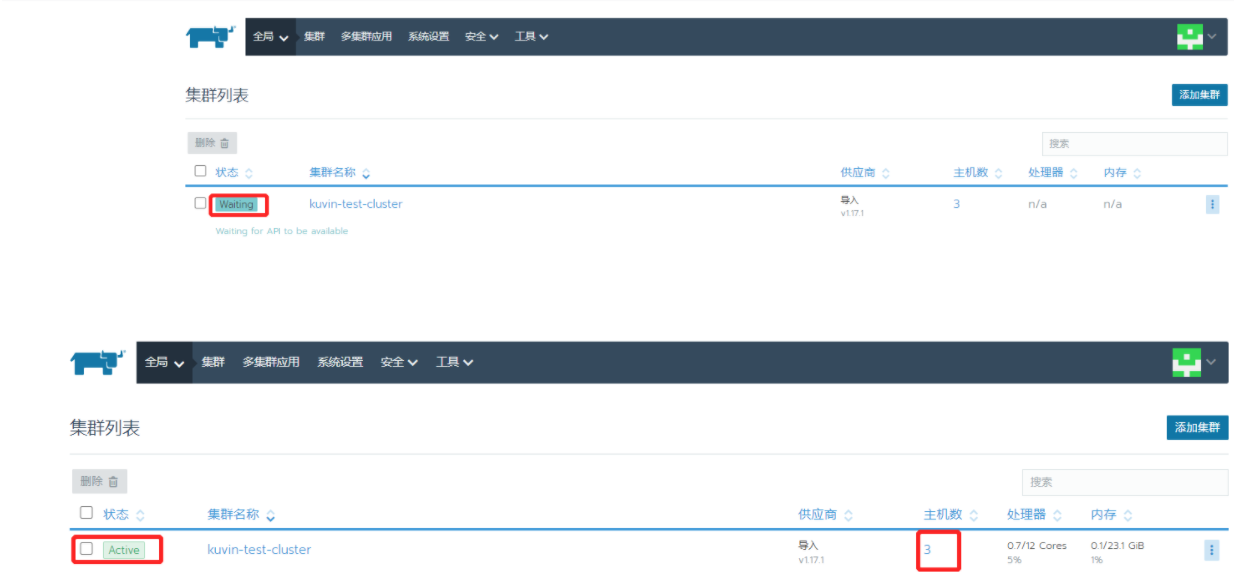
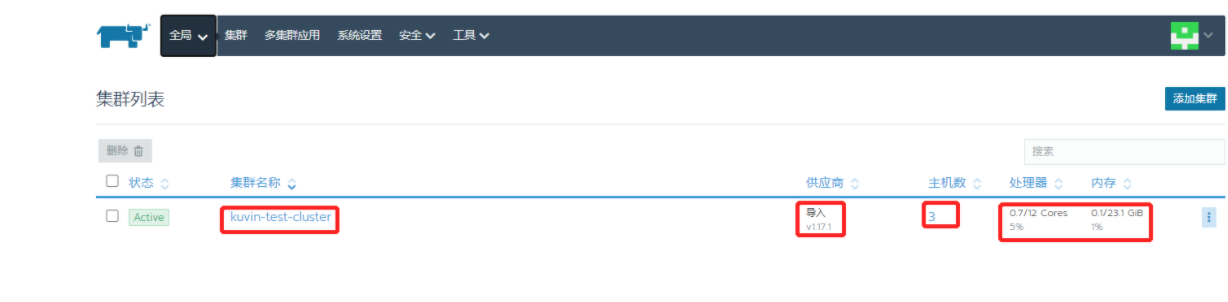
2) 给自己导入的集群起一个名称。比如这里我导入的k8s集群名称设置为"kuvin-test-cluster"
3)按照下面的指向,执行第一步骤和第三步骤(因为我这里二进制部署的k8s集群是有证书,所以跳过第二步骤,直接执行第三步骤)

先查看node节点kubelet配置中的USER_ACCOUNT,默认是default-auth

[root@k8s-master01 work]# kubectl create clusterrolebinding cluster-admin-binding --clusterrole cluster-admin --user default-auth
clusterrolebinding.rbac.authorization.k8s.io/cluster-admin-binding created
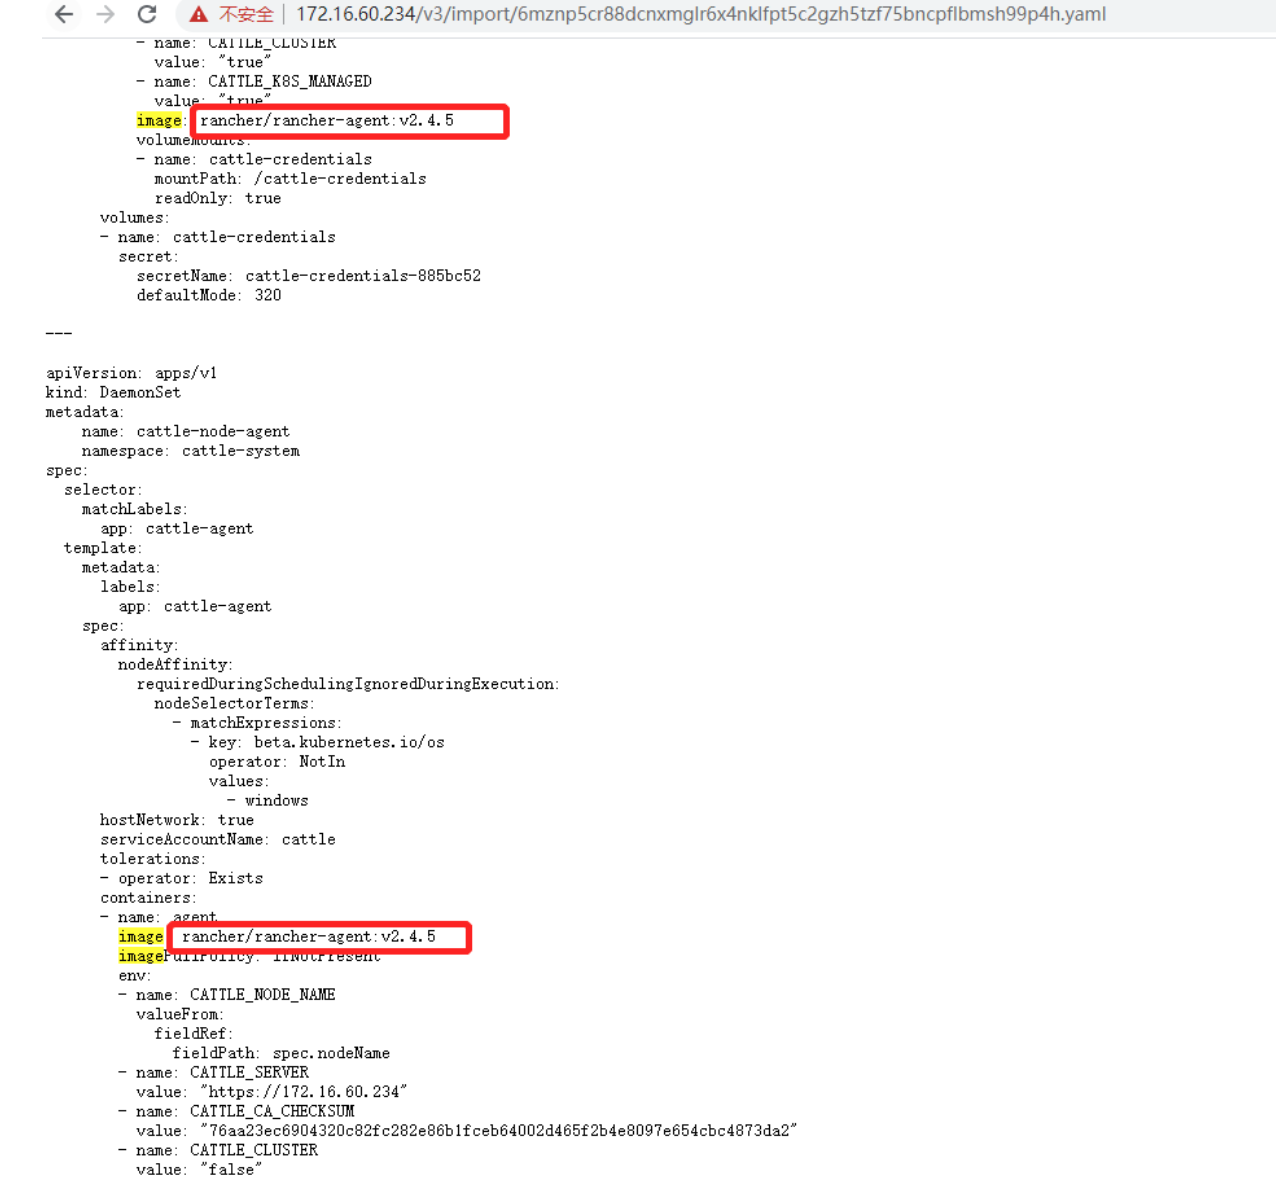
查出来image镜像后,提前在所有的node节点节点上下载这个rancher/rancher-agent:v2.4.5镜像
[root@k8s-node01 ~]# docker pull rancher/rancher-agent:v2.4.5

[root@k8s-node01 ~]# docker images
REPOSITORY                                                TAG                 IMAGE ID            CREATED             SIZE
rancher/rancher-agent                                     v2.4.5              2e6c7ac4e072        13 days ago         294MB
.......
[root@k8s-master01 work]# curl --insecure -sfL https://172.16.60.234/v3/import/qx7972dgq5876dlvtx66hmb55l49w57tvpr8v58ldwvlk75bb44msn.yaml | kubectl apply -f -
clusterrole.rbac.authorization.k8s.io/proxy-clusterrole-kubeapiserver created
clusterrolebinding.rbac.authorization.k8s.io/proxy-role-binding-kubernetes-master created
namespace/cattle-system created
serviceaccount/cattle created
clusterrolebinding.rbac.authorization.k8s.io/cattle-admin-binding created
secret/cattle-credentials-ad2b8cf created
clusterrole.rbac.authorization.k8s.io/cattle-admin created
deployment.apps/cattle-cluster-agent created
daemonset.apps/cattle-node-agent created
检查会发现k8s中多了一个cattle-system的命名空间
[root@k8s-master01 work]# kubectl get ns
NAME              STATUS   AGE
cattle-system     Active   18m
default           Active   3d19h
kube-node-lease   Active   3d19h
kube-public       Active   3d19h
kube-system       Active   3d19h

cattle-system的命名空间下创建了cattle-cluster-agent和cattle-node-agent的pod
[root@k8s-master01 work]# kubectl get pods -n cattle-system
NAME                                   READY   STATUS    RESTARTS   AGE
cattle-cluster-agent-87944bb89-9l8vn   1/1     Running   0          18m
cattle-node-agent-24vnp                1/1     Running   0          18m
cattle-node-agent-86hdx                1/1     Running   0          18m
cattle-node-agent-qz59v                1/1     Running   0          18m

[root@k8s-master01 work]# kubectl get deployment -n cattle-system
NAME                   READY   UP-TO-DATE   AVAILABLE   AGE
cattle-cluster-agent   1/1     1            1           19m

[root@k8s-master01 work]# kubectl get daemonset -n cattle-system
NAME                DESIRED   CURRENT   READY   UP-TO-DATE   AVAILABLE   NODE SELECTOR   AGE
cattle-node-agent   3         3         3       3            3           <none>          19m

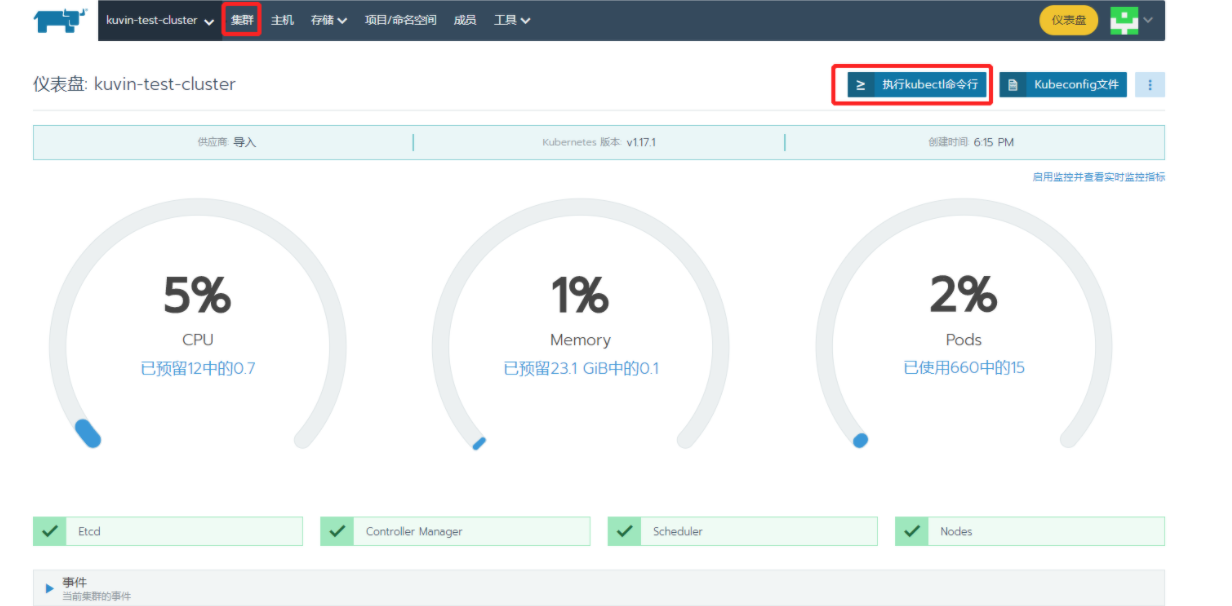
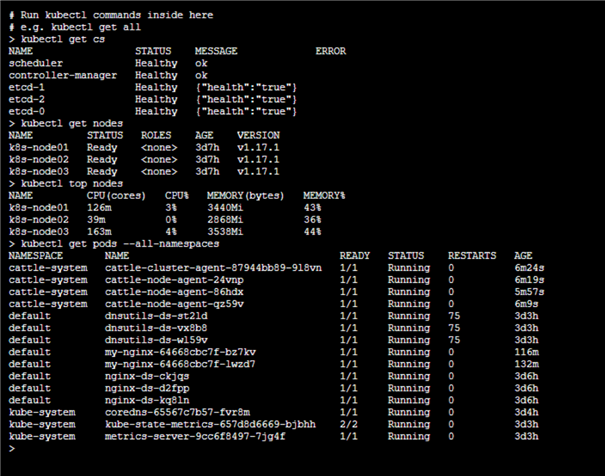
点击上图右上角的"执行kubelet命令行",就可以在webshell里面通过kubelet命令查看集群信息了
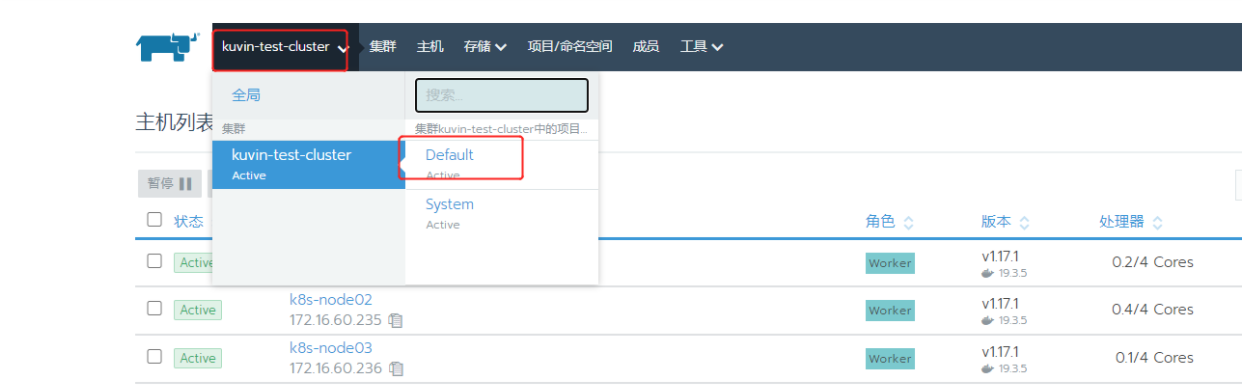
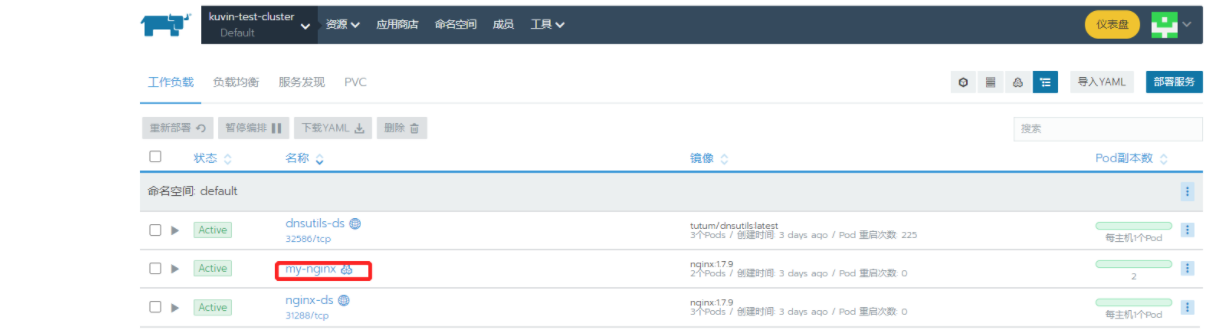
还可以通过查看导入的k8s集群的项目里的资源,来查看每个service下的pod情况
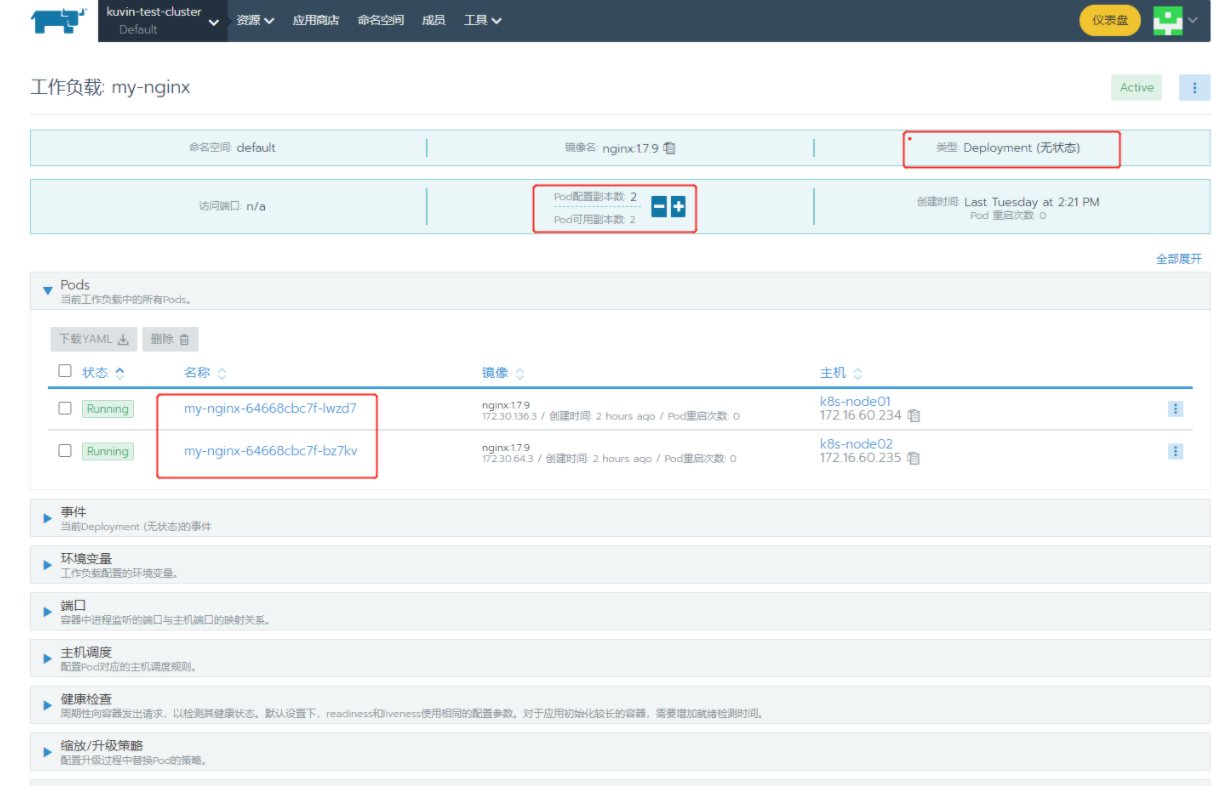
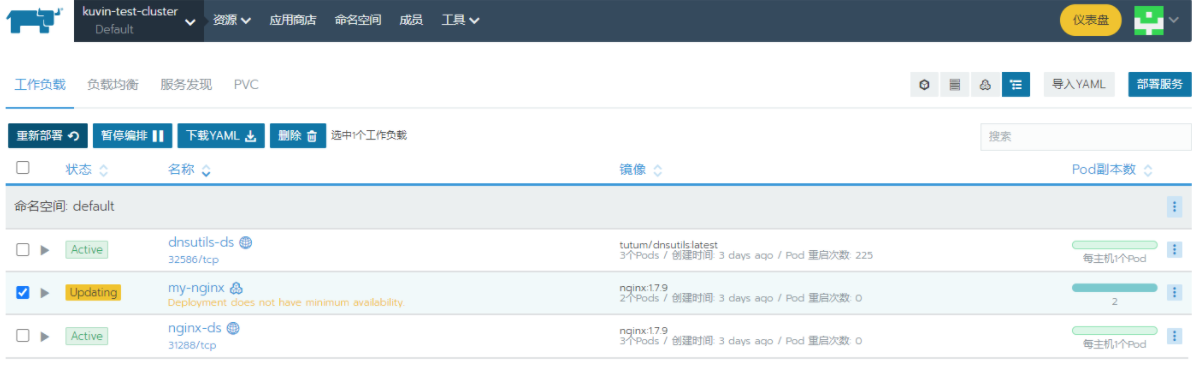
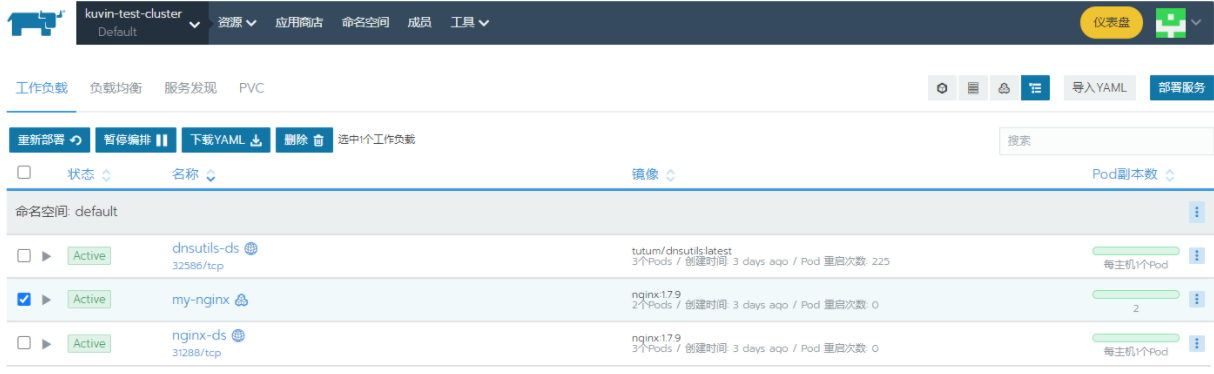
动态伸缩pod副本
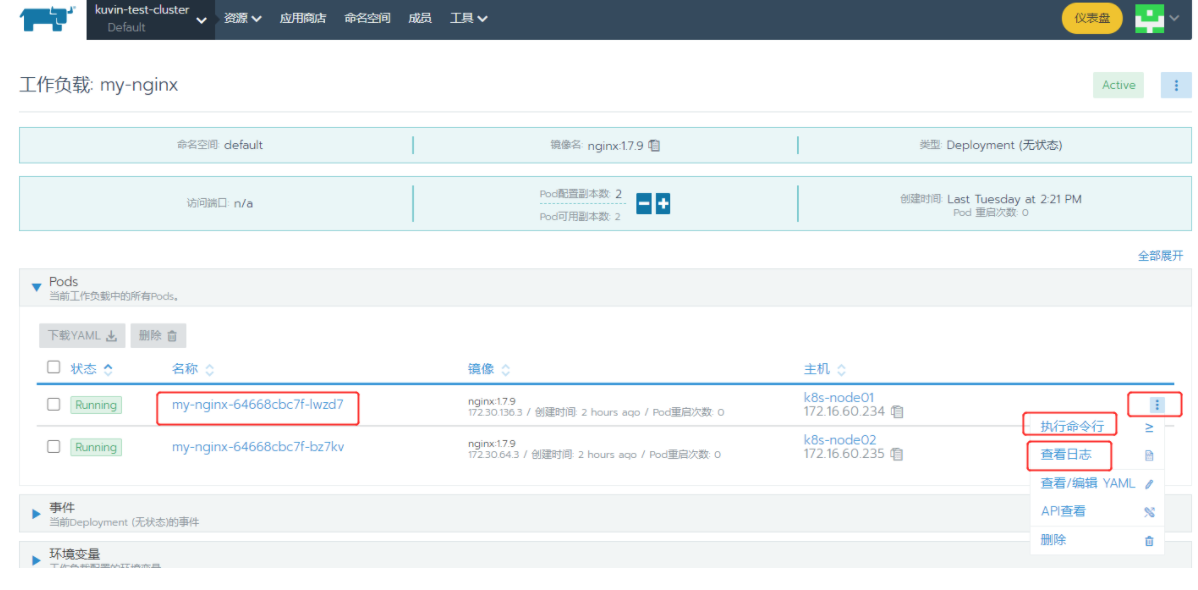
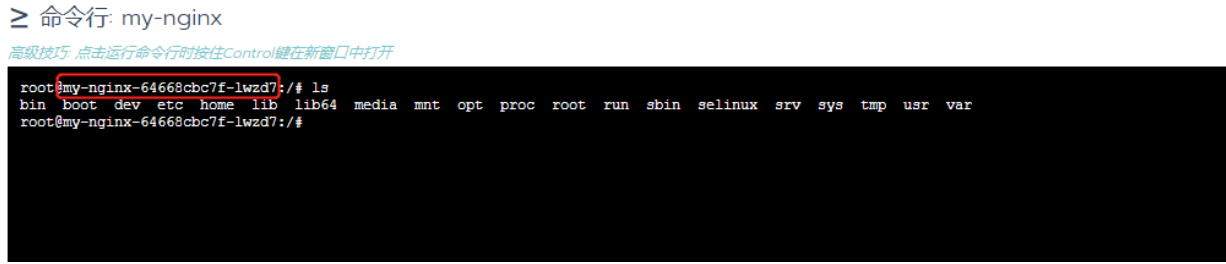
登录pod容器内部
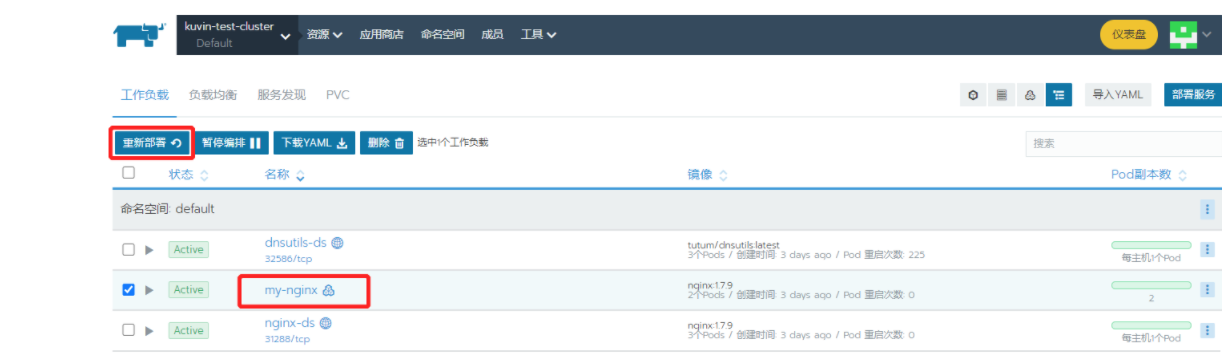
pod重新部署
Rancher还有很多管理k8s集群的其他操作功能,在这里就不一一介绍了。
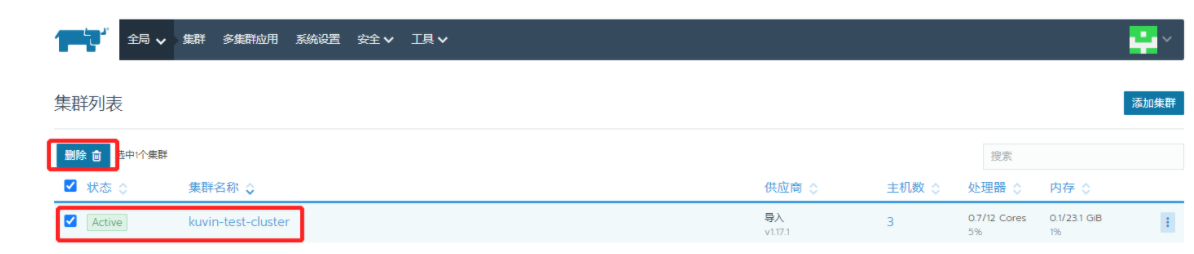
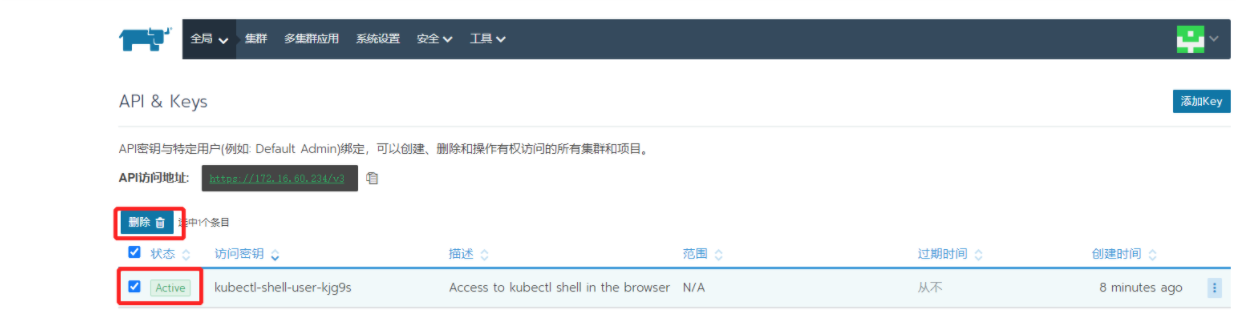
2)删除已经导入的 "API&Keys" 信息
3)删除上面截图中第一步骤中添加的权限(在k8s集群的master节点操作)
[root@k8s-master01 work]# kubectl delete clusterrolebinding cluster-admin-binding
[root@k8s-master01 work]# kubectl delete deployment cattle-cluster-agent -n cattle-system
[root@k8s-master01 work]# kubectl delete daemonset cattle-node-agent -n cattle-system
或者将上面截图中第三步骤的yaml文件地址里的内容粘贴到k8s的master节点的一个yaml文件,比如rancher_imoprt.yml,直接针对这个yml文件执行"kubectl delete -f rancher_imoprt.yml"操作即可删除
[root@k8s-master01 work]# kubectl delete -f rancher_imoprt.yml
原文:https://www.cnblogs.com/kevingrace/p/14617757.html