pycharm-windows编码在linux运行
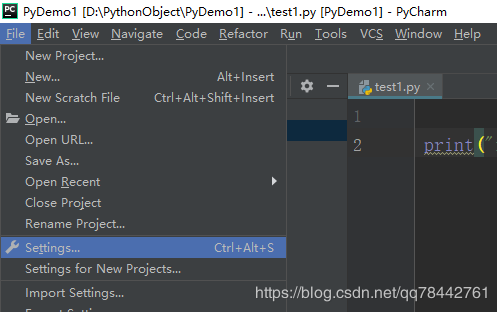
1. 新建项目或者打开项目 File->Settings
2. 在settings中选择:
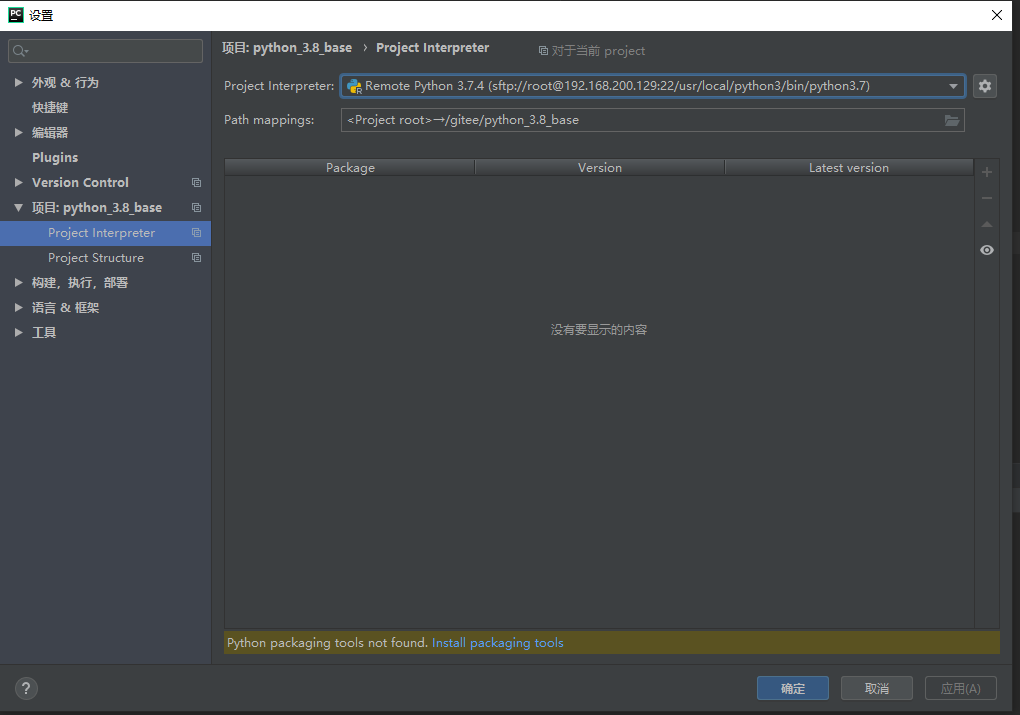
- Project:xxxx->Project Interpreter
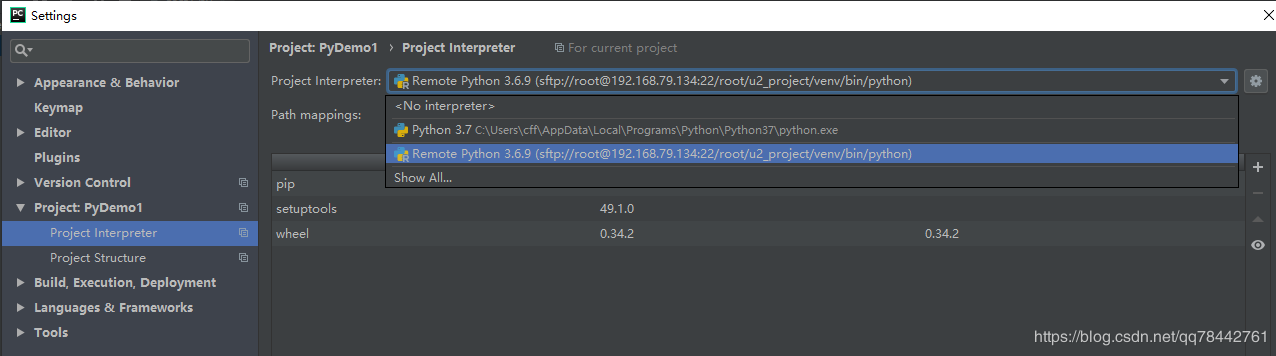
3. 这里我已经配置好了,如果没有要选择这个:
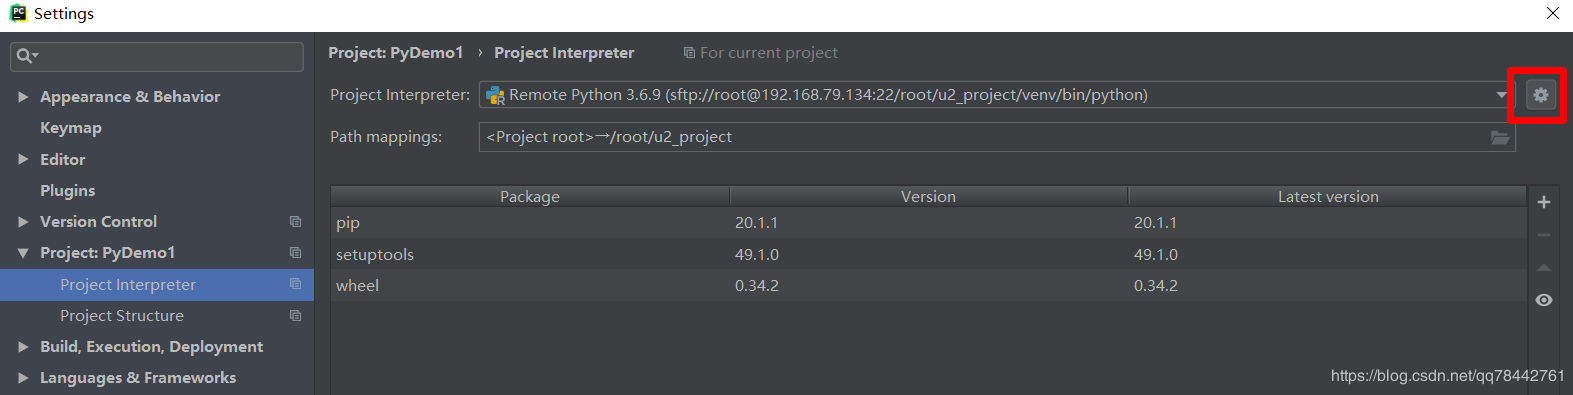
4. 点击Add,进入:SSH Interpreter

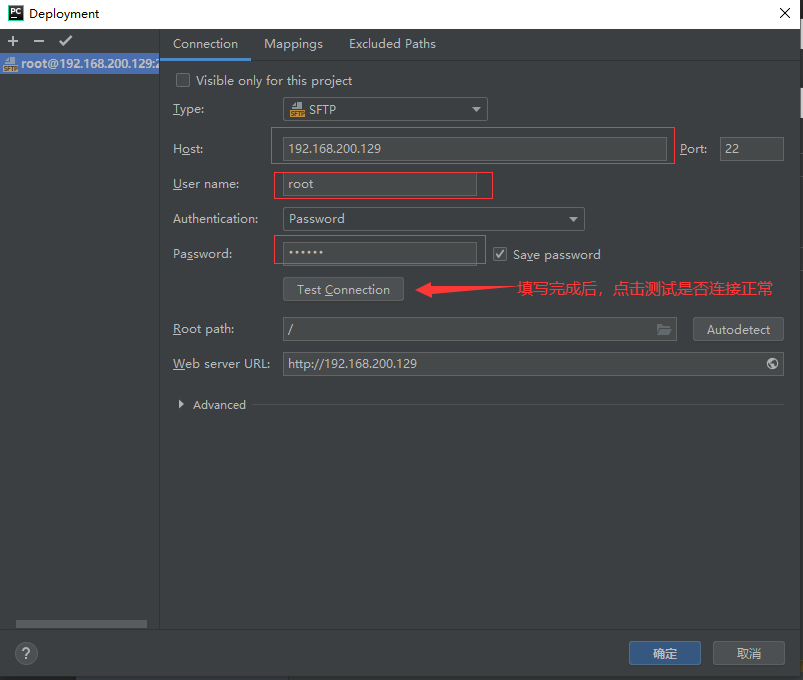
5. 点击那 ... 后:这里Tpye要选择SFTP
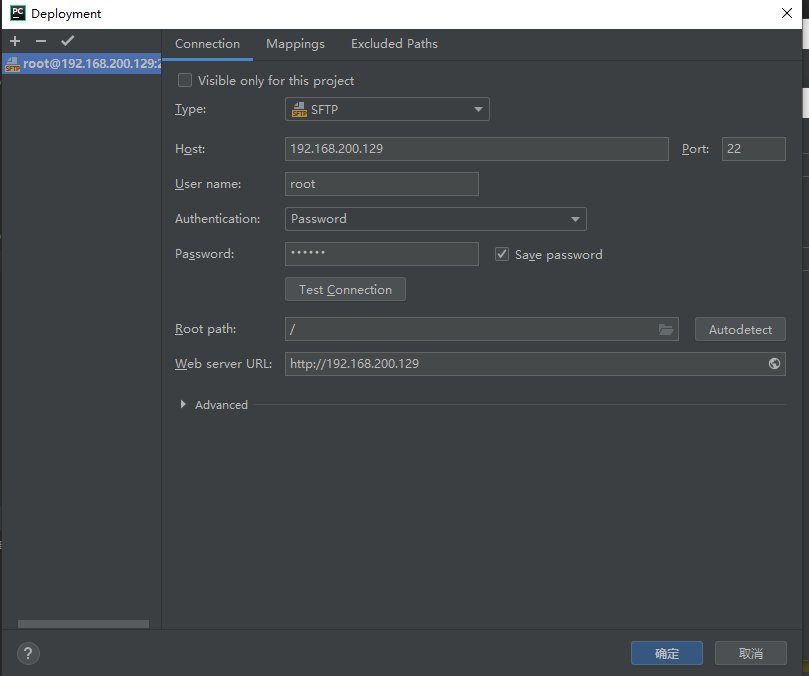
6. 这里Host写Linux的ip地址,User name和Password填写好,然后点击Test Connection测试下
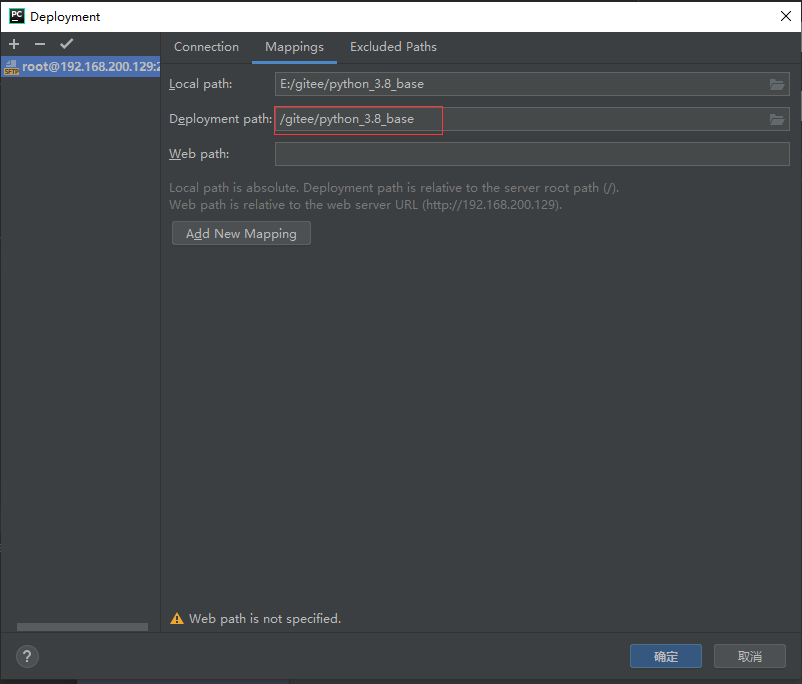
7. 在配置一下Mappings路径
8.然后点击保存
9. 验证是否成功

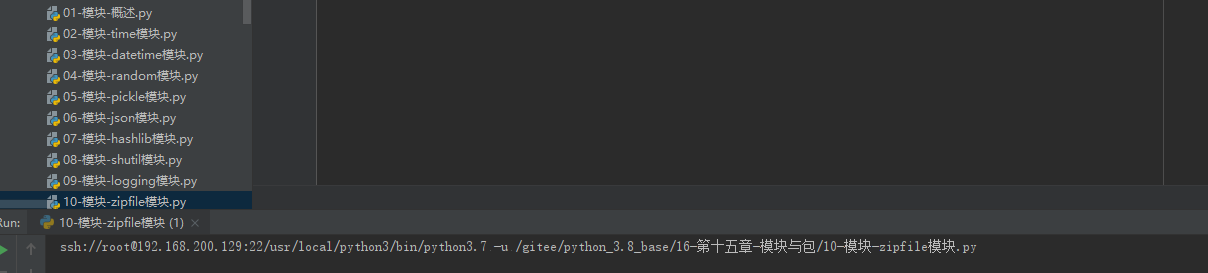
10.新建py文件,进行测试一下
pycharm-在windows编码在linux上运行
原文:https://www.cnblogs.com/scajy/p/14716949.html