在前面,我们学习到了一些 Kubernetes 知识,现在列出 kubectl 的所有命令以及其缩写形式,供翻阅查询。
kubectl 命令格式:
kubectl [command] [type] [Name] [flag]
| all | events (ev) | podsecuritypolicies (psp) |
|---|---|---|
| certificatesigningrequests (csr) | horizontalpodautoscalers (hpa) | podtemplates |
| clusterrolebindings | ingresses (ing) | replicasets (rs) |
| clusterroles | jobs | replicationcontrollers (rc) |
| clusters (valid only for federation apiservers) | limitranges (limits) | resourcequotas (quota) |
| componentstatuses (cs) | namespaces (ns) | rolebindings |
| configmaps (cm) | networkpolicies (netpol) | roles |
| controllerrevisions | nodes (no) | secrets |
| cronjobs | persistentvolumeclaims (pvc) | serviceaccounts (sa) |
| customresourcedefinition (crd) | persistentvolumes (pv) | services (svc) |
| daemonsets (ds) | poddisruptionbudgets (pdb) | statefulsets |
| deployments (deploy) | podpreset | storageclasses |
| endpoints (ep) | pods (po) |
Kubernetes-Dashboard 是一个 管理 Kubernetes 集群的 Web UI,跟 kubectl 一样,其后端是 API-Server,使用在线的 YAML 文件部署 Kubernetes-Dashboard :
kubectl apply -f https://raw.githubusercontent.com/kubernetes/dashboard/v2.2.0/aio/deploy/recommended.yaml
dashboard 创建后会在 kubernetes-dashboard 命名空间中。
root@instance-1:~# kubectl get pods --namespace=kubernetes-dashboard
NAME                                         READY   STATUS    RESTARTS   AGE
dashboard-metrics-scraper-856586f554-4nd9v   1/1     Running   0          9d
kubernetes-dashboard-78c79f97b4-288js        1/1     Running   0          9d

root@instance-1:~# kubectl get services --namespace=kubernetes-dashboard
NAME                            TYPE        CLUSTER-IP       EXTERNAL-IP   PORT(S)         AGE
dashboard-metrics-scraper       ClusterIP   10.98.50.123     <none>        8000/TCP        9d
kubernetes-dashboard            NodePort    10.111.44.44     <none>        443/TCP   9d
由于其网络默认是 NodePort 的方式,没有配置外界打开,所以为了能够被外界访问,可以修改其 service:
kubectl edit service kubernetes-dashboard --namespace=kubernetes-dashboard
  ports:
  - nodePort: 30633
    port: 443
    protocol: TCP
    targetPort: 8443
  selector:
    k8s-app: kubernetes-dashboard
  sessionAffinity: None
  type: NodePort
或者把 type 修改为 LoadBalancer。
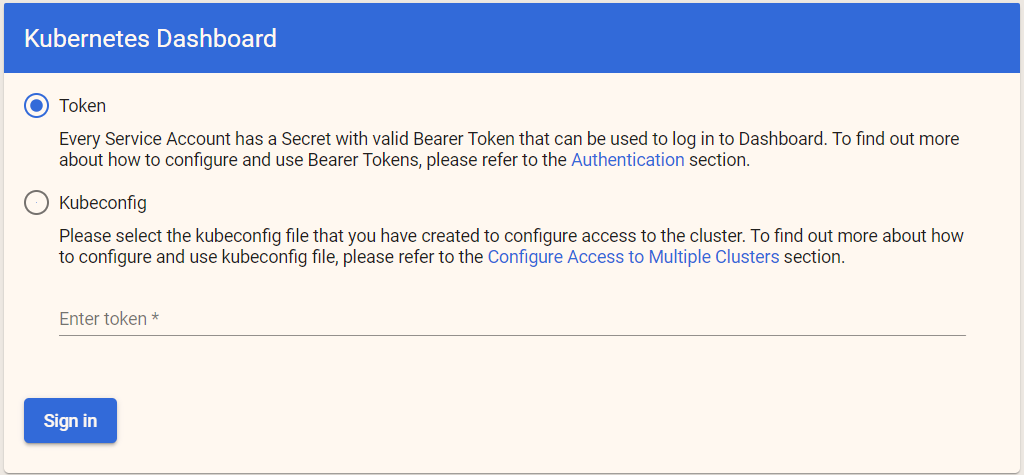
在集群内网可以通过 443 访问,在外网可以通过 30633 访问,访问方式是 https。

可以看到,访问方式有 Token 和配置文件方式(kubeconfing),这两者后面再讲。
通过下面这条命令我们可以查看 Token:
kubectl -n kube-system describe $(kubectl -n kube-system get secret -n kube-system -o name | grep namespace) | grep token
复制,填写到 Web UI 中,即可进入控制台。
我们可以集群中的任意节点访问 API-Server ,其端口是 6443。
API 可以使用 Token 和 证书方式 进行认证,我们可以使用上一小节查询出来的 token,对 API 进行访问:
curl https://k8smaster:6443/api/v1/pods -k --header "Authorization: bearer {此处填写你的token}"
注:使用 -k 可以忽略证书问题;k8smaster 是笔者配置 hosts 的,具体要以你的 主节点 ip为准。
也可以使用证书访问 API,其格式如下:
curl --cert /tmp/client.pem --key /tmp/client-key.pem --cacert /tmp/ca.pem -v -XGET \
https://k8smaster:6443/api/v1/pods
这里不多介绍 k8s 的 API,只介绍几个对调试有用的 API。
GET /api/v1/namespaces/{namespace}/pods/{name}/exec

GET /api/v1/namespaces/{namespace}/pods/{name}/log

GET /api/v1/watch/namespaces/{namespace}/pods/{name}
由于 API-Server 需要一定权限才能访问,所以实际上用户使用 kubectl 工具时,也需要权限才能执行命令。
kubectl auth can-i 命令用来确定一个用户是否能够访问 API。
如果要确定当前用户是否有权限访问 deployments,可以使用:
kubectl auth can-i create deployments
kubectl auth can-i {命令}
如果要检查其它用户是否有权限,可以使用 --as:
kubectl auth can-i create deployments --as ddddd
kubectl auth can-i create deployments --as ddddd --namespace kube-system
为了更加方便地获得权限,我们可以使用 SelfSubjectAccessReview 这个 API 来获得权限信息资源,它将 API 服务器鉴权公开给外部服务,其 API 说明文档地址:
另外还有三个相关的 API:
SubjectAccessReview - 对任意用户的访问进行评估,而不仅仅是当前用户。 当鉴权决策被委派给 API 服务器时很有用。例如,kubelet 和扩展 API 服务器使用 它来确定用户对自己的 API 的访问权限。LocalSubjectAccessReview - 与 SubjectAccessReview 类似,但仅限于特定的 名字空间。SelfSubjectRulesReview - 返回用户可在名字空间内执行的操作集的审阅。 用户可以快速汇总自己的访问权限,或者用于 UI 中的隐藏/显示动作。这里只需要了解,不需要深入。
我们可以使用 Kubernetes 注解为对象附加任意的非标识的元数据,注解使用 annotations 标识。客户端程序(例如工具和库)能够获取这些元数据信息。
我们查看 dashboard 的相关 annotations :
kubectl describe services -n kubernetes-dashboard
... ...
Labels:                   k8s-app=kubernetes-dashboard
Annotations:              <none>
... ...
annotations 由 key/value 组成,类似 label,但是 annotations 支持一些特殊字符,可以用作构建发布镜像时的信息、日志记录等。
kubectl annotate service kubernetes-dashboard -n kubernetes-dashboard description=‘my test‘
key=description

value=my test
重新查看 describe,可以看到:
Annotations: description: my test
如果要覆盖 key 的值,需要加上 --overwrite 。
如果要删除一个 key:
kubectl annotate service kubernetes-dashboard description-
这是一个简单的 YAML 文件:
apiVersion: v1
kind: Pod
metadata:
    name: firstpod
spec:
    containers:
    - image: nginx
      name: stan
k8s 的 YAML 必须包含四个部分:
在 $HOME/.kube/config 文件中存储了 Kubernetes 的配置信息,可以直接打开文件查看,也可以通过 kubectl config view 查看(只显示部分信息)。
前面我们访问 API 时,使用了 token,现在我们可以通过这个 config,来创建证书文件,通过证书访问。。
client 密钥,就在这个 config 文件的 client-certificate-data 字段中存储。
grep client-cert $HOME/.kube/config |cut -d" " -f 6
key,在 client-key-data 字段中存储:
grep client-key-data $HOME/.kube/config |cut -d " " -f 6
API-Server 的公钥(auth),就在 certificate-authority-data 字段中存储:
grep certificate-authority-data $HOME/.kube/config |cut -d " " -f 6
意思就是三个重要的 密钥数据,这里为了方便,分别使用 client、key、auth 三个变量存储查询的数据。
export client=(grep client-cert $HOME/.kube/config |cut -d" " -f 6)
export key=(grep client-key-data $HOME/.kube/config |cut -d " " -f 6)
export auth=(grep certificate-authority-data $HOME/.kube/config |cut -d " " -f 6)
创建证书文件:
echo $client | base64 -d - > ./client.pems
echo $key | base64 -d - > ./client-key.pem
echo $auth | base64 -d - > ./ca.pem
然后访问的时候就可以通过证书安全地访问 API-Server:
curl --cert ./client.pem --key ./client-key.pem --cacert ./ca.pem https://k8smaster:6443/api/v1/pod
浅入Kubernetes(13):dashboard、api、访问配置
原文:https://www.cnblogs.com/whuanle/p/14719723.html