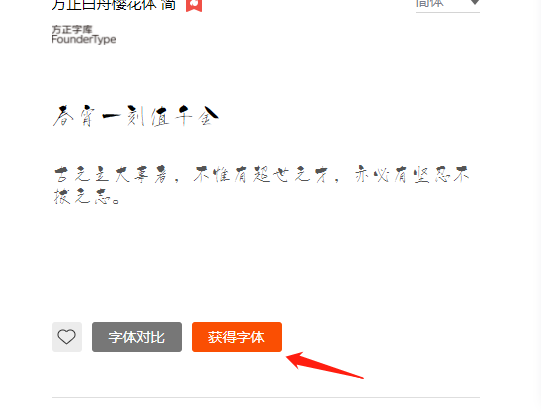
生成验证码图片首先需要字体文件(.TTF文件)
免费获取字体文件地址:https://www.zijia.com.cn/FindFont.html


1.随机生成颜色
import random
import os
import time

def get_random_color():
    """
    随机生成颜色
    :return:
    """
    return (random.randint(0, 255), random.randint(0, 255), random.randint(0, 255))
2.将生成的图片文件保存在本地
from PIL import Image, ImageDraw, ImageFont
from CRM01 import settings

def get_verification_img():
    """
    生成验证码图片
    :return: 返回图片路径
    """
    # Image图片处理,ImageDraw给图片上画东西,ImageFont处理图片上文字

    # RGB采取那种颜色的标准,RGB,RGBA、等. 第二个参数代表图片大小高度宽度,第三个随机颜色
    img_obj = Image.new(‘RGB‘, (200, 34), get_random_color())

    draw_obj = ImageDraw.Draw(img_obj)  # 通过图片对象生成一个画笔对象

    font_path = os.path.join(settings.BASE_DIR, ‘statics/static/font/FZZJ-HGXSJW.TTF‘)  # static/font/FZQuSJW.TTF字体文件  字体文件存放路径
    # 获取字体、注意有些字体文件不能识别数字,所有数字显示不出来,就换一个字体
    font_obj = ImageFont.truetype(font_path, 25)  # 16字体大小。 创建一个字体对象

    sum_str = ‘‘  # 这个数据就是用户需要输入的验证码的内容

    for i in range(6):
        a = random.choice(
            [str(random.randint(0, 9)), chr(random.randint(97, 122)), chr(random.randint(65, 90))])  # chr将sicii的数值转换成英文
        sum_str += a
    print(sum_str)
    draw_obj.text((64, 10), sum_str, fill=get_random_color(), font=font_obj)  # 通过画笔对象,添加文字以及颜色
    # (64,10)起始画的坐标点,sum_str随机生成字符串,fill背景颜色,font字体

    # 添加噪线噪点
    width = 200
    height = 34
    # 添加噪线
    for i in range(5):  # 添加5个噪线
        # 一个坐标表示一个点,两个点就可以连成一条线
        x1 = random.randint(0, width)
        x2 = random.randint(0, width)
        y1 = random.randint(0, height)
        y2 = random.randint(0, height)
        draw_obj.line((x1, y1, x2, y2), fill=get_random_color())
    # 添加噪点
    for i in range(20):  # 添加20个噪点
        draw_obj.point([random.randint(0, width), random.randint(0, height)], fill=get_random_color())
        # 下面是添加很小的弧线,看上去类似于一个点,40个小弧线
        x = random.randint(0, width)
        y = random.randint(0, height)
        draw_obj.arc((x, y, x + 4, y + 4), 0, 90, fill=get_random_color())  # x,y是弧线的起始点位置,x+4,y+4是弧线的结束位置

    verification_path = os.path.join(settings.BASE_DIR, ‘statics/verification_img/‘)
    # 保存文件路径、已经文件名称
    img_name = verification_path + f‘{time.time()}.png‘
    img_obj.save(img_name)  # 可以将图片保存在本地
    return img_name
3.如果我们不想将生成的文件保存在本地的话,我们可以在内存中重新开辟一块空间,保存在内存中。然后我们从内存中取,这样也不会每次都会生成一个图片验证吗,浪费资源。下面是直接使用接口封装,如果需要其他处理自行拆分封装。
#获取验证码接口
def get_valid_img(request):
    import random
    import os
    def get_random_color():
        return (random.randint(0,255),random.randint(0,255),random.randint(0,255))
    from PIL import Image,ImageDraw,ImageFont
    #Image图片处理,ImageDraw给图片上画东西,ImageFont处理图片上文字

    #RGB采取那种颜色的标准,RGB,RGBA、等. 第二个参数代表图片大小高度宽度,第三个随机颜色
    img_obj = Image.new(‘RGB‘,(200,34),get_random_color())

    draw_obj = ImageDraw.Draw(img_obj)#通过图片对象生成一个画笔对象

    from supercrm import settings
    font_path = os.path.join(settings.BASE_DIR,‘static/font/NAUERT_.TTF‘) #static/font/NAUERT_.TTF字体文件
    #获取字体、注意有些字体文件不能识别数字,所有数字显示不出来,就换一个字体
    font_obj = ImageFont.truetype(font_path,16) #16字体大小。 创建一个字体对象

    sum_str = ‘‘  #这个数据就是用户需要输入的验证码的内容

    for i in range(6):
        a = random.choice([str(random.randint(0,9)),chr(random.randint(97,122)),chr(random.randint(65,90))]) #chr将sicii的数值转换成英文
        sum_str += a
    print(sum_str)
    draw_obj.text((64,10),sum_str,fill=get_random_color(),font=font_obj) #通过画笔对象,添加文字以及颜色
    #(64,10)起始画的坐标点,sum_str随机生成字符串,fill背景颜色,font字体


    #添加噪线噪点
    width = 200
    height = 34
    #添加噪线
    for i in range(5): #添加5个噪线
        #一个坐标表示一个点,两个点就可以连成一条线
        x1 = random.randint(0,width)
        x2 = random.randint(0,width)
        y1 = random.randint(0,height)
        y2 = random.randint(0,height)
        draw_obj.line((x1,y1,x2,y2),fill=get_random_color())
    #添加噪点
    for i in range(40): #添加40个噪点
        draw_obj.point([random.randint(0,width),random.randint(0,height)],fill=get_random_color())
        #下面是添加很小的弧线,看上去类似于一个点,40个小弧线
        x = random.randint(0,width)
        y = random.randint(0,height)
        draw_obj.arc((x,y,x+4,y+4),0,90,fill=get_random_color()) #x,y是弧线的起始点位置,x+4,y+4是弧线的结束位置


    #现阶段图片已经生成但是不在本地而是在内存中,因此我们需要在内存中将图片存在本地。下面就要使用到io模块的BytesIO(字节流)
    from io import BytesIO
    f = BytesIO()
    img_obj.save(f,‘png‘) #以png格式将图片保存在BytesIO中。相当于在内存中开了一块空间,将图片以png格式存储
    data = f.getvalue() #从临时空间中取出数据
    request.session[‘valid_str‘] = sum_str
    return HttpResponse(data)
原文:https://www.cnblogs.com/zhuxibo/p/14754488.html