我这里是 win64
https://gitlab-runner-downloads.s3.amazonaws.com/latest/binaries/gitlab-runner-windows-amd64.exe
cd gitlab-runner
# 当然不改也可以,这里改名是为了后面执行命令方便
改名成:gitlab-runner.exe
注意后续使用 .\gitlab-runner.exe 执行的命令都需要使用管理员身份运行
否则会被拒绝
使用系统账号安装gitlab-runner
.\gitlab-runner.exe install
使用指定账户安装gitlab-runner
.\gitlab-runner.exe install --user your-username --password your-password
注册的 gitlab-runner 分为共享runner和特定runner
共享runner,所有gitalb项目都可用
特定runner,只对指定项目生效
这里我们注册特定runner
.\gitlab-runner.exe register
注册时候需要填写该runner关联的url和token,以及runner的描述和标签tags,还有runner执行时候的脚本类型
.gitlab-ci.yml 中执行任务中的tags,指定要运行的runner
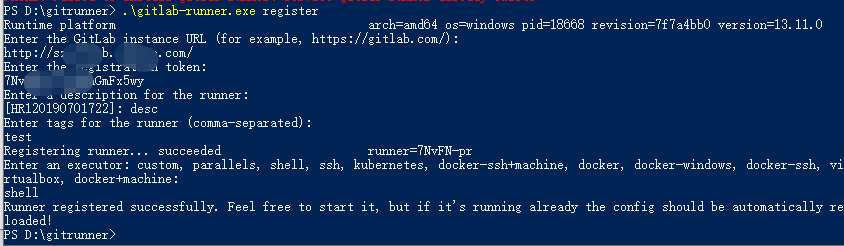
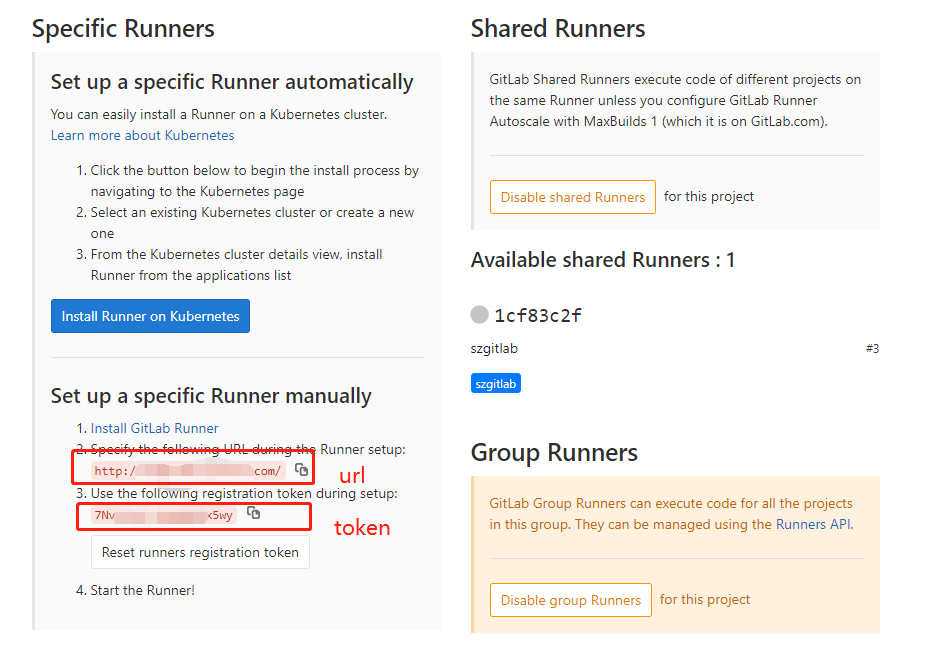
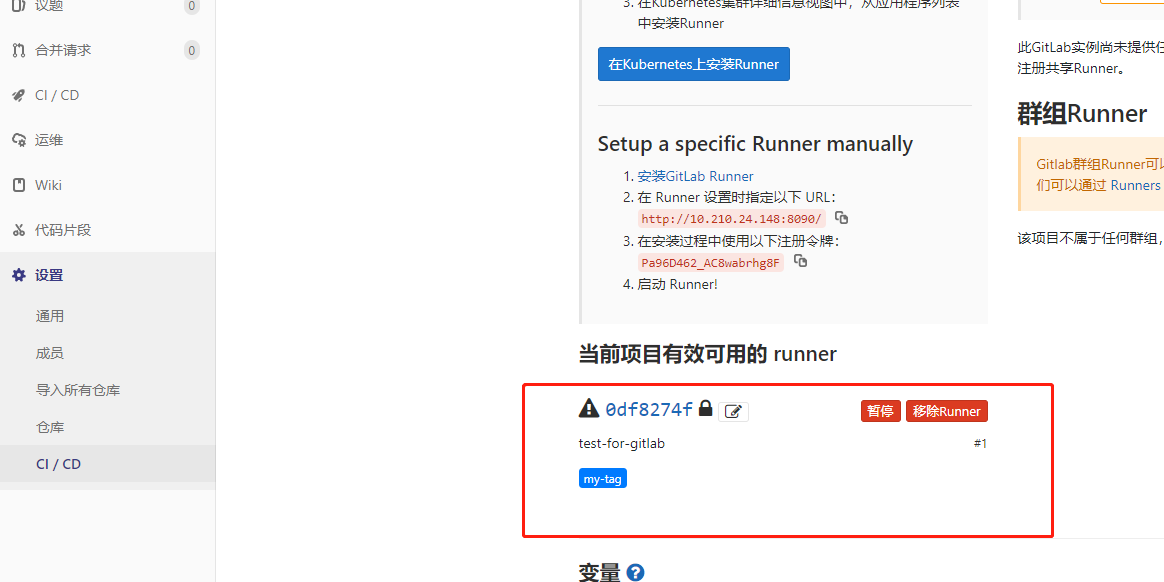
url 和 token 在 gitlab 项目 ---> 设置 ---> CI/CD ---> Setup a specific Runner manually 获取
回到 gitlab 页面,刷新即可看到注册的 runner
.gitlab-ci.yml 文件在里面定义gitlab-runner所要执行的逻辑:
<working-directory>/builds/<short-token>/<concurrent-id>/<namespace>/<project-name>
例如
D:\gitrunner\builds\58820ada\0\web-secure\webapp
项目的caches被存储到
<working-directory>/cache/<namespace>/<project-name>
变量解释:
<working-directory>:runner当前执行的目录或者使用--working-directory指定的目录
<short-token>:runner的token前8位
<concurrent-id>:一个唯一的number,用于区别job,从0开始
<namespace>:项目拥有者的名称
<project-name>:项目名
注意使用 .\gitlab-runner.exe 执行的命令都需要使用管理员身份运行
否则会被拒绝
安装
.\gitlab-runner.exe install
注册
.\gitlab-runner.exe register
启动
.\gitlab-runner.exe start
停止
.\gitlab-runner.exe stop
更新
1、.\gitlab-runner.exe stop
2、下载新版的gitlab-runner程序,替换掉当前的gitlab-runner.exe
3、.\gitlab-runner.exe start
卸载
.\gitlab-runner.exe stop
.\gitlab-runner.exe uninstall
cd ..
rmdir /s gitlab-runner
查看runner状态
.\gitlab-runner.exe status
查看runner列表
.\gitlab-runner.exe list
原文:https://www.cnblogs.com/linjunfu/p/14760750.html