pip install pytest
1.测试文件以test_开头(以_test结尾也可以)
2.测试类以Test开头,并且不能带有 init 方法
3.测试函数以test_开头
4.断言使用基本的assert即可
1、主函数模式
if __name__ == ‘__main__‘:
    pytest.main([‘s‘])  #s 表示输出调试信息,包括print打印的信息
2、命令行模式
示例代码如下:
import pytest


class TestDemo_1(object):

    def test_01(self):
        x = ‘hell‘
        assert ‘h‘ in x

    def test_02(self):
        sum = 4-2
        assert 2 == sum


class TestDemo_2(object):

    def test_add_01(self):
        print(‘add user 01‘)
        assert 1 == 2

    def test_add_02(self):
        print(‘add user 02‘)
        assert 3 != 6
运行test_num.py文件中的全部用例:通过nodeld
命令窗口输入
pytest test_num.py
运行TestDemo_2类下的两个用例:
pytest test_num.py::TestDemo_2
运行TestDemo_1类下面的test_02用例
pytest test_num.py::TestDemo_1::test_02
3、通过读取pytest.ini配置文件运行(***企业自动化推荐使用)
pytest.ini是单元测试框架的核心配置文件(文件名必须是pytest.ini)
1、位置:一般放置于项目的根目录
2、编码:必须是ANSI
3、作用:改变pytest的默认行为
4、运行规则:不管是主函数的模式运行,命令行运行,都会去读取这个配置文件
pytest.ini配置文件范例:
 1 [pytest]
 2 # 命令行参数,多个参数用空格分隔
 3 addopts = -vs --html ./report/report.html
 4
 5 # 测试用例文件夹,可自己配置(测试用例路径)
 6 testpaths = ./testcase
 7
 8 # 配置测试搜索的模块文件名称
 9 python_files = test_*.py
10
11 # 配置测试搜索的类名
12 python_classes = Test*
13
14 # 配置测试搜索的测试函数名
15 python_functions = test
16
17 #分组执行
18 markes =
19     smock:冒烟用例
20     productmanger:产品管理
命令行:pytest -vs ./testcase
参数详解:
1 -s 表示输出调试信息,包括print打印信息
2 -v 显示更详细的信息
3 -vs 两个参数一起使用
4 -n 支持多进程或多分布式运行测试用例,例:pytest -vs test_pro.py -n 5
5 --reruns NUM 失败用例重跑
6 -x 表示只要一个用例报错,那么测试停止
7 --maxfail=2 出现两个用例失败就停止
8 -k 指定运行测试用例(??)
9 --html 生成HTML的测试报告
在我们做接口自动化测试时,当测试用例很多时,就需要用到多进程运行
首先需要安装内置库
pip install -U pytest -xdist
运行
pytest test_num.py -n Num

# Num表示要运行的进程数

pytest test_num.py -n 5
当做接口自动化测试,遇到网络波动或503时导致case运行失败,这并不是测试失败,这时需要重试运行
首先也是需要安装内置库
pip install -U pytest-rerunfailures
运行
pytest test_se.py --reruns NUM

# NUM表示重试的次数

pytest test_num.py --reruns 5
unittest:通过ascll码的大小来绝对的执行顺序
pytest:1.从上到下
2.改变默认的执行顺序,通过装饰器方式来控制用例执行顺序,@pytest.mark.run(order=1)
 1 import pytest
 2
 3 sum = 2
 4
 5
 6 class TestOrder(object):
 7
 8     @pytest.mark.run(order=2)
 9     def test_02(self):
10         print(‘我是02‘)
11         assert ‘h‘ in ‘hello‘
12
13     @pytest.mark.run(order=1)
14     def test_01(self):
15         print(‘我是01‘)
16         assert 2 == sum
17
18     @pytest.mark.run(order=4)
19     def test_05(self):
20         print(‘我是05‘)
21
22     @pytest.mark.run(order=3)
23     def test_03(self):
24         print(‘我是03‘)
25
26
27 if __name__ == ‘__main__‘:
28     pytest.main([‘vs‘])
smock:冒烟测试,测试用例分布在各个模块中
分模块执行:同样在pytest.ini配置文件配置markers即可,在分组执行的测试用例前加上@pytest.mark.smock(smock可以自定义)
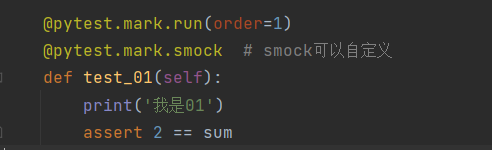
命令行执行:pytest -m "smock"
同时执行多个分组:pytest -m "smock or productmanager"
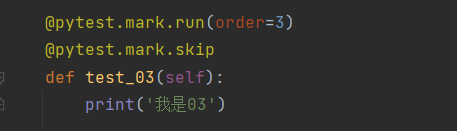
(1)无条件跳过
@pytest.mark.skip
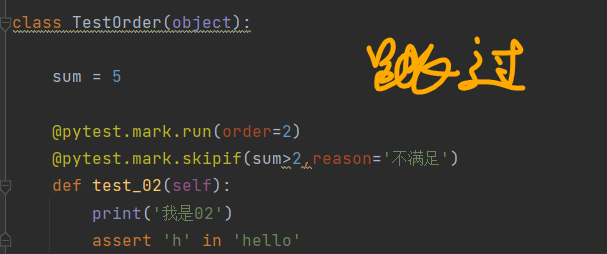
(2)有条件跳过
@pytest.mark.skipif(sum>2,reason=‘不满足‘)
安装pytest -html插件
pip install pytest-html
--html ./report/report.html
第一种:类似于unittest的前后置,setup/teardown/setup_class/teardown_class
class SetupDemo(object):
# 这个在所有的测试用例之前只运行一次
def setup_class(self):
print(‘在每个类执行前的初始化操作,如数据库的链接,创建日志对象‘)
# 每个测试用例执行前都会执行
def setup(self):
print(‘在每个测试用例执行之前运行,如打开网页‘)
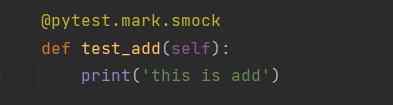
def test_add(self):
print(‘this is add‘)
def test_delete(self):
print(‘this is delete‘)
def test_update(self):
print(‘this is update‘)
# 在每个类执行完后只执行一次
def teardown_class(self):
print(‘在每个类执行后的操作,如数据库的关闭,销毁日志对象‘)
# 每个测试用例执行后都会执行
def teardown(self):
print(‘在每个测试用例执行之后运行‘)
第二种(*****):pytest的核心,通过装饰器@pytest.fixtrue方式来实现部分用例的前后置和所有用例前后置。
格式和结构:
1 @pytest.fixture(scope="function", params="", autouse=False, ids="", name="")
2 def fixture_test():
3     print(‘测试fixture处理用例的前后置‘)
1、scope(******):表示被@pytest.fixture标记的方法作用域,它有四个值--->function(默认)、class、module、package/session
2、params(****):参数化(支持的格式:list、tuple、字典列表[{},{},{}],字典元组({},{},{}) )
3、autouse(*****):自动使用,默认为False
4、ids(*):当使用params参数化时,给每一个值设置一个变量,意义不大
5、name(**):表示给@pytest.fixture标记的方法取一个别名
代码实践使用详细范例介绍:
1)scope="function"-->作用域函数,yield分隔,使用后置
 1 import pytest
 2
 3
 4 @pytest.fixture(scope="function")
 5 def fixture_test():
 6     print(‘测试fixture处理用例的前置‘)
 7     yield
 8     print(‘测试fixture处理用例的后置‘)
 9
10
11 class TestDemo(object):
12
13     def test_add(self,fixture_test):
14         print(‘this is add‘)
15
16     def test_delete(self):
17         print(‘this is delete‘)
如果类下面的两个方法都需要使用fixture_test前后置,可以直接加上autouse=True参数即可。--》@pytest.fixture(scope="function",autouse=True)
2)scope="class"-->作用域是类,类似于setup_class和teardown_class,只在类开始之前、结束之后执行一次
 1 import pytest
 2
 3 @pytest.fixture(scope="class",autouse=True)
 4 def fixture_test():
 5     print(‘测试fixture处理用例的前置‘)
 6     yield
 7     print(‘测试fixture处理用例的后置‘)
 8
 9 class TestDemo(object):
10
11     def test_add(self):
12         print(‘this is add‘)
3)scope="module"--->作用域是模块,一个文件中有多个类,也会只执行一次前置和后置
 1 import pytest
 2
 3
 4 @pytest.fixture(scope="module",autouse=True)
 5 def fixture_test():
 6     print(‘测试fixture处理用例的前置‘)
 7     yield
 8     print(‘测试fixture处理用例的后置‘)
 9
10
11 class TestDemo(object):
12
13     def test_add(self):
14         print(‘this is add‘)
15
16     def test_delete(self):
17         print(‘this is delete‘)
18
19
20 class TestDemo2:
21
22     def test_update(self):
23         print(‘this is update‘)
24
25     def test_query(self):
26         print(‘this is query‘)
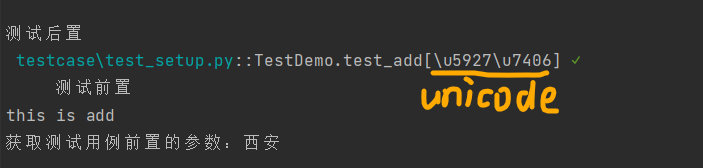
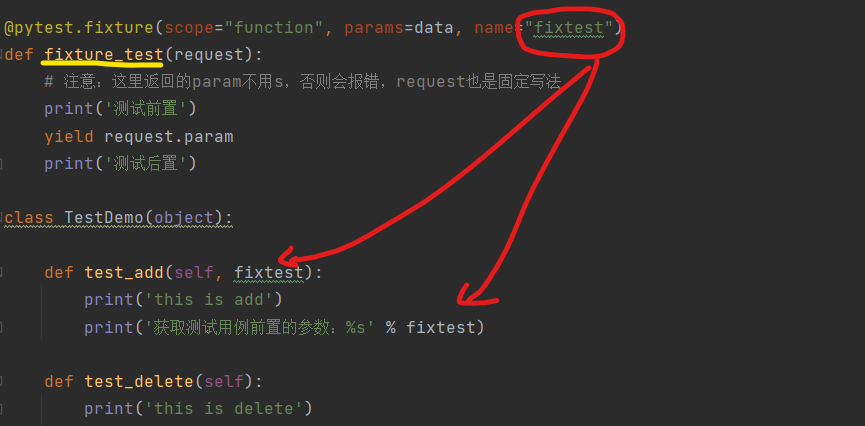
 1 import pytest
 2
 3 data = [‘成都‘, ‘大理‘, ‘西安‘, ‘北京‘, ‘南昌‘]
 4
 5 @pytest.fixture(scope="function", params=data)
 6 def fixture_test(request):
 7     # 注意:这里返回的param不用s,否则会报错,request也是固定写法
 8     print(‘测试前置‘)
 9     yield request.param
10     print(‘测试后置‘)
11
12 class TestDemo(object):
13
14     def test_add(self, fixture_test):
15         print(‘this is add‘)
16         print(‘获取测试用例前置的参数:%s‘ % fixture_test)
17
18     def test_delete(self):
19         print(‘this is delete‘)
不设置的情况,执行结果显示的是Unicode值,如下:
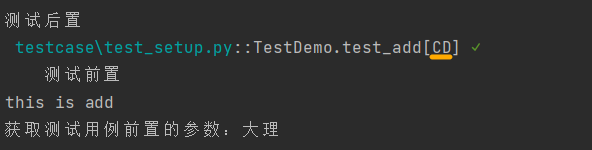
设置以后,展示如下:
@pytest.fixture(scope="function", params=data, ids=[‘CD‘, ‘DL‘, ‘XA‘])
原文:https://www.cnblogs.com/yzmPython/p/14771586.html