Maven是Apache下的一个项目管理工具。它可以构建项目和管理依赖(管理jar包,防止jar之间的依赖和冲突,管理jdk、tomcat版本等环境变量)。
项目构建是一个项目从编写源代码到清理、编译、测试、运行、打包、部署、运行的过程。
一、maven安装
步骤一、解压压缩包

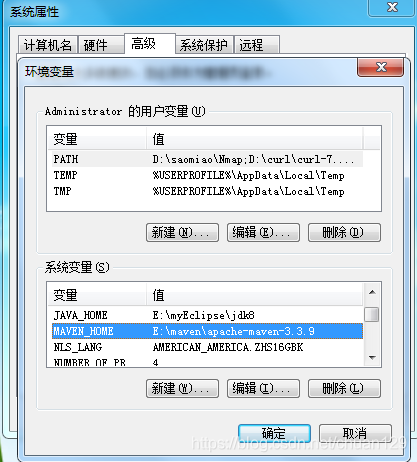
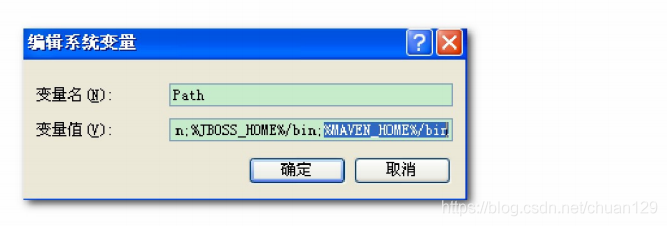
步骤二、配置环境变量
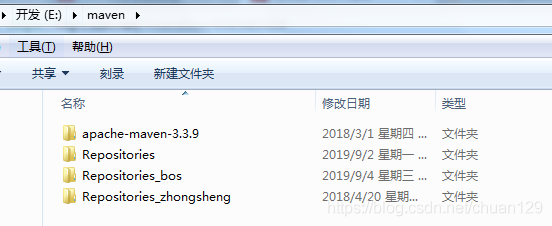
步骤三、建一个Repositories文件夹
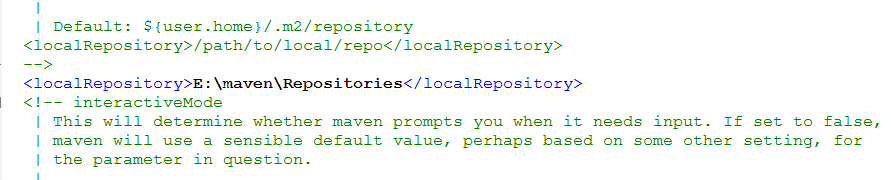
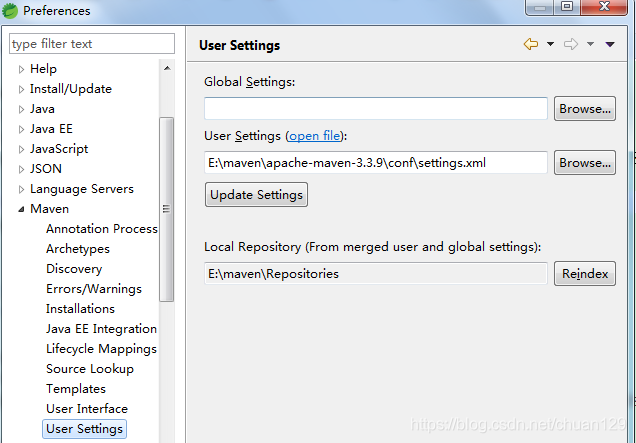
步骤四、自定义仓库配置(settings.xml)
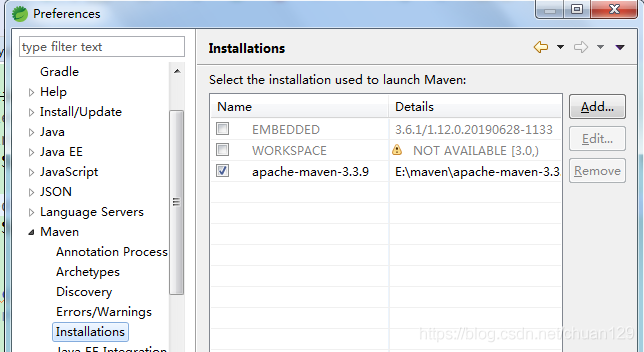
步骤五、eclipse配置
二、maven常用的命令
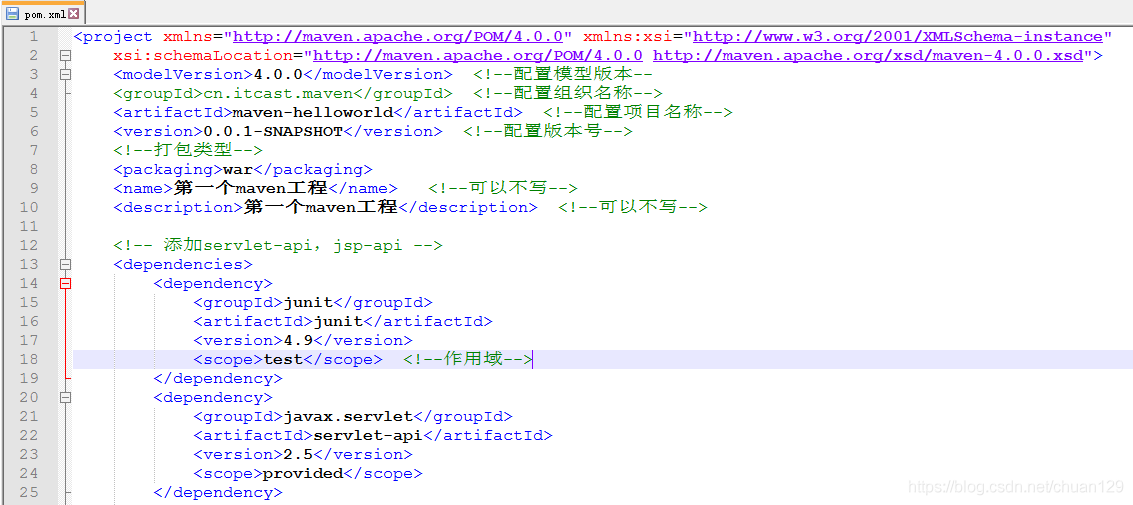
pom文件介绍
编译:cmd进入命令模式,执行 mvn compile 便可以将src/main/java下的文件编译为class文件输出到target目录下。
测试:cmd进入命令模式,执行 mvn test。
清理:cmd进入命令模式,执行 mvn clean,便可以删除target目录的内容。
打包:cmd进入命令模式,执行 mvn package 便可以将java工程打成jar包,web工程打成war包。
安装:cmd进入命令模式,执行 mvn install 便可以将war包或者jar包,发布到本地仓库。
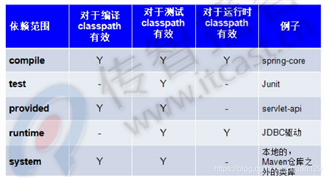
三、依赖范围
A依赖B,需要在A的pom.xml文件中添加B的坐标,添加坐标时,需要指定依赖范围,依赖范围包括:
当项目引入多个依赖时,每个依赖之前也存在依赖,比如A依赖C-1.2.1,B也依赖C-1.2.4,只是C的版本不同,同时引入A,B,这是会发生依赖冲突,解决方法有:
1、按照maven以下原则调解:
(1)第一声明者优先原则:A和B谁在前面,就依赖谁的C版本
(2)路径进者优先原则:A在前,B在后,若想使用B依赖的C版本,可以在单独配一下想依赖的C版本
2、排除依赖
3、锁定版本号(最常用):使用dependencyManagement
四、搭建私服
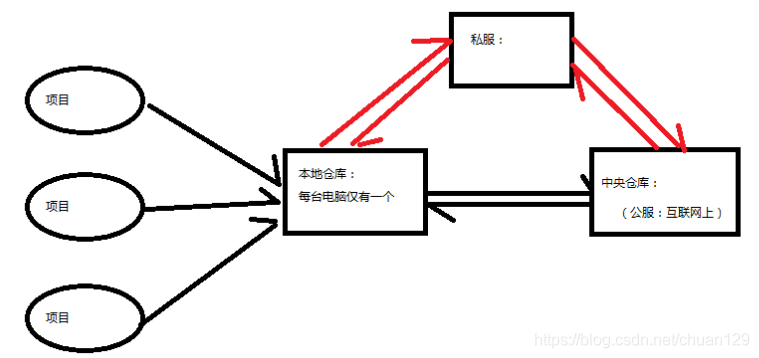
私服:独立于中央仓库之外,把自己的东西分享给公司的人,所以需要把jar包放在私服里。
maven本地仓库与中央仓库、私服之间的关系:如果本地仓库没有,则向中央仓库下载,若是公司有私服,则先通过私服下载,私服没有之后,再向中央仓库下载。
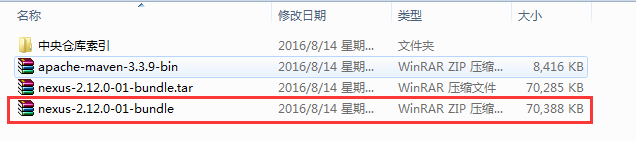
步骤一:下载nexus
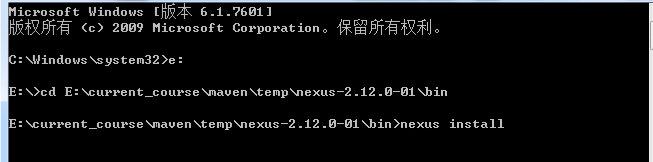
步骤二:使用管理员身份运行cmd,执行nexus install命令
步骤三:启动私服服务, 访问私服:http://localhost:8081/nexus/
步骤四:发布项目到私服
在maven的settings.xml配置文件中,加上以下配置:
<server>
<id>releases</id>
<username>admin</username>
<password>admin123</password>
</server>
<server>
<id>snapshots</id>
<username>admin</username>
<password>admin123</password>
</server>
releases为连接发布版本仓库;snapshots为测试版本仓库
在发布项目代码的pom.xml上配置添加以下配置:
<!--发布配置-->
<distributionManagement>
<repository>
<id>releases</id>
<url>http://localhost:8081/nexus/content/repositories/releases/</url>
</repository>
<snapshotRepository>
<id>snapshots</id>
<url>http://localhost:8081/nexus/content/repositories/snapshots/</url>
</snapshotRepository>
</distributionManagement>
里面的url为私服对应的url
通过maven运行package命令将项目打成war包
运行deplog命令,将war包发布到私服上。
步骤六:从私服下载jar包到项目里
在maven的settings.xml配置文件中,添加以下配置:
 <profile>
        <id>nexus</id>
        <repositories>
            <repository>
                <id>dev</id>
                <url>http://localhost:8081/nexus/content/groups/public/</url>
                <releases>
                    <enabled>true</enabled>
                </releases>
                <snapshots>
                    <enabled>true</enabled>
                </snapshots>
            </repository>
        </repositories>
        <pluginRepositories>
            <pluginRepository>
                <id>public</id>
                <name>public Repositories</name>
                <url>http://localhost:8081/nexus/content/groups/public/</url>
            </pluginRepository>
        </pluginRepositories>
    </profile>

    <activeProfiles>
        <activeProfile>dev</activeProfile>
    </activeProfiles>
————————————————
在项目的pom.xml里添加以下配置:
 <repositories>
        <repository>
            <releases>
                <enabled>true</enabled>
            </releases>
            <snapshots>
                <enabled>true</enabled>
            </snapshots>
            <id>public</id>
            <name>Public Repositories</name>
            <url>http://localhost:8081/nexus/content/groups/public/</url>
        </repository>
        <repository>
            <snapshots>
                <enabled>false</enabled>
            </snapshots>
            <id>central</id>
            <name>Central Repository</name>
            <url>https://repo.maven.apache.org/maven2</url>
        </repository>
    </repositories>
    <pluginRepositories>
        <pluginRepository>
            <id>public</id>
            <name>Public Repositories</name>
            <url>http://localhost:8081/nexus/content/groups/public/</url>
        </pluginRepository>
        <pluginRepository>
            <releases>
                <updatePolicy>never</updatePolicy>
            </releases>
            <snapshots>
                <enabled>false</enabled>
            </snapshots>
            <id>central</id>
            <name>Central Repository</name>
            <url>https://repo.maven.apache.org/maven2</url>
        </pluginRepository>
    </pluginRepositories>
更多java、大数据学习面试资料,请扫码关注我的公众号:

原文:https://www.cnblogs.com/javaydsj/p/14854175.html