<!--        mysql驱动-->
        <dependency>
            <groupId>mysql</groupId>
            <artifactId>mysql-connector-java</artifactId>
            <version>5.1.47</version>
        </dependency>
<!--        mybatis驱动-->
        <dependency>
            <groupId>org.mybatis</groupId>
            <artifactId>mybatis</artifactId>
            <version>3.5.2</version>
        </dependency>
<!--        junit驱动-->
        <dependency>
            <groupId>junit</groupId>
            <artifactId>junit</artifactId>
            <version>4.12</version>
            <scope>test</scope>
        </dependency>
<build>
        <resources>
            <resource>
                <directory>src/main/resources</directory>
                <includes>
                    <include>**/*.properties</include>
                    <include>**/*.xml</include>
                </includes>
                <filtering>true</filtering>
            </resource>
            <resource>
                <directory>src/main/java</directory>
                <includes>
                    <include>**/*.properties</include>
                    <include>**/*.xml</include>
                </includes>
                <filtering>true</filtering>
            </resource>
        </resources>
</build>
?
package com.Util;
?
import org.apache.ibatis.io.Resources;
import org.apache.ibatis.session.SqlSession;
import org.apache.ibatis.session.SqlSessionFactory;
import org.apache.ibatis.session.SqlSessionFactoryBuilder;
?
import java.io.IOException;
import java.io.InputStream;
?
public class Util {
    static  SqlSessionFactory sqlSessionFactory;
    static {
        try {
            //就写个他的名字就行
            String resource = "mybatis-config.xml";
            InputStream inputStream = Resources.getResourceAsStream(resource);
            sqlSessionFactory = new SqlSessionFactoryBuilder().build(inputStream);
        }catch (IOException e) {
            e.printStackTrace();
        }
    }
    public static SqlSession getSession(){
        //自动提交  增删查改不用写提交了
        return sqlSessionFactory.openSession(true);
    }
}
driver=com.mysql.jdbc.Driver
url=jdbc:mysql://localhost:3306/test?userSSL=true&userUnicode=true&characterEncoding=utf8
username=root
password=123456
SqlSession sqlSession = Util.getSession();
//实例化对象  mapper
userMapper mapper = sqlSession.getMapper(userMapper.class);
HashMap<String, Integer> map = new HashMap<>();
map.put("startIndex",0);
map.put("pageSize",3);
//用实例化对象进行操作
List<Signon> signonList = mapper.getUserByLimit(map);
for (Signon signon : signonList) {
    System.out.println(signon);
}
//切记关闭
sqlSession.close();
  <!--引入外部配置文件-->
<properties resource="db.properties">
    <!--在外部增加配置项  可以不要-->
    <property name="name" value="李一博"/>
</properties>
name : logImpl value: SLF4J LOG4J | LOG4J2 | JDK_LOGGING | COMMONS_LOGGING | STDOUT_LOGGING | NO_LOGGING
<settings>
   	 		<!--默认日志 -->
        <setting name="logImpl" value="STDOUT_LOGGING"/>
        	<!--开启全局缓存-->
        <setting name="cacheEnabled" value="true"/>
</settings>
用一种就行
用的时候自己注释掉另一个
<typeAliases>
    <!--这个方法  的这个别名谁便取-->
    <typeAlias type="hkd.pojo.Blog" alias="blog"/>

    				<!--还有一种   扫描包-->
    <!--扫描包    别名就是包名的小写      在实体类添加注解可以谁便改名-->
    <package name="com.hkd.pojo"/>  <!--@Alias("hello")--->
</typeAliases>
二者选其一
<mappers>
    <mapper resource="hkd/Dao/BologMapper.xml"/>
    <!--扫描包-->
    <!-- 这个更常用  注意接口名与Mybatis的映射文件名一定要一模一样。-->
    <mapper class="hkd.Dao.BolgMapper"/>
</mappers>
1.起别名
select username username,password pwd from signon;
2通过 resultMap 进行映射
          <!--对应的名         要映射的对象-->
    <resultMap id="signon" type="com.pojo.Signon">
                  <!--数据库对象    实体类对象属性-->
        <result column="username" property="username"/>
        <result column="password" property="pwd"/>
    </resultMap>
                             <!--起的名-->
    <select id="getSignon" resultMap="signon">
        select * from signon;
    </select>
核心配置文件必须是扫描包
<mappers>
    <mapper class="hkd.Dao.UserMapper"/>
</mappers>
写法
public interface UserMapper {
    @Select("select * from Signon")
    List<Signon> getuser();
    //@Param("name") 可写可不写  写了就要按里面来   **最好写上**
    @Select("Select * from Signon where username = #{name}")
    Signon getSignonByUserName(@Param("name") String username);

    //CRUD
    @Insert("insert into signon(username,password) values (#{username},#{password})")
    int addSignon(Signon signon);

    @Update("update signon set password = #{password} where username = #{username} ")
    int updateSignon(Signon signon);
}
偷懒用的
1 在pom.xml中导入
<dependencies>
    <!-- https://mvnrepository.com/artifact/org.projectlombok/lombok -->
    <dependency>
        <groupId>org.projectlombok</groupId>
        <artifactId>lombok</artifactId>
        <version>1.18.12</version>
    </dependency>
</dependencies>
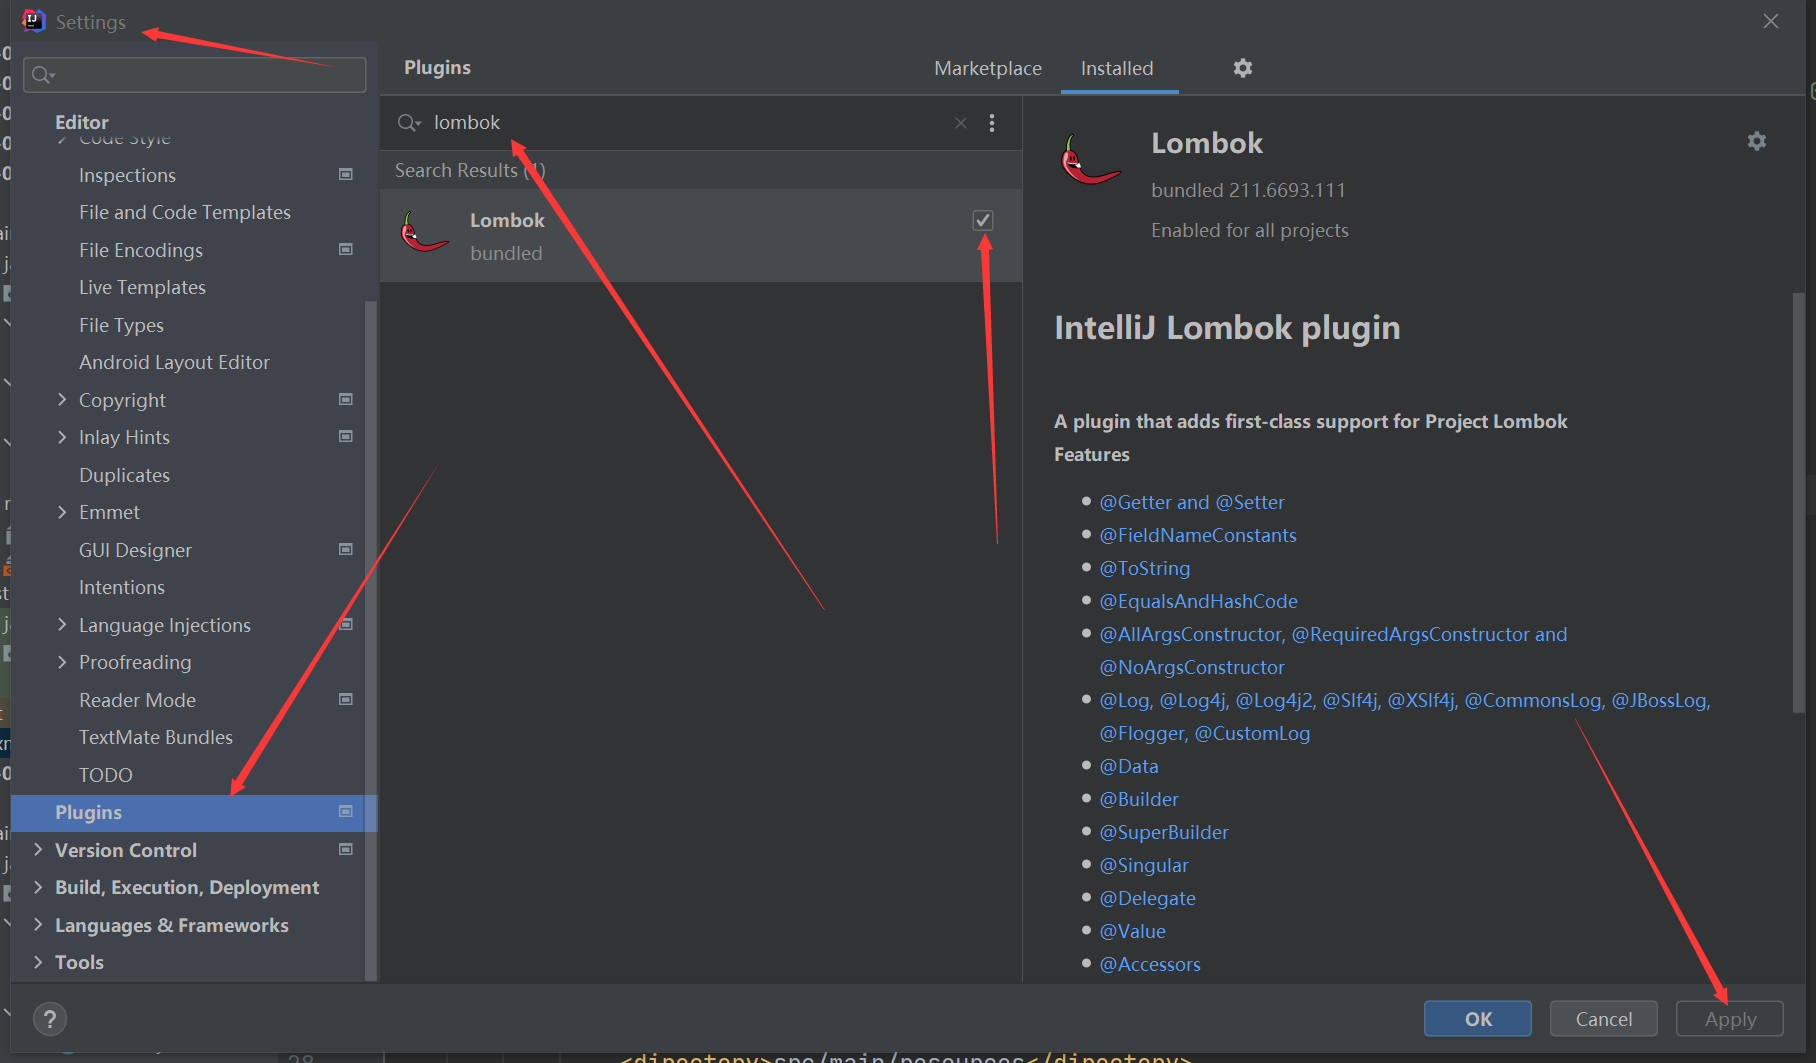
2下载插件
3在实体类里面写
@Data   //基本的
@NoArgsConstructor //无参
@AllArgsConstructor  //全参
    <select id="getItem" resultMap="itemInventory">
        SELECT im.itemid id,im.listprice price,iy.qty qty FROM item im,inventory iy WHERE im.itemid = iy.itemid;
    </select>
    <resultMap id="itemInventory" type="hkd.pojo.Item">
        <result column="id" property="itemid"/>
        <result column="price" property="listprice"/>
        <!--对象是association    javaType  多对一
        集合是collection  ofType 泛型   一对多
           javaType 用来指定实体类中属性类型
           ofType用来映射到List或者集合中的pojo类型  泛型中的类型
        -->
        <association property="inventory" javaType="hkd.pojo.Inventory" >
            <result column="qty" property="qty"/>
        </association>
    </resultMap>
有点像jstl
不建议使用
    <!--sql片段 把冗余的部分提取出来  通过id找到-->
<sql id="if-title-author">
    <if test="title!=null">
        and title = #{title}
    </if>
    <if test="author!=null">
        and author = #{author}
    </if>
</sql>

<!--用-->
<select id="queryBlogIf" parameterType="map" resultType="blog">
    /*这个是动态查询 要是存在就加上不存在忽略   这就是动态的sql*/
    select *
    from test.blog
    <where>
        <include refid="if-title-author"></include>
    </where>
</select>
<!--判断条件-->
<if test="title!=null">
     and title = #{title}
</if>
就是sql里面的where 不过他可以修复sql 比如去掉多余的and/or
<where>
     <if test="title!=null">
        and title = #{title}
    </if>
    <if test="author!=null">
        and author = #{author}
    </if>
</where>
<where>
<choose>
<when test="title!=null">
title = #{title}
</when>
<when test="author!=null">
and author = #{author}
</when>
<otherwise>
and views < #{views}
</otherwise>
</choose>
</where>
用在update语句里面 他可以忽略 ,
update test.blog
    <set>
        <if test="title!=null">
            title = #{title},
        </if>
        <if test="author!=null">
            author = #{author},
        </if>
    </set>
where id = #{id};
有点像for循环
select *
from test.blog
where 1=1 and (title =‘Mybatis进阶‘ or title = ‘Mybatis‘ )
对应
<select id="queryBlogForeach" parameterType="map" resultType="blog">
    select *
    from test.blog
    <where>
        <foreach collection="titles"  item="title" open="and (" close=")" separator="or">
            title = #{title}
        </foreach>
    </where>
</select>
collection   集合    外面传进来的map里面的
item  集合里面的每一项
open   开始的地方
close 结束的地方
separator  间隔
	  and (title = ‘Mybatis进阶‘ or title = ‘Mybatis‘ )
open="and ("         separator= "or"          close=")"
一级缓存
缓存就是不用重复走sql语句 提高效率
增删查 会清理缓存
手动清理缓存 sqlSession.clearCache();
1 开启全局缓存 核心配置文件里面
 <!--开启全局缓存-->
<setting name="cacheEnabled" value="true"/>
2 在接口的xml里面写
<cache/>
/* 二级缓存
            先在核心配置文件中开启全局缓存
             <setting name="cacheEnabled" value="true"/>
             然后 在xml里面开启二级缓存
             <cache/>

             机制当前sqlsession关闭了之后会把东西留到二级缓存里面
             当下一次查询的时候会先到二级缓存里面看看 直接读取
             也就是说只有当前会话提交或关闭时会提交到二级缓存中
             注:
             要对实体类开启序列化  implements Serializable
             要不然报错
         */
InputStream inputStream = Resources.getResourceAsStream(resource); 包导不进去
却发现apache处爆红,按快捷键Add Maven Dependency, 发现org.apache.ibatis.io.Resources是属于org.mybatis包下的, 但我在pom.xml中已经添加了该依赖,我以为是版本错误,我将org.mybatis 3.4.5版本删了, 重新换成了3.4.6版本,但还是爆红,我去本地仓库可以发现org.mybatis包存在, 并不是org.mybatis包没导入的问题,应该是还有其他依赖包没有导入, 我重新在file --> Project Structrue Libraries --> + --> From maven , 在搜索框,输入org.mybatis搜索时, 发现 下拉列表有org.mybatis.maven:maven-migration-plugin:1.0.0, 将该插件添加到项目的lib中问题就解决了。 donload里面就好了
找不到resource //就写个他的名字就行 String resource = "mybatis-config.xml";
<mappers> <!--这个中间是/ 找到自己写的配置文件--> <mapper resource="com/hkd/Dao/UserMapper.xml"/> </mappers>
乱码导致运行失败 jdbc:mysql://localhost:3306/bookstore?userSSL=true&userUnicode=true&characterEncoding=utf8
原文:https://www.cnblogs.com/bxl-lyb/p/14874273.html