LNMP部署
LNMP是什么?是指一组通常一起使用来运行动态网站或者服务器的自由软件名称首字母缩写。
L指Linux,N指Nginx,M一般指MySQL,也可以指MariaDB,P一般指PHP,也可以指Perl或Python
LNMP的工作原理 ?https://zhuanlan.zhihu.com/p/258739351
测试使用三台
cat /etc/hosts
192.168.40.22 ? web01
192.168.40.23 ? web02
192.168.40.24 ? web03
1 修改ip 主机名
# web02 web03设置相同略
hostnamectl set-hostname web01
nmcli c mod eth1 ipv4.addr "192.168.40.22/24"
nmcli d reapply eth1
ifconfig
# 系统优化,请参考:https://blog.51cto.com/lehappy/2781516
# nginx部署,请参考: https://blog.51cto.com/lehappy/2908335
2 MariaDB部署
2.1 安装MariaDB并设置开机启动
[root@web01 ~]#yum -y install mariadb-server mariadb
[root@web01 ~]#systemctl start mariadb
[root@web01 ~]#systemctl enable mariadb
Created symlink from /etc/systemd/system/multi-user.target.wants/mariadb.service to /usr/lib/systemd/system/mariadb.service.
[root@web01 ~]#systemctl status mariadb
● mariadb.service - MariaDB database server
? ?Loaded: loaded (/usr/lib/systemd/system/mariadb.service; enabled; vendor preset: disabled)
? ?Active: active (running) since Wed 2021-06-16 14:24:35 CST; 15s ago
2.2 数据库初始化(yum 安装后不需要),编译安装必须执行
[root@web01 ~]#mysql_install_db --basedir=path ? ?--datadir=path ? --user=mysql
# ? ? ? ? ? ? ? ? ?初始化命令 ? ? 程序安装路径 ? ? 数据保存路径 ? ? 管理的用户
# ?完成后有提示信息,告诉如何设置密码(这里使用的是yum安装所以没有)
2.3 测试数据库
root@web01 ~]#mysql -e "show databases;"
+--------------------+
| Database ? ? ? ? ? |
+--------------------+
| information_schema |
| mysql ? ? ? ? ? ? ?|
| performance_schema |
| test ? ? ? ? ? ? ? |
+--------------------+
2.4 设置数据库root用户密码
[root@web01 ~]#mysqladmin -u root password ‘666‘
3 PHP部署
3.1 安装PHP并设置开机启动
[root@web01 ~]#rpm -aq php ? # 安装前查看下,如果系统自带需要卸载
[root@web01 ~]#yum remove php php-mysql php-fpm php-common ?# 卸载系统自带的php
3.2 修改yum源信息
# EPEL 中文官网 https://fedoraproject.org/wiki/EPEL/zh-cn
[root@web01 ~]#rpm -Uvh https://dl.fedoraproject.org/pub/epel/epel-release-latest-7.noarch.rpm
[root@web01 ~]#rpm -Uvh https://mirror.webtatic.com/yum/el7/webtatic-release.rpm ? # 参考文献:yum方式安装php7
# 安装php7.1
[root@web01 ~]#yum -y install php71w*
# 报错提示
Error: Package: php71w-pecl-imagick-3.4.3-1.w7.x86_64 (webtatic)
? ? ? ? ? ?Requires: libMagickWand.so.5()(64bit)
Error: php71w-mysql conflicts with php71w-mysqlnd-7.1.33-1.w7.x86_64
Error: Package: php71w-pecl-imagick-3.4.3-1.w7.x86_64 (webtatic)
? ? ? ? ? ?Requires: libMagickCore.so.5()(64bit)
?You could try using --skip-broken to work around the problem
?You could try running: rpm -Va --nofiles --nodigest
?
# 处理方法 ?参考文献:ImageMagick 更新错误
[root@web01 ~]#yum -y install php71w* --skip-broken
Skipped (dependency problems): ? ? ? ? ? ? ? ? ? # 跳过了3个安装包
?php71w-mysql ? ? ? ? ? ?x86_64 7.1.33-1.w7 ? ? ? ? webtatic ?83 k
?php71w-pecl-imagick ? ? x86_64 3.4.3-1.w7 ? ? ? ? ?webtatic 132 k
?php71w-pecl-imagick-devel
? ? ? ? ? ? ? ? ? ? ? ? ?x86_64 3.4.3-1.w7 ? ? ? ? ?webtatic 5.0 k
Transaction Summary
===================================================================
Install ? ? ? ? ? ? ? ? ? ? ? ?40 Packages (+24 Dependent packages)
Skipped (dependency problems) ? 3 Packages
# 运行php并设置开机启动
[root@web01 ~]#systemctl start php-fpm
[root@web01 ~]#systemctl enable php-fpm
3.3 修改配置文件,保证nginx进程的管理用户和php服务进程管理用户相同
[root@web01 ~]#ps -ef|grep nginx
root ? ? ? 1295 ? ? ?1 ?0 22:52 ? ? ? ? ?00:00:00 nginx: master process /usr/sbin/nginx -c /etc/nginx/nginx.conf
nginx ? ? ?1296 ? 1295 ?0 22:52 ? ? ? ? ?00:00:00 nginx: worker process ? ? # nginx管理用户
[root@web01 ~]#ps -ef|grep php
root ? ? ? 1884 ? ? ?1 ?8 22:52 ? ? ? ? ?00:00:00 php-fpm: master process (/etc/php-fpm.conf)
apache ? ? 1885 ? 1884 ?0 22:52 ? ? ? ? ?00:00:00 php-fpm: pool www ? # apache管理用户
apache ? ? 1886 ? 1884 ?0 22:52 ? ? ? ? ?00:00:00 php-fpm: pool www
# 把管理用户 apache 修改为 nginx
[root@web01 ~]#vi /etc/php-fpm.d/www.conf?
user = nginx
group = nginx
[root@web01 ~]#systemctl reload php-fpm
[root@web01 ~]#ps -ef|grep php
root ? ? ? 1884 ? ? ?1 ?0 22:52 ? ? ? ? ?00:00:00 php-fpm: master process (/etc/php-fpm.conf)
nginx ? ? ?1945 ? 1884 ?0 22:56 ? ? ? ? ?00:00:00 php-fpm: pool www ? # nginx管理用户
nginx ? ? ?1946 ? 1884 ?0 22:56 ? ? ? ? ?00:00:00 php-fpm: pool www
4 实现LNMP
4.1 配置nginx文件与php建立关联
[root@web01 /etc/nginx/conf.d]#vi www.conf?
server {
? ? listen ? ? ? 80;
? ? server_name ?www.jjyy.com jjyy.com;
? ? location / {
? ? ? ? root ? /html/www;
? ? ? ? index ?index.html index.htm;
? ? }
? ? location ~ \.php$ {
? ? ? ? root ? /html/www;
? ? ? ? fastcgi_index index.php;
? ? ? ? fastcgi_param SCRIPT_FILENAME $document_root$fastcgi_script_name;
? ? ? ? # ? ? ? ? ? ? ? ? ? 执行 ? ? ? ? ? url变量 ? ? ? ? uri变量
? ? ? ? fastcgi_pass 127.0.0.1:9000;
? ? ? ? include fastcgi_params; ? ?# 加载变量配置文件,和fastcgi_param关联
? ? }
}
# 查看变量配置文件 fastcgi_params 有上面加载的名称否
[root@web01 ~]#egrep "document_root|fastcgi_script_name" /etc/nginx/fastcgi_params?
fastcgi_param ?SCRIPT_NAME ? ? ? ?$fastcgi_script_name; ??
fastcgi_param ?DOCUMENT_ROOT ? ? ?$document_root;
[root@web01 /etc/nginx/conf.d]#nginx -t ? ?# 查检语法
nginx: the configuration file /etc/nginx/nginx.conf syntax is ok
nginx: configuration file /etc/nginx/nginx.conf test is successful
[root@web01 /etc/nginx/conf.d]#systemctl restart nginx ? # 重启服务
4.2 测试php
[root@web01 /etc/nginx/conf.d]#cat >/html/www/index.php<<END ? # 增加php文件
<?php
phpinfo();
?>
END
[root@web01 /etc/nginx/conf.d]#echo ‘www.jjyy.com --> ok‘ >/html/www/index.html ?# 增加html文件
[root@web01 /etc/nginx/conf.d]#vi /etc/hosts ? ?# 修改hosts文件
192.168.40.22 ? web01 www.jjyy.com jjyy.com
# 这里使用curl命令测试,也可以使用浏览器测试,但都要修改hosts文件(window路径为 C:\Windows\System32\drivers\etc\hosts)
[root@web01 /etc/nginx/conf.d]#curl jjyy.com ? ?# 测试html
www.jjyy.com --> ok
[root@web01 /etc/nginx/conf.d]#curl jjyy.com/index.php ?# 测试php
<!DOCTYPE html PUBLIC "-//W3C//DTD XHTML 1.0 Transitional//EN" "DTD/xhtml1-transitional.dtd">
<html xmlns="http://www.w3.org/1999/xhtml"><head>
<style type="text/css">
...略
4.4 编写php代码与mariadb建立关联
[root@web01 /html/www]#vi db.php
<?php
? // ? ? 数据库连接函数 ? ?主机名 ? ?用户 ? 密码
? $con = mysqli_connect("localhost","root","666");
? if ($con) {
? ? ?echo "mairadb connect ok!\n";
? } else {
? ? ?echo mysql_error();
? }
?>
[root@web01 /html/www]#curl jjyy.com/db.php ?# 测试mairadb连接
mairadb connect ok!
5 搭建网站实例
5.1 下载免费的开源代码(生产中是开发提供)
知乎 ? ? ? ? www.wecenter.com ?下载地址 ?https://www.wecenter.com/downloads/
www网站 ? ? ?www.dedecms.com ? 下载地址 ?http://www.dedecms.com/products/dedecms/downloads/
bbs网站 ? ? ?www.discuz.net ? ?下载地址 ?https://www.discuz.net/thread-3847642-1-1.html
blog网站 ? ? cn.wordpress.org ?下载地址 ?https://cn.wordpress.org/download/#download-install
注:下载地址可能会随时间更新,自己搜索下
[root@web01 ~]#cd /html/
[root@web01 /html]#wget https://cn.wordpress.org/latest-zh_CN.tar.gz ?# 下载
[root@web01 /html]#tar xf wordpress-5.7.2-zh_CN.tar.gz ? ? ? ? ? ? ? ?# 解压
[root@web01 /html]#mv wordpress blog ? ? ? ? ? ? ? ? ? ? ? ? ? ? ? ? ?# 更换目录名称
[root@web01 /html]#chown nginx.nginx -R blog/ ? ? ? ? ? ? ? ? ? ? ? ? # 修改目录所有者,安全考虑
[root@web01 /html]#ll
total 16052
drwxr-xr-x 5 nginx nginx ? ? 4096 Jun 15 21:00 blog
5.2 修改nginx配置文件
[root@web01 /etc/nginx/conf.d]#mv www.conf blog.conf ? ?# 修改配置名称为blog
[root@web01 /etc/nginx/conf.d]#vi blog.conf?
server {
? ? listen ? ? ? 80;
? ? server_name ?blog.jjyy.com jjyy.com; ? ? ? ?# 网站名称
? ? location / {
? ? ? ? root ? /html/blog; ? ? ? ? ? ? ? ? ? ? ?# 路径
? ? ? ? index ?index.php index.html index.htm; ?# 增加index.php
? ? }
? ? location ~ \.php$ {
? ? ? ? root ? /html/blog; ? ? ? ? ? ? ? ? ? ? ?# 路径
? ? ? ? fastcgi_index index.php;
? ? ? ? fastcgi_param SCRIPT_FILENAME $document_root$fastcgi_script_name;
? ? ? ? fastcgi_pass 127.0.0.1:9000;
? ? ? ? include fastcgi_params;
? ? }
}
[root@web01 /etc/nginx/conf.d]#systemctl restart nginx ? # 重启服务
[root@web01 /etc/nginx/conf.d]#vi /etc/hosts
192.168.40.22 ? web01 www.jjyy.com jjyy.com blog.jjyy.com # 修改hosts文件
5.3 对网站进行初始化操作
5.3.1 打开浏览器输入 www.jjyy.com 出现初始化向导 点现在就开始
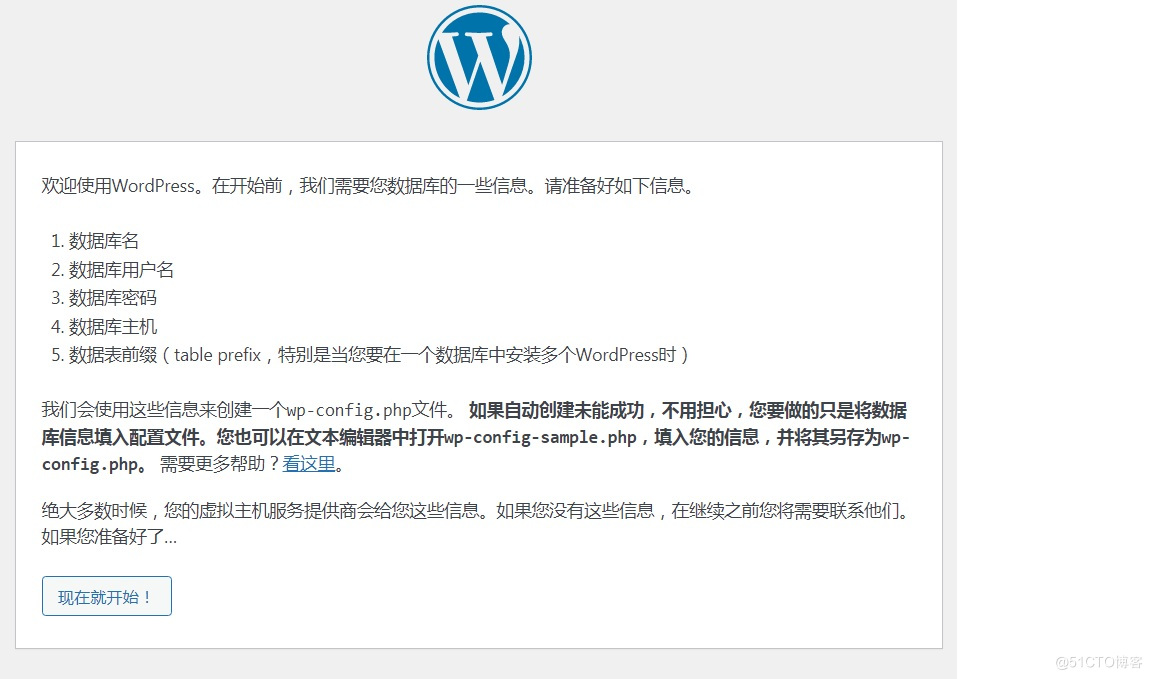
图1
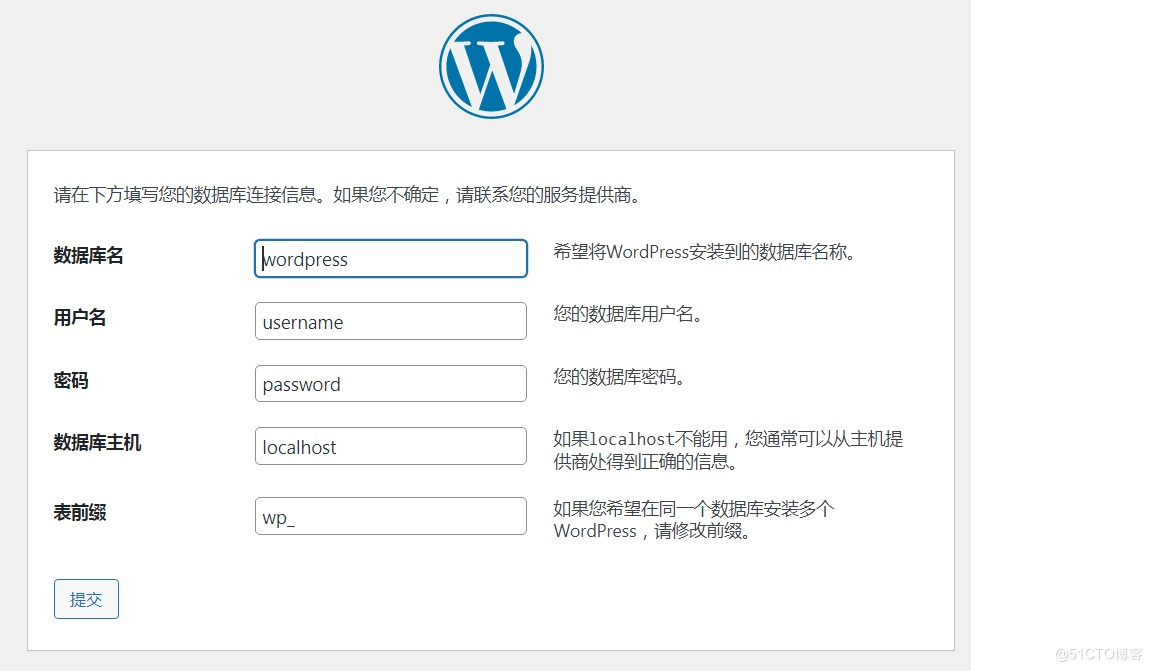
图2
5.3.2 这是需要数据库提供信息,创建数据库
[root@web01 ~]#mysql -uroot -p666 ? ? ? ? ? ? # 进入数据库
MariaDB [(none)]> create database wordpress; ?# 创建数据库
Query OK, 1 row affected (0.00 sec)
MariaDB [(none)]> grant all on wordpress.* to ‘wordpress‘@‘localhost‘ identified by ‘abc123‘; ?# 对创建的wordpress库进行授权
Query OK, 0 rows affected (0.10 sec)
MariaDB [(none)]> select user,host from mysql.user; ? # 显示用户信息
+-----------+--------------+
| user ? ? ?| host ? ? ? ? |
+-----------+--------------+
| root ? ? ?| 127.0.0.1 ? ?|
| wordpress | 192.168.40.% |
| root ? ? ?| ::1 ? ? ? ? ?|
| ? ? ? ? ? | localhost ? ?|
| root ? ? ?| localhost ? ?|
| wordpress | localhost ? ?|
| ? ? ? ? ? | web01 ? ? ? ?|
| root ? ? ?| web01 ? ? ? ?|
+-----------+--------------+
8 rows in set (0.00 sec)
MariaDB [(none)]> flush privileges; ? # 立即生效
Query OK, 0 rows affected (0.00 sec)
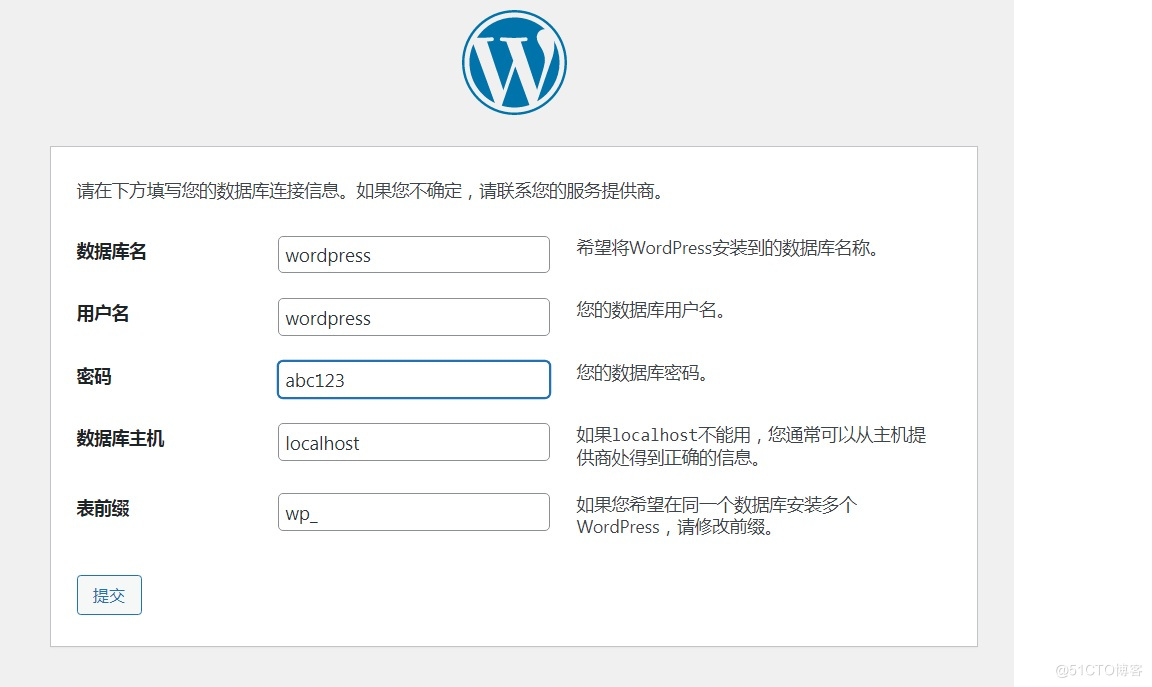
图3
结合图3对照下命令看下
grant all on wordpress.* to ‘wordpress‘@‘localhost‘ identified by ‘abc123‘?
点提交,再点现在安装
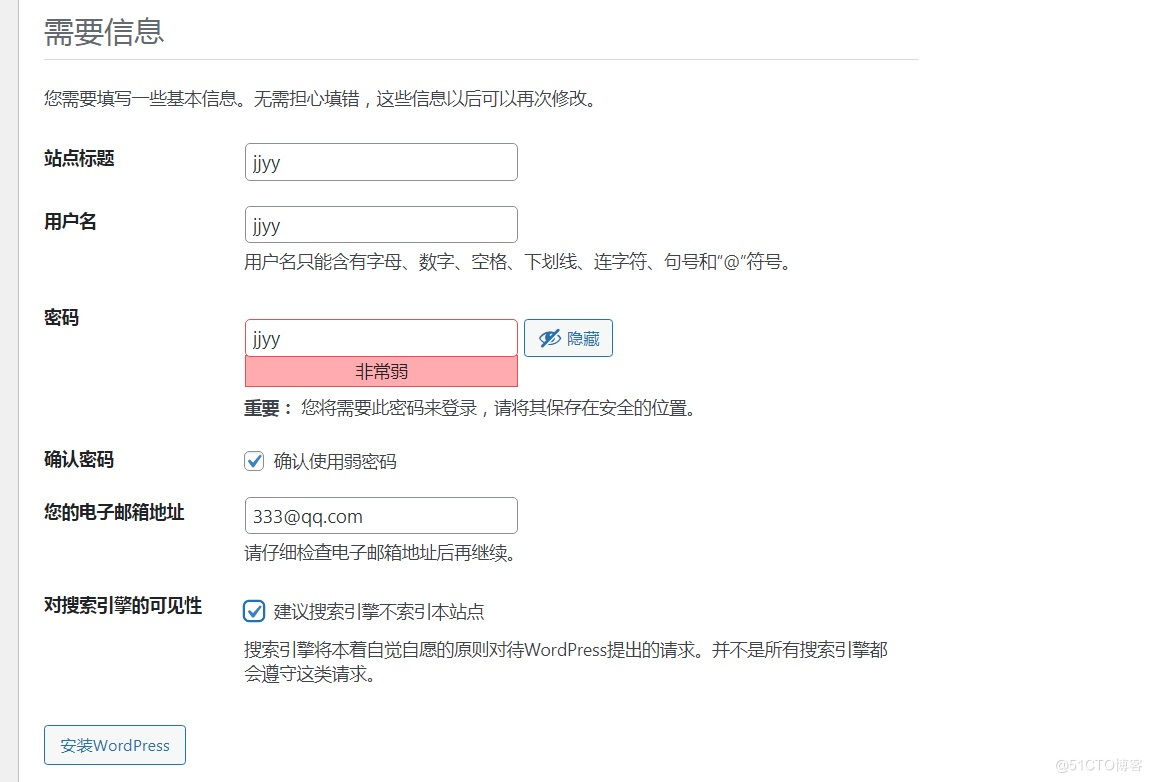
图4
根据提交填写信息完成后,点安装WordPress
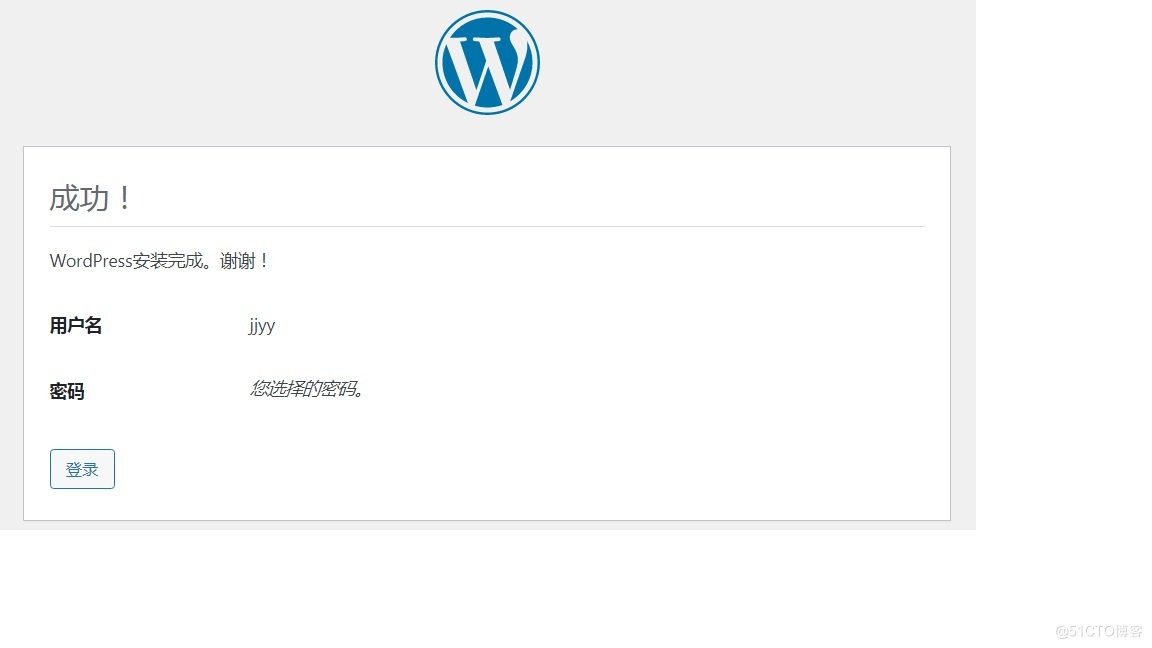
图5
点登录

图6
输入用户名和密码
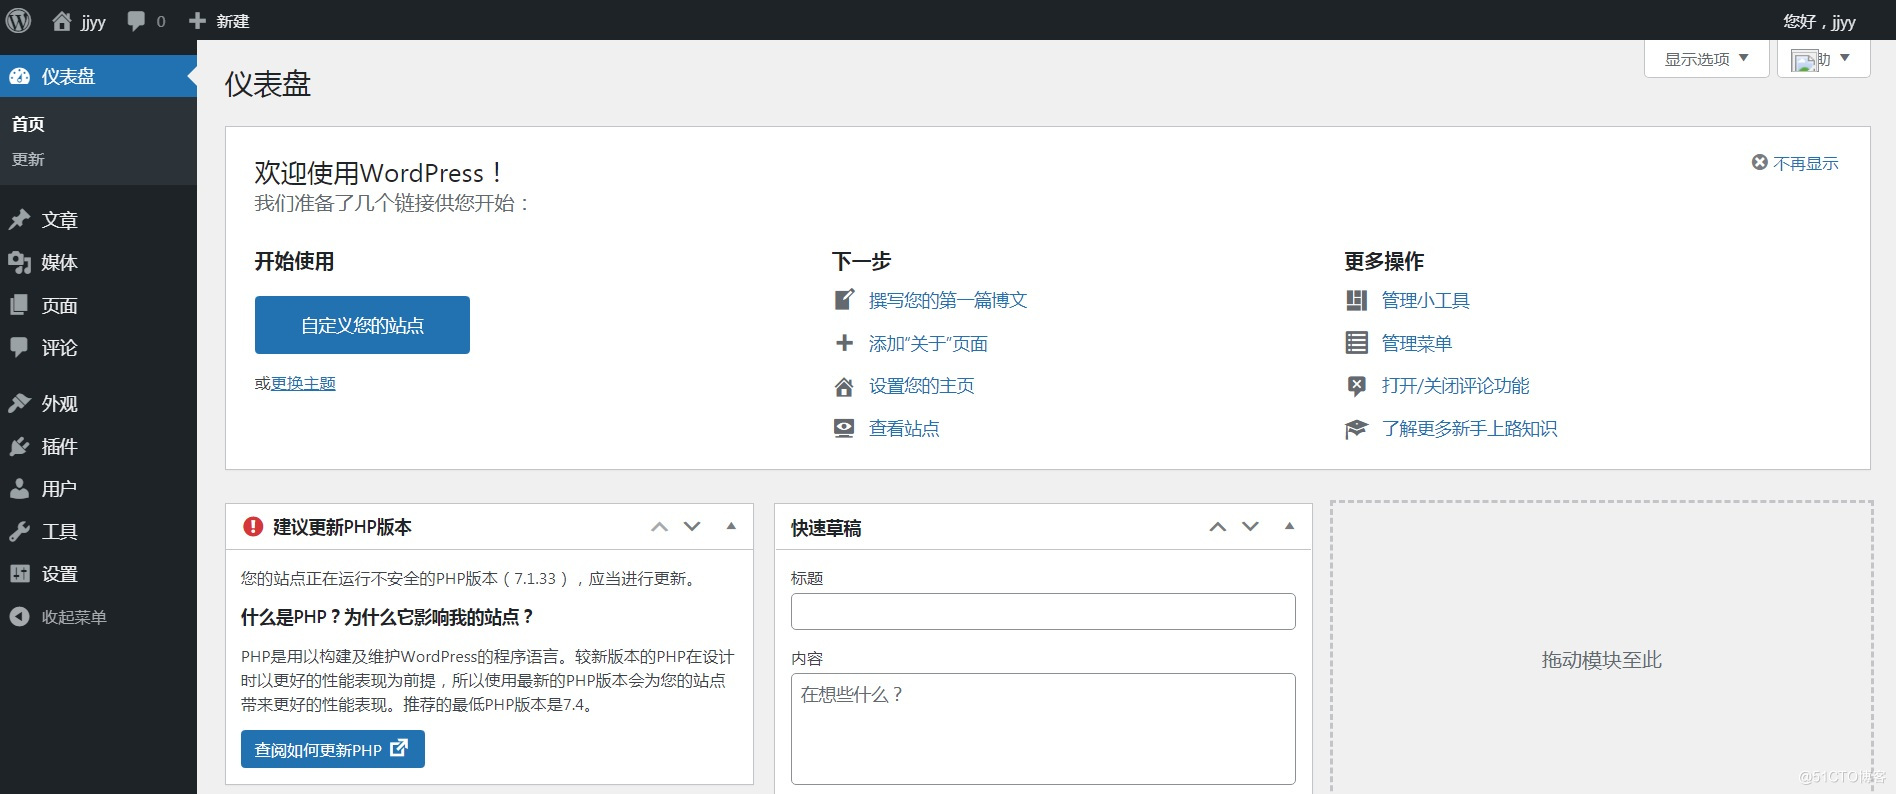
图7
进入blog网站,初始化完成
?
参考文献:
跟老男孩学Linux运维 Web集群实战
https://zhuanlan.zhihu.com/p/258739351 ? ?LNMP的工作原理
https://blog.csdn.net/qq_43413788/article/details/105788988 ?CentOS7 使用webtatic源 yum方式安装php7
https://talk.plesk.com/threads/plesk-centos-7-8-imagemagick-update-error.356359/ ? Plesk CentOS 7.8 ImageMagick 更新错误
?
原文:https://blog.51cto.com/lehappy/2917680