和之前清除所有搜索历史列表一样,引用confirm组件拦截提示用户的操作
<confirm ref="confirm" text="是否清空播放列表" confirmBtnText="清空"></confirm>
给垃圾桶图标添加点击事件showConfirm
<span class="clear" @click="showConfirm"><i class="iconfont icon-clear"></i></span>


    showConfirm() {
      this.$refs.confirm.show();
    },
在vuex中做清除歌曲的action
export const deleteSongList = function ({ commit }) {
  commit(types.SET_PLAYLIST, []);
  commit(types.SET_SEQUENCE_LIST, []);
  commit(types.SET_CURRENT_INDEX, -1);
  commit(types.SET_PLAYING_STATE, false);
};
在confirm也要定义一个事件confrimClear:如果点击弹出框的情况按钮就会调用这个action方法
<confirm ref="confirm" @confirm="confirmClear" text="是否清空播放列表" confirmBtnText="清空"></confirm>


    confirmClear() {
      this.deleteSongList();
      this.hide();
    },
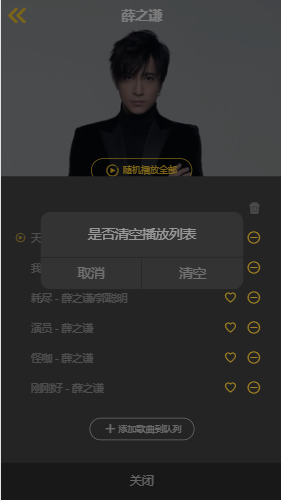
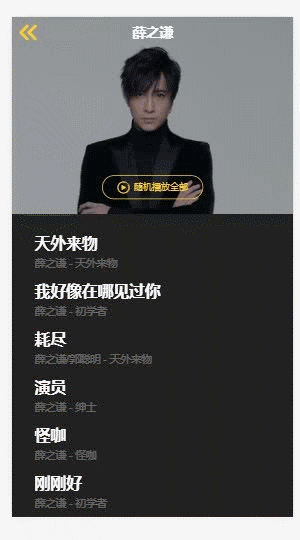
如果点击取消,整个列表就关闭了,因为在confirm.vue中有个click事件,confirm被playlist包裹,所以click事件就冒泡到@click="hide"上。为了让confirm的点击事件独立不影响外部,添加@click.stop阻止向上冒泡。
<div class="confirm" v-show="showFlag" @click.stop>
在mixin.js中创建
export const playerMixin = {
  computed: {
    iconMode() {
      return this.mode === playMode.sequence ? ‘icon-sequence‘ : this.mode === playMode.loop ? ‘icon-loop‘ : ‘icon-random‘;
        },
    }
}
在player组件和playlist组件使用mixin,player里的iconMode()就可以删掉了。
import { playerMixin } from ‘../../common/js/mixin‘;


 mixins: [playerMixin],
有了mixin后,playlist就可以使用它添加iconMode
<div class="list-header">
          <h1 class="title">
            <i class="icon iconfont" :class="iconMode"></i>
            ……
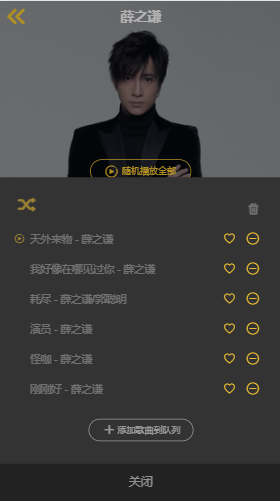
除了这个iconMode的样式需要共享,点击事件也需要共享。将player组件里的有关changeMode的操作方法以及引入方法和除了full_screen之外的mutations和playlist引入相同的mapGetters都拷贝到playerMixin里。有了mixin,两个组件就可以删掉共享的mapGetters和mapMutations,留下特有的。
export const playerMixin = {
  computed: {
    iconMode() {
      return this.mode === playMode.sequence ? ‘icon-sequence‘ : this.mode === playMode.loop ? ‘icon-loop‘ : ‘icon-random‘;
    },

    ...mapGetters([
      ‘sequenceList‘,
      ‘playlist‘,
      ‘currentSong‘,
      ‘mode‘,
      ‘favoriteList‘,
    ]),
  },
  methods: {
    changeMode() {
      // 有3种播放模式,每点击一次就改变它的mode
      const mode = (this.mode + 1) % 3;
      this.setPlayMode(mode);
      let list = null;
      if (this.mode === playMode.random) {
        list = shuffle(this.sequenceList);
      } else {
        // 如果是顺序播放或者循环播放
        list = this.sequenceList;
      }
      this.resetCurrentIndex(list);
      this.setPlaylist(list);
    },
    resetCurrentIndex(list) {
      let index = list.findIndex((item) => {
        return item.id === this.currentSong.id;
      });
      this.setCurrentIndex(index);
    },
    ...mapMutations({
      setPlayMode: ‘SET_PLAY_MODE‘,
      setPlaylist: ‘SET_PLAYLIST‘,
      setCurrentIndex: ‘SET_CURRENT_INDEX‘,
      setPlayingState: ‘SET_PLAYING_STATE‘,
    }),
  },
};
给图标位置添加点击事件,就可以看到切换模式和player的互相对应
<i class="icon iconfont" :class="iconMode" @click="changeMode"></i>
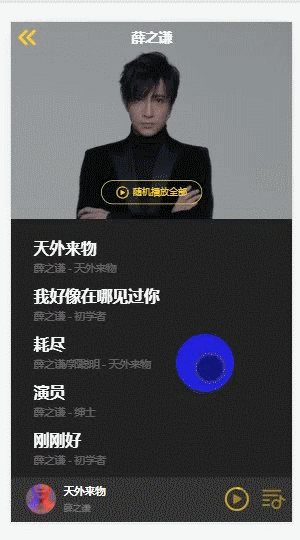
给图标位置旁边添加播放模式名称的文案,因为是playlist特有的,所以写在playlist组件里。
<i class="icon iconfont" :class="iconMode" @click="changeMode"></i>
<span class="text">{{modeText}}</span>
<span class="clear" @click="showConfirm"><i class="iconfont icon-clear"></i></span>
 computed: {
    modeText() {
      return this.mode === playMode.sequence ? ‘顺序播放‘ : this.mode === playMode.random ? ‘随机播放‘ : ‘单曲循环‘;
    },
  },
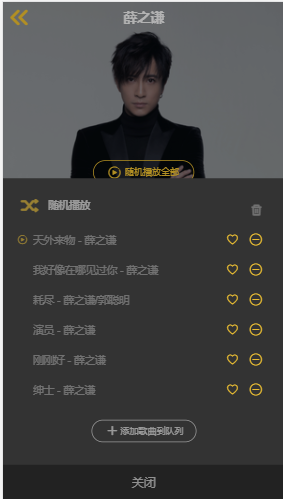
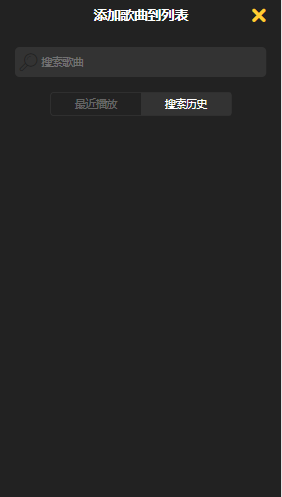
创建add-song组件,基本代码如下:

<template>
  <transition name="slide">
    <div class="add-song">
      <div class="header">
        <h1 class="title">添加歌曲到列表</h1>
        <div class="close">
          <i class="iconfont icon-close"></i>
        </div>
      </div>
      <div class="search-box-wrapper"></div>
      <div class="shortcut"></div>
      <div class="search-result"></div>
    </div>
  </transition>
</template>

<script>
export default {

};
</script>

<style lang="scss">
.add-song {
  position: fixed;
  top: 0;
  bottom: 0;
  width: 100%;
  z-index: 200;
  background: $color-background;

  &.slide-enter-active,
  &.slide-leave-active {
    transition: all 0.3s;
  }

  &.slide-enter,
  &.slide-leave-to {
    transform: translate3d(100%, 0, 0);
  }

  .header {
    position: relative;
    height: 44px;
    text-align: center;

    .title {
      line-height: 44px;
      font-size: $font-size-large;
      color: $color-text;
    }

    .close {
      position: absolute;
      top: 0;
      right: 8px;

      .icon-close {
        display: block;
        padding: 12px;
        font-size: 20px;
        color: $color-theme;
      }
    }
  }

  .search-box-wrapper {
    margin: 20px;
  }

  .shortcut {
    .list-wrapper {
      position: absolute;
      top: 165px;
      bottom: 0;
      width: 100%;

      .list-scroll {
        height: 100%;
        overflow: hidden;

        .list-inner {
          padding: 20px 30px;
        }
      }
    }
  }

  .search-result {
    position: fixed;
    top: 124px;
    bottom: 0;
    width: 100%;
  }

  .tip-title {
    text-align: center;
    padding: 18px 0;
    font-size: 0;

    .icon-ok {
      font-size: $font-size-medium;
      color: $color-theme;
      margin-right: 4px;
    }

    .text {
      font-size: $font-size-medium;
      color: $color-text;
    }
  }
}
</style>
使用v-show控制该组件的显示隐藏,并向外提供show()方法和hide()方法
<div class="add-song" v-show="showFlag">
 <div class="close" @click="hide">


data() {
    return {
      showFlag: false,
    };
  },
  methods: {
    show() {
      this.showFlag = true;
    },
    hide() {
      this.showFlag = false;
    },
  },
在playlist引入add-song,在添加歌曲到队列这部分绑定点击事件方法,在方法中调用add-song提供的show方法让它显示。
 <div class="add" @click="addSong">
......
<add-song ref="addSong"></add-song>

  addSong() {
      this.$refs.addSong.show();
    },
同理,add-song在playlist组件中,任何的点击事件都会冒泡到playlist上,我们要阻止它冒泡。这样它点击页面的任何地方都不会消失,点击叉号就可以隐藏。
<div class="add-song" v-show="showFlag" @click.stop>
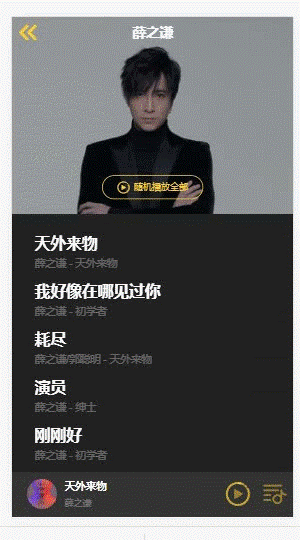
在add-song组件里引入search-box组件
<div class="search-box-wrapper">
        <search-box placeholder="搜索歌曲"></search-box>
</div>


import SearchBox from ‘../../base/search-box/search-box.vue‘;


  components: {
    SearchBox,
  },
search-box监听query事件,add-song组件要维护数据query
<search-box @query="search" placeholder="搜索歌曲"></search-box>
data() {
    return {
      showFlag: false,
      query: ‘‘,
    };
  },

  methods: {
  ……
    search(query) {
      this.query = query;
    },
  },
根据query就可以决定short-cut和search-result两个区块的显示隐藏
      <div class="shortcut" v-show="!query"></div>
      <div class="search-result" v-show="query"></div>
search-result区块实际是用来包裹suggest组件,引入suggest组件,然后把query传进去。
      <div class="search-result" v-show="query">
        <suggest :query="query"></suggest>
      </div>


import Suggest from ‘../suggest/suggest.vue‘;
  components: {
    SearchBox,
    Suggest,
  },
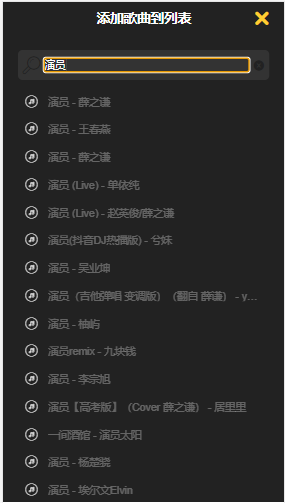
当我们点击列表元素的时候要做一些处理,与search组件的js逻辑有很多是共用的。这里也定义与search相关的mixin
<suggest :query="query" @select="selectSuggest"></suggest>
export const searchMixin = {
  data() {
    return {
      query: ‘‘,
    };
  },
  computed: {
    ...mapGetters([
      ‘searchHistory‘,
    ]),
  },
  methods: {
    onQueryChange(query) {
      this.query = query;
    },
    blurInput() {
      this.$refs.searchBox.blur();
    },
    addQuery(query) {
      this.$refs.searchBox.setQuery(query);
    },
    saveSearch() {
      this.saveSearchHistory(this.query);
    },
    ...mapActions([
      ‘saveSearchHistory‘,
      ‘deleteSearchHistory‘,
    ]),
  },
};
引入searchMixin,在search组件使用并剔除掉已有的重复内容,在add-song组件使用searchMixin的内容
//add-song.vue
<div class="search-box-wrapper">
        <search-box @query="onQueryChange" placeholder="搜索歌曲" @listScroll="blurInput"></search-box>
</div>


import { searchMixin } from ‘../../common/js/mixin‘;
  mixins: [searchMixin],
在selectSuggest方法中调用searchMixin里的saveSearch方法保存搜索历史
    selectSuggest() {
      this.saveSearch();
    },
创建switches.vue,基本代码如下:
<template>
  <ul class="switches">
    <li class="switch-item">
      <span></span>
    </li>
  </ul>
</template>

<script>
export default {

};
</script>

<style lang="scss">
.switches {
  display: flex;
  align-items: center;
  width: 240px;
  margin: 0 auto;
  border: 1px solid $color-hightlight-background;
  border-radius: 5px;

  .switch-item {
    flex: 1;
    padding: 8px;
    text-align: center;
    font-size: $font-size-medium;
    color: $color-text-d;

    &.active {
      background: $color-highlight-background;
      color: $color-text;
    }
  }
}
</style>
设置这个组件的props
 props: {
  // 标题
    switches: {
      type: Array,
      // eslint-disable-next-line vue/require-valid-default-prop
      default: [],
    },
    // 索引
    currentIndex: {
      type: Number,
      default: 0,
    },
  },
有了props就可以写dom上的结构了:遍历switches数组显示switches各个标题和根据当前的索引激活高亮
<template>
  <ul class="switches">
    <li class="switch-item" v-for="(item,index) in switches" :key="index" :class="{‘active‘:currentIndex === index}">
      <span>{{item.name}}</span>
    </li>
  </ul>
</template>
在add-song组件引入switches组件,定义currentIndex和switches,然后传给switches组件
<div class="shortcut" v-show="!query">
        <switches :switches="switches" :currentIndex="currentIndex"></switches>
</div>

data() {
    return {
      showFlag: false,
      currentIndex: 0,
      switches: [
        { name: ‘最近播放‘ },
        { name: ‘搜索历史‘ },
      ],
    };
  },
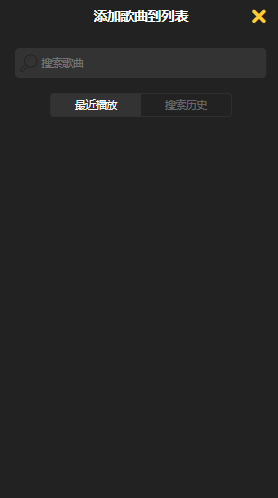
currentIndex默认为0,所以“最近播放”显示是为高亮的。需要实现点击“搜索历史”,应该把这个currentIndex切到1的点击事件。
给元素添加点击事件,当被点击时它就派发事件告诉外组件“我被点击了”同时把被点击的索引传给外组件。
<li class="switch-item" v-for="(item,index) in switches" :key="index" :class="{‘active‘:currentIndex === index}" @click="switchItem(index)">


  methods: {
    switchItem(index) {
      this.$emit(‘switch‘, index);
    },
  },
父组件add-song监听switch,去修改currentIndex
        <switches :switches="switches" :currentIndex="currentIndex" @switch="switchItem"></switches>


    switchItem(index) {
      this.currentIndex = index;
    },
在state下定义播放历史数据:playHisitory
  // 播放历史
  playHistory: [],
定义mutation-types、mutations和getters
//mutation-types.js
export const SET_PLAY_HISTORY = ‘SET_PLAY_HISTORY‘;

//mutations.js
  [types.SET_PLAY_HISTORY](state, history) {
    state.playHistory = history;
  },

//getters.js
export const playHistory = (state) => state.playHistory;
在player组件ready的时候往playHistory写入数据,这个过程需要调用action
   ready() {
      this.songReady = true;
      this.savePlayHistory(this.currentSong);
    },
在actions.js定义savePlayHistory:跟之前的搜索历史是一个套路,在cache.js定义对播放列表的读写方法然后在action中调用然后commit
//cache.js

const PLAY_KEY = ‘__play__‘;
// 存储最近播放的200首歌曲
const PLAY_MAX_LENGTH = 200;

export function savePlay(song) {
  let songs = storage.get(PLAY_KEY, []);
  insertArray(songs, song, (item) => {
    // 比较函数: 如果song在里面的话,就挪到前面去
    return item.id === song.id;
  }, PLAY_MAX_LENGTH);
  storage.set(PLAY_KEY, songs);
  return songs;
}
export function loadPlay() {
  return storage.get(PLAY_KEY, []);
}
//有了loadPlay(),初始值也可以从缓存里面读

//state.js
  // 播放历史
  playHistory: loadPlay(),
//actions.js

export const savePlayHistory = function ({ commit }, song) {
  commit(types.SET_PLAY_HISTORY, savePlay(song));
};
一切准备就绪后就可以在add-song组件使用playHistory数据了。
通过mapGetters就可以在模板上使用playHistory数据。但是因为这个数据很长,应当是个可以滚动的列表,所以还需要引入scroll组件,并且当currentIndex为0时才会显示滚动列表。
<scroll v-if="currentIndex === 0" :data="playHistory"></scroll>


import Scroll from ‘../../base/scroll/scroll.vue‘;
import { mapGetters } from ‘vuex‘;

computed: {
    ...mapGetters([
      ‘playHistory‘,
    ]),
  },

components: {
    SearchBox,
    Suggest,
    Switches,
    Scroll,
  },
scroll组件包裹的元素其实是之前使用过的song-list组件,这里也需要引入使用来展示playHistory数据。
<div class="list-wrapper">
          <scroll class="list-scroll" v-if="currentIndex === 0" :data="playHistory">
            <div class="list-inner">
              <song-list :songs="playHistory"></song-list>
            </div>
          </scroll>
</div>
监听song-list的@select事件:使用之前写的insertSong方法,点击除了第一首以外的歌都可以插入到当前播放列表中。
import Song from ‘../../common/js/song‘;

 selectSong(song, index) {
      // 因为song是从缓存中拿出来的,并不是Song的实例,需要转换
      if (index !== 0) {
        this.insertSong(new Song(song));
      }
    },
    ...mapActions([
      ‘insertSong‘,
    ]),
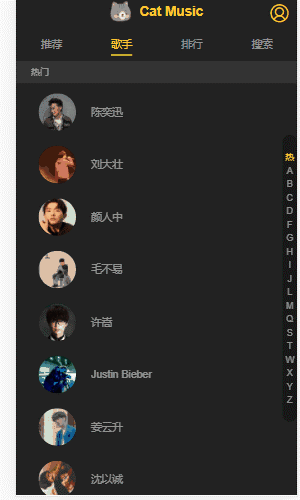
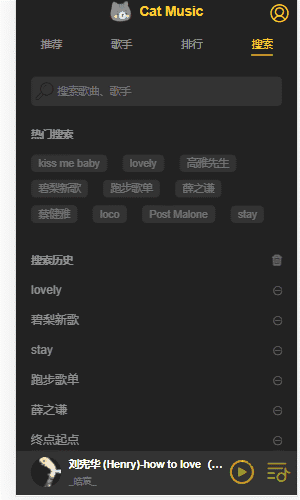
在add-song添加可滚动的区块,即搜索历史这个区块。然后绑定数据,searchHistory可以在mixin定义,通过共享拿到数据
          <scroll class="list-scroll" v-if="currentIndex === 1" :data="searchHistory">

          </scroll>
在scroll区块依然有一个div区块包裹着search-list,这个search-list要传入几个东西,监听删除事件调用mixin已经定义好的deleteSearchHistory;点击事件调用addQuery;往searches传入searchHistory数据。
 <scroll class="list-scroll" v-if="currentIndex === 1" :data="searchHistory">
            <div class="list-inner">
              <search-list @delete="deleteSearchHistory" @select="addQuery" :searches="searchHistory"></search-list>
            </div>
</scroll>
在删除搜索历史上添加动画:优化search-list组件,给它添加动画
 <transition-group name="list" tag="ul">
      <li @click="selectItem(item)" class="search-item" v-for="(item,index) in searches" :key="index">
        ……

//动画样式

    &.list-enter-active,
    &.list-leave-active {
      transition: all 0.1s;
    }

    &.list-enter,
    &.list-leave-to {
      height: 0;
    }
在add-song组件分别对这2个滚动组件在页面渲染的时候作refresh重新计算高度,防止无法滚动
 show() {
      this.showFlag = true;
      setTimeout(() => {
        if (this.currentIndex === 0) {
          this.$refs.songList.refresh();
        } else {
          this.$refs.searchList.refresh();
        }
      }, 20);
    },
创建基础组件top-tip,基本代码如下:

<template>
  <transition name="drop">
    <div class="top-tip">
      <slot></slot>
    </div>
  </transition>
</template>

<script>
export default {

};
</script>

<style lang="scss">
.top-tip {
  position: fixed;
  top: 0;
  width: 100%;
  z-index: 500;
  background: $color-dialog-background;

  &.drop-enter-active,
  &.drop-leave-active {
    transition: all 0.3s;
  }

  &.drop-enter,
  &.drop-leave-to {
    transform: translate3d(0, -100%, 0);
  }
}
</style>
使用showFlag变量控制其显示隐藏,并向外提供显示和隐藏的方法
    <div class="top-tip" v-show="showFlag">


  data() {
    return {
      showFlag: false,
    };
  },
  methods: {
    show() {
      this.showFlag = true;
    },
    hide() {
      this.showFlag = false;
    },
  },
在add-song组件使用它,因为top-tip有一个插件,可以往里面填入内容
<top-tip ref="topTip">
        <div class="tip-title">
          <i class="iconfont icon-ok"></i>
          <span class="text">1首歌曲已经添加到播放队列</span>
        </div>
</top-tip>
定义showTip方法,在selectSuggest和selectSong时调用它控制top-tip的显示
selectSuggest() {
      this.saveSearch();
      this.showTip();
    },

selectSong(song, index) {
      // 因为song是从缓存中拿出来的,并不是Song的实例,需要转换
      if (index !== 0) {
        this.insertSong(new Song(song));
        this.showTip();
      }
    },

showTip() {
      this.$refs.topTip.show();
    },
一般这种顶部提示的交互会有几秒钟就可以把它关闭的效果,可以在top-tip组件的show方法添加延时隐藏
 show() {
      this.showFlag = true;
      // 清除定时器,防止多次显示产生多个计时器
      clearTimeout(this.timer);
      this.timer = setTimeout(() => {
        this.hide();
      }, 2000);
    },
这个2000毫秒可以作为props传入,外部的组件就可以控制top-tip组件的延迟隐藏时间
props: {
    delay: {
      type: Number,
      default: 2000,
    },
  },

this.timer = setTimeout(() => {
        this.hide();
      }, this.delay);
在top-tip组件提供另一种隐藏方法:用户点击后隐藏
<div class="top-tip" v-show="showFlag" @click.stop="hide">
将scroll组件的20毫秒设置为一个变量,作为props传入,外部的组件就可以控制
    refreshDelay: {
      type: Number,
      default: 20,
    },

watch: {
    data() {
      setTimeout(() => {
        this.refresh();
      }, this.refreshDelay);
    },
  },
playlist向scroll传递一个refreshDelay,除此之外还有search组件和add-song都需要传入一个refreshDelay,由于这2个组件都共用了mixin,可以在mixin的data里定义refreshDelay
        <scroll :data="sequenceList" class="list-content" ref="listContent" :refreshDelay="refreshDelay">

  data() {
    return {
      showFlag: false,
      refreshDelay: 100,
    };
  },
VUE移动端音乐APP学习【二十五】:歌曲列表组件开发(二)
原文:https://www.cnblogs.com/Small-Windmill/p/14988647.html