处理器映射器和适配器分为两类:非注解的处理器映射器和适配器、注解的处理器映射器和适配器
一、非注解的处理器映射器和适配器
①、处理器映射器
将bean的name作为url精选查找
<!--
        处理器映射器
        将bean的name作为url精选查找
        如下:
        <bean name="/xxx.action" class="xxxxx.xxxController"/>
     -->
    <bean class="org.springframework.web.servlet.handler.BeanNameUrlHandlerMapping"/>
根据url查找bean的id
    <bean id="itemsControllerId" class="com.xxx.springmvc.controller.ItemsController"/>
    <bean class="org.springframework.web.servlet.handler.SimpleUrlHandlerMapping">
        <property name="mappings">
            <props>
                <prop key="/queryItems.action">itemsControllerId</prop>
            </props>
        </property>
    </bean>
多个url可以指向同一个bean id
②、处理器适配器
org.springframework.web.servlet.mvc.SimpleControllerHandlerAdapter:要求编写的Handler实现 Controller接口。
org.springframework.web.servlet.mvc.HttpRequestHandlerAdapter:要求编写的Handler实现 HttpRequestHandler接口。
public class ItemsController implements HttpRequestHandler {

    public void handleRequest(HttpServletRequest request, HttpServletResponse response) throws ServletException, IOException {
        List<Items> itemsList=new ArrayList<Items>();

        Items items_1 = new Items();
        items_1.setName("笔记本");
        items_1.setPrice(6000f);
        items_1.setDetail("笔记本电脑!");

        Items items_2 = new Items();
        items_2.setName("手机");
        items_2.setPrice(5000f);
        items_2.setDetail("手机!");

        itemsList.add(items_1);
        itemsList.add(items_2);
        //设置request
        request.setAttribute("itemsList", itemsList);
        //设置转发视图
        request.getRequestDispatcher("/WEB-INF/jsp/items/itemsList.jsp").forward(request, response);
    }
}
使用此方法可以通过修改response,设置响应的数据格式,比如响应json数据
/*
        response.setCharacterEncoding("utf-8");
        response.setContentType("application/json;charset=utf-8");
        response.getWriter().write("json串");
*/
二、注解的处理器映射器和适配器
①、在spring3.1之前使用
org.springframework.web.servlet.mvc.annotation.DefaultAnnotationHandlerMapping注解映射器。
org.springframework.web.servlet.mvc.annotation.AnnotationMethodHandlerAdapter注解适配器。
②、在spring3.1之后使用
org.springframework.web.servlet.mvc.method.annotation.RequestMappingHandlerMapping注解映射器。
org.springframework.web.servlet.mvc.method.annotation.RequestMappingHandlerAdapter注解适配器。
③、配置处理器映射器和适配器
    <bean class="com.xxx.springmvc.controller.ItemsController"/>
    <!-- 处理器映射器 -->
    <bean class="org.springframework.web.servlet.mvc.method.annotation.RequestMappingHandlerMapping"/>
    <!-- 处理器适配器 -->
    <bean class="org.springframework.web.servlet.mvc.method.annotation.RequestMappingHandlerAdapter"/>
使用 mvc:annotation-driven代替上边注解映射器和注解适配器配置
mvc:annotation-driven默认加载很多的参数绑定方法,比如json转换解析器就默认加载了,如果使用mvc:annotation-driven不用配置上边的RequestMappingHandlerMapping和RequestMappingHandlerAdapter
实际开发时使用mvc:annotation-driven
<mvc:annotation-driven></mvc:annotation-driven>
使用注解的映射器和注解的适配器。(注解的映射器和注解的适配器必须配对使用)
④、开发注解Handler
//使用Controller标识 它是一个控制器
@Controller
public class ItemsController {

    //@RequestMapping实现 对queryItems方法和url进行映射,一个方法对应一个url
    //一般建议将url和方法写成一样
    @RequestMapping("/queryItemsList")
    public ModelAndView queryItemsList() {
        List<Items> itemsList=new ArrayList<Items>();

        Items items_1 = new Items();
        items_1.setName("笔记本");
        items_1.setPrice(6000f);
        items_1.setDetail("笔记本电脑!");

        Items items_2 = new Items();
        items_2.setName("手机");
        items_2.setPrice(5000f);
        items_2.setDetail("手机!");

        itemsList.add(items_1);
        itemsList.add(items_2);

        //返回ModelAndView
        ModelAndView modelAndView =  new ModelAndView();
        //相当 于request的setAttribut,在jsp页面中通过itemsList取数据
        modelAndView.addObject("itemsList", itemsList);

        //指定视图
        modelAndView.setViewName("/WEB-INF/jsp/items/itemsList.jsp");

        return modelAndView;
    }
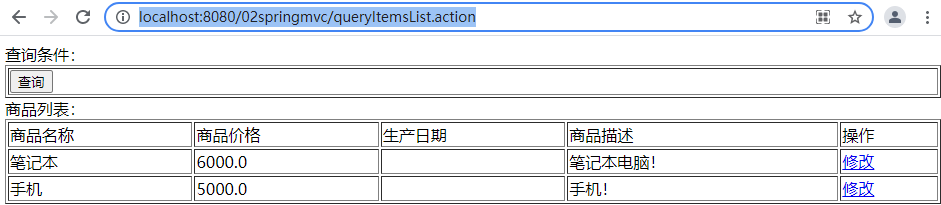
⑤、访问:http://localhost:8080/02springmvc/queryItemsList.action
spring管理Handler有两种方式:bean单个配置(<bean class=""/>),使用组件扫描
    <!--
       对于注解的Handler可以单个配置
    -->
    <!-- <bean class="com.xxx.springmvc.controller.ItemsController" /> -->
    <!--
       使用组件扫描
          可以扫描controller、service、...
       这里让扫描controller,指定controller的包
     -->
    <context:component-scan base-package="com.xxx.springmvc.controller"></context:component-scan>
注意:有可能出现 IllegalArgumentException异常,原因因为jdk和spring版本不能互相支持导致的。
三、视图解析器
前缀和后缀
    <!-- 视图解析器 -->
    <bean class="org.springframework.web.servlet.view.InternalResourceViewResolver">
        <property name="prefix">/WEB-INF/jsp/</property>
        <property name="suffix">.jsp</property>
    </bean>
Handler代码
    @RequestMapping("/queryItemsList")
    public ModelAndView queryItemsList() {
        List<Items> itemsList=new ArrayList<Items>();

        Items items_1 = new Items();
        items_1.setName("笔记本");
        items_1.setPrice(6000f);
        items_1.setDetail("笔记本电脑!");

        Items items_2 = new Items();
        items_2.setName("手机");
        items_2.setPrice(5000f);
        items_2.setDetail("手机!");

        itemsList.add(items_1);
        itemsList.add(items_2);

        //返回ModelAndView
        ModelAndView modelAndView =  new ModelAndView();
        //相当 于request的setAttribut,在jsp页面中通过itemsList取数据
        modelAndView.addObject("itemsList", itemsList);

        //指定视图
        modelAndView.setViewName("items/itemsList");

        return modelAndView;
    }
这样就不用在程序中指定jsp文件的完整路径了
四、小结
前端控制器配置:主要针对url配置
处理器映射器:
非注解处理器映射器
注解的处理器映射器
对标记@Controller类中标识有@RequestMapping的方法进行映射。在@RequestMapping里边定义映射的url。使用注解的映射器不用在xml中配置url和Handler的映射关系。
处理器适配器:
非注解处理器适配器
注解的处理器适配器
注解处理器适配器和注解处理器映射器是配对使用。
<mvc:annotation-driven></mvc:annotation-driven>可以代替下边的配置
原文:https://www.cnblogs.com/WarBlog/p/15006614.html