单进程单线程优势
单进程单线程弊端
安装wget工具
yun -y install wget
下载安装包(本次安装6.0.9) 安装包地址(https://download.redis.io/releases/)
wget https://download.redis.io/releases/redis-6.0.9.tar.gz
安装gcc+c环境
yum install -y gcc-c++ autoconf automake
在编译Redis 6之前需要升级gcc的版本,默认情况下yum安装的gcc版本是4.8.5,由于版本过低,在编译期间会报错。因此在编译前需要先升级gcc
# 安装scl源
yum install -y centos-release-scl scl-utils-build
# 安装9版本的gcc、gcc-c++、gbd工具链(toolchain)
yum install -y devtoolset-9-toolchain
# 临时覆盖系统原有的gcc 引用
scl enable devtoolset-9 bash
# 检查gcc当前版本
gcc -v
成功升级到gcc 9版本
[root@localhost redis-6.0.9]# gcc -v
Using built-in specs.
COLLECT_GCC=gcc
COLLECT_LTO_WRAPPER=/opt/rh/devtoolset-9/root/usr/libexec/gcc/x86_64-redhat-linux/9/lto-wrapper
Target: x86_64-redhat-linux
Configured with: ../configure --enable-bootstrap --enable-languages=c,c++,fortran,lto --prefix=/opt/rh/devtoolset-9/root/usr --mandir=/opt/rh/devtoolset-9/root/usr/share/man --infodir=/opt/rh/devtoolset-9/root/usr/share/info --with-bugurl=http://bugzilla.redhat.com/bugzilla --enable-shared --enable-threads=posix --enable-checking=release --enable-multilib --with-system-zlib --enable-__cxa_atexit --disable-libunwind-exceptions --enable-gnu-unique-object --enable-linker-build-id --with-gcc-major-version-only --with-linker-hash-style=gnu --with-default-libstdcxx-abi=gcc4-compatible --enable-plugin --enable-initfini-array --with-isl=/builddir/build/BUILD/gcc-9.3.1-20200408/obj-x86_64-redhat-linux/isl-install --disable-libmpx --enable-gnu-indirect-function --with-tune=generic --with-arch_32=x86-64 --build=x86_64-redhat-linux
Thread model: posix
gcc version 9.3.1 20200408 (Red Hat 9.3.1-2) (GCC)
tar -zxvf redis-6.0.9.tar.gz -C /usr/local/
cd  /usr/local/redis-6.0.9/
make
mkdir -p /usr/local/redis
make PREFIX=/usr/local/redis/ install
cd /usr/local/redis/bin

./redis-server
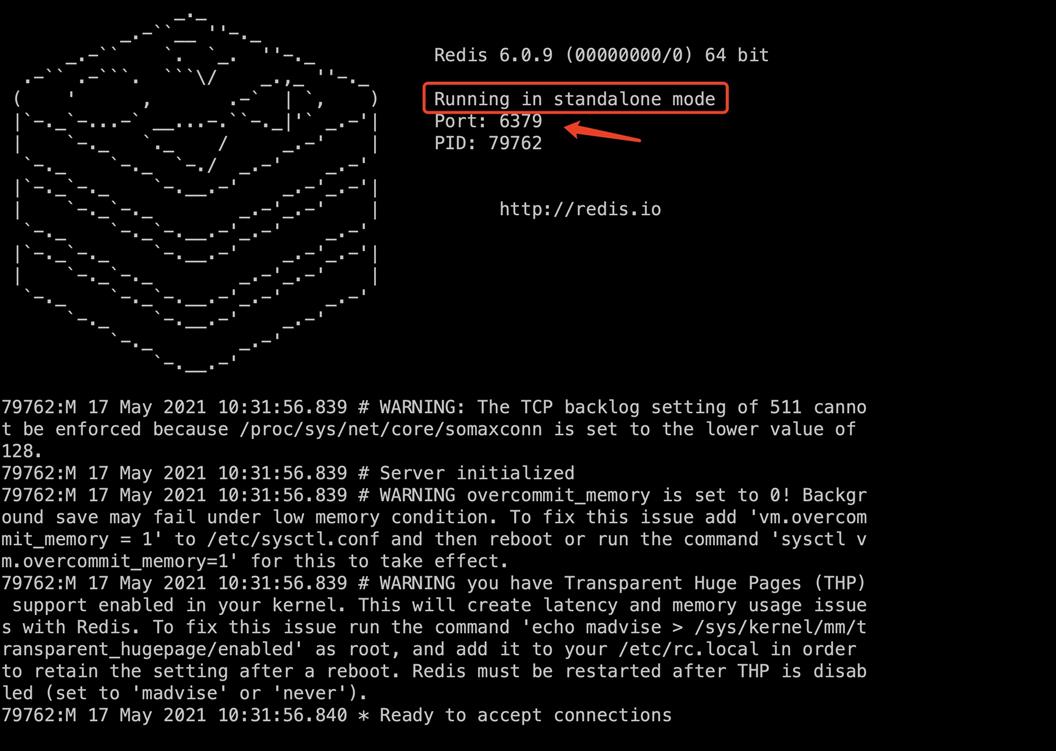
启动后可以看到redis显示为单节点、Port 
bash cd redis-6.0.9/ cp redis.conf /usr/local/redis/bin/# 修改第224行
daemonize yes
再次启动
./redis-server ./redis.conf
bash vi /etc/systemd/system/redis.service写入以下内容 ``` bash [Unit] Description=redis-server After=network.target[Service] Type=forking ExecStart=/usr/local/redis/bin/redis-server /usr/local/redis/bin/redis.conf PrivateTmp=true
[Install] WantedBy=multi-user.target
*重载系统服务*
``` bash
systemctl daemon-reload
systemctl stop redis.servicesystemctl start redis.servicesystemctl restart redis.servicesystemctl status redis.servicebash systemctl enable redis.service添加POM依赖
<dependencies>
   <!-- jedis 客户端-->
   <dependency>
       <groupId>redis.clients</groupId>
       <artifactId>jedis</artifactId>
       <version>3.3.0</version>
   </dependency>

   <!--junit test-->
   <dependency>
       <groupId>junit</groupId>
       <artifactId>junit</artifactId>
       <version>4.12</version>
       <scope>test</scope>
   </dependency>
2. 编写连接池代码
``` java
public class jedisPoolConnectRedis {
    private static JedisPool jedisPool;
    static {
        // 创建连接池配置对象
        JedisPoolConfig jedisPoolConfig = new JedisPoolConfig();
        //设置最大连接数,默认是8
        jedisPoolConfig.setMaxTotal(5);
        //设置最大空闲数, 默认是8
        jedisPoolConfig.setMaxIdle(5);
        //设置最小空闲数量,默认是0
        jedisPoolConfig.setMinIdle(0);
        //设置等待时间 ms
        jedisPoolConfig.setMaxWaitMillis(100);
        //初始化jedisPool对象
        GenericObjectPoolConfig poolConfig;
        jedisPool = new JedisPool(jedisPoolConfig, "192.168.21.105", 6379,
                100, "123456");
    }

    /**
     * 获取Jedis对象
     * @return
     */
    public static Jedis getJedis(){
        return jedisPool.getResource();
    }
测试类
public class JedisPoolTest {
Jedis jedis = null;

//建立连接
@Before
public void init(){
   //初始化Jedis客户端
   jedis = jedisPoolConnectRedis.getJedis();
   //身份认证,设置连接密码
   //ping pang心跳机制,监测是否连接成功
   String pong = jedis.ping();
   System.out.println("pong = " + pong);
}

@Test
public void testJedisPool(){
   Set<String> keys =
           jedis.keys("*");
    Assert.assertNotNull(keys);
}

@After
public void close(){
   if(null!=jedis){
       jedis.close();
   }
}
}
2. application.yml配置

3. 测试类
| ip | 角色 |
|---|---|
| 192.168.147.102 | Master |
| 192.168.147.103 | slave1 |
| 192.168.147.104 | slave2 |
mkdir -p /usr/local/redis/conf
mkdir -p /usr/local/redis/data
mkdir -p /usr/local/redis/log
# 放行访问ip限制
bind 0.0.0.0
# 后台启动
daemonize yes
# 日志存储目录及日志文件名
logfile "/usr/local/redis/log/redis.log"
# rdb数据文件名
dbfilename dump.rdb
# aof模式开启和aof数据文件名
appendonly yes
appendfilename "appendonly.aof"
# rdb数据文件和aof数据文件的存储目录
dir /usr/local/redis/data
# 设置密码
requirepass 123456
# 从节点访问主节点密码(必须与requirepass一致)
masterauth 123456
# 从节点只读模式
replica-read-only yes
在maste配置文件的基础上,最后一行增加slaveof
#  从节点属于哪个主节点
slaveof 192.168.147.102 6379
分别启动主节点和从节点
# 启动redis 服务
/usr/local/redis/bin/redis-server /usr/local/redis/conf/redis.conf
查看主从副本信息
# redis-cli连接
 /usr/local/redis/bin/redis-cli -a 123456
# 进入redis-cli后,输入 info replication 查看slave状态
info replication
主节点redis-cli连接后,查看主节点信息
127.0.0.1:6379> info replication
# Replication
role:master
connected_slaves:2
slave0:ip=192.168.147.104,port=6379,state=online,offset=784,lag=1
slave1:ip=192.168.147.103,port=6379,state=online,offset=784,lag=0
master_replid:e8101cf8b0d87dfd39a9ac78f9c4b4530fa051fd
master_replid2:0000000000000000000000000000000000000000
master_repl_offset:784
second_repl_offset:-1
repl_backlog_active:1
repl_backlog_size:1048576
repl_backlog_first_byte_offset:1
repl_backlog_histlen:784
127.0.0.1:6379>
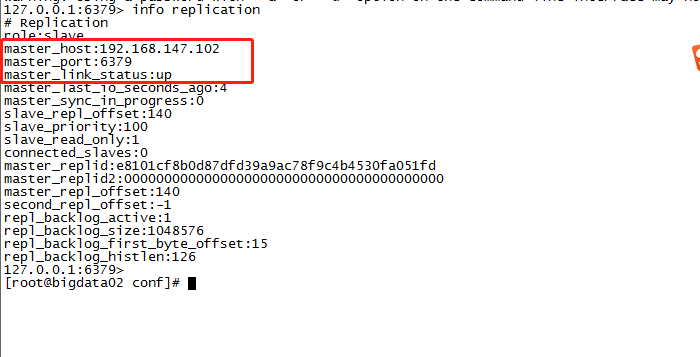
从节点redis-cli连接后,查看从节点信息
127.0.0.1:6379> info replication
# Replication
role:slave
master_host:192.168.147.102
master_port:6379
master_link_status:up
master_last_io_seconds_ago:4
master_sync_in_progress:0
slave_repl_offset:140
slave_priority:100
slave_read_only:1
connected_slaves:0
master_replid:e8101cf8b0d87dfd39a9ac78f9c4b4530fa051fd
master_replid2:0000000000000000000000000000000000000000
master_repl_offset:140
second_repl_offset:-1
repl_backlog_active:1
repl_backlog_size:1048576
repl_backlog_first_byte_offset:15
repl_backlog_histlen:126
127.0.0.1:6379>

| IP | 角色 |
|---|---|
| 192.168.147.102 | master |
| 192.168.147.103 | slave1 |
| 192.168.147.104 | slave2 |
三个节点分别创建sentinel.conf配置文件
# 放行所有IP限制
bind 0.0.0.0
# 进程端口号
port 26379
# 后台启动
daemonize yes
# 日志记录文件
logfile "/usr/local/redis/log/sentinel.log"
# 进程编号记录文件
pidfile /var/run/sentinel.pid
# 指示Sentinel 去监视一个名为mymaster的主服务器
sentinel monitor mymaster 192.168.147.102 6379 2
# 访问主节点的密码
sentinel auth-pass mymaster 123456
# Sentinel 认为服务器已经断线所需的毫秒数
sentinel down-after-millseconds mymaster 10000
# 若Sentinel 在该配置值内未完成failover操作,则认为本次failover 失败
sentinel failover-timeout master 180000
先启动3个redis服务
/usr/local/redis/bin/redis-server /usr/local/redis/conf/redis.conf
再启动3个Sentinel服务
/usr/local/redis/bin/redis-server /usr/local/redis/conf/sentinel.conf --sentinel
或使用
/usr/local/redis/bin/redis-sentinel /usr/local/redis/conf/sentinel.conf
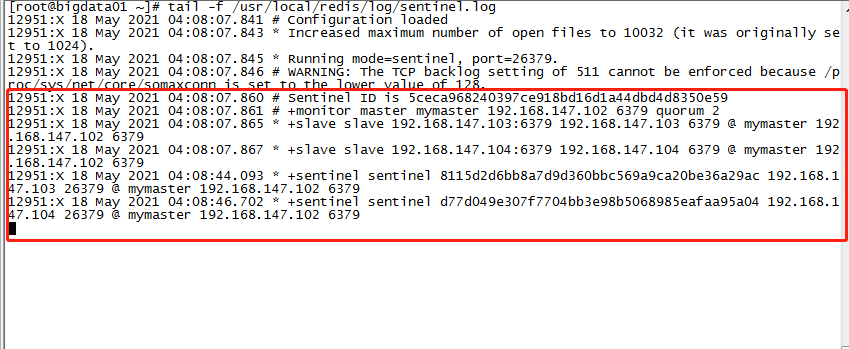
tail -f /usr/local/redis/log/sentinel.log
12951:X 18 May 2021 04:08:07.841 # Configuration loaded
12951:X 18 May 2021 04:08:07.843 * Increased maximum number of open files to 10032 (it was originally set to 1024).
12951:X 18 May 2021 04:08:07.845 * Running mode=sentinel, port=26379.
12951:X 18 May 2021 04:08:07.846 # WARNING: The TCP backlog setting of 511 cannot be enforced because /proc/sys/net/core/somaxconn is set to the lower value of 128.
12951:X 18 May 2021 04:08:07.860 # Sentinel ID is 5ceca968240397ce918bd16d1a44dbd4d8350e59
12951:X 18 May 2021 04:08:07.861 # +monitor master mymaster 192.168.147.102 6379 quorum 2
12951:X 18 May 2021 04:08:07.865 * +slave slave 192.168.147.103:6379 192.168.147.103 6379 @ mymaster 192.168.147.102 6379
12951:X 18 May 2021 04:08:07.867 * +slave slave 192.168.147.104:6379 192.168.147.104 6379 @ mymaster 192.168.147.102 6379
12951:X 18 May 2021 04:08:44.093 * +sentinel sentinel 8115d2d6bb8a7d9d360bbc569a9ca20be36a29ac 192.168.147.103 26379 @ mymaster 192.168.147.102 6379
12951:X 18 May 2021 04:08:46.702 * +sentinel sentinel d77d049e307f7704bb3e98b5068985eafaa95a04 192.168.147.104 26379 @ mymaster 192.168.147.102 6379

Sentinel内部有3个定时任务,分别是:
ping操作(监控)info命令所谓主管下线(Subjectively down,简称SDOWN)指的是单个Sentinel实例对服务器做出的下线判断,即单位Sentinel任务某个服务下线(有可能是接收不到订阅,之间的网络不通等原因)。
客观下线(Objectively Down,简称ODOWN)指的是多个Sentinel实例在对同一个服务器做出SDOWN判断,并且通过命令相互交流之后,得出的服务器下线判断,然后开启failover。
仲裁指的是配置文件中的quorum选项
quorum的值一般设置为Sentinel个数的二分之一加1,例如3个Sentinel就设置为2。
pingdown-after-milliseconds选项所指定的值,被认定为主观下线原文:https://www.cnblogs.com/shine-rainbow/p/redis-ying-yong-appllication.html