开发环境:win10专业版20H2+JDK8+Eclipse4.10.0
一、下载安装Maven
1.进入官网:https://maven.apache.org/download.cgi,下载maven最新版本apache-maven-3.8.1-bin.zip(目前是3.8.1)。
2.解压,配置本地资源库。我解压到的路径是:D:\eclipse-jee-2018-12-R-win32-x86_64\apache-maven-3.8.1,在此处新建名为repository的文件夹作为本地资源库。
3.配置系统环境变量:在Path下增加%JAVA_HOME%\bin,增加变量MAVEN_HOME,值为解压路径,我的是D:\eclipse-jee-2018-12-R-win32-x86_64\apache-maven-3.8.1。
二、配置Eclipse
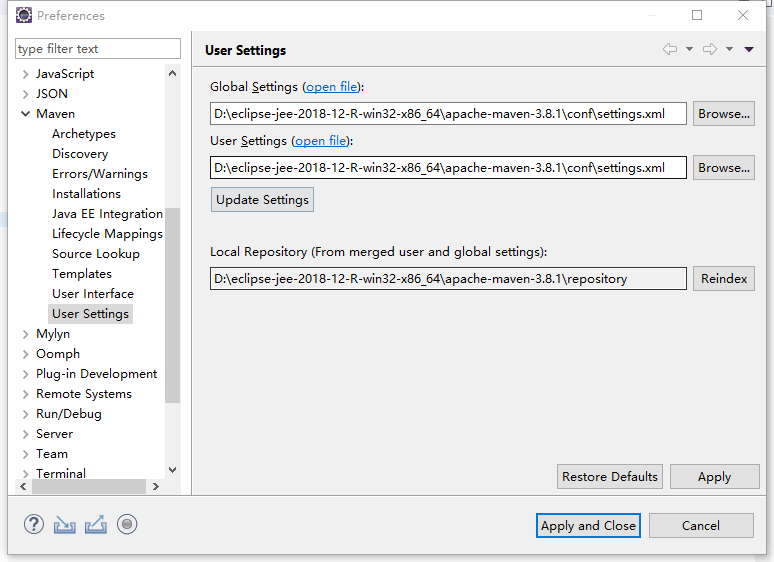
1.打开Eclipse,选择Window->Preferences->Maven->User Settings。
2.修改相关参数,第一二个为Maven解压路径下\conf\settings.xml。第三个为本地资源库路径。
3.修改settings.xml,将JRE版本改为JDK8。在profiles下增加
<profile>
 <id>jdk-1.8</id>
 <activation>
  <activeByDefault>true</activeByDefault>
  <jdk>1.8</jdk>
 </activation>
 <properties>
  <maven.compiler.source>1.8</maven.compiler.source>
  <maven.compiler.target>1.8</maven.compiler.target>
 <maven.compiler.compilerVersion>1.8</maven.compiler.compilerVersion>
 </properties>
</profile>
三、第一个Spring Boot应用
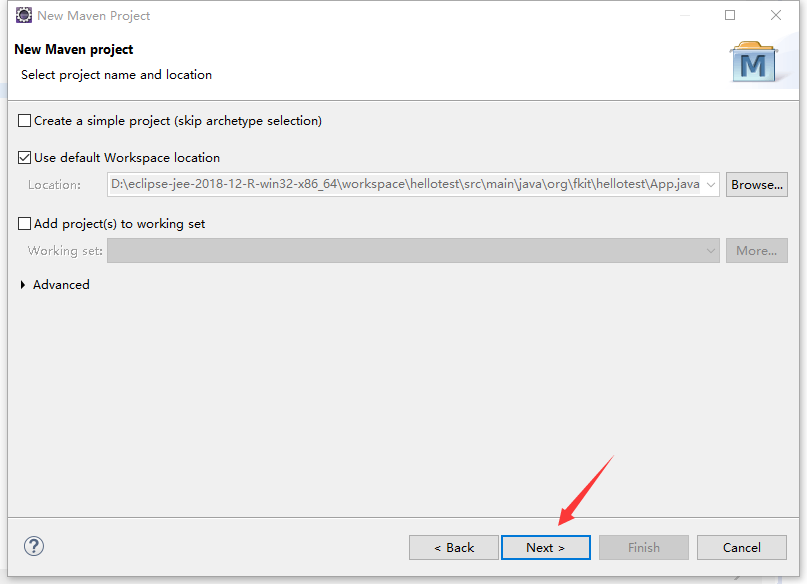
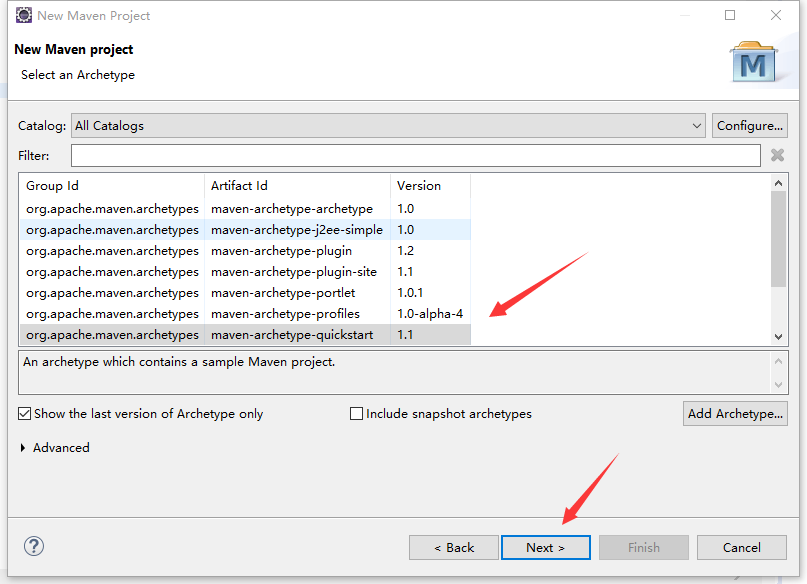
1.选择File->New->Other->Maven->Maven Project
2.依次选择,完成项目命名。

3.修改pom.xml配置文档
<project xmlns="http://maven.apache.org/POM/4.0.0" xmlns:xsi="http://www.w3.org/2001/XMLSchema-instance"
  xsi:schemaLocation="http://maven.apache.org/POM/4.0.0 http://maven.apache.org/xsd/maven-4.0.0.xsd">
  <modelVersion>4.0.0</modelVersion>

  <groupId>org.fkit</groupId>
  <artifactId>hellotest</artifactId>
  <version>0.0.1-SNAPSHOT</version>
  <packaging>jar</packaging>

  <name>hellotest</name>
  <url>http://maven.apache.org</url>
    <parent>
        <groupId>org.springframework.boot</groupId>
        <artifactId>spring-boot-starter-parent</artifactId>
        <version>2.0.0.RELEASE</version>
        <relativePath/>
    </parent>

  <properties>
    <project.build.sourceEncoding>UTF-8</project.build.sourceEncoding>
  </properties>

  <dependencies>
    <dependency>
      <groupId>junit</groupId>
      <artifactId>junit</artifactId>
      <scope>test</scope>
    </dependency>
     <dependency>
       <groupId>org.springframework.boot</groupId>
       <artifactId>spring-boot-starter-web</artifactId>
    </dependency>
  </dependencies>
</project>
4.添加测试代码
修改App.java
package org.fkit.hellotest;

import org.springframework.boot.SpringApplication;
import org.springframework.boot.autoconfigure.SpringBootApplication;

@SpringBootApplication
public class App {

    public static void main(String[] args) {

        SpringApplication.run(App.class, args);
    }

}
增加HelloController.java
package org.fkit.hellotest;

import org.springframework.web.bind.annotation.RequestMapping;
import org.springframework.web.bind.annotation.RestController;


//RestController @Controller + @ResponseBody
@RestController
public class HelloController {
    //"/hello"
    @RequestMapping("/hello")
    public String hello(){
        return "Hello Spring Boot!";
    }
}
5.运行。打开浏览器,访问http://localhost:8080/hello

原文:https://www.cnblogs.com/y451533754/p/15085615.html