import numpy
import numpy as np
import torch
import matplotlib.pyplot as plt
import torch.nn as nn
import torch.nn.functional as F
import torch.optim as optim

import torchvision
import torchvision.transforms as transforms
import tensorboard
from torch.utils.tensorboard import SummaryWriter

# print(tensorboard.__version__)


device = torch.device("cuda:0" if torch.cuda.is_available() else "cpu")

# Assuming that we are on a CUDA machine, this should print a CUDA device:

# print(device)

‘‘‘
device="cuda" if torch.cuda.is_available() else "cpu"
# print(device)
‘‘‘
torch.set_printoptions(linewidth=120)  # Display options for output
torch.set_grad_enabled(True)  # Already on by default
print(torch.__version__, torchvision.__version__, sep=‘\n‘)

def get_num_correct(preds, labels):
    return preds.argmax(dim=1).eq(labels).sum().item()

class Network(nn.Module):
    def __init__(self):
        super().__init__()
        self.conv1 = nn.Conv2d(in_channels=1, out_channels=6, kernel_size=5)
        self.conv2 = nn.Conv2d(in_channels=6, out_channels=12, kernel_size=5)

        self.fc1 = nn.Linear(in_features=12 * 4 * 4, out_features=120)
        self.fc2 = nn.Linear(in_features=120, out_features=60)
        self.out = nn.Linear(in_features=60, out_features=10)

    def forward(self, t):
        # (1) input layer
        t = t

        # (2) hidden conv layer
        t = self.conv1(t)
        t = F.relu(t)
        t = F.max_pool2d(t, kernel_size=2, stride=2)

        # (3) hidden conv layer
        t = self.conv2(t)
        t = F.relu(t)
        t = F.max_pool2d(t, kernel_size=2, stride=2)

        # (4) hidden Linear layer
        t = t.reshape(-1, 12 * 4 * 4)  # -1表示对行没约束,反正是12*4*4列
        t = self.fc1(t)
        t = F.relu(t)
        # (5) hidden Linear layer
        t = self.fc2(t)
        t = F.relu(t)
        # (6) output layer
        t = self.out(t)
        # t=F.softmax(t,dim=1) #此处不使用softmax函数,因为在训练中我们使用了交叉熵损失函数,而在torch.nn函数类中,已经在其输入中隐式的
        # 执行了一个softmax操作,这里我们只返回最后一个线性变换的结果,也即是 return t,也即意味着我们的网络将使用softmax操作进行训练,但在
        # 训练完成后,将不需要额外的计算操纵。

        return t

# get data

train_set = torchvision.datasets.FashionMNIST(
    root=‘./data/FashionMNIST‘,
    train=True,
    download=True,
    transform=transforms.Compose([transforms.ToTensor()])
)


data_loader = torch.utils.data.DataLoader(train_set,batch_size=100,shuffle=True)  # shuffle=True

# from collections import Iterable
#
# print(isinstance(data_loader,Iterable)) #返回True

#####################
# starting out with TensorBoard(Network Graph and Images) 下面一段为生成日志文件的代码,直到tb.close()
#####################
tb=SummaryWriter()

network=Network()
images,labels=next(iter(data_loader))
grid=torchvision.utils.make_grid(images)#网格效用函数

tb.add_image(‘images‘,grid)
tb.add_graph(network,images)
tb.close()

# optimizer = optim.Adam(network.parameters(), lr=0.01)

‘‘‘

for epoch in range(3):

    total_loss = 0
    total_correct = 0

    for batch in data_loader:  # get batch
        images, labels = batch
        images, labels = images.to(device), labels.to(device)

        preds = network(images)  # pass batch
        loss = F.cross_entropy(preds, labels)  # calculate loss

        optimizer.zero_grad()
        loss.backward()  # calculate gradients
        optimizer.step()  # update weights  using the gradient and the learning rate
        total_loss += loss.item()
        total_correct += get_num_correct(preds, labels)

    print(‘epoch:‘, epoch, ‘total_correct:‘, total_correct, ‘total_loss:‘, total_loss)

print(total_correct / len(train_set))

‘‘‘
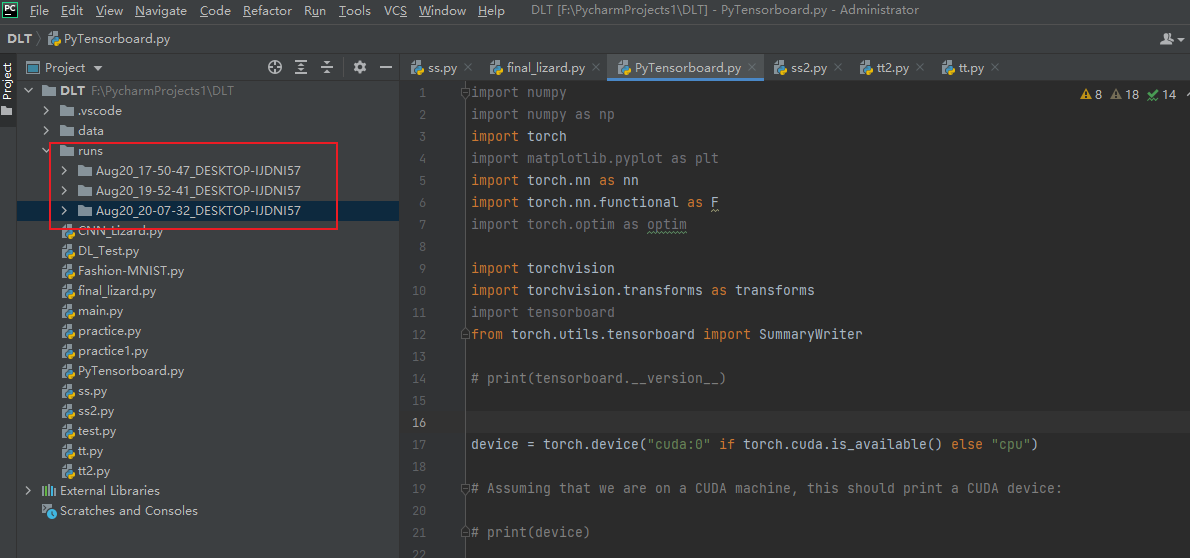
其中 runs为该代码所在文件夹中位置,日志文件生成后也在这个文件夹里
如下图:

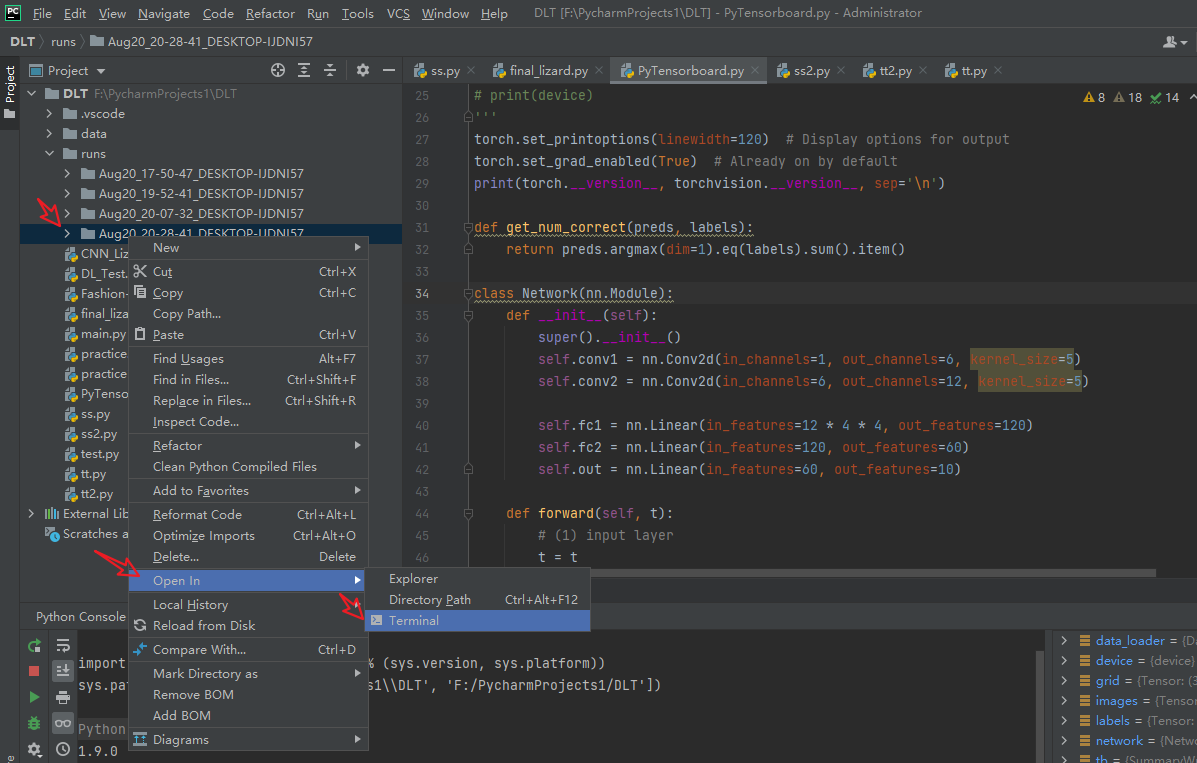
在runs文件夹上点击鼠标右键 有一个open in terminal 点击
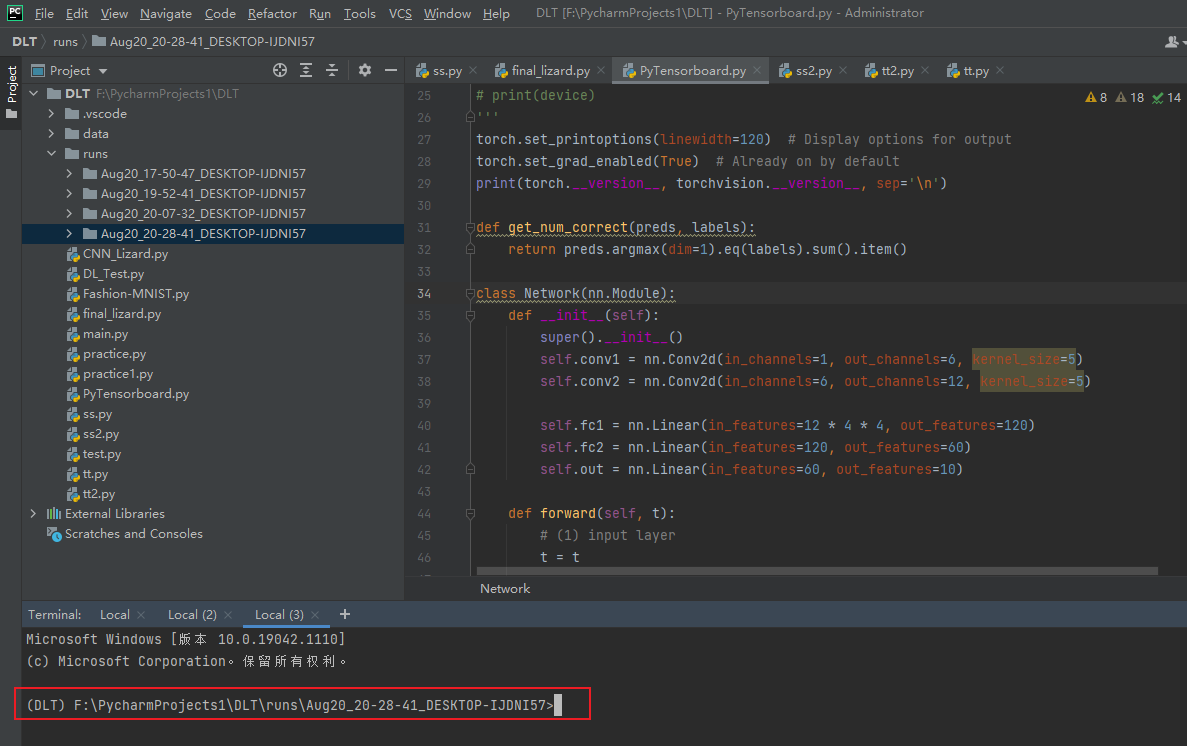
打开后如下图所示:

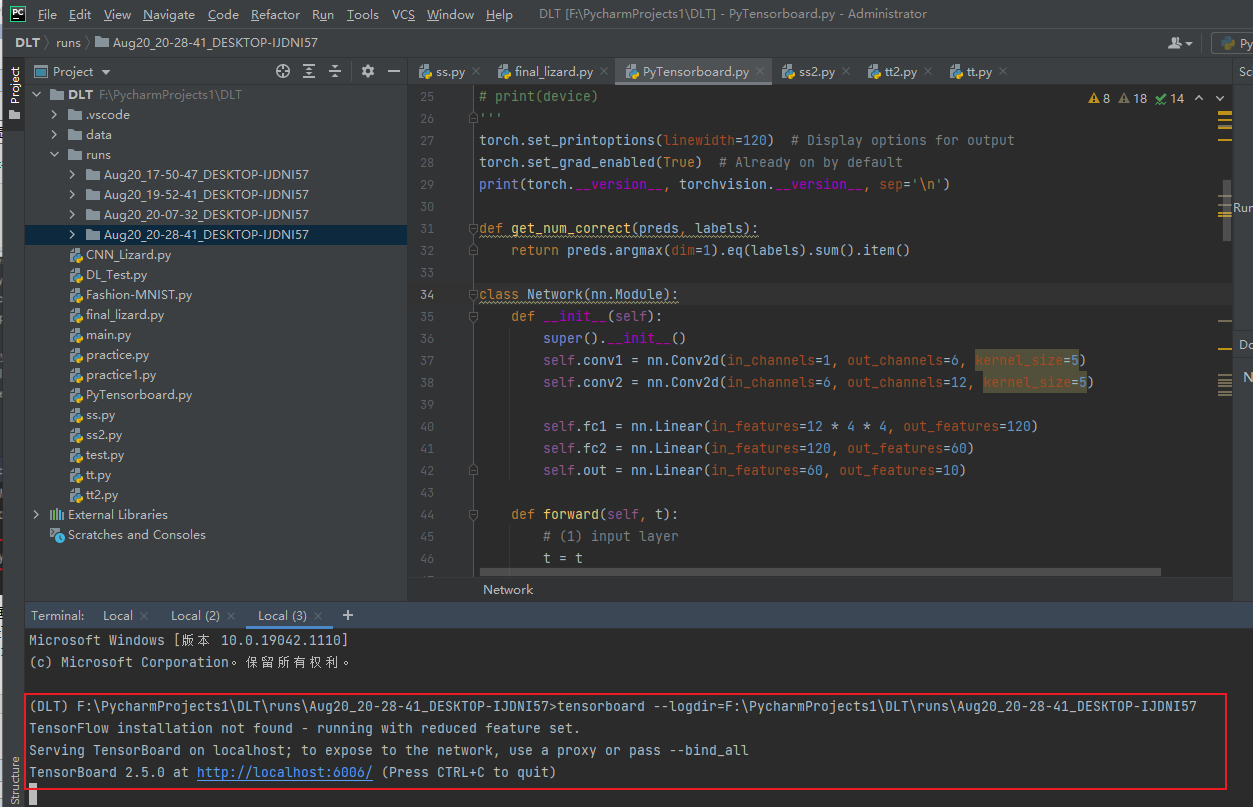
然后再再上图红框右边输入:tensorboard --logdir=日志文件所在的绝对路径
日志文件绝对路径可以直接在runs文件夹右击 有一个copy path 即可
回车后出现一个网址,点击就可以看到tensorboard图:

Win10 pycharm中显示PyTorch tensorboard图
原文:https://www.cnblogs.com/Li-JT/p/15168086.html