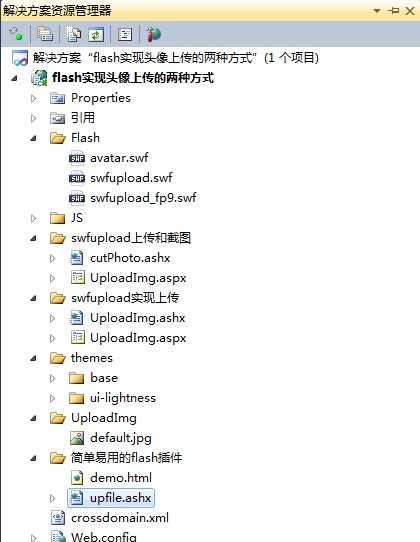
SWFUpload是一个客户端文件上传工具,最初由Vinterwebb.se开发,它通过整合Flash与JavaScript技术为WEB开发者提供了一个具有丰富功能继而超越传统<input type="file" />标签的文件上传模式。另一个Flash插件用起来比较简单,支持截图、本地摄像头拍照上传,但flash中有版权声明,不适合商业开发。这是官网地址:http://www.hdfu.net/
关于SWFUpload的介绍,可以查看百度百科,博客园中也有SWFUpload2.5的中文翻译文档。
http://www.cnblogs.com/youring2/archive/2012/07/13/2590010.html
SWFUpload .Net安装包和官方Demo:
http://download.csdn.net/detail/qq14039056961/5246596
关于这两个插件的介绍,都可以通过以上网址了解,下面提供三个Demo介绍插件的使用。
Demo下载http://pan.baidu.com/share/link?shareid=445745&uk=3627406265
一、swfupload实现上传:
效果图:
网盘下载文件解压后,SWFUpload_v250_beta_3_samples\SWFUpload_v250_beta_3_samples\demos\applicationdemo.net路径中有一个Default.aspx文件。我们可以拷贝里面的代码,复制到我们新建的UploadImg.aspx文件中。
注意事项:
1、文件引用:
<script src="../JS/handlers.js" type="text/javascript"></script>
<script src="../JS/jquery-1.8.2.js" type="text/javascript"></script>
<script src="../JS/swfupload.js" type="text/javascript"></script>
将解压后整理好的swfuploadv250.Net开发包文件夹中的两个JS以及Jquery复制到项目中,注意引用路径
2、swfu=new SWFUpload{}中,我们需要修改upload_url(执行上传操作的一般处理程序或aspx),比如我修改为upload_url: "UploadImg.ashx"
3、修改flash插件的引用路径:
// Flash Settings
 //在这里修改flash插件的引用路径
 flash_url: "/Flash/swfupload.swf", // Relative to this file
 flash9_url: "/Flash/swfupload_FP9.swf", // Relative to this file
4、上传成功后,我们希望通过得到后台返回的路径,显示刚上传的图片,添加一个ShowData方法,并将这个方法绑定到 upload_success_handler中。修改为upload_success_handler: ShowData,
//上传成功后执行,将img标签的src设置为返回的图片保存好的路径
        function ShowData(file, serverData) {
            $("#imgSrc").attr("src", serverData);
        };
5、其他的一些关于图片类型限制大小限制怎么修改,可以查看官方文档

 UploadImg.aspx
 1 <!DOCTYPE html PUBLIC "-//W3C//DTD XHTML 1.0 Transitional//EN" "http://www.w3.org/TR/xhtml1/DTD/xhtml1-transitional.dtd">
 2 <html xmlns="http://www.w3.org/1999/xhtml">
 3 <head>
 4     <title></title>
 5     <script src="../JS/handlers.js" type="text/javascript"></script>
 6     <script src="../JS/jquery-1.8.2.js" type="text/javascript"></script>
 7     <script src="../JS/swfupload.js" type="text/javascript"></script>
 8     <script type="text/javascript">
 9         var swfu;
10         window.onload = function () {
11             swfu = new SWFUpload({
12                 // Backend Settings
13                 //修改执行上传操作的文件(aspx或ashx)
14                 upload_url: "UploadImg.ashx",
15                 post_params: {
16                     "ASPSESSID": "<%=Session.SessionID %>"
17                 },
18
19                 // File Upload Settings
20                 file_size_limit: "2 MB",
21                 file_types: "*.jpg",
22                 file_types_description: "JPG Images",
23                 file_upload_limit: 0,    // Zero means unlimited
24
25                 // Event Handler Settings - these functions as defined in Handlers.js
26                 //  The handlers are not part of SWFUpload but are part of my website and control how
27                 //  my website reacts to the SWFUpload events.
28                 swfupload_preload_handler: preLoad,
29                 swfupload_load_failed_handler: loadFailed,
30                 file_queue_error_handler: fileQueueError,
31                 file_dialog_complete_handler: fileDialogComplete,
32                 upload_progress_handler: uploadProgress,
33                 upload_error_handler: uploadError,
34                 //指定图片上传成功后执行的方法为我们自己定义的ShowData
35                 upload_success_handler: ShowData,
36                 upload_complete_handler: uploadComplete,
37
38                 // Button settings
39                 button_image_url: "images/XPButtonNoText_160x22.png",
40                 button_placeholder_id: "spanButtonPlaceholder",
41                 button_width: 160,
42                 button_height: 22,
43                 button_text: ‘<span class="button">Select Images <span class="buttonSmall">(2 MB Max)</span></span>‘,
44                 button_text_style: ‘.button { font-family: Helvetica, Arial, sans-serif; font-size: 14pt; } .buttonSmall { font-size: 10pt; }‘,
45                 button_text_top_padding: 1,
46                 button_text_left_padding: 5,
47
48                 // Flash Settings
49                 //在这里修改flash插件的引用路径
50                 flash_url: "/Flash/swfupload.swf", // Relative to this file
51                 flash9_url: "/Flash/swfupload_FP9.swf", // Relative to this file
52
53                 custom_settings: {
54                     upload_target: "divFileProgressContainer"
55                 },
56
57                 // Debug Settings
58                 debug: false
59             });
60         }
61         //上传成功后执行,将img标签的src设置为返回的图片保存好的路径
62         function ShowData(file, serverData) {
63             $("#imgSrc").attr("src", serverData);
64         };
65     </script>
66
67
68 </head>
69 <body>
70     <form>
71         <div id="content">
72             <div id="swfu_container" style="margin: 0px 10px;">
73                 <div>
74                     <span id="spanButtonPlaceholder"></span>
75                 </div>
76                 <div id="divFileProgressContainer" style="height: 75px;"></div>
77                 <div id="thumbnails"></div>
78             </div>
79         </div>
80         <img id="imgSrc" />
81
82     </form>
83
84 </body>
85 </html>
前台的工作已经完成,然后我们需要写一个后台,接收上传的图片,保存到文件夹中。这里我建的是一个一般处理程序UploadImg.ashx。
UploadImg.ashx
 1 public void ProcessRequest(HttpContext context)
 2         {
 3             context.Response.ContentType = "text/plain";
 4             HttpPostedFile file = context.Request.Files["Filedata"];//接受文件
 5             string fileName = Path.GetFileName(file.FileName);//获取文件名
 6             string fileExt = Path.GetExtension(fileName);//获取文件类型
 7             if (fileExt.Equals(".jpg", StringComparison.InvariantCultureIgnoreCase))
 8             {
 9                 //构建一个路径,网站根目录/UploadImg/年份/月/
10                 string dircStr = "/UploadImg/" + DateTime.Now.Year + "/" + DateTime.Now.Month + "/";
11                 //在服务器的物理路径创建一个文件夹,不能写Path.GetDirectoryName(dircStr),这样获取到的是虚拟路径
12                 Directory.CreateDirectory(Path.GetDirectoryName(context.Server.MapPath(dircStr)));
13                 //为避免图片重名,使用guid重命名图片
14                 string fileLoadName = dircStr + Guid.NewGuid().ToString() + fileExt;
15                 //保存图片到服务器的物理路径
16                 file.SaveAs(context.Server.MapPath(fileLoadName));
17                 //响应报文返回路径名,已便于前台显示
18                 context.Response.Write(fileLoadName);
19
20             }
21
22         }
这样子我们的前后台都完成了。总结一下实现思路:前台:根据提供的demo,添加需要用到的JS、Flash,修改执行上传操作的文件路径、JS的引用路径、Flash的引用路径,添加上传成功后的方法(上传成功后执行,将img标签的src设置为返回的图片保存好的路径),并绑定到upload_success_handler中。后台:使用context.Request.Files["Filedata"]接收文件,判断文件类型后,根据服务器物理路径创建一个文件夹,为避免重名,使用Guid重命名后,保存图片,并在响应报文中返回路径名。二、我们刚才只是实现了简单的上传功能,下面我们用GDI+做一下截图功能。效果图:
1、在刚才的基础上,添加一个DIV divContent,将截图前图片设置为该DIV的背景。在该DIV中,添加一个小DIV divCut,用于选择截图范围。

<div id="divContent" style="width:300px;height:300px">
      <div id="divCut" style="width:100px;height:100px;border:solid 1px red"></div>
</div>
2、divContent的宽高是可以根据上传图片的大小动态确定的,而图片的宽高我们可以通过后台获取,获取后,在前台设置即可。
var d;//保存上传成功图片的路径信息
        function ShowData(file, serverData) {
            d = serverData.split(":");
            if (d[0] == "ok") {
                $("#divContent").css("backgroundImage","url("+d[1]+")").css("width",d[2]+"px").css("height",d[3]+"px");
            }
        };
2、我们希望小DIV能够移动并调整大小,方便我们选择截图范围,这时候我们可以使用JQueryUI来实现。JqueryUI的安装包请另行下载。使用JqueryUI前,我们需要引入jquery.ui.all.css和jquery-ui-1.8.2.custom.min.js。这里我们用到两个方法draggable移动层,resizable调整层大小。代码只有一句:
$("#divCut").draggable({ containment: ‘parent‘ }).resizable({ containment: ‘#divContent‘ });
3、这时候我们发现可以移动层和调整层大小了,但这并不是对图片做截图操作,我们希望根据divCut和divContent的位置,确定所选截取图片的位置,将这些信息返回到后台,通过GDI+截图。这里我们可以在截图按钮事件中添加一个方法,异步将位置信息返回后台:
$("#btnCut").click(function () {
                var y = $("#divCut").offset().top - $("#divContent").offset().top;
                var x = $("#divCut").offset().top - $("#divContent").offset().top;
                var width = $("#divCut").width();
                var height = $("#divCut").height();
                $.post("cutPhoto.ashx", { "action": "cut", "x": parseInt(x), "y": parseInt(y), "width": parseInt(width), "height": parseInt(height), "imgSrc": d[1] }, function (data) {
                    $("#imgSrc").attr("src",data);
                });
            });
4、这样前台的事情就做好了,下面我们看一下后台该怎么写:
后台cutPhoto.ashx需要处理两个工作,利用SWFUpload插件点击上传按钮时,地址栏参数action设为up,执行上传操作,并返回文件名、宽高,用于设置DivContent的大小和背景。
if (action == "up")//表示上传
            {
                HttpPostedFile file = context.Request.Files["Filedata"];//接收文件.
                string fileName = Path.GetFileName(file.FileName);//获取文件名。
                string fileExt = Path.GetExtension(fileName);//获取文件类型.
                if (fileExt.Equals(".jpg",StringComparison.InvariantCultureIgnoreCase))
                {
                    using (Image img = Image.FromStream(file.InputStream))//根据上传的文件创建一个Image.
                    {
                        file.SaveAs(context.Server.MapPath("/UploadImg/" + fileName));
                        context.Response.Write("ok:/UploadImg/" + fileName + ":" + img.Width + ":" + img.Height);
                    }
                }
            }
在点击截图按钮时,异步提交的地址参数action设为cut,执行图片截取操作,并返回图片路径
else if (action == "cut")//头像截取
            {
                int x = Convert.ToInt32(context.Request.Form["x"]);
                int y = Convert.ToInt32(context.Request.Form["y"]);
                int width = Convert.ToInt32(context.Request.Form["width"]);
                int height = Convert.ToInt32(context.Request.Form["height"]);
                string imgSrc = context.Request.Form["imgSrc"];//获取上传成功的图片路径
                //根据传递过来的范围,将该范围的图片画到画布上,将画布保存。
                using (Bitmap map = new Bitmap(width, height))
                {
                    using (Graphics g = Graphics.FromImage(map))//为画布创建画笔.
                    {
                        using (Image img = Image.FromFile(context.Server.MapPath(imgSrc)))//创建img
                        {
                            //将图片画到画布上
                            //第一:对哪张图片进行操作
                            //二:画多么大
                            //三:画哪部分
                            g.DrawImage(img, new Rectangle(0, 0, width, height), new Rectangle(x, y, width, height), GraphicsUnit.Pixel);
                            string newfile = Guid.NewGuid().ToString();
                            map.Save(context.Server.MapPath("/UploadImg/" + newfile + ".jpg"));//将画布上的图片按照GUID命名保存
                            context.Response.Write("/UploadImg/" + newfile + ".jpg");

                        }
                    }
                }

            }
到此我们利用SWFUpload做头像截图上传就完成了。
三、SWFUpload自定义性很强,非常适合做上传操作,但有时候我们只也可以用一些做好的f更简单的falsh完成这一功能。
下面我们就用一个比较简单的插件,效果如下

学习一个插件,我们可以先熟悉它提供的Demo。
1、Demo中,avatar.swf是执行上传的flash文件,default.jpg是默认显示的图片,demo.html是demo,可以直接复制里面的代码,upfile.aspx是执行上传的后台文件,其实我们可以用一般处理程序代替,没必要写aspx,xml的实际作用不了解无需修改。
2、demo.html中,有两个层,altContent存放flash,里面的东西最好不要修改,我们只需修改里面引用flash的路径及默认图片,avatar_priview用于显示上传成功后的图片,可以删除。JS中uploadevent上传成功后执行,status表示响应报文值,返回1则表示成功,执行
var time = new Date().getTime();
        document.getElementById(‘avatar_priview‘).innerHTML = "头像1 : <img src=‘1.png?" + time + "‘/> <br/> 头像2: <img src=‘2.png?" + time + "‘/><br/> 头像3: <img src=‘3.png?" + time + "‘/>" ;
这段代码只是用于显示上传成功后的图片,可以删除。我修改后的demo.html.
demo.html
 1 <!DOCTYPE html PUBLIC "-//W3C//DTD XHTML 1.0 Strict//EN" "http://www.w3.org/TR/xhtml1/DTD/xhtml1-strict.dtd">
 2 <html xmlns="http://www.w3.org/1999/xhtml" lang="en" xml:lang="en">
 3  <head>
 4   <title>flash上传头像组件演示</title>
 5   <meta http-equiv="Content-Type" content="text/html; charset=utf-8" />
 6   <meta name="Keywords" content="flash头像上传组件,仿新浪微博头像上传组件,头像图片剪裁" />
 7   <meta name="Description" content="flash 上传头像,用户体验好,头像剪裁,预览组件" />
 8   <style type="text/css" media="screen">
 9   html, body { height:100%; background-color: #ffffff;}
10   #flashContent { width:100%; height:100%; }
11   </style>
12
13   <script type="text/javascript">
14    function uploadevent(status){
15     //alert(status);
16         status += ‘‘;
17      switch(status){
18      case ‘1‘:
19          var time = new Date().getTime();
20         //这里用于显示刚上传的图片,但图片地址是固定的,不是后天接收到的路径
21         document.getElementById(‘avatar_priview‘).innerHTML = "头像1 : <img src=‘1.png?" + time + "‘/> <br/> 头像2: <img src=‘2.png?" + time + "‘/><br/> 头像3: <img src=‘3.png?" + time + "‘/>" ;
22
23     break;
24      break;
25      case ‘-1‘:
26       window.location.reload();
27      break;
28      default:
29      window.location.reload();
30     }
31    }
32   </script>
33  </head>
34  <body>
35   <div id="altContent">
36
37
38 <OBJECT classid="clsid:D27CDB6E-AE6D-11cf-96B8-444553540000"
39 codebase="http://download.macromedia.com/pub/shockwave/cabs/flash/swflash.cab#version=6,0,40,0"
40 WIDTH="650" HEIGHT="450" id="myMovieName">
41 <!---这里修改flash路径-->
42 <PARAM NAME=movie VALUE="/Flash/avatar.swf">
43 <PARAM NAME=quality VALUE=high>
44 <PARAM NAME=bgcolor VALUE=#FFFFFF>
45 <!----./default.jpg修改默认图片路径,=./upfile.aspx修改后台执行页面的路径------------->
46 <param name="flashvars" value="imgUrl=/UploadImg/default.jpg&uploadUrl=upfile.ashx&uploadSrc=false&pSize=162|162|48|48|20|20" />
47 <!----./default.jpg修改默认图片路径,=./upfile.aspx修改后台执行页面的路径------------->
48 <!---这里修改flash路径-->
49 <EMBED src="/Flash/avatar.swf" quality=high bgcolor=#FFFFFF WIDTH="650" HEIGHT="450" wmode="transparent" flashVars="imgUrl=/UploadImg/default.jpg&uploadUrl=upfile.ashx&uploadSrc=false&pSize=162|162|48|48|20|20"
50 NAME="myMovieName" ALIGN="" TYPE="application/x-shockwave-flash" allowScriptAccess="always"
51 PLUGINSPAGE="http://www.macromedia.com/go/getflashplayer">
52 </EMBED>
53 </OBJECT>
54
55
56   </div>
57   <!--这个div用于演示刚上传的图片,可以删除 --->
58   <div id="avatar_priview"></div>
59
60 </body>
61 </html>
我们大概了解了前台做了什么操作,下面我们看一下后台。
后台很简单,获取原图和修改大小后的三张图片:
String pic = Request.Form["pic"];
String pic1 = Request.Form["pic1"];
String pic2 = Request.Form["pic2"];
String pic3 = Request.Form["pic3"];
并通过File保存,当然,我们如果只需要一张图片,可以删除多余代码,也可以修改保存图片的地址。有了图片的地址,我们可以直接在这里将图片地址保存到数据库中。
这里要注意的是,返回响应报文
Response.Write("{\"status\":1}");是不能修改的,如果改为其他值,比如图片路径,那么后台执行上传是可以成功的,但前台无法响应上传成功,不能弹出上传成功的框。如果我们需要把后台处理后的路径返回前台,可以用Session或静态变量在后台保存值。
upfile.ashx
 1 public void ProcessRequest(HttpContext context)
 2         {
 3             String pic = context.Request.Form["pic"];
 4             String pic1 = context.Request.Form["pic1"];
 5             String pic2 = context.Request.Form["pic2"];
 6             String pic3 = context.Request.Form["pic3"];
 7
 8             //原图
 9             if (pic.Length == 0)
10             {
11             }
12             else
13             {
14                 byte[] bytes = Convert.FromBase64String(pic);  //将2进制编码转换为8位无符号整数数组
15
16                 string url = "./src.png";
17                 FileStream fs = new FileStream(context.Server.MapPath(url), System.IO.FileMode.Create);
18                 fs.Write(bytes, 0, bytes.Length);
19                 fs.Close();
20             }
21
22             byte[] bytes1 = Convert.FromBase64String(pic1);  //将2进制编码转换为8位无符号整数数组.
23             byte[] bytes2 = Convert.FromBase64String(pic2);  //将2进制编码转换为8位无符号整数数组.
24             byte[] bytes3 = Convert.FromBase64String(pic3);  //将2进制编码转换为8位无符号整数数组.
25
26
27
28             //图1,
29             string url1 = "./1.png";//需要修改图片保存地址,否则每次都是1.png,第二次会覆盖,为避免重名,可以使用guid:string fileLoadName =Guid.NewGuid().ToString() + ".png";
30             FileStream fs1 = new FileStream(context.Server.MapPath(url1), System.IO.FileMode.Create);
31             fs1.Write(bytes1, 0, bytes1.Length);
32             fs1.Close();
33
34             //图2
35             string url2 = "./2.png";
36             FileStream fs2 = new FileStream(context.Server.MapPath(url2), System.IO.FileMode.Create);
37             fs2.Write(bytes2, 0, bytes2.Length);
38             fs2.Close();
39
40             //图3
41             string url3 = "./3.png";
42             FileStream fs3 = new FileStream(context.Server.MapPath(url3), System.IO.FileMode.Create);
43             fs3.Write(bytes3, 0, bytes3.Length);
44             fs3.Close();
45             //这里响应的是1,前台接收到json数组{status:1},如果返回图片地址,如改为context.Response.Write("{\"status\":"+url1+"}");则前台页面无法执行uploadevent方法,只能按固定格式{\"status\":1}。
46             //如果想返回图片路径,可以用静态类或session等方式。
47             context.Response.Write("{\"status\":1}");
48
头像截图上传两种方式(SWFUpload、一个简单易用的flash插件)
原文:http://www.cnblogs.com/redasurc/p/3564155.html
