心血来潮就想自己搭建一个框架,我使用的是MyEclipse2013,单击右键New->Other->Maven Project,如下所示:
接着点击"Next",选择默认,出现如下:
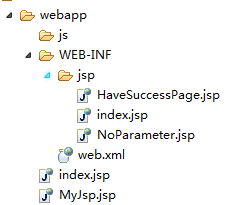
选择"maven-archetype-webapp",接着点击"Next",填写:Group Id、Artifact Id,选择0.0.1-SNAPSHOT项的Version,填写完成后再点击"Finish",至此创建Maven项目已完成。我的文件目录是:

但是该项目中的web.xml文件的头文件出现的声明是:
<!DOCTYPE web-app PUBLIC
 "-//Sun Microsystems, Inc.//DTD Web Application 2.3//EN"
 "http://java.sun.com/dtd/web-app_2_3.dtd" >
强烈不建议使用2.3,应使用2.4、3.0等,我使用的声明就是3.0的:
<?xml version="1.0" encoding="UTF-8"?>
<web-app xmlns="http://java.sun.com/xml/ns/javaee"
    xmlns:xsi="http://www.w3.org/2001/XMLSchema-instance"
    xsi:schemaLocation="http://java.sun.com/xml/ns/javaee http://java.sun.com/xml/ns/javaee/web-app_3_0.xsd" version="3.0">
web.xml的DOCTYPE声明告诉服务器使用Servlet规范的版本,如果是2.3,JSP页面极大可能无法使用EL取到Cntroller层返回的数据。
配置pom.xml文件,Spring整合MyBatis,pom.xml的配置如下:
<project xmlns="http://maven.apache.org/POM/4.0.0" xmlns:xsi="http://www.w3.org/2001/XMLSchema-instance"
  xsi:schemaLocation="http://maven.apache.org/POM/4.0.0 http://maven.apache.org/maven-v4_0_0.xsd">
  <modelVersion>4.0.0</modelVersion>
  <groupId>com.jianming.buildIntegrationFramework</groupId>
  <artifactId>UseSpringIntegrationMyBatis</artifactId>
  <packaging>war</packaging>
  <version>0.0.1-SNAPSHOT</version>
  <name>UseSpringIntegrationMyBatis</name>
  <url>http://maven.apache.org</url>
  <dependencies>
    <dependency>
      <groupId>junit</groupId>
      <artifactId>junit</artifactId>
      <version>3.8.1</version>
      <scope>test</scope>
    </dependency>

    <!-- MyBatis-Spring -->
    <dependency>
      <groupId>org.mybatis</groupId>
      <artifactId>mybatis-spring</artifactId>
      <version>1.2.2</version>
      <scope>compile</scope>
    </dependency>

    <!-- MyBatis -->
    <dependency>
      <groupId>org.mybatis</groupId>
      <artifactId>mybatis</artifactId>
      <version>3.2.8</version>
      <scope>compile</scope>
    </dependency>

    <!-- Spring -->
    <dependency>
        <groupId>org.springframework</groupId>
        <artifactId>spring-core</artifactId>
        <version>4.1.2.RELEASE</version>
    </dependency>
    <dependency>
        <groupId>org.springframework</groupId>
        <artifactId>spring-context</artifactId>
        <version>4.1.2.RELEASE</version>
        <scope>runtime</scope>
    </dependency>
    <dependency>
       <groupId>org.springframework</groupId>
       <artifactId>spring-web</artifactId>
       <version>4.1.2.RELEASE</version>
    </dependency>
    <dependency>
       <groupId>org.springframework</groupId>
       <artifactId>spring-orm</artifactId>
       <version>4.1.2.RELEASE</version>
    </dependency>
    <dependency>
       <groupId>org.springframework</groupId>
       <artifactId>spring-jdbc</artifactId>
       <version>4.1.2.RELEASE</version>
    </dependency>
    <dependency>
       <groupId>org.springframework</groupId>
       <artifactId>spring-tx</artifactId>
       <version>4.1.2.RELEASE</version>
    </dependency>
    <dependency>
       <groupId>org.springframework</groupId>
       <artifactId>spring-webmvc</artifactId>
       <version>4.1.2.RELEASE</version>
    </dependency>

    <!-- DBCP -->
    <dependency>
        <groupId>org.apache.commons</groupId>
        <artifactId>commons-dbcp2</artifactId>
        <version>2.0.1</version>
        <scope>compile</scope>
    </dependency>
    <dependency>
        <groupId>commons-dbcp</groupId>
        <artifactId>commons-dbcp</artifactId>
        <version>20030825.184428</version>
        <scope>compile</scope>
    </dependency>

    <!-- commons-pool -->
    <dependency>
        <groupId>commons-pool</groupId>
        <artifactId>commons-pool</artifactId>
        <version>1.4</version>
    </dependency>

    <!-- mysql connector java -->
    <dependency>
        <groupId>mysql</groupId>
        <artifactId>mysql-connector-java</artifactId>
        <version>5.1.34</version>
        <scope>compile</scope>
    </dependency>

  </dependencies>


  <build>
    <finalName>UseSpringIntegrationMyBatis</finalName>
  </build>
</project>
接着配置web.xml文件,具体配置如下:
<?xml version="1.0" encoding="UTF-8"?>
<web-app xmlns="http://java.sun.com/xml/ns/javaee"
    xmlns:xsi="http://www.w3.org/2001/XMLSchema-instance"
    xsi:schemaLocation="http://java.sun.com/xml/ns/javaee http://java.sun.com/xml/ns/javaee/web-app_3_0.xsd" version="3.0">

  <display-name>UseSpringIntegrationMyBatis</display-name>

  <!-- 定义Spring监听器,加载Spring -->
  <listener>
     <listener-class>org.springframework.web.context.ContextLoaderListener</listener-class>
  </listener>
    <listener>
        <listener-class>org.springframework.web.context.request.RequestContextListener</listener-class>
    </listener>

  <!-- 指定Spring配置文件位置 -->
  <context-param>
      <param-name>contextConfigLocation</param-name>
      <param-value>classpath:spring/applicationContext.xml</param-value>
  </context-param>


  <!-- 配置Spring MVC -->
  <servlet>
      <servlet-name>dispatcherServlet</servlet-name>
      <servlet-class>org.springframework.web.servlet.DispatcherServlet</servlet-class>
      <init-param>
        <param-name>contextConfigLocation</param-name>
        <param-value>classpath:spring/mvcContext.xml</param-value>
    </init-param>
  </servlet>
  <servlet-mapping>
      <servlet-name>dispatcherServlet</servlet-name>
      <url-pattern>*.do</url-pattern>
  </servlet-mapping>

  <!-- 设置默认页面 -->
  <welcome-file-list>
      <welcome-file>MyJsp.jsp</welcome-file>
  </welcome-file-list>


  <!-- 解决乱码 -->
  <filter>
    <filter-name>encodingFilter</filter-name>
    <filter-class>org.springframework.web.filter.CharacterEncodingFilter</filter-class>
    <init-param>
        <param-name>encoding</param-name>
        <param-value>UTF-8</param-value>
    </init-param>
    <init-param>
        <param-name>forceEncoding</param-name>
        <param-value>true</param-value>
    </init-param>
  </filter>
  <filter-mapping>
    <filter-name>encodingFilter</filter-name>
    <url-pattern>/*</url-pattern>
  </filter-mapping>

</web-app>
接着配置applicatiopnContext.xml文件,具体如下:
<?xml version="1.0" encoding="UTF-8"?>
<beans xmlns="http://www.springframework.org/schema/beans"
    xmlns:mvc="http://www.springframework.org/schema/mvc"
    xmlns:xsi="http://www.w3.org/2001/XMLSchema-instance"
    xmlns:context="http://www.springframework.org/schema/context"
    xsi:schemaLocation="http://www.springframework.org/schema/beans
        http://www.springframework.org/schema/beans/spring-beans.xsd
        http://www.springframework.org/schema/mvc
        http://www.springframework.org/schema/mvc/spring-mvc.xsd
        http://www.springframework.org/schema/context
        http://www.springframework.org/schema/context/spring-context.xsd">

    <bean class="org.springframework.beans.factory.config.PropertyPlaceholderConfigurer">
        <property name="locations" value="classpath:config.properties"/>
    </bean>

    <bean id="dataSource" destroy-method="close" class="org.apache.commons.dbcp.BasicDataSource">
        <property name="driverClassName" value="${jdbc.driverClassName}"/>
        <property name="url" value="${jdbc.url}"/>
        <property name="username" value="${jdbc.username}"/>
        <property name="password" value="${jdbc.password}"/>
    </bean>

    <bean id="sqlSessionFactory" class="org.mybatis.spring.SqlSessionFactoryBean">
      <property name="configLocation" value="classpath:mybaits/mybatisConfig.xml"></property>
      <property name="dataSource" ref="dataSource" />
    </bean>

    <bean id="vipInfoDao" class="org.mybatis.spring.mapper.MapperFactoryBean">
      <property name="mapperInterface" value="com.jianming.dao.IVipInfoDao" />
      <property name="sqlSessionFactory" ref="sqlSessionFactory" />
    </bean>

    <bean id="vipInfoService" class="com.jianming.service.impl.VipInfoService">
        <property name="vipInfoDao" ref="vipInfoDao"></property>
    </bean>

</beans>
现在配置mvcContext.xml,具体如下:
<?xml version="1.0" encoding="UTF-8"?>
<beans xmlns="http://www.springframework.org/schema/beans"
    xmlns:mvc="http://www.springframework.org/schema/mvc"
    xmlns:xsi="http://www.w3.org/2001/XMLSchema-instance"
    xmlns:context="http://www.springframework.org/schema/context"
    xsi:schemaLocation="http://www.springframework.org/schema/beans
        http://www.springframework.org/schema/beans/spring-beans.xsd
        http://www.springframework.org/schema/mvc
        http://www.springframework.org/schema/mvc/spring-mvc.xsd
        http://www.springframework.org/schema/context
        http://www.springframework.org/schema/context/spring-context.xsd">
    <context:component-scan base-package="com.jianming.*"></context:component-scan>
    <mvc:annotation-driven/>
    <context:annotation-config/>
    <mvc:default-servlet-handler/>

    <bean id="jspViewResolver" class="org.springframework.web.servlet.view.InternalResourceViewResolver">
        <property name="contentType" value="text/html;charset=UTF-8"/>
        <property name="prefix" value="/WEB-INF/jsp/"/>
        <property name="suffix" value=".jsp"/>
    </bean>

</beans>
创建实体类TblVipInfo类,具体代码如下:
package com.jianming.domain;

import java.util.Date;

public class TblVipInfo {

    private long id;

    private String vipName;

    private String vipPassword;

    private Date createTime;

    private Date updateTime;

    public long getId() {
        return id;
    }

    public String getVipName() {
        return vipName;
    }

    public String getVipPassword() {
        return vipPassword;
    }

    public Date getCreateTime() {
        return createTime;
    }

    public Date getUpdateTime() {
        return updateTime;
    }

    public void setId(long id) {
        this.id = id;
    }

    public void setVipName(String vipName) {
        this.vipName = vipName;
    }

    public void setVipPassword(String vipPassword) {
        this.vipPassword = vipPassword;
    }

    public void setCreateTime(Date createTime) {
        this.createTime = createTime;
    }

    public void setUpdateTime(Date updateTime) {
        this.updateTime = updateTime;
    }
}
编写IVipInfoDao接口,具体如下:
package com.jianming.dao;

import java.util.Map;

public interface IVipInfoDao {

    public Map<String, Object> selectVipInfo(String vip_name);

    public int countAllVipInfo();

    public void deleteVipInfo(long id);

}
配置mybatisConfig.xml文件,具体如下:
<?xml version="1.0" encoding="UTF-8" ?>
<!DOCTYPE configuration
  PUBLIC "-//mybatis.org//DTD Config 3.0//EN"
  "http://mybatis.org/dtd/mybatis-3-config.dtd">
<configuration>
  <typeAliases>
      <typeAlias type="com.jianming.domain.TblVipInfo" alias="TblVipInfo"/>
  </typeAliases>
  <mappers>
    <mapper resource="mybaits/mapping/TblVipInfo.ibt.xml"/>
  </mappers>
</configuration>
特别需要注意的地方:<configuration>标签的子标签必须按顺序。可以选中标签<configuration>,然后按“F2”键。出现如下约束,如图:

接着编写映射器TblVipInfo.ibt.xml文件,具体如下:
<?xml version="1.0" encoding="UTF-8" ?>
<!DOCTYPE mapper PUBLIC "-//mybatis.org//DTD Mapper 3.0//EN" "http://mybatis.org/dtd/mybatis-3-mapper.dtd">
<mapper namespace="com.jianming.dao.IVipInfoDao">

  <select id="countAllVipInfo" resultType="int">
    select count(*) from tbl_vip_info
  </select>

  <insert id="addVipInfo" parameterType="TblVipInfo">
      insert into tbl_vip_info(vip_name, vip_password, create_time, update_time) value(#{vipName}, #{vipPassword}, #{createTime}, #{updateTime})
  </insert>

  <update id="updateVipInfo" parameterType="TblVipInfo">
      update tbl_vip_info set vip_name=#{vipName},vip_password=#{vipPassword},create_time=#{createTime},update_time=#{updateTime} where id=#{id}
  </update>

  <delete id="deleteVipInfo" parameterType="long">
      delete from tbl_vip_info where id=#{id}
  </delete>

  <select id="selectVipInfo" parameterType="string" resultType="map">
      select * from tbl_vip_info where vip_name=#{vipName}
  </select>

</mapper>
现在开发Service层中的IVipInfoService接口,具体代码如下:
package com.jianming.service;

import java.util.Map;

public interface IVipInfoService {

    public Map<String, Object> doSelectOne(String vip_name);

    public int countAllVipInfo();

    public void deleteOneVipInfo(Long id);
}
接着编写实现IVipInfoService接口的实现类:
package com.jianming.service.impl;

import java.util.Map;

import com.jianming.dao.IVipInfoDao;
import com.jianming.service.IVipInfoService;

public class VipInfoService implements IVipInfoService{

    private  IVipInfoDao vipInfoDao;

    public IVipInfoDao getVipInfoDao() {
        return vipInfoDao;
    }

    public void setVipInfoDao(IVipInfoDao vipInfoDao) {
        this.vipInfoDao = vipInfoDao;
    }

    public Map<String, Object> doSelectOne(String vip_name) {
        Map<String, Object> map = vipInfoDao.selectVipInfo(vip_name);
        return map;
    }

    public int countAllVipInfo() {
        return vipInfoDao.countAllVipInfo();
    }

    public void deleteOneVipInfo(Long id) {
        vipInfoDao.deleteVipInfo(id);
    }

}
最后到控制层,编写控制层代码,创建VipInfoController类,具体代码如下:
package com.jianming.web;

import java.util.Map;

import org.springframework.beans.factory.annotation.Autowired;
import org.springframework.stereotype.Controller;
import org.springframework.ui.Model;
import org.springframework.web.bind.annotation.RequestMapping;

import com.jianming.service.IVipInfoService;

@Controller
public class VipInfoController {

    @Autowired
    private    IVipInfoService vipInfoService;

    @RequestMapping(value="/selectVipInfo")
    public String justTest(String vipName,Long id, Model model){
        if(vipName==null || id==null){
            return "NoParameter";
        }
        Map<String, Object> vipInfoMap = vipInfoService.doSelectOne(vipName);
        model.addAttribute("vip_name", vipName);
        model.addAttribute("countVipInfo", vipInfoService.countAllVipInfo());
        model.addAttribute("vipInfo", vipInfoMap);
        vipInfoService.deleteOneVipInfo(id);
        return "HaveSuccessPage";
    }

}
webapp下的目录下:
仅仅为了测试是否成功,就编写简单的页面经常测试,现在编写MyJsp.jsp,具体代码如下:
<%@ page language="java" import="java.util.*" pageEncoding="UTF-8"%>
<%
String path = request.getContextPath();
String basePath = request.getScheme()+"://"+request.getServerName()+":"+request.getServerPort()+path+"/";
%>

<!DOCTYPE HTML PUBLIC "-//W3C//DTD HTML 4.01 Transitional//EN">
<html>
  <head>
    <base href="<%=basePath%>">
    <title>My JSP ‘MyJsp.jsp‘ starting page</title>

    <meta http-equiv="Content-Type" content="text/html; charset=UTF-8" />
    <meta http-equiv="pragma" content="no-cache">
    <meta http-equiv="cache-control" content="no-cache">
    <meta http-equiv="expires" content="0">
    <meta http-equiv="keywords" content="keyword1,keyword2,keyword3">
    <meta http-equiv="description" content="This is my page">

  </head>

  <body>
      <form name="input" action="/UseSpringIntegrationMyBatis/selectVipInfo.do" method="post">
        Input VIP‘s name:
        <input type="text" name="vipName" /><br/>
        Delete :
        <input type="text" name="id" />
        <input type="submit" value="Submit" />
     </form>
  </body>
</html>
编写HaveSuccessPage.jsp,具体如下:
<%@ page language="java" import="java.util.*" pageEncoding="UTF-8"%>
<%
String path = request.getContextPath();
String basePath = request.getScheme()+"://"+request.getServerName()+":"+request.getServerPort()+path+"/";
%>

<!DOCTYPE html PUBLIC "-//W3C//DTD XHTML 1.0 Transitional//EN" "http://www.w3.org/TR/xhtml1/DTD/xhtml1-transitional.dtd">
<html xmlns="http://www.w3.org/1999/xhtml">
<head>
<meta http-equiv="Content-Type" content="text/html; charset=UTF-8" />
    <base href="<%=basePath%>">

    <title>My JSP ‘HaveSuccessPage.jsp‘ starting page</title>

    <meta http-equiv="pragma" content="no-cache">
    <meta http-equiv="cache-control" content="no-cache">
    <meta http-equiv="expires" content="0">
    <meta http-equiv="keywords" content="keyword1,keyword2,keyword3">
    <meta http-equiv="description" content="This is my page">
    <!--
    <link rel="stylesheet" type="text/css" href="styles.css">
    -->

  </head>

  <body>
    Success!传入过来的参数为:${vip_name}<br/><hr/>
           表tbl_vip_info中共有:${countVipInfo}条数据<br/><hr/>
          查询得到的数据的id是:${vipInfo.id}<br/><hr/>
    vip的名称是:${vipInfo[‘vip_name‘]}<br/><hr/>
    vip的密码是:${vipInfo[‘vip_password‘]}<br/><hr/>
  </body>
</html>
编写NoParameter.jsp,具体如下:
<%@ page language="java" import="java.util.*" pageEncoding="UTF-8"%>
<%
String path = request.getContextPath();
String basePath = request.getScheme()+"://"+request.getServerName()+":"+request.getServerPort()+path+"/";
%>

<!DOCTYPE HTML PUBLIC "-//W3C//DTD HTML 4.01 Transitional//EN">
<html>
  <head>
    <base href="<%=basePath%>">

    <title>My JSP ‘NoParameter.jsp‘ starting page</title>

    <meta http-equiv="pragma" content="no-cache">
    <meta http-equiv="cache-control" content="no-cache">
    <meta http-equiv="expires" content="0">
    <meta http-equiv="keywords" content="keyword1,keyword2,keyword3">
    <meta http-equiv="description" content="This is my page">
    <!--
    <link rel="stylesheet" type="text/css" href="styles.css">
    -->

  </head>

  <body>
        <h1>传入数据失败!</h1>
  </body>
</html>
使用Maven clean命令之后,出现:

如果立刻compile程序,

会立刻出一些错误如下:

解决办法也非常简单,就是必须Project->clean,如下:

clean之后,问题就会自动解决,我个人认为是MyEclipse自身的缓存引起的问题。然后就可以正常的使用compile命令,package命令亦正常。tomcat-maven-plugin非常好用,直接使用tomcat:run命令就能自动部署项目:

点击“Run”之后,运行如下:

访问http://localhost:8080/UseSpringIntegrationMyBatis/,出现如下页面:
填写信息,

数据库中的表的一些数据如下:

提交之后,出现:

刷新数据库发现编号为"201414"的数据被删除:

至此框架搭建OK,并通过测试。
原文:http://my.oschina.net/dengjianming/blog/354329