一、 打开安装好的虚拟机,因为上一篇我们未设置任何RHEL的安装源,所以它会如下图提示:
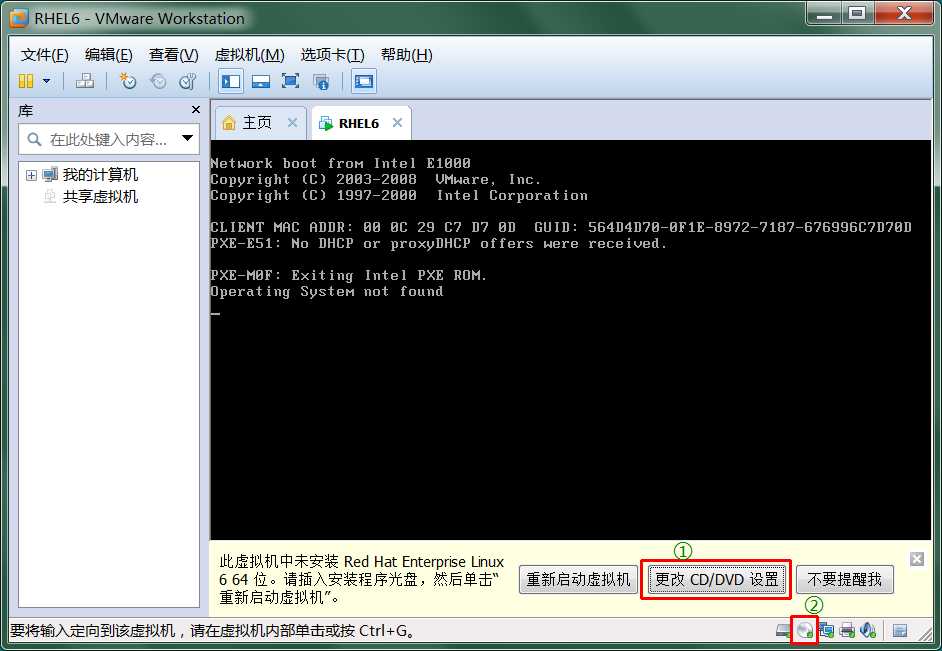
二、 图上标识为两种更改光盘设置的方法,物理或虚拟光盘皆可。
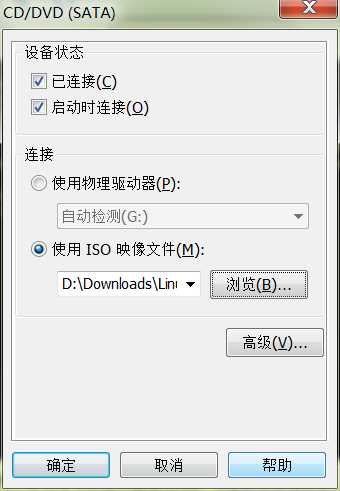
1. 选择①:
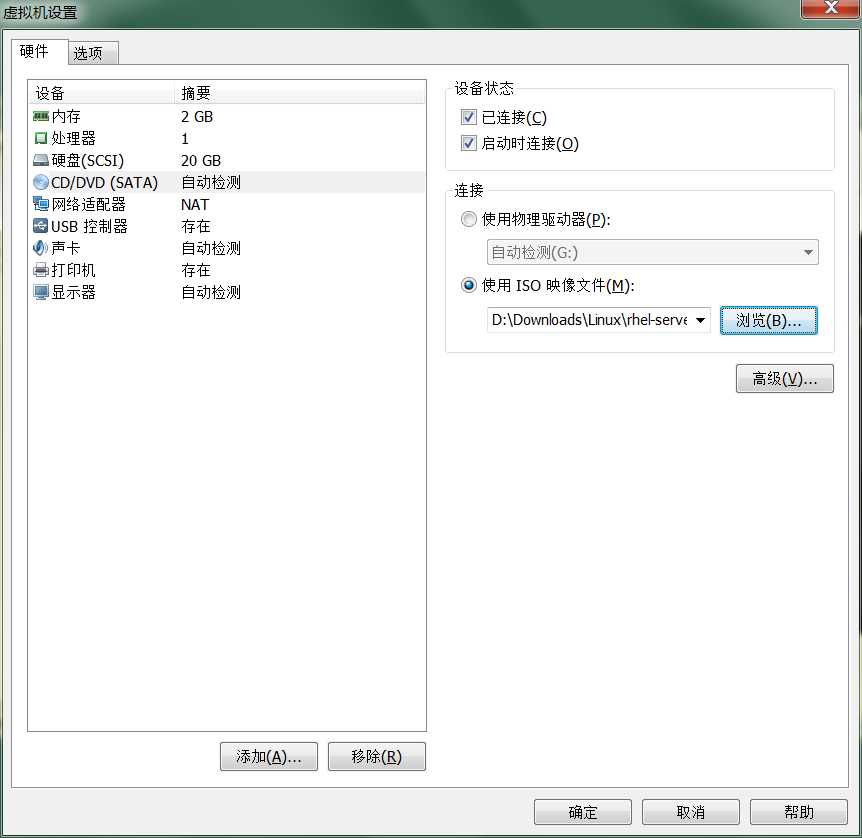
2. 选择②,点击设置...:
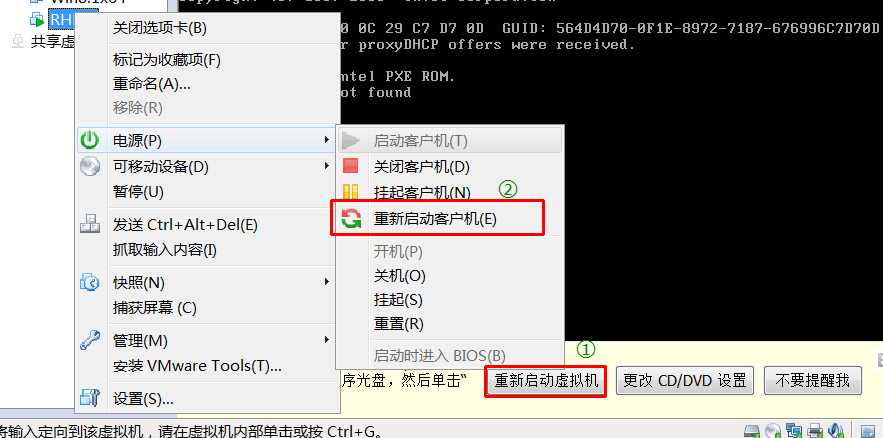
三、 设置好光盘后,重启虚拟机即可进入安装界面。
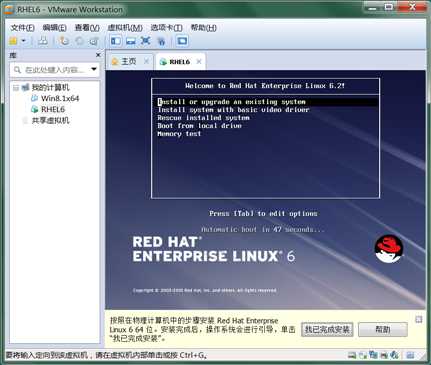
四、 进入安装界面,有五项选择,分别为:
1. Install or upgrade an existing system:安装或更新一个已经存在的系统。
2. Install system with basic video driver:使用最基本的显卡驱动来安装此操作系统(不会影响安装过程,但分辨率会比较低)。
3. Rescue installed system:进入救援模式。
4. Boot from local drive:从本地磁盘启动。
5. Memory test:内存测试。
这里我们选择第一个就可以。
五、加载完后。如果是用光盘安装,会出现下面的窗口。该项是用于检测光盘中是否有物理损坏或被注入病毒。
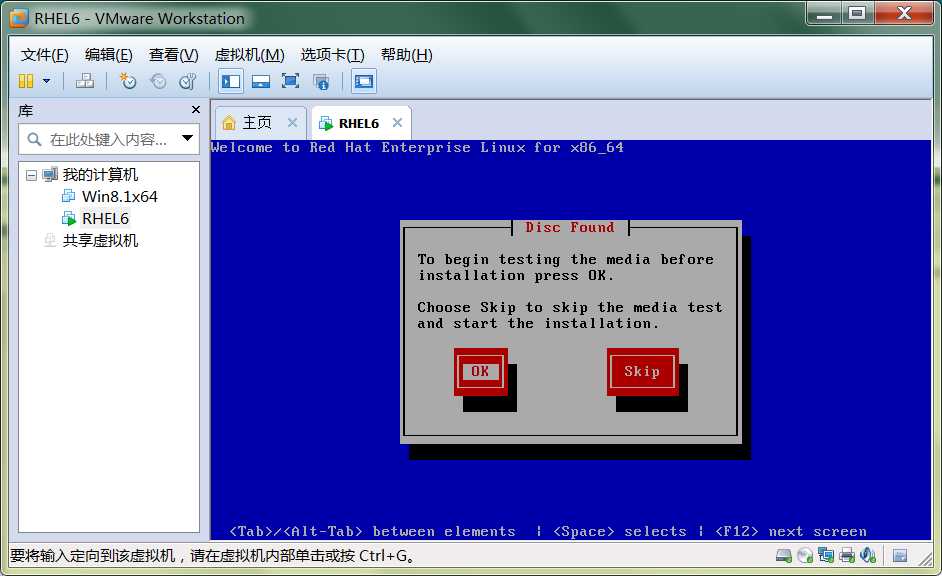
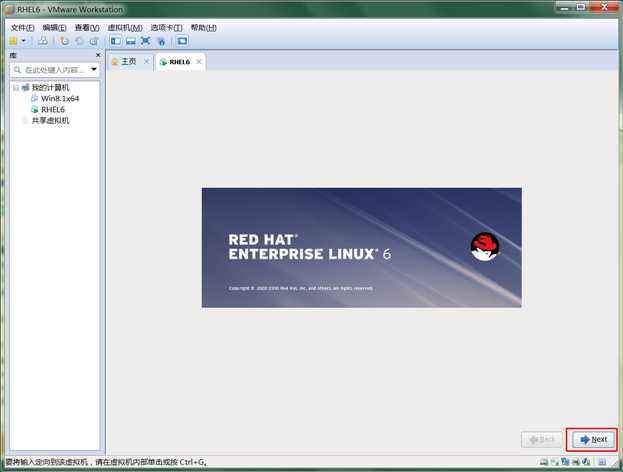
六、检测完或跳过,都会进入安装界面,直接点击Next。
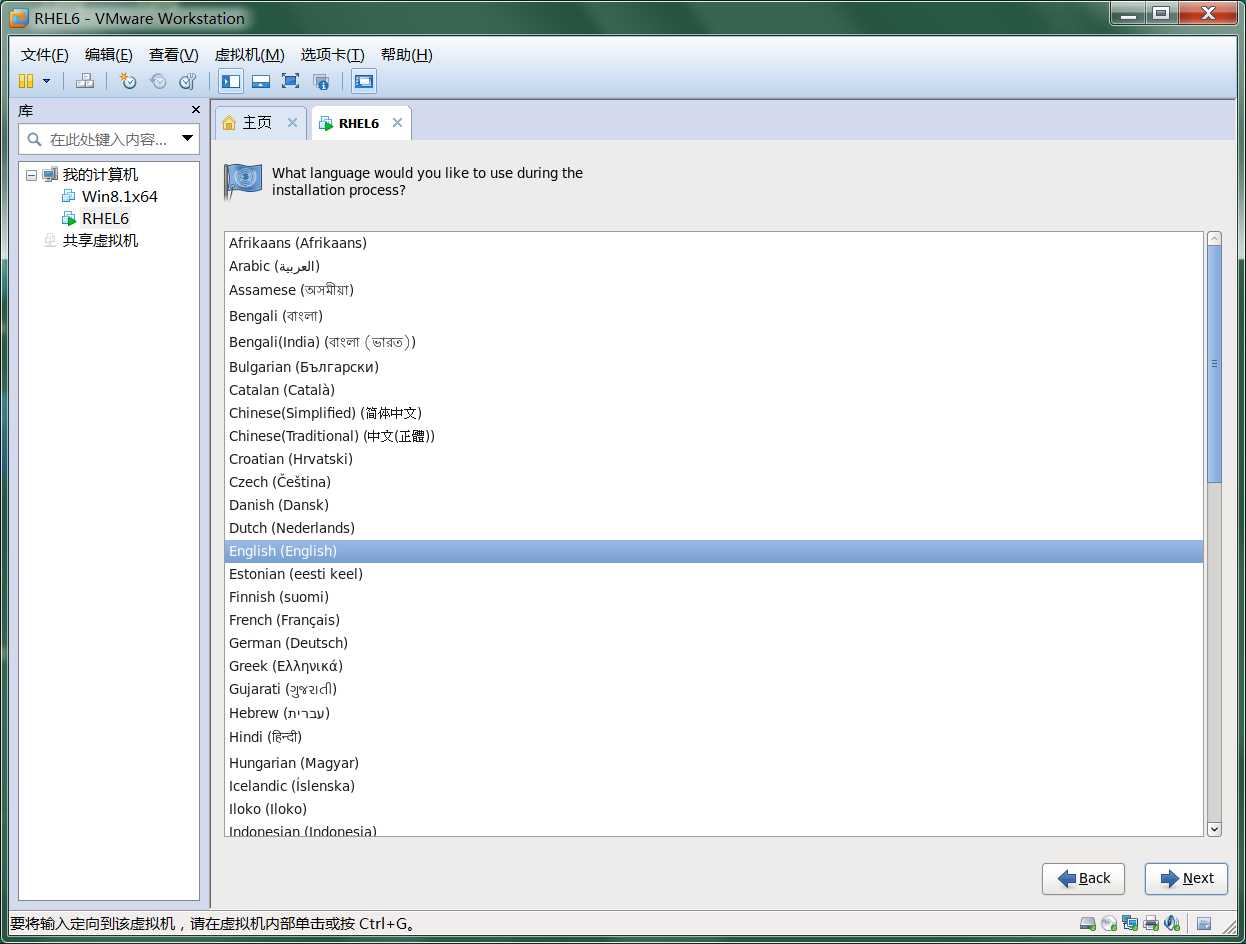
七、选择语言(建议还是选择英文的,万一报错了,查错比较方便)。
八、选择键盘类型。

九、存储设备,选择第一个。
1. Basic Storage Devices:基本存储设备。将系统装在本地的磁盘驱动器(硬盘)上。
2. Specialized Storage Devices:指定的存储设备。安装或更新在企业级的存储设备上。

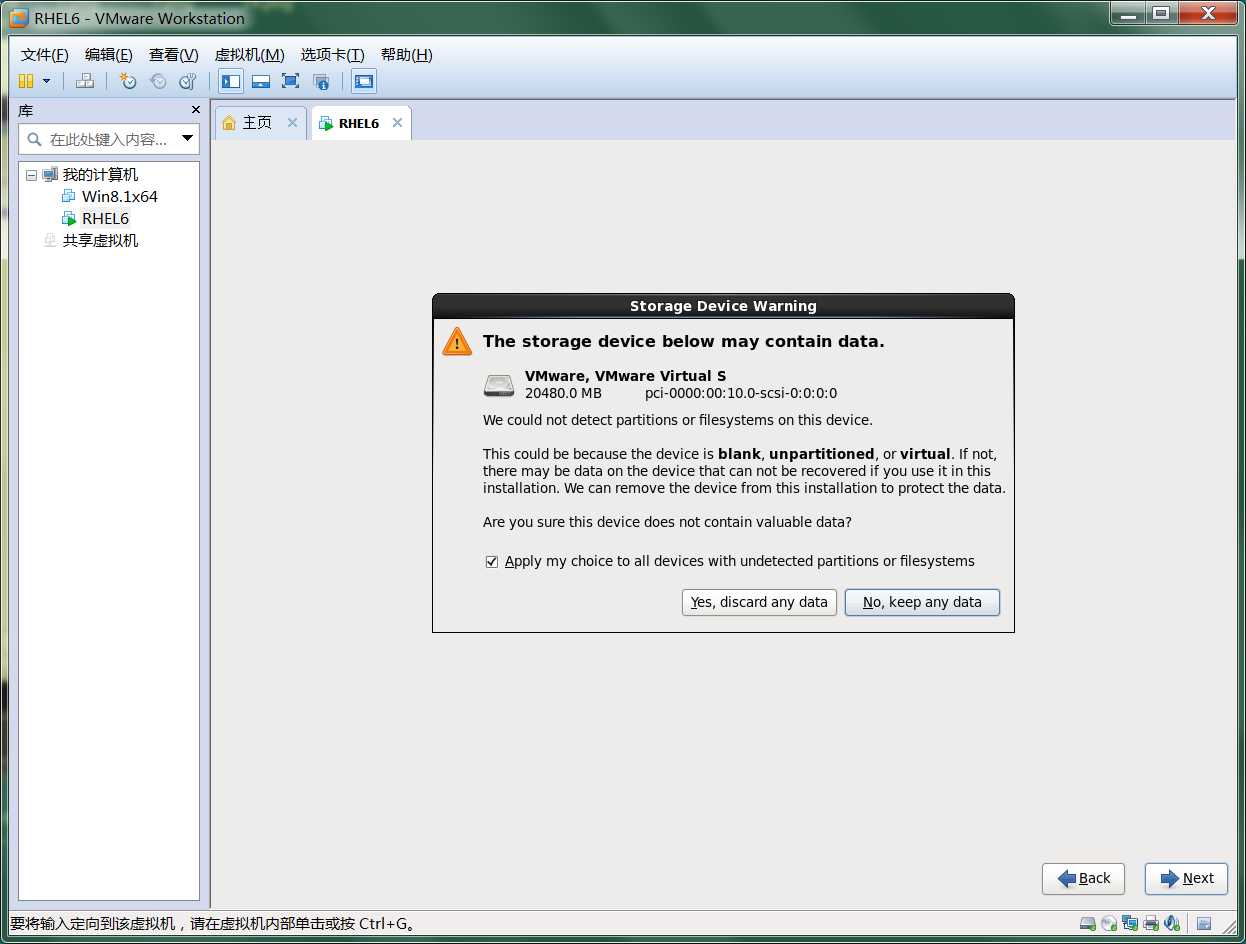
十、警告硬盘可能有数据,是否要格式化。选择是就好了。
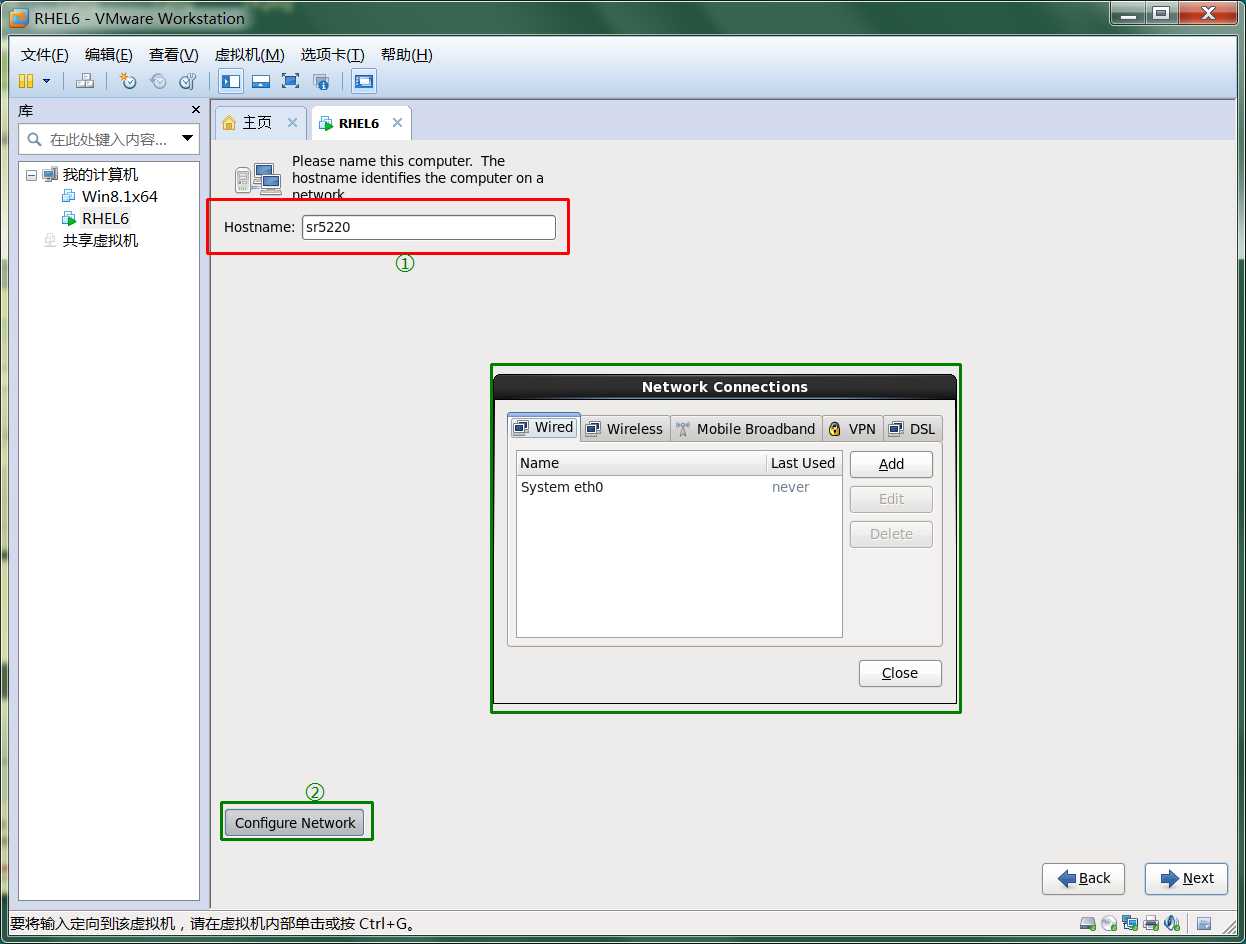
十一、设置主机名。
1. 红色部分设置主机名;
2. 绿色部分配置静态IP地址(绿框为点击 ② 时弹出);
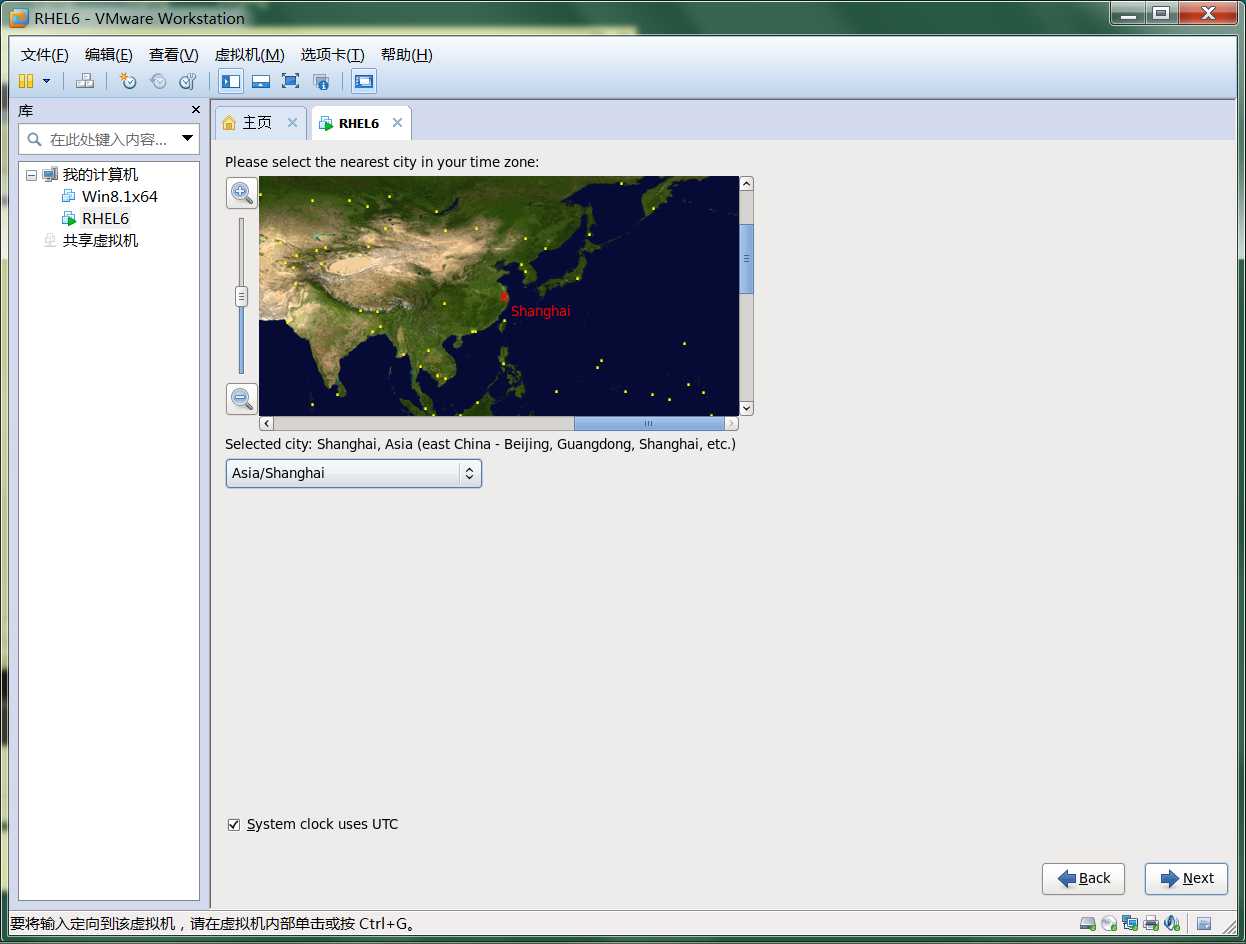
十二、选择时区。
1. 在文本框中选择 Asia/Shanghai(亚洲/上海),也可以直接点击地图中的Shanghai位置。
2. 下面的 System clock users UTC,使用UTC时间,也就是网络时间。
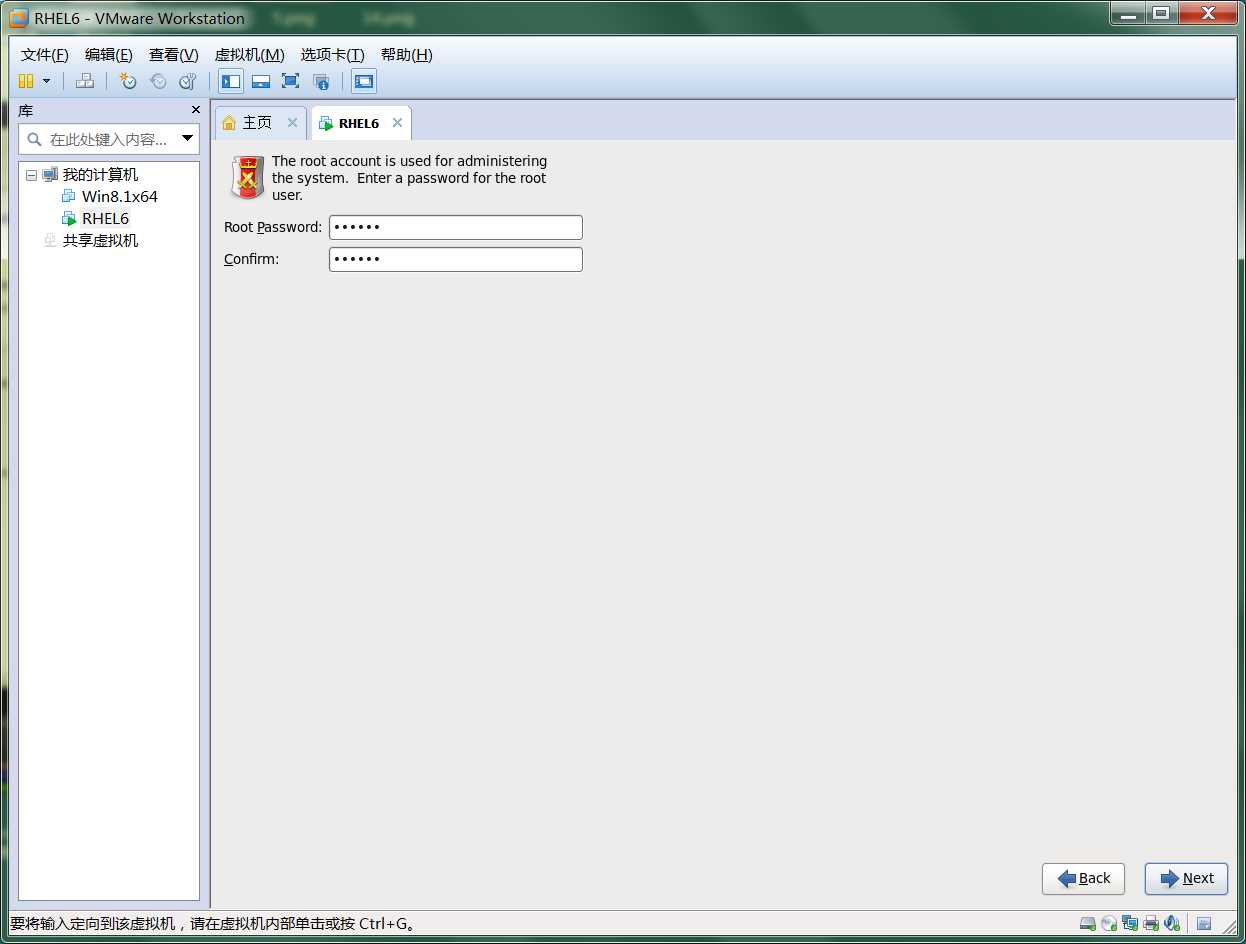
十三、 设置root账户的密码(root是超级管理员,尽可能设置复杂些)。
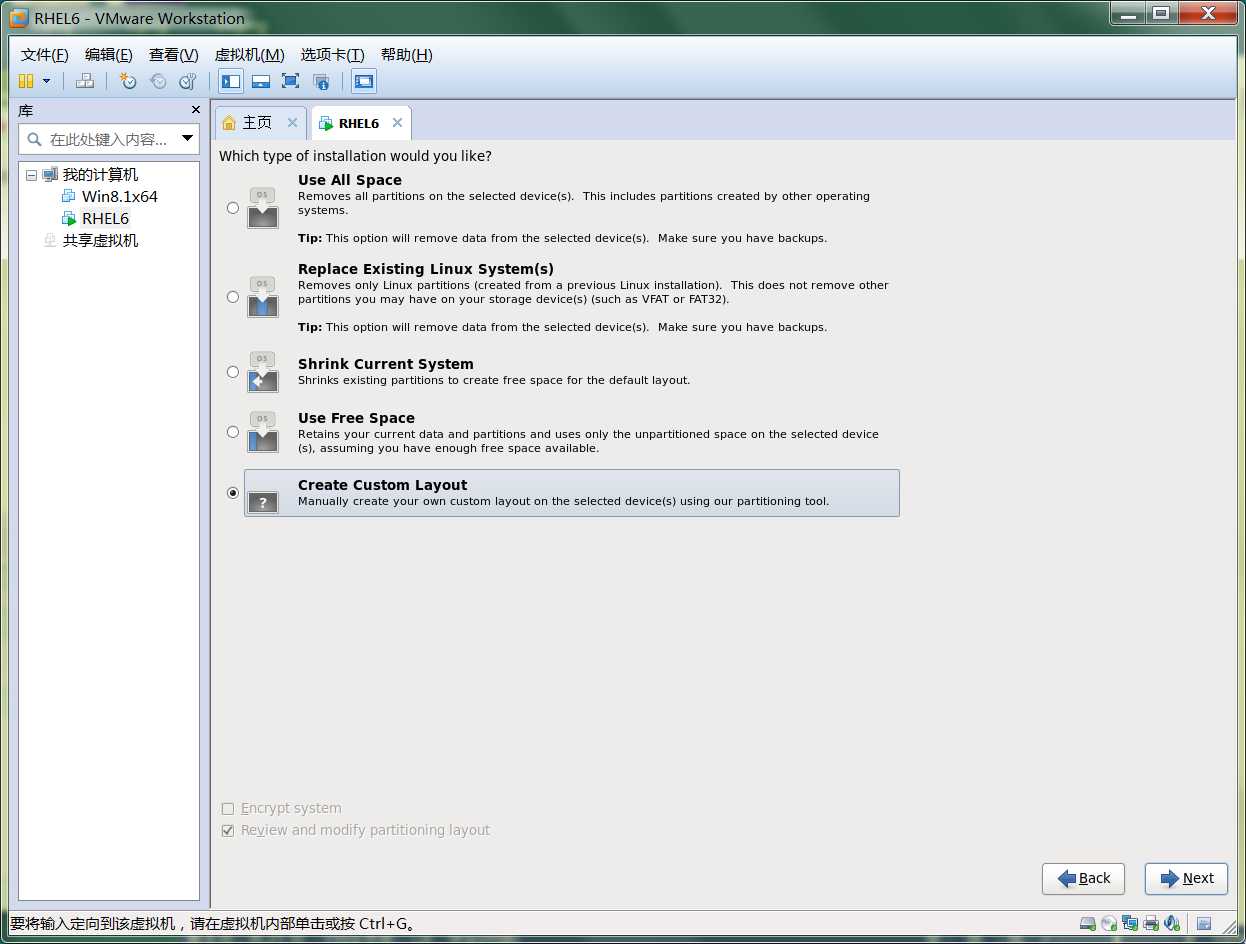
十四、选择分区方案。
1. Use All Space:使用所有空间。删除所有分区,并执行默认的安装策略。
2. Replace Existing Linux System(s):替换现有 Linux 系统。只删除 Linux 文件系统的分区,并执行默认的安装策略。
3. Shrink Current System:缩小现有系统。缩小现有分区大小,并执行默认的安装策略。
4. Use Free Space:使用剩余空间。使用剩余的空间,执行默认的安装策略。
5. Create Custom Layout:创建自定义布局。
默认的安装策略:
① 分出一个单独的分区,挂载到 /boot 目录;
② 创建 SWAP 分区,一般为内存的 1.5-2 倍;
③ 剩余空间全部分给 / 分区
我们选择最后一项。
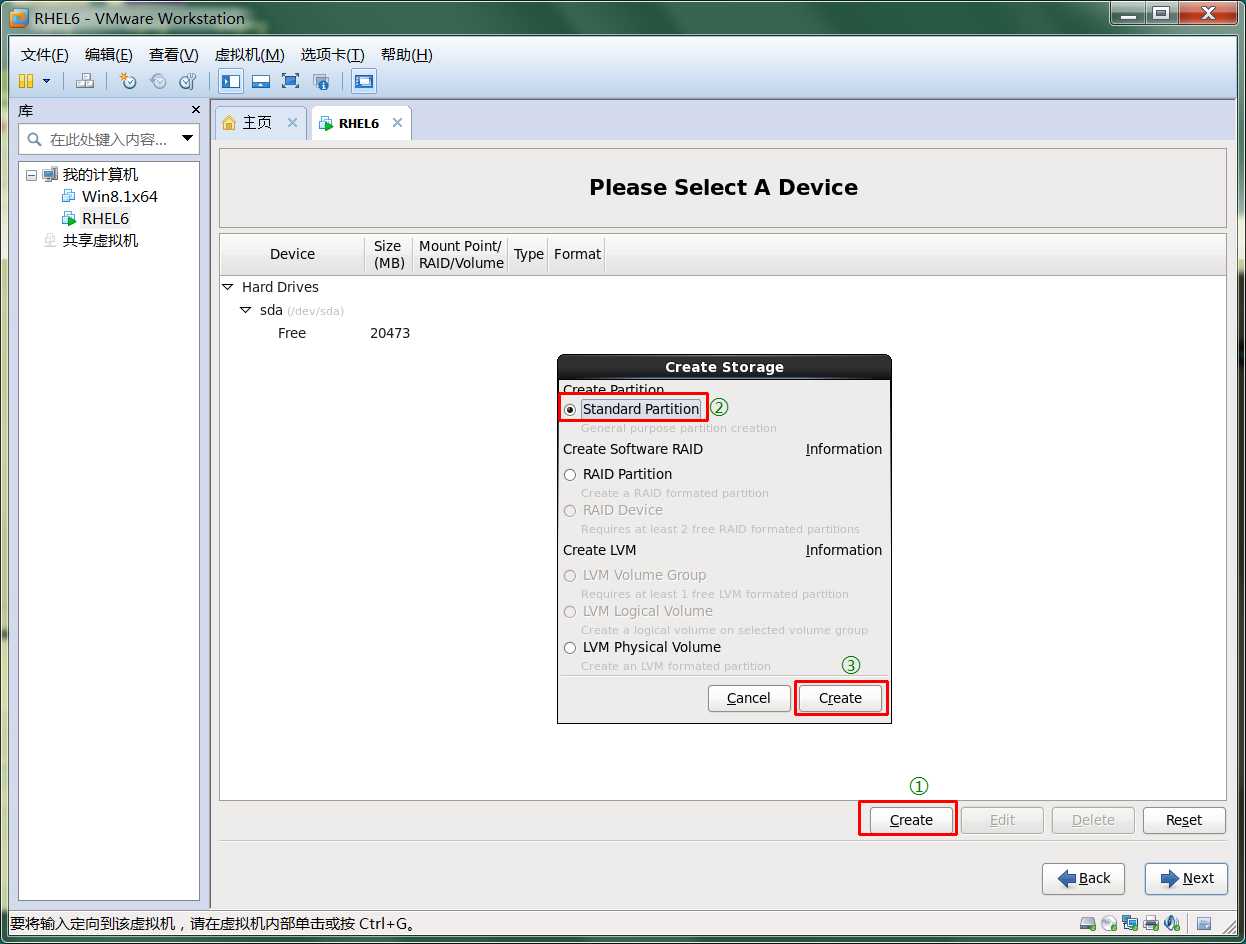
十五、创建分区。
1. 点击 Create(创建);
2. 选择 Standard Partition(标准分区);
3. 点击 Create(生成);
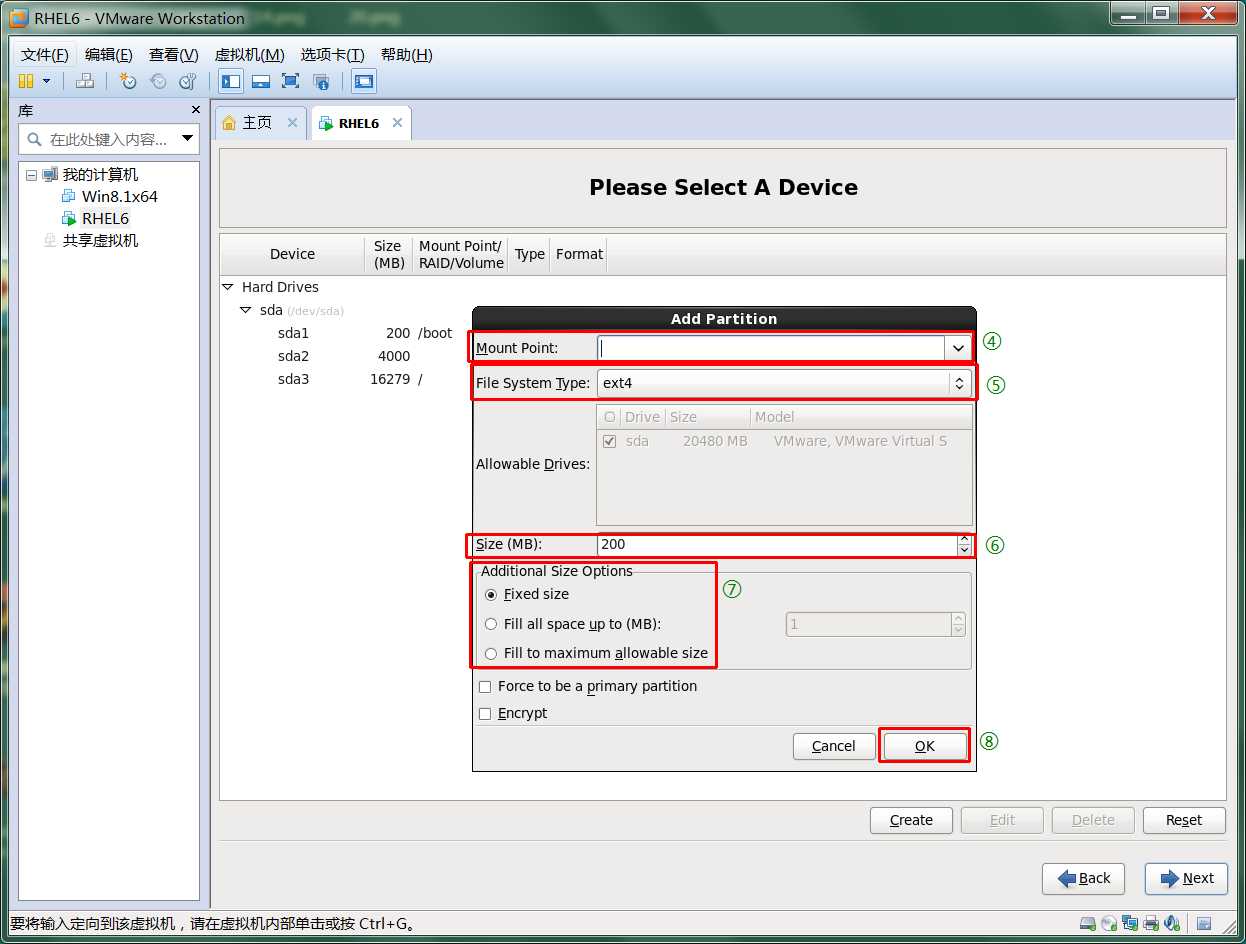
4. 点下拉框,选择挂载点,如 /boot;
5. 下拉框可设置分区类型;
6. 设置分区大小(SWAP分区一般设为内存的 1.5-2 倍);
7. 其它大小设置,如分配所有剩余空间;
8. 最后点 OK;
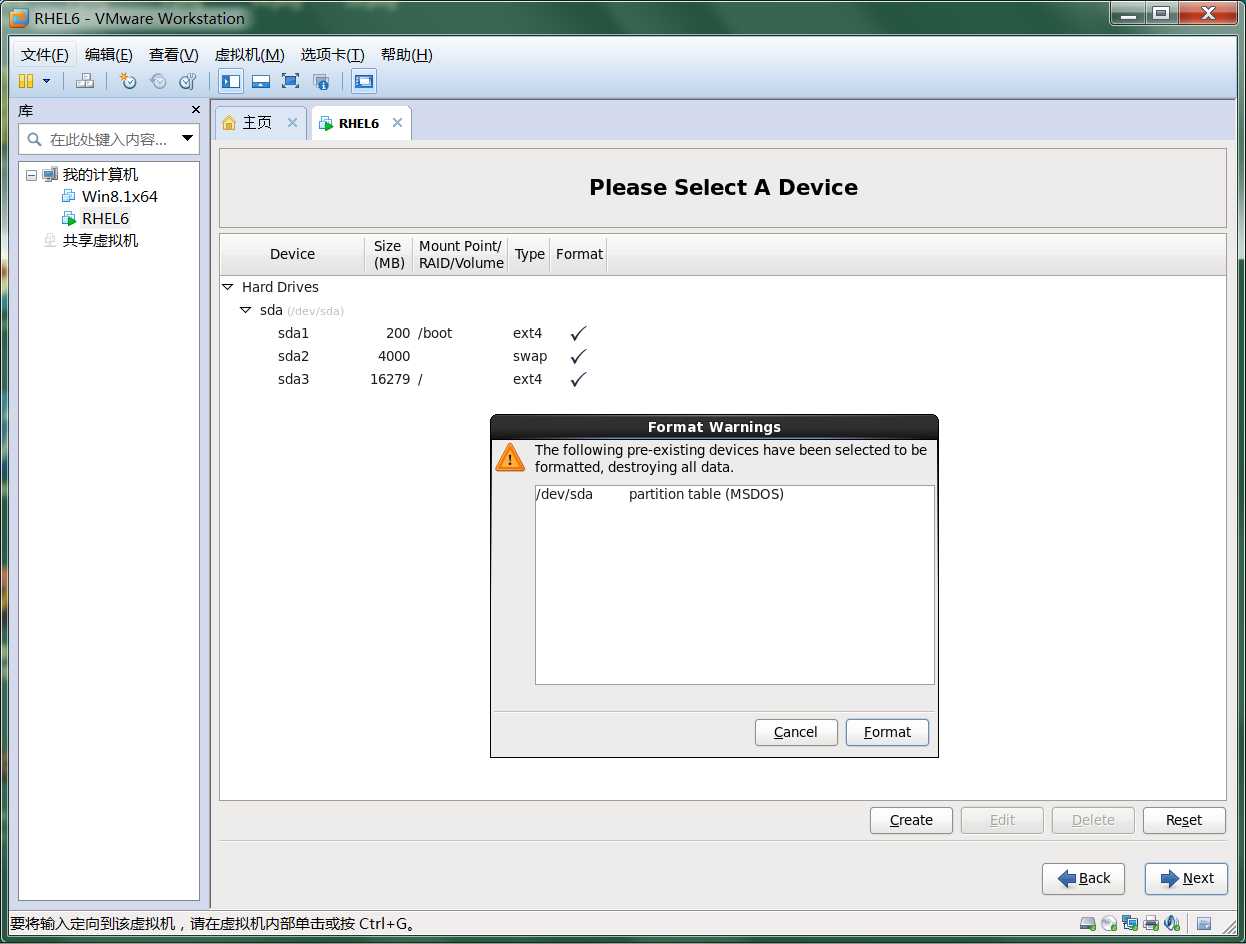
最后分完区,点 Next 会弹出一个对话框,提示是否格式化,点击 Format,还会弹出个小对话框,选择 Write changes to disk。
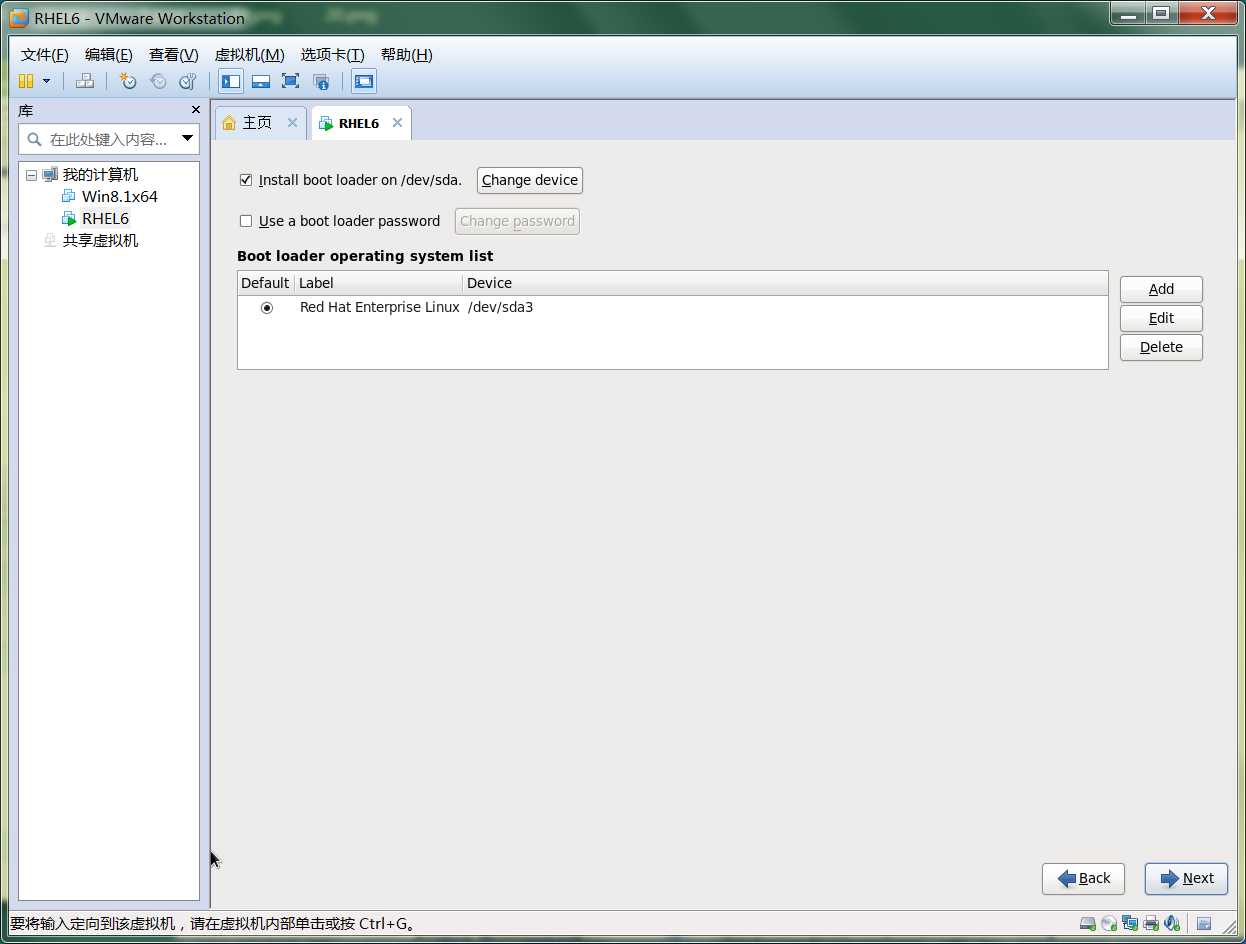
十六、引导层设置,直接点 Next 即可。
1. Install boot loader on /dev/sda:在 /dev/sda 中安装引导装载程序。这项就是安装 grub(次引导程序)。
2. Use a boot loader password:使用引导装载程序密码。这项对 grub 加密。
3. Boot loader operating system list:引导装载程序操作系统列表。
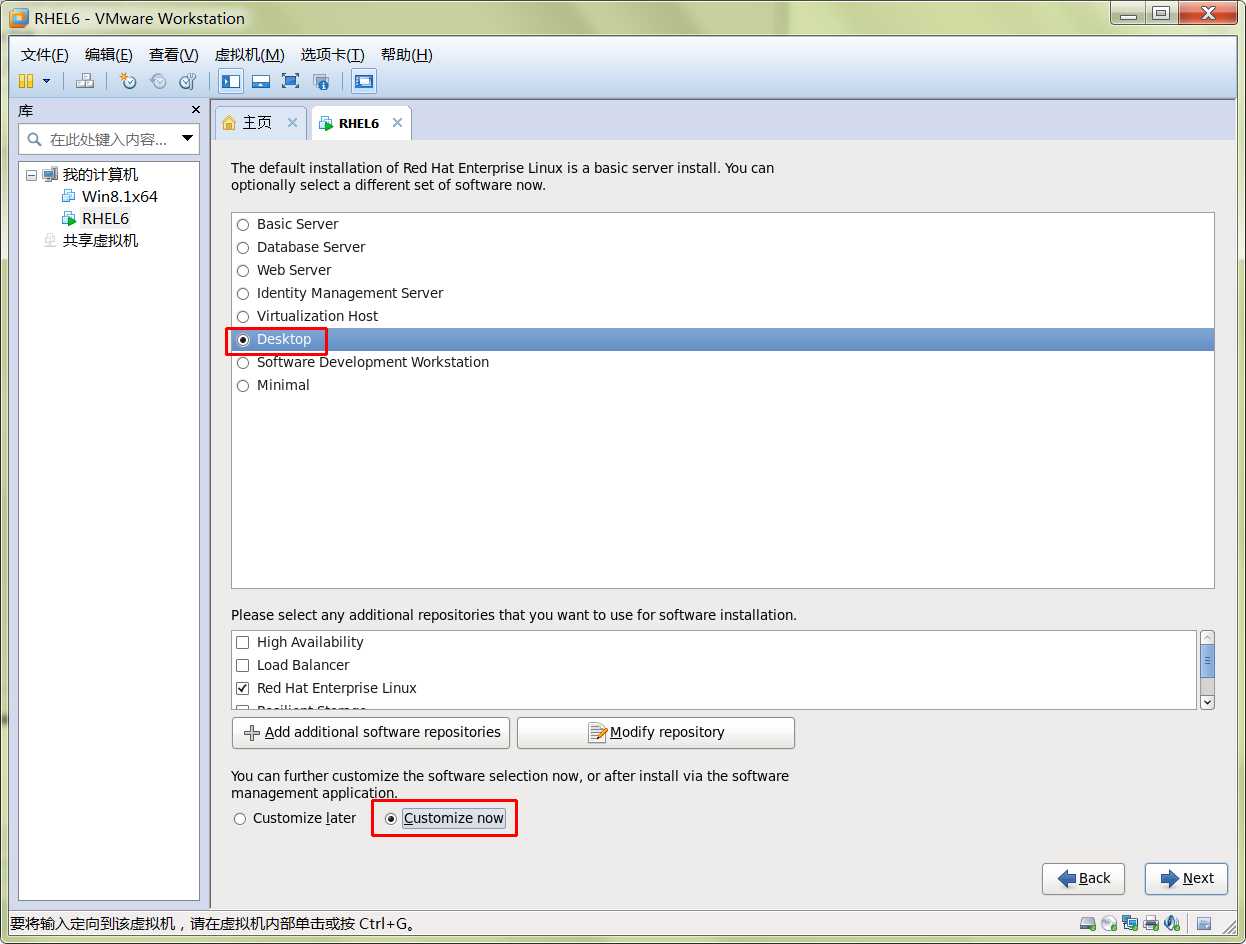
十七、选择软件组。
选择 Desktop(桌面)和 Customize now(现在自定义)。
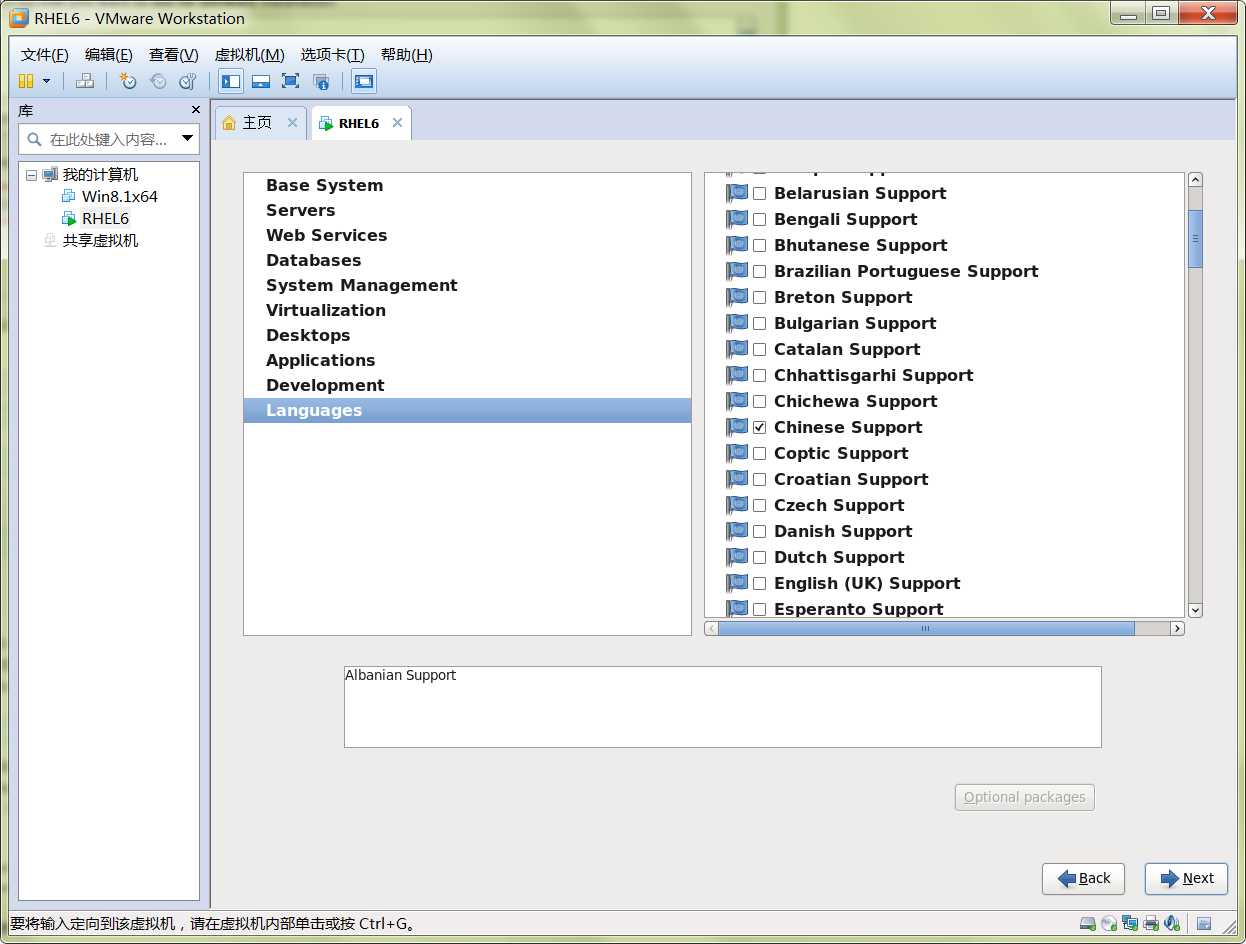
十八、选择安装的包。
根据需要来选择包,这里可以选择默认的包,以后需要以后再安装也可以。
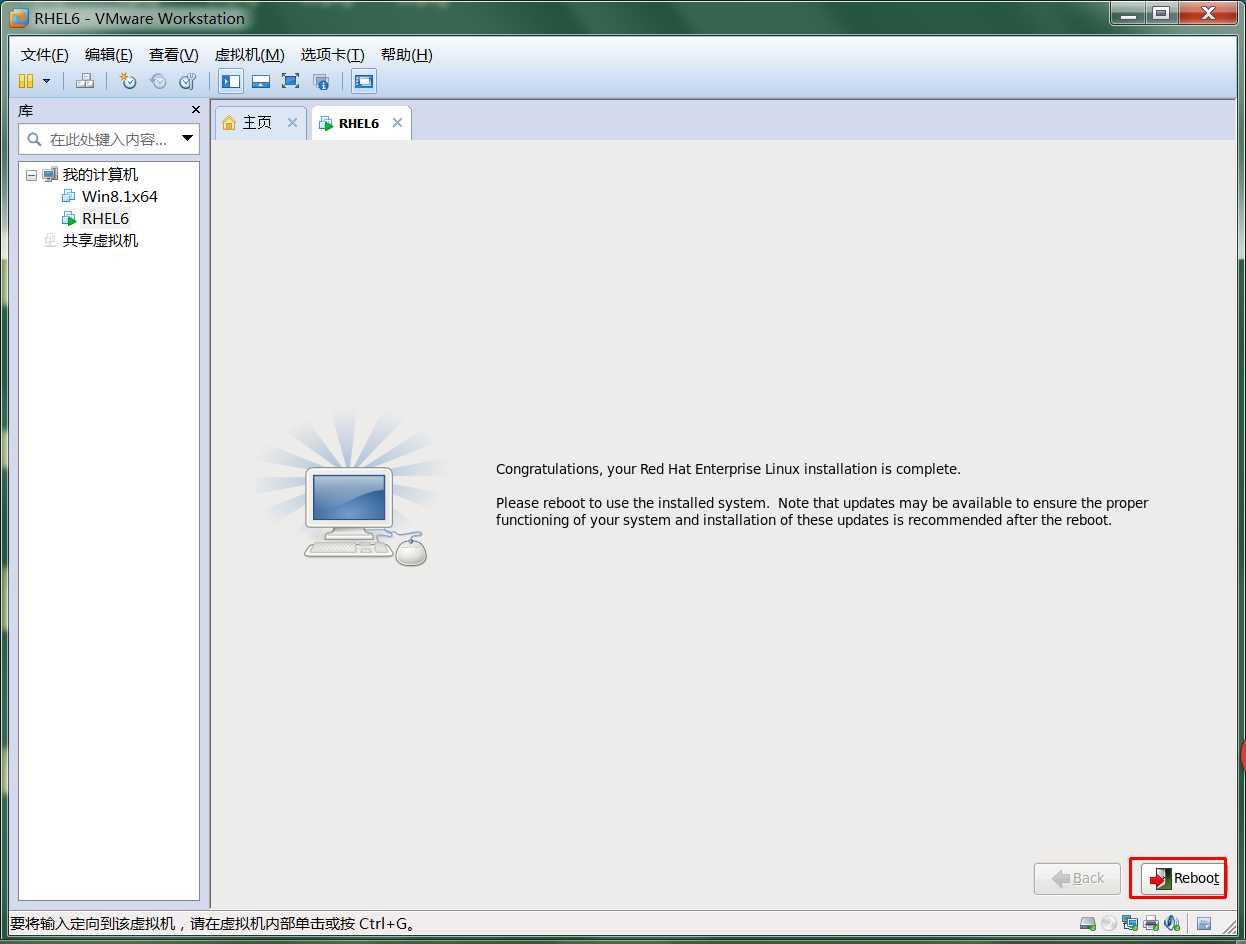
十九、安装完成,点重新启动(重启后出现的红条按下 Esc 键可查看内容)。
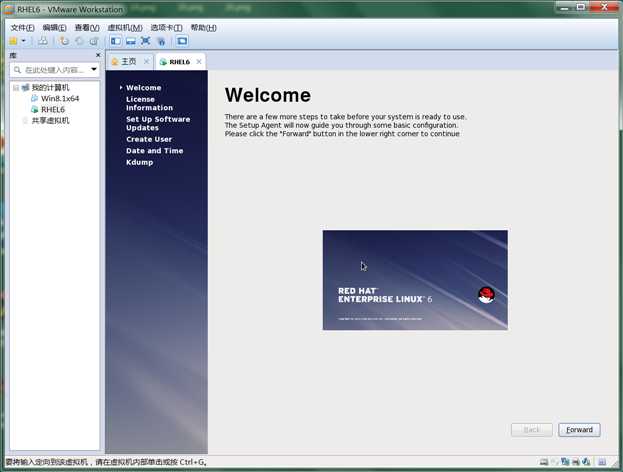
二十、重启后,进入欢迎界面,点 Forward。
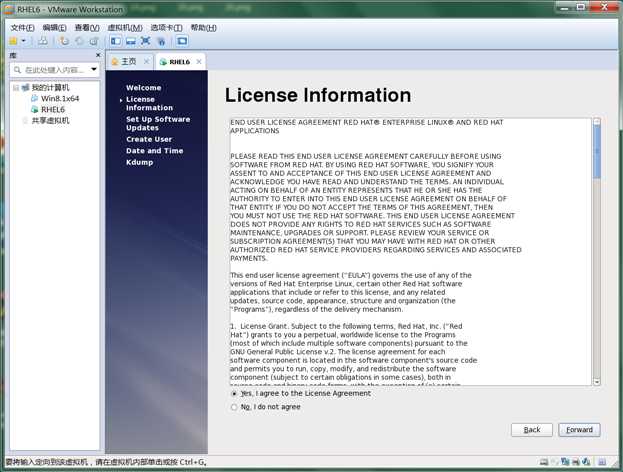
二十一、 许可证信息,继续 Forward。
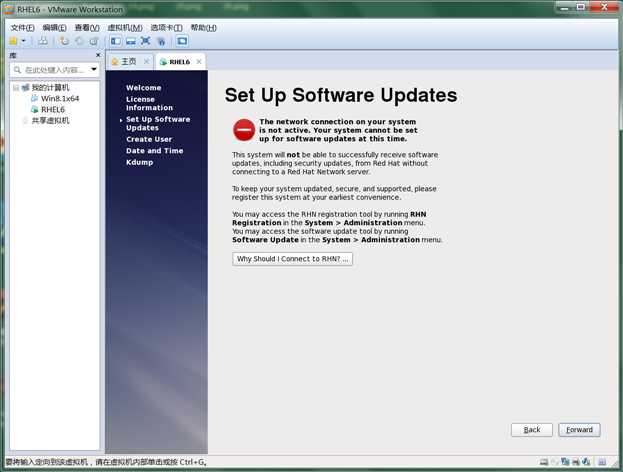
二十二、提示没有加入 RHN 自动更新,继续 Forward。
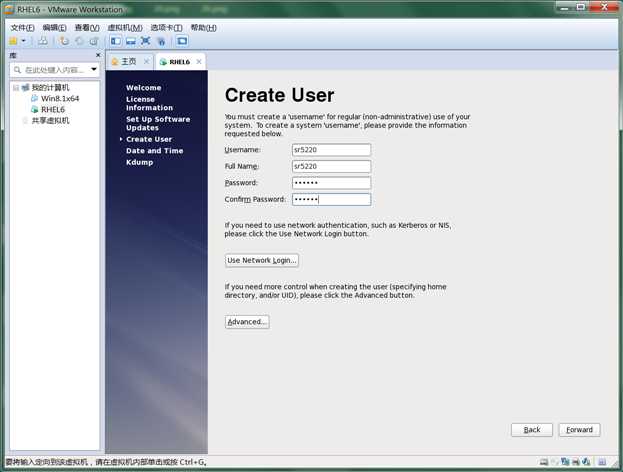
二十三、创建普通用户(必须创建)。
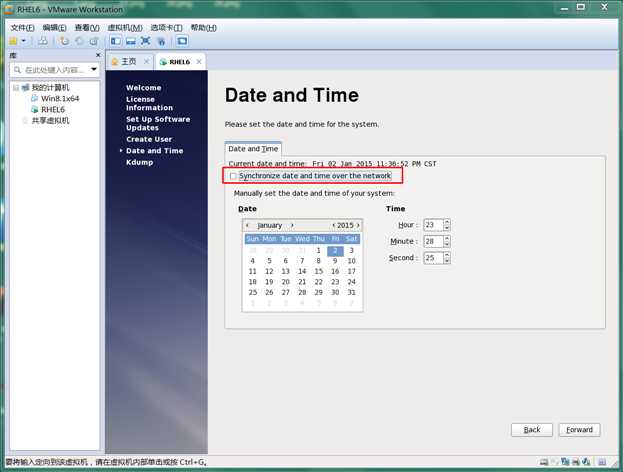
二十三、日期和时间
默认使用系统时间。若勾上 Synchronize date and time over the network(在网络上同步日期和时间),设置NTP服务器位置,可使用网络时间。
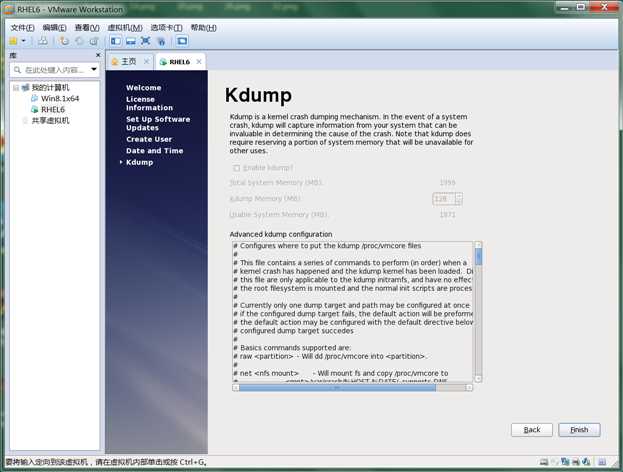
二十四、Kdump。
Kdump 是用来修复内核的,这个不用管它,直接完成。
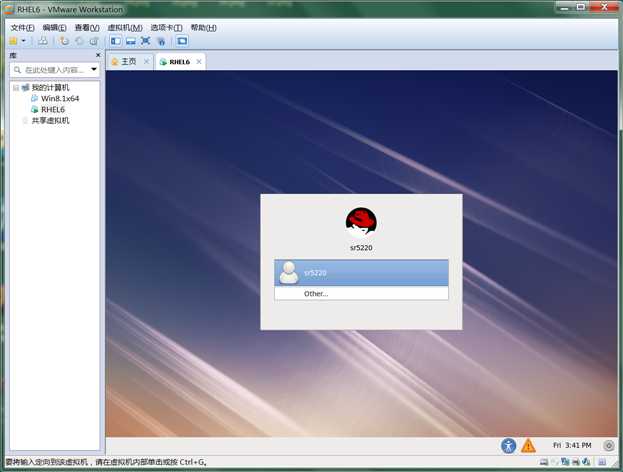
二十五、安装完毕,进入登录界面吧~ o(∩_∩)o 。
在VMware中安装RHEL6.2(下)—— RHEL系统安装
原文:http://www.cnblogs.com/sr5220/p/4198537.html