转自: http://testerhome.com/topics/539
用过python的同学对于python setup.py install肯定不会陌生。那么我们自己如果封装了很多的方法怎么很好的保存或者开源呢?模块安装包的制作是必不可少的。
假设我们的模块叫做monkey。那么首先我们创建一个monkey.py。添加如下代码:
# -*- coding: utf-8 -*-
class MyClass():
    def __init__(self):
        self.url = "http://www.testerhome.com"
    def printurl(self):
        print self.url
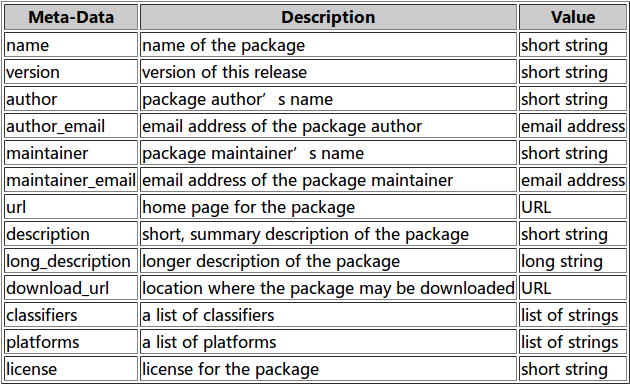
然后创建一个setup.py,添加如下代码:
# -*- coding: utf-8 -*-
from distutils.core import setup
setup(name=‘test‘,
    version=‘1.0‘,
    description=‘MonkeyTest make first setup moudle‘,
    author=‘MonkeyTest‘,
    author_email=‘snowangelsiomn@gmail.com‘,
    url=‘http://www.testerhome.com‘,
    py_modules=[‘monkey‘],
    )

将两个python文件放入一个文件夹,执行python setup.py sdist,然后会出现一个test-1.0.tar.gz的压缩包,显示如下log
running sdist
running check
warning: sdist: manifest template ‘MANIFEST.in‘ does not exist (using default file list)

warning: sdist: standard file not found: should have one of README, README.txt

writing manifest file ‘MANIFEST‘
creating test-1.0
making hard links in test-1.0...
hard linking monkey.py -> test-1.0
hard linking setup.py -> test-1.0
Creating tar archive
removing ‘test-1.0‘ (and everything under it)
解压缩之后可以看到文件夹中有一个setup.py,这个就是我们可以install的py文件。安装之后我们可以尝试
>>> from monkey import MyClass
>>> app=MyClass()
>>> app.printurl()
http://www.testerhome.com
原文:http://www.cnblogs.com/zhang-pengcheng/p/4336203.html