看别人博客,有些小技巧就直接转过来了,以后做开发可以大大提高开发效率。以下代码片摘自多个博客和自己平时的学习积累,若原作者认为侵犯著作权,请私信告知,我看到后讲第一时间删除。
PackageInfo info = this.getPackageManager().getPackageInfo(this.getPackageName(), 0);
int versionCode=nfo.versionCode
string versionName=info.versionNam
String archiveFilePath="sdcard/download/Law.apk";//安装包路径
PackageManager pm = getPackageManager();
PackageInfo info = pm.getPackageArchiveInfo(archiveFilePath, PackageManager.GET_ACTIVITIES);
if(info != null){
ApplicationInfo appInfo = info.applicationInfo;
String appName = pm.getApplicationLabel(appInfo).toString();
String packageName = appInfo.packageName; //得到安装包名称
String version=info.versionName; //得到版本信息
Toast.makeText(test4.this, "packageName:"+packageName+";version:"+version, Toast.LENGTH_LONG).show();
Drawable icon = pm.getApplicationIcon(appInfo);//得到图标信息
TextView tv = (TextView)findViewById(R.id.tv); //显示图标
tv.setBackgroundDrawable(icon);android中获取当前程序路径 getApplicationContext().getFilesDir().getAbsolutePath() (2)android取已安装的程序列表 List<PackageInfo> packageInfoList = getPackageManager().getInstalledPackages(0);
PackageManager pManager = MessageSendActivity.this.getPackageManager();
List<PackageInfo> appList = Utils.getAllApps(MessageSendActivity.this);
     for(int i=0;i<appList.size();i++) {
         PackageInfo pinfo = appList.get(i);
         ShareItemInfo shareItem = new ShareItemInfo();
         //set Icon
         shareItem.setIcon(pManager.getApplicationIcon(pinfo.applicationInfo));
         //set Application Name shareItem.setLabel(pManager.getApplicationLabel(pinfo.applicationInfo).toString());
        //set Package Name shareItem.setPackageName(pinfo.applicationInfo.packageName);
}1. 在item试图上面添加代码: android:descendantFocusability="blocksDescendants" 2.在listview里 添加代码 android:focusable="true"
android:digits="1234567890qwertyuiopasdfghjklzxcvbnm`-=[]\;,./~!@#$%^*()_+}{:?&<>"'"
这样就不会输入中文了。
DisplayMetrics displayMetrics = new DisplayMetrics();
this.getWindowManager().getDefaultDisplay().getMetrics(displayMetrics);
int height = displayMetrics.heightPixels;
int width = displayMetrics.widthPixels;
设置TabWidget的属性 android:layout_alignParentBottom="true"
Log.v("@@@@@@@@@@",Thread.currentThread().getId()+" "+Thread.currentThread().getName());
ComponentName comp = new ComponentName("com.Test","com.login.Main");
 intent = new Intent();
 intent.setComponent(comp);
 intent.setAction("android.intent.action.VIEW");
startActivity(intent);EditText有焦点(focusable为true)阻止输入法弹出 editText.setInputType(InputType.TYPE_NULL); // 关闭软键盘 当EidtText无焦点(focusable=false)时阻止输入法弹出
InputMethodManager imm = (InputMethodManager)getSystemService(INPUT_METHOD_SERVICE);
imm.hideSoftInputFromWindow(editText.getWindowToken(), 0);
单位:像素
WVGA854: 854*480
WVGA800: 800*480
HVGA: 480*320
QVGA: 320*240
WQVGA432:432*240
WQVGA400:400*240
Context c = createPackageContext("chroya.demo", Context.CONTEXT_INCLUDE_CODE | Context.CONTEXT_IGNORE_SECURITY);
//载入这个类
Class clazz = c.getClassLoader().loadClass("chroya.demo.Main");
//新建一个实例
Object owner = clazz.newInstance();
//获取print方法,传入参数并执行
Object obj = clazz.getMethod("print", String.class).invoke(owner, "Hello");
4.0上如果还用Theme.Dialog,只能说很土,跟整体UI风格差别很大
请使用android:theme="@android:style/Theme.Holo.DialogWhenLarge"
Intent intent = new Intent();
       intent.addFlags(Intent.FLAG_ACTIVITY_NEW_TASK);
	intent.setAction(android.content.Intent.ACTION_VIEW);
	intent.setDataAndType(Uri.fromFile(“APK”),"application/vnd.android.package-archive");
startActivity(intent);String device_model = Build.MODEL; // 设备型号 String version_sdk = Build.VERSION.SDK; // 设备SDK版本 String version_release = Build.VERSION.RELEASE; // 设备的系统版本
public void SharePhoto(String photoUri,final Activity activity) {
    Intent shareIntent = new Intent(Intent.ACTION_SEND);
    File file = new File(photoUri);
    shareIntent.putExtra(Intent.EXTRA_STREAM, Uri.fromFile(file));
    shareIntent.setType("image/jpeg");
    StartActivity(Intent.createChooser(shareIntent, activity.getTitle()));
}
 )
)在Windows下,按着电源键4秒强制关机,在Linux下强烈不建议这么做。Windows由于是单用户、“假多”任务的情况,所以即使你的计算机关机,也不会对别人造成影响。不过在Linux中,由于每个程序都是在后台执行的,因此,在你看不到的屏幕背后可能有很多人同时在你的主机上工作。而且,若不正常关机可能会造成文件系统的损毁。所以,正常情况下,要关机时需要注意下面几件事情:
(1)查看系统的使用状态。
要看目前有谁在线,可以用who命令。要看网络的联机状态,可以用netstat-a命令。要看后台执行那个的程序可以执行ps-aux命令。
(2)通知在线用户的关机时刻
这个时候可以使用shutdown命令
Shutdown命令:
语法:shutdown[-t秒][-arkhncfF]时间 警告消息
-t:后面加描述表示过几秒之后关机。
-k:不是真的关机,仅仅发出警告消息。
-r:将系统服务停掉之后重启。
-h:将系统服务停掉之后立即关机。
-f:关机并开机之后,强制跳过fsck的磁盘检查。
-F:系统重启之后,强制进行fsck的磁盘检查。
-c:取消已经进行的shutdown命令内容。

另外,重启关机命令有reboot、halt、poweroff。其实在默认情况下,都完成一样的工作。
halt先调用shutdown,而shutdown最后调用halt。不过,shutdown可以根据目前已经启动的服务来逐次关闭服务后才关机;而halt能够在不理会目前系统情况下,进行硬件关机的特殊功能。

除了这些,还有一个关机命令是init 0
init是切换执行等级的命令。Linux共有7种执行等级,比较重要的是下面4种等级:
run level 0:关机
run level 3:纯命令行模式
run level 5:含有图形界面模式
run level 6:重启
public void forceStopPackage(final String packageName) {
        if (checkCallingPermission(android.Manifest.permission.FORCE_STOP_PACKAGES)
                != PackageManager.PERMISSION_GRANTED) {
            String msg = "Permission Denial: forceStopPackage() from pid="
                    + Binder.getCallingPid()
                    + ", uid=" + Binder.getCallingUid()
                    + " requires " + android.Manifest.permission.FORCE_STOP_PACKAGES;
            Slog.w(TAG, msg);
            throw new SecurityException(msg);
        }
        long callingId = Binder.clearCallingIdentity();
        try {
            IPackageManager pm = ActivityThread.getPackageManager();
            int pkgUid = -1;
            synchronized(this) {
                try {
                    pkgUid = pm.getPackageUid(packageName);
                } catch (RemoteException e) {
                }
                if (pkgUid == -1) {
                    Slog.w(TAG, "Invalid packageName: " + packageName);
                    return;
                }
                //begin:加入一个判断条件
                if (packageName.equals("你的进程名")) {
                    return;
                }
                //end: 加入一个判断条件                                forceStopPackageLocked(packageName, pkgUid);
            }
        } finally {
            Binder.restoreCallingIdentity(callingId);
        }
    }
这样的话在任务管理器里可以保证KISS不掉的;
还有在这个方法上还有个方法clearApplicationUserData中保证如果是该进程就不让调用forceStopPackage()方法。
EditText.requestFoucus()
    DisplayMetrics  dm = new DisplayMereics();

    getWindowManager().getDefaultDisplay().getMetrics(dm);

    float width = dm.widthPixels * dm.density;

   float height = dm.heightPixels * dm.density
   public void onCreate(Bundle savedInstanceState) {
           super.onCreate(savedInstanceState);
           setContentView(R.layout.mainlay);
           mediaPlayer = MediaPlayer.create(this, R.raw.mu);
           mediaPlayer.setLooping(true);
           mediaPlayer.start();

    }
 <activity
     android:screenOrientation="portrait">
 </activity>
第二种,在代码里面
setRequestedOrientation(ActivityInfo.SCREEN_ORIENTATION_LANDSCAPE);
 requestWindowFeature(Window.FEATURE_NO_TITLE);
 getWindow().setFlags(WindowManager.LayoutParams. FLAG_FULLSCREEN ,WindowManager.LayoutParams. FLAG_FULLSCREEN);
RelativeLayout 里面加上android:clickable="true"
    显示:
    InputMethodManager imm = (InputMethodManager)(getSystemService(Context.INPUT_METHOD_SERVICE));
    imm.toggleSoftInput(InputMethodManager.SHOW_FORCED, 0);

    隐藏:
    InputMethodManager imm = (InputMethodManager)(getSystemService(Context.INPUT_METHOD_SERVICE));
    imm.hideSoftInputFromWindow(m_edit.getWindowToken(), 0);
  NotificationManager nm = (NotificationManager)getSystemService(NOTIFICATION_SERVICE);
  nm.cancelAll();
    Intent intent=new Intent();
    //设置快捷方式的图标
    intent.putExtra(Intent.EXTRA_SHORTCUT_ICON_RESOURCE, Intent.ShortcutIconResource.fromContext(this, R.drawable.img));
    //设置快捷方法的名称
    intent.putExtra(Intent.EXTRA_SHORTCUT_NAME, "点击启动哥的程序");            //设置点击快键图标的响应操作
intent.putExtra(Intent.EXTRA_SHORTCUT_INTENT, new Intent(this,MainActivity.class));
//传递Intent对象给系统
setResult(RESULT_OK, intent);
finish(); String path = context.getPackageManager().getApplicationInfo(
context.getPackageName(), 0).sourceDir;
DexFile dexfile = new DexFile(path);
Enumeration<String> entries = dexfile.entries();
while (entries.hasMoreElements()) {
String name = (String) entries.nextElement();
......
}
而setTextSize()是以sp为单位的.
所以如果直接用返回的值来设置会出错,解决办法是:
用setTextSize()的另外一种形式,可以指定单位
    TypedValue.COMPLEX_UNIT_PX : Pixels
    TypedValue.COMPLEX_UNIT_SP : Scaled Pixels
    TypedValue.COMPLEX_UNIT_DIP : Device Independent Pixels
中,否则容易出现绘制大小发生改变
    <TextView
     android:id="@+id/tvText1"
     android:layout_width="wrap_content"
     android:layout_height="wrap_content"
     android:text="text1"
     android:textSize="30sp"
     android:textStyle="bold"
     android:textColor="#FFFFFF"
     android:shadowColor="#ff0000ff"
     android:shadowDx="5"
     android:shadowDy="5"
     android:shadowRadius="10"/>
android:shadowColor 阴影颜色
android:shadowDx 阴影的水平偏移量
android:shadowDy 阴影的垂直偏移量
android:shadowRadius 阴影的范围
为了统一风格和代码的复用,通常可以把这个样式抽取放入到style.xml文件中
    <?xml version="1.0" encoding="utf-8"?>
    <resources>
        <style name="textstyle">
            <item name="android:shadowColor">#ff0000ff</item>
            <item name="android:shadowRadius">10</item>
            <item name="android:shadowDx">5</item>
            <item name="android:shadowDy">5</item>
        </style>
    </resources>
<TextView
style="@style/textstyle"
android:layout_width="fill_parent"
android:layout_height="wrap_content"
android:text="字体样式"
android:textSize="30sp"
android:textStyle="bold" /> import android.app.Activity;
import android.app.Service;
import android.os.Vibrator;
public class TipHelper {
public static void Vibrate(final Activity activity, long milliseconds) {
Vibrator vib = (Vibrator) activity.getSystemService(Service.VIBRATOR_SERVICE);
vib.vibrate(milliseconds);
}
public static void Vibrate(final Activity activity, long[] pattern,boolean isRepeat) {
Vibrator vib = (Vibrator) activity.getSystemService(Service.VIBRATOR_SERVICE);
vib.vibrate(pattern, isRepeat ? 1 : -1);
}
} <uses-permission android:name="android.permission.VIBRATE" />
final Activity activity :调用该方法的Activity实例
long milliseconds :震动的时长,单位是毫秒
long[] pattern
:自定义震动模式 。数组中数字的含义依次是[静止时长,震动时长,静止时长,震动时长。。。]时长的单位是毫秒
boolean isRepeat : 是否反复震动,如果是true,反复震动,如果是false,只震动一次
^[\w-]+(\.[\w-]+)*@[\w-]+(\.[\w-]+)+$ //email地址
^[a-zA-z]+://(\w+(-\w+)*)(\.(\w+(-\w+)*))*(\?\S*)?$ //url
^(d{2}|d{4})-((0([1-9]{1}))|(1[1|2]))-(([0-2]([1-9]{1}))|(3[0|1]))$ //年-月-日
^((0([1-9]{1}))|(1[1|2]))/(([0-2]([1-9]{1}))|(3[0|1]))/(d{2}|d{4})$ //月/日/年
^([w-.]+)@(([[0-9]{1,3}.[0-9]{1,3}.[0-9]{1,3}.)|(([w-]+.)+))([a-zA-Z]{2,4}|[0-9]{1,3})(]?)$ //Emil
^((\+?[0-9]{2,4}\-[0-9]{3,4}\-)|([0-9]{3,4}\-))?([0-9]{7,8})(\-[0-9]+)?$ //电话号码
^(d{1,2}|1dd|2[0-4]d|25[0-5]).(d{1,2}|1dd|2[0-4]d|25[0-5]).(d{1,2}|1dd|2[0-4]d|25[0-5]).(d{1,2}|1dd|2[0-4]d|25[0-5])$ //IP地址
(^\s*)|(\s*$) // 首尾空格
^[a-zA-Z][a-zA-Z0-9_]{4,15}$ // 帐号是否合法(字母开头,允许5-16字节,允许字母数字下划线)
^[1-9]*[1-9][0-9]*$ // 腾讯QQ号
在manifest的activity下添加
android:descendantFocusability="blocksDescendants"
    public class Tools {
        public static String getLocalIpAddress() {
            try {
                for (Enumeration<NetworkInterface> en = NetworkInterface.getNetworkInterfaces(); en.hasMoreElements();) {
                    NetworkInterface intf = en.nextElement();
                    for (Enumeration<InetAddress> enumIpAddr = intf.getInetAddresses(); enumIpAddr.hasMoreElements();) {
                        InetAddress inetAddress = enumIpAddr.nextElement();
                        if (!inetAddress.isLoopbackAddress()) {
                            return inetAddress.getHostAddress().toString();
                        }
                    }
                }
            } catch (SocketException ex) {
                Log.e("出错啦", ex.toString());
            }
            return null;
        }
    }
    然后
            WifiManager wm = (WifiManager)getSystemService(WIFI_SERVICE);
            WifiInfo wi = wm.getConnectionInfo();
            System.out.println("IP地址是:"+Tools.getLocalIpAddress());
            System.out.println("SSID:"+wi.getSSID());
    最后记得加两个权限
        <uses-permission android:name="android.permission.INTERNET"/>
<uses-permission android:name="android.permission.ACCESS_WIFI_STATE"/> 触发长按事件后浮动原理:
    windowParams = new WindowManager.LayoutParams();
      windowParams.gravity = Gravity.TOP | Gravity.LEFT;
      windowParams.x = x - itemWidth / 2;
      windowParams.y = y - itemHeight / 2;
      windowParams.height = WindowManager.LayoutParams.WRAP_CONTENT;
      windowParams.width = WindowManager.LayoutParams.WRAP_CONTENT;
      ImageView iv = new ImageView(getContext());
      iv.setImageBitmap(bm);
      windowManager = (WindowManager) getContext().getSystemService(
      Context.WINDOW_SERVICE);// "window"
windowManager.addView(iv, windowParams); if (dragImageView != null) {
windowParams.alpha = 0.6f;
windowParams.x = x - itemWidth / 2;
windowParams.y = y - itemHeight / 2;
windowManager.updateViewLayout(dragImageView, windowParams);
}
数据库中的字段设置为 binary类型
Bitmap bitmap = BitmapFactory.decodeFile(path);
ByteArrayOutputStream baos = new ByteArrayOutputStream();
                bitmap.compress(CompressFormat.JPEG, 50, baos);
String sql = "insert into pic_info(pic_data, pic_name,pic_size,send_date,is_success) " +"values(?,?,?,?,?)";
                Object[] args = new Object[]{baos.toByteArray(), name, size, now, isSucess};
db.insert(sql, args);
读取数据库的图片信息:
byte[] picData = cursor.getBlob(cursor.getColumnIndex("pic_data"));
bitmap.setImageBitmap(BitmapFactory.decodeByteArray(picData, 0, picData.length));
在listView里使用addView()、addFooterView(v)、addHeaderView(v)时,要在setAdepter以前添加,或者在重写的Adapter中添加。因为setAdapter以后,就是listView已经绘制完毕,不能再进行添加。
有的时候,我们使用progressBar的时候,后面的背景色是白色或者是亮色,使得progressBar效果很不明显,所以,我们可以在下面三条中随意添加一条熟悉就可以了:
<ProgressBar style="@android:style/Widget.ProgressBar.Inverse"/>
<ProgressBar style="@android:style/Widget.ProgressBar.Large.Inverse"/>
<ProgressBar style="@android:style/Widget.ProgressBar.Small.Inverse"/>
先看下效果图:
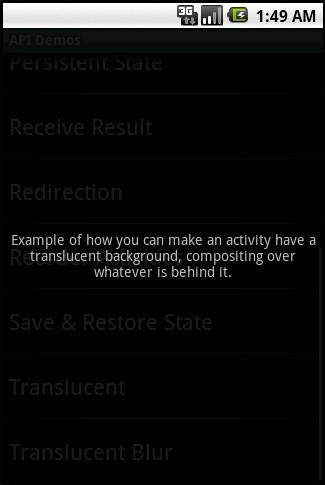

第一种效果:
在styles.xml中定义
<style name="Theme.Translucent" parent="android:style/Theme.Translucent">
<item name="android:windowBackground">
@drawable/translucent_background
</item>
<item name="android:windowNoTitle">true</item>
<item name="android:colorForeground">#fff</item>
</style>
getWindow().setFlags(WindowManager.LayoutParams.FLAG_BLUR_BEHIND,WindowManager.LayoutParams.FLAG_BLUR_BEHIND);
setContentView(R.layout.translucent_background);
设置模糊效果是通过窗口管理器(WindowManager)设置参数来完成的,这种设置只有在背景设置为透明后才能显示效果。
我们都知道EditText与TextView是Android的文本输入框和文本显示框,但是基于手机屏幕的大小因素,如果在需要输入较多文字或者显示较多内容的时候,手机屏幕是远远不够的,因此让文本框具有滚动条的功能是手机上必备的,要加上滚动条,其实很简单,只需要在文本输入框或者文本显示框上面加上滚动条控件即可,该控件名字为ScrollView,以下我们对比下(以TextView举例)。
<ScrollView
android:id="@+id/scrollView"
android:layout_width="fill_parent"
android:layout_height="200px"
android:scrollbarStyle="outsideOverlay" android:background="@android:drawable/edit_text">
<TextView
android:layout_width="fill_parent"
android:layout_height="wrap_content"
android:id="@+id/textView"
/>
</ScrollView>
|
|
|
运行模拟器的时候总是会内存错误。 |
这种情况偶尔出现,没什么关系,不用管他。点击‘取消’就可以了。
经常出现就危险了,弄不好就得重装系统了。
运行某些程序的时候,有时会出现内存错误的提示,然后该程序就关闭。
“0x????????”指令引用的“0x????????”内存。该内存不能为“read”。
“0x????????”指令引用的“0x????????”内存,该内存不能为“written”。
一般出现这个现象有方面的,一是硬件,即内存方面有问题,二是软件
开始 运行 输入:cmd 确定:
在DOS提示符下输入:
for %1 in (%windir%\system32\*.dll) do regsvr32.exe /s %1
等待3分钟,左右后,搞定了。(如果怕输错,就把这句话复制上去)。
通过路径获取媒体文件信息 http://blog.csdn.net/aomandeshangxiao/article/details/6600725
java文件操作 http://blog.csdn.net/aomandeshangxiao/article/details/6597302
Android文件的读写 http://blog.csdn.net/aomandeshangxiao/article/details/6589510
<?xml version="1.0" encoding="utf-8"?>
<translate xmlns:android="http://schemas.android.com/apk/res/android"
	android:duration="1000"
	android:fromYDelta="0"
	android:toYDelta="10"
	android:fromXDelta="0"
	android:toXDelta="10"
	android:interpolator="@anim/cycle_7" />
<?xml version="1.0" encoding="utf-8"?>

<cycleInterpolator xmlns:android="http://schemas.android.com/apk/res/android"
	android:cycles="10" />
Animation shake = AnimationUtils.loadAnimation(this, R.anim.shake);
		findViewById(R.id.image).startAnimation(shake);
http://hi.baidu.com/fountainblog/blog/item/66cb9918b0220eaa4bedbc2e.html
public boolean onKeyDown(int keyCode, KeyEvent event) {
    if (keyCode == KeyEvent.KEYCODE_BACK) {
        Intent intent = new Intent(Intent.ACTION_MAIN);
        intent.setFlags(Intent.FLAG_ACTIVITY_NEW_TASK);
        intent.addCategory(Intent.CATEGORY_HOME);
        startActivity(intent);
        return true;
    }
    return super.onKeyDown(keyCode, event);
}
http://mobile.51cto.com/hot-230282.htm
int[] points = { 0, 0 };
view.getLocationInWindow(points);
@Override
	protected synchronized void onDraw(Canvas canvas) {
		super.onDraw(canvas);
		Rect rect = new Rect();
		this.mPaint.getTextBounds(this.text, 0, this.text.length(), rect);
		int x = (getWidth() / 2) - rect.centerX();
		int y = (getHeight() / 2) - rect.centerY();
		canvas.drawText(this.text, x, y, this.mPaint);
	}
@Override
	public boolean onTouchEvent(MotionEvent event) {

		if(event.getAction() == MotionEvent.ACTION_DOWN){
			 vibrator = (Vibrator) getSystemService(VIBRATOR_SERVICE);
		     long[] pattern = {800, 40,400, 30}; // OFF/ON/OFF/ON...
		     vibrator.vibrate(pattern, 2);//-1不重复,非-1为从pattern的指定下标开始重复
		}
		return super.onTouchEvent(event);
	}
invalidate()或者view.postinvalidate()方法
未完待续。。。。
原文:http://blog.csdn.net/u012566693/article/details/45075191