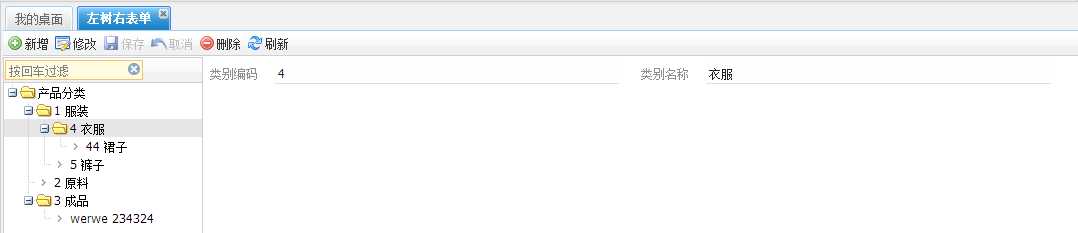
左树右表单的页面实际上就是动态对一颗具有树结构的表进行编辑。如下图所示:
开发步骤:
1、创建表,有几个字段是必须的,pk_category(主键),pk_parentclass(父级PK)
2、使用nw-designer自动生成VO
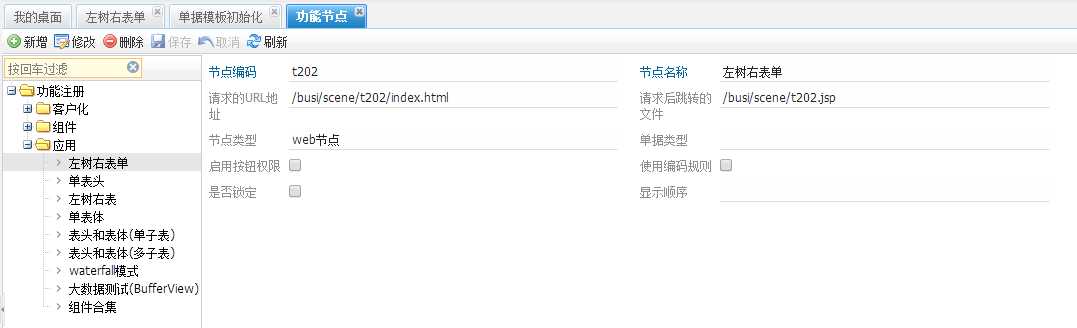
3、创建功能节点,如下图所示:
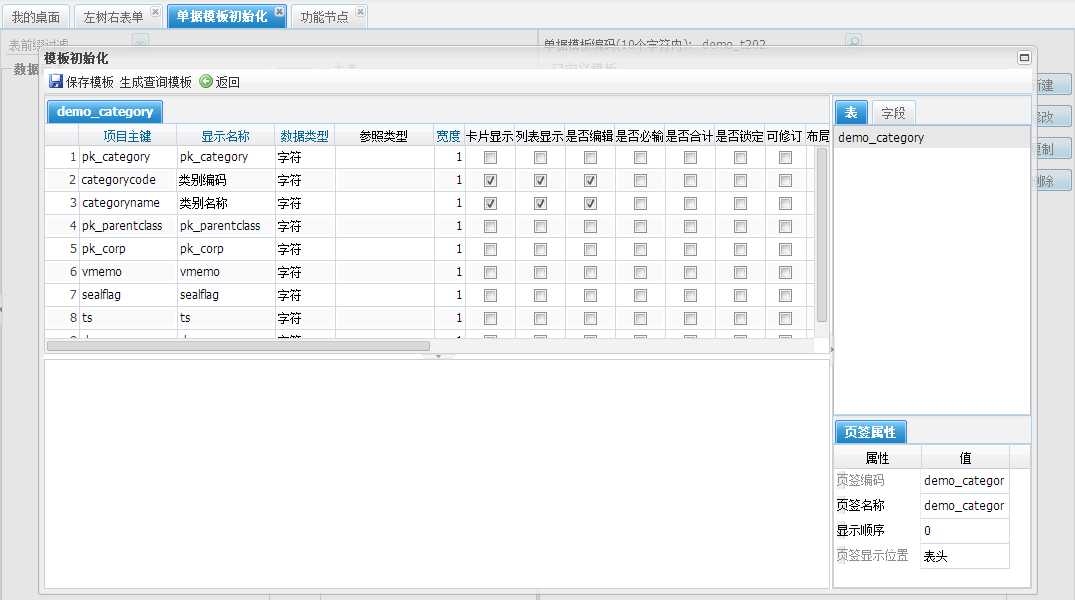
4、创建单据模板,如下图所示:
5、创建查询模板,可以从单据模板初始化界面直接生成查询模板,略。
6、分配模板,如下图所示:

以上的步骤是开发所有页面的一般步骤,不管这个步骤是什么样的,如果要使用打印功能,那么可以创建打印模板,以后其他页面的教程都将直接从第7个步骤开始
7、创建Service类,代码如下:
|
1
2
3
4
5
6
7
8
9
10
11
12
13
14
15
16
17
18
19
20
21
22
23
24 |
/** * 产品类别,左树右表单 * * @author xuqc * @date 2013-10-17 下午02:31:07 */@Servicepublic class T202Service extends
AbsToftServiceImpl { private
AggregatedValueObject billInfo; public
AggregatedValueObject getBillInfo() { if(billInfo == null) { billInfo = new
HYBillVO(); VOTableVO vo = new
VOTableVO(); vo.setAttributeValue(VOTableVO.BILLVO, HYBillVO.class.getName()); vo.setAttributeValue(VOTableVO.HEADITEMVO, CategoryVO.class.getName()); vo.setAttributeValue(VOTableVO.PKFIELD, CategoryVO.PK_CATEGORY); billInfo.setParentVO(vo); } return
billInfo; }} |
8、创建Controller类,代码如下:
|
1
2
3
4
5
6
7
8
9
10
11
12
13
14
15
16
17
18
19
20
21
22
23
24
25
26
27
28
29
30
31
32
33
34
35
36
37
38
39
40
41
42
43
44
45
46
47
48
49
50
51
52
53
54
55
56
57
58
59
60
61
62
63
64
65
66
67
68
69
70
71
72
73
74
75
76
77
78
79
80
81
82
83
84
85
86
87
88
89 |
/** * 左树右表单 * * @author xuqc * @date 2013-10-17 下午02:50:43 */@Controller@RequestMapping(value = "/busi/scene/t202")public class T202Controller extends
AbsTreeFormController { @Autowired private
T202Service t202Service; @Override public
T202Service getService() { return
t202Service; } /** * 加载树的数据 * * @return */ @RequestMapping(value = "/getItemTree.json") @ResponseBody public
List<TreeVO> getTree() { String whereSql = " isnull(dr,0)=0 order by categorycode"; CategoryVO[] categorys = (CategoryVO[]) NWDao.getInstance().queryForSuperVOArrayByWhereClause(CategoryVO.class, whereSql); List<TreeVO> roots = new
ArrayList<TreeVO>(); if(categorys == null
|| categorys.length == 0) { return
roots; } HashMap<String, List<TreeVO>> allLeafs = new
HashMap<String, List<TreeVO>>(); // 对子节点进行分组 for(CategoryVO category : categorys) { TreeVO vo = new
TreeVO(); vo.setId(category.getPk_category()); vo.setCode(category.getCategorycode()); vo.setText(category.getCategorycode() + " "
+ category.getCategoryname());// 编码+名称显示 if(StringUtils.isBlank(category.getPk_parentclass())) { vo.setLeaf(false); roots.add(vo); continue; } if(allLeafs.get(category.getPk_parentclass()) == null) { ArrayList<TreeVO> list = new
ArrayList<TreeVO>(); list.add(vo); allLeafs.put(category.getPk_parentclass(), list); } else
{ allLeafs.get(category.getPk_parentclass()).add(vo); } } return
getTrunk(allLeafs, roots); } private
List<TreeVO> getTrunk(HashMap<String, List<TreeVO>> leafs, List<TreeVO> trunks) { for(TreeVO trunk : trunks) { if(leafs.get(trunk.getId()) == null
|| leafs.get(trunk.getId()).size() == 0) { trunk.setLeaf(true); continue; } trunk.setChildren(getTrunk(leafs, leafs.get(trunk.getId()))); } return
trunks; } /** * 树的PK字段 */ @Override public
String getTreePkField() { return
CategoryVO.PK_CATEGORY; } /** * 如何返回树的PK值 */ public
String getTreeIdValue(Map<String, Object> map) { return
(String) map.get(CategoryVO.PK_CATEGORY); } /** * 如何返回树的text值 */ public
String getTreeTextValue(Map<String, Object> map) { return
(String) map.get(CategoryVO.CATEGORYCODE) + " "
+ (String) map.get(CategoryVO.CATEGORYNAME);// 编码+名称显示 }} |
9、创建jsp文件,根据功能节点上面的配置,jsp文件应该是位于/busi/scene/t202.jsp,这个文件内容如下:

<!DOCTYPE html PUBLIC "-//W3C//DTD HTML 4.01 Transitional//EN" "http://www.w3.org/TR/html4/loose.dtd">
<%@ page language="java" pageEncoding="UTF-8" contentType="text/html; charset=UTF-8"%>
<html>
    <head>
        <%@ include file="/common/header.jsp"%>
    </head>
    <body>
    <nw:Bill templetVO="${templetVO}" isBuildHeaderGrid="false" tableColumns="2"/>
    </body>
    <script type="text/javascript">
    //对树档案进行编辑的界面
    var itemTree = new uft.extend.tree.Tree({
        id : ‘itemTree‘,
        treeRootNodeText:‘产品分类‘, //默认根节点名称
        rootVisible : true,//是否显示根节点
        dataUrl : ‘getItemTree.json‘, //默认数据来源
        isTreeFilter:true//是否在树的工具栏加上过滤框
    });
    ${moduleName}.appUiConfig.leftTree=itemTree;
    ${moduleName}.appUiConfig.treePkField=‘pk_category‘;//树所对应的表的pk
    ${moduleName}.appUiConfig.treeParentPkField=‘pk_parentclass‘;//树所对应的表的父节点PK
    ${moduleName}.appUiConfig.toolbar = new uft.jf.TreeFormToolbar();
    var app = new uft.jf.ToftPanel(${moduleName}.appUiConfig);

    //监听树的数据加载完成后事件
    itemTree.getLoader().on(‘load‘,function(loader,node){
        //当树数据加载完成后,触发点击第一个节点的事件
        var tree = node.getOwnerTree();
        tree.fireEvent(‘click‘,tree.getRootNode().firstChild);
    });
    </script>
    <%@ include file="/common/footer.jsp"%>
</html>
这样整个页面就开发完成了。controller一般只负责接收请求,具体的业务逻辑放在service中,也提供了足够的灵活性。
不管对于什么样的树结构,这样的代码结构都是稳定的,也提供了各种各样的扩展。其他页面的开发也是这样的原则。
具体的示例可以参考:http://xuqc.fangwei.name:9080/demo-webapp administrator/143305
(未完待续)
NW开发教程系列一:左树右表单的页面,布布扣,bubuko.com
原文:http://www.cnblogs.com/aimer311/p/3598192.html