网络信息服务(NIS)是集中控制几个系统管理数据库的网络用品。
用户只需要在nis服务器上面创建,客户端加入nis域,直接可以使用Nis域上的用户来登录客户端。
1、相关服务:ypserv(NIS服务器端),ypbind(NIS客户端),yppasswd(修改密码时,NIS客户端与NIS服务器端之前通过这个服务来通信)
2、相关端口:portmap :111,因为NIS、NFS 都是依赖于portmap服务 6.0版本用rpcbind取代portmap服务 ,我的系统是redhat
6.1
3、相关包:ypserv(NIS服务器必需的),ypbind(NIS客户端必需的,默认已安装),yp-tools(NIS的常用工具,默认已安装)
环境信息如下:nis服务端ip:192.168.100.114
hostname:localhost 服务端i18n文件里配置的是中文
nis客户端ip:192.168.100.115
hostname:linux211
[root@localhost
root]# cat/etc/issue
#检查系统版本
Red
Hat Enterprise Linux Server release 6.1(Santiago)
Kernel
\r on an \m
[root@localhost
~]# vi/etc/yum.repos.d/rhel-source.repo
#修改yum源
[rhel-source]
name=Red
Hat Enterprise Linux $releasever -$basearch - Source
baseurl=file:///mnt/Server
enabled=1
gpgcheck=0
gpgkey=file:///etc/pki/rpm-gpg/RPM-GPG-KEY-redhat-release
[rhel-source-beta]
name=Red
Hat Enterprise Linux $releaseverBeta - $basearch - Source
baseurl=ftp://ftp.redhat.com/pub/redhat/linux/beta/$releasever/en/os/SRPMS/
enabled=0
gpgcheck=1
gpgkey=file:///etc/pki/rpm-gpg/RPM-GPG-KEY-redhat-beta,file:///etc/pki/rpm-gpg/RPM-GPG-KEY-redhat-release
[root@localhost
~]# mount /dev/cdrom /mnt
#挂载镜像
mount:
block device /dev/sr0 iswrite-protected, mounting
read-only
[root@localhost
~]# yum install ypserv
#安装ypserv包
Loaded
plugins: product-id,refresh-packagekit,
subscription-manager
Updating
Red Hat repositories.
rhel-source
|4.0
kB 00:00 ...
Setting
up Install Process
Resolving
Dependencies
-->
Running transaction check
--->
Package ypserv.i686 0:2.19-18.el6will be installed
-->
Finished Dependency Resolution
Dependencies
Resolved
================================================================================
Package
Arch
Version
Repository
Size
================================================================================
Installing:
ypserv
i686
2.19-18.el6
rhel-source
127 k
Transaction
Summary
================================================================================
Install
1 Package(s)
Total
download size: 127 k
Installed
size: 291 k
Is
this ok [y/N]: y
Downloading
Packages:
Running
rpm_check_debug
Running
Transaction Test
Transaction
Test Succeeded
Running
Transaction
Installing
: ypserv-2.19-18.el6.i686
1/1
duration:
3273(ms)
Installed
products updated.
Installed:
ypserv.i686
0:2.19-18.el6
Complete!
[root@localhost
~]# mkdir /opt/nishome
#建立一个Nis专用用户目录文件夹
[root@localhost
opt]# useradd-d /opt/nishome/yezi -u 1000 -m yezi
#新建用户
[root@localhost
opt]# cat/etc/passwd |grep yezi
yezi:x:1000:1000::/opt/nishome/yezi:/bin/bash
[root@localhost
opt]# passwdyezi #修改yezi用户密码
更改用户 yezi 的密码。
新的密码:
无效的密码:过于简单化/系统化
无效的密码:过于简单
重新输入新的密码:
passwd: 所有的身份验证令牌已经成功更新
[root@localhost
opt]# vim/etc/sysconfig/network
#为NIS服务器指定NIS域名
NETWORKING=yes
HOSTNAME=localhost.localdomain
NISDOMAIN=yezi.com
[root@localhost
opt]# nisdomainname #查看nis域
(none)
[root@localhost
opt]#nisdomainname yezi.com #加入域yezi.com
[root@localhost
opt]#nisdomainname
yezi.com
[root@localhost
opt]# echo "/bin/nisdomainname yezi.com">>
/etc/rc.local #每次开机自动加入nis域的命令
[root@localhost
opt]# service ypserv start
#启动ypserv
启动 YP 服务器的服务:[确定]
[root@localhost
opt]# /usr/lib/yp/ypinit -m #生成nis数据库每次添加用户之后,都需要重新生成nis数据库
At
this point, we have to construct a listof the hosts which will run
NIS
servers.
localhost is in the list of NIS server hosts. Please
continue to add
the
names for the other hosts, one perline. When you are done
with the
list,
type a <control D>.
next host to add: localhost
next host to add:
The
current list of NIS servers looks likethis:
localhost
Is
this correct? [y/n: y] y
We
need a few minutes to build thedatabases...
Building
/var/yp/yezi.com/ypservers...
Running
/var/yp/Makefile...
gmake[1]:
Entering directory`/var/yp/yezi.com‘
Updating
passwd.byname...
Updating
passwd.byuid...
Updating
group.byname...
Updating
group.bygid...
Updating
hosts.byname...
Updating
hosts.byaddr...
Updating
rpc.byname...
Updating
rpc.bynumber...
Updating
services.byname...
Updating
services.byservicename...
Updating
netid.byname...
Updating
protocols.bynumber...
Updating
protocols.byname...
Updating
mail.aliases...
gmake[1]:
Leaving directory`/var/yp/yezi.com‘
localhost
has been set up as a NIS masterserver.
Now
you can run ypinit -s localhost on allslave server.
[root@localhost
opt]# cd/var/yp #一旦生成数据库会在nishome目录下看到域名命名的目录,例如:yezi
[root@localhost
yp]# ls
binding
Makefile nicknames yezi.com
ypservers
[root@localhost
yp]# service ypserv restart #重新启动ypserv服务
停止 YP 服务器的服务:[确定]
启动 YP 服务器的服务:[确定]
[root@localhost
yp]# chkconfigypserv on #设置开机启动
[root@localhost
yp]# chkconfig| grep ypserv #查看ypserv是否开机启动
ypserv
0:关闭 1:关闭 2:启用 3:启用 4:启用 5:启用 6:关闭
[root@localhost
yp]# vi/etc/exports #使用NFS共享NIS用户家目录
/opt/nishome *(rw)
[root@localhost
yp]# /etc/init.d/nfsrestart #重启nfs服务
关闭 NFS mountd:[失败]
关闭 NFS 守护进程:[失败]
关闭 NFS quotas:[失败]
启动 NFS 服务: [确定]
关掉 NFS 配额:[确定]
启动 NFS 守护进程:[确定]
启动 NFS mountd:[确定]
[root@localhost
yp]# chkconfignfs on #设置nfs开机启动
[root@localhost
yp]# chkconfig| grep nfs #查看ypserv是否开机启动
nfs
0:关闭 1:关闭 2:启用 3:启用 4:启用 5:启用 6:关闭
nfslock
0:关闭 1:关闭 2:关闭 3:启用 4:启用 5:启用 6:关闭
至此nis服务端搭建完毕
客户端搭建:
[root@linux211
~]#setenforce 0 #设置selinux为警告模式
[root@linux211
~]# getenforce #查看selinux模式
Permissive
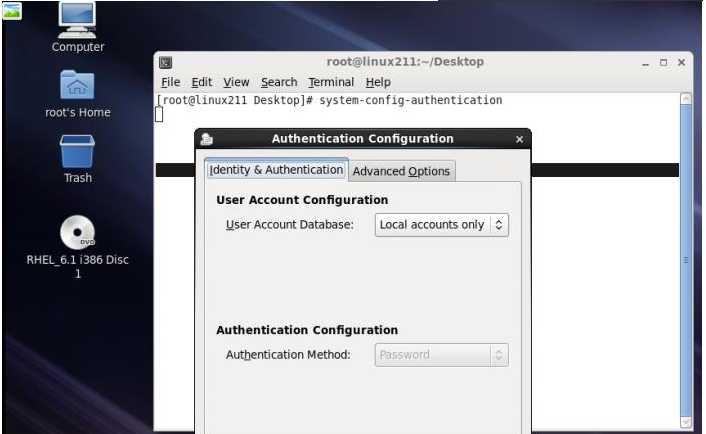
图形化界面输入“system-config-authentication”

[root@linux211
~]# /etc/init.d/ypbind restart #启动ypbind服务
Shutting
down NIS service: [ OK ]
Starting
NIS service: [ OK ]
Binding
NIS service:..................[FAILED]
绑定nis服务失败,检查服务端selinu模式和iptables状态,关掉iptables,selinux设置为警告模式。
[root@linux211
~]# /etc/init.d/ypbind restart #重启ypbind服务
Shutting
down NIS service: [ OK ]
Starting
NIS service: [ OK ]
Binding
NIS service: .[ OK ]
[root@linux211
~]# vi /etc/auto.master
#将共享目录设置为自动挂载
#
#
Sample auto.master file
#
This is an automounter map and it has thefollowing format
#
key [ -mount-options-separated-by-comma ]location
#
For details of the format look atautofs(5).
#
/opt/nishome
/etc/auto.misc
#
#
NOTE: mounts done from a hosts map willbe mounted with the
#
"nosuid" and "nodev" options unless the"suid" and
"dev"
#
options are explicitly given.
#
/net
-hosts
#
#
Include central master map if it can befound using
#
nsswitch sources.
#
#
Note that if there are entries for /netor /misc (as
#
above) in the included master map anykeys that are the
#
same will not be seen as the first readkey seen takes
#
precedence.
#
+auto.master
[root@linux211
~]# vi /etc/auto.misc
*
-fstype=nfs
192.168.100.114:/opt/nishome/&
#这里是对所有人自动挂载家目录,当然也可以指定用户)
[root@linux211
~]# /etc/init.d/autofs restart #重启服务
Stopping
automount: [ OK ]
Starting
automount: [ OK ]
登录验证:
nis的设置内容“
[root@linux211
~]# yptest
Test
1: domainname
Configured
domainname is"yezi.com"
Test
2: ypbind
Used
NIS server: 192.168.100.114
Test
3: yp_match
WARNING:
No such key in map (Mappasswd.byname, key nobody)
Test
4: yp_first
yeziyezi:$6$alKOj62W$yeo0z.tKyGOmnQd5SMZgC4XuFi3WX.9tS7fyj83ROprY7SCZVMviCdEkn44nlFCF.MMV8z8fCoU15ZxOBl2up0:1000:1000::/opt/nishome/yezi:/bin/bash
Test
5: yp_next
Test
6: yp_master
localhost
Test
7: yp_order
1394632648
Test
8: yp_maplist
passwd.byuid
group.byname
netid.byname
rpc.bynumber
hosts.byaddr
group.bygid
protocols.bynumber
passwd.byname
protocols.byname
hosts.byname
mail.aliases
services.byservicename
ypservers
services.byname
rpc.byname
Test
9: yp_all
yeziyezi:$6$alKOj62W$yeo0z.tKyGOmnQd5SMZgC4XuFi3WX.9tS7fyj83ROprY7SCZVMviCdEkn44nlFCF.MMV8z8fCoU15ZxOBl2up0:1000:1000::/opt/nishome/yezi:/bin/bash
1
tests failed
nis
[root@linux211
~]# ypwhich
192.168.100.114
nis服务器上的用户与密码信息。
[root@linux211
~]# ypcat -x
Use
"ethers" for map "ethers.byname"
Use
"aliases" for map "mail.aliases"
Use
"services" for map "services.byname"
Use
"protocols" for map"protocols.bynumber"
Use
"hosts" for map "hosts.byname"
Use
"networks" for map "networks.byaddr"
Use
"group" for map "group.byname"
Use
"passwd" for map "passwd.byname"
[yezi@linux211
~]$ ypcat passwd
yezi:$6$alKOj62W$yeo0z.tKyGOmnQd5SMZgC4XuFi3WX.9tS7fyj83ROprY7SCZVMviCdEkn44nlFCF.MMV8z8fCoU15ZxOBl2up0:1000:1000::/opt/nishome/yezi:/bin/bash
登录验证
[root@linux211
~]# su - yezi
[yezi@linux211
~]$ cat /etc/passwd
root:x:0:0:root:/root:/bin/bash
bin:x:1:1:bin:/bin:/sbin/nologin
daemon:x:2:2:daemon:/sbin:/sbin/nologin
adm:x:3:4:adm:/var/adm:/sbin/nologin
lp:x:4:7:lp:/var/spool/lpd:/sbin/nologin
sync:x:5:0:sync:/sbin:/bin/sync
shutdown:x:6:0:shutdown:/sbin:/sbin/shutdown
halt:x:7:0:halt:/sbin:/sbin/halt
mail:x:8:12:mail:/var/spool/mail:/sbin/nologin
uucp:x:10:14:uucp:/var/spool/uucp:/sbin/nologin
operator:x:11:0:operator:/root:/sbin/nologin
games:x:12:100:games:/usr/games:/sbin/nologin
gopher:x:13:30:gopher:/var/gopher:/sbin/nologin
ftp:x:14:50:FTP
User:/var/ftp:/sbin/nologin
nobody:x:99:99:Nobody:/:/sbin/nologin
dbus:x:81:81:System
messagebus:/:/sbin/nologin
usbmuxd:x:113:113:usbmuxduser:/:/sbin/nologin
avahi-autoipd:x:170:170:Avahi
IPv4LLStack:/var/lib/avahi-autoipd:/sbin/nologin
vcsa:x:69:69:virtual
console memoryowner:/dev:/sbin/nologin
rpc:x:32:32:RpcbindDaemon:/var/cache/rpcbind:/sbin/nologin
rtkit:x:499:497:RealtimeKit:/proc:/sbin/nologin
abrt:x:173:173::/etc/abrt:/sbin/nologin
ntp:x:38:38::/etc/ntp:/sbin/nologin
apache:x:48:48:Apache:/var/www:/sbin/nologin
saslauth:x:498:496:"Saslauthduser":/var/empty/saslauth:/sbin/nologin
postfix:x:89:89::/var/spool/postfix:/sbin/nologin
avahi:x:70:70:Avahi
mDNS/DNS-SDStack:/var/run/avahi-daemon:/sbin/nologin
haldaemon:x:68:68:HALdaemon:/:/sbin/nologin
pulse:x:497:495:PulseAudio
SystemDaemon:/var/run/pulse:/sbin/nologin
gdm:x:42:42::/var/lib/gdm:/sbin/nologin
rpcuser:x:29:29:RPC
ServiceUser:/var/lib/nfs:/sbin/nologin
nfsnobody:x:65534:65534:Anonymous
NFSUser:/var/lib/nfs:/sbin/nologin
sshd:x:74:74:Privilege-separatedSSH:/var/empty/sshd:/sbin/nologin
tcpdump:x:72:72::/:/sbin/nologin
可以看到我的客户端是没有yezi这个用户的,现在我们做个试验,在服务端yezi目录下创建一个haha目录(注意主机名)
[root@localhostyp]#
cd /opt/nishome/
[root@localhost
nishome]# ls
yezi
[root@localhost
nishome]# cd yezi/
[root@localhost
yezi]# ls
[root@localhost
yezi]# mkdir haha
[root@localhost
yezi]# ls
haha
现在切换到客户端,
[root@linux211
~]# su - yezi
[yezi@linux211
~]$ ls
haha
可以看到服务端创建的目录啦。证明我们的nis搭建成功。
原文:http://www.cnblogs.com/loveqq/p/3600096.html